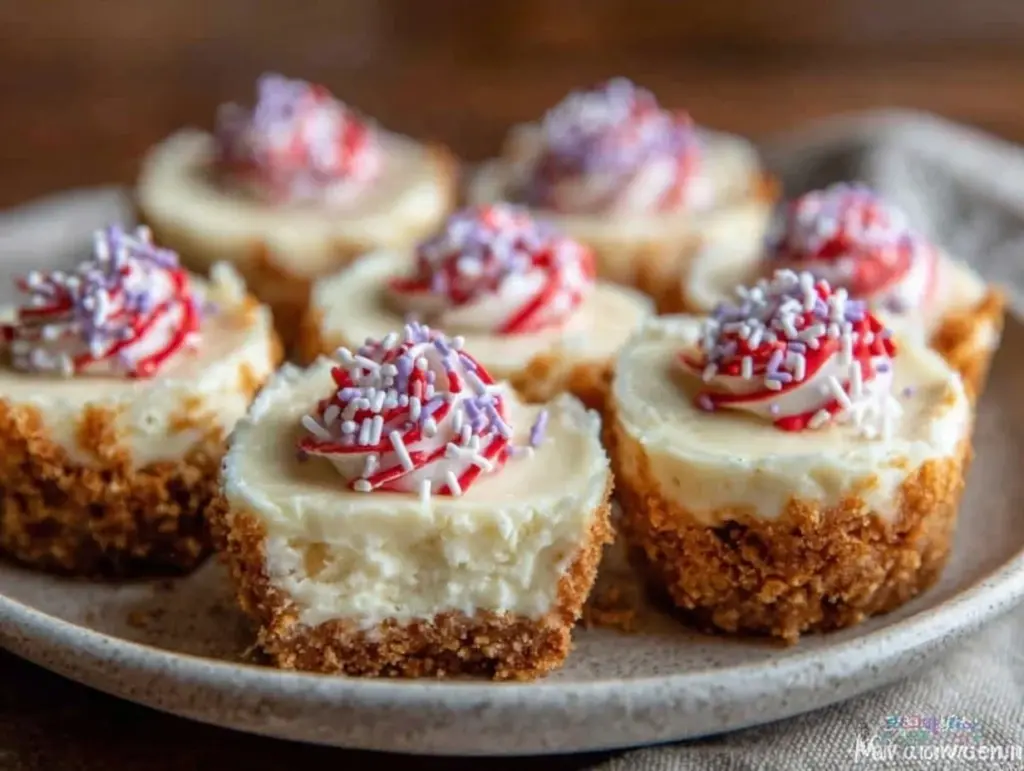
It all started on a chaotic Friday afternoon before the big game day at my kid’s school. I’d promised to bring a dessert that matched the school colors, but honestly, I hadn’t planned a thing. Between work calls and last-minute errands, I found myself staring at a block of cream cheese and a box of mini muffin liners, wondering if I could pull something together that didn’t scream “I ran out of time.”
As I whipped up a quick cream cheese mixture, I thought, “Why not make mini cheesecake bites and color them with the school’s red and gold? It’s simple, right?” Well, not exactly. My first batch was a bit too tangy, and the colors bled into each other, but after a few tweaks (and a lot of taste tests), these creamy mini cheesecake bites turned out to be the perfect crowd-pleaser. They were rich but light, with just the right touch of sweetness and that smooth, melt-in-your-mouth texture you want from cheesecake.
That afternoon, as I watched the kids’ faces light up over these little bites, I realized this recipe wasn’t just about matching colors—it was about making moments. Those creamy mini cheesecake bites with school colors became a tradition, a quick go-to for game days, bake sales, or whenever I needed something impressive but fuss-free. Now, every time I make them, I’m reminded how something simple can still feel special.
Why You’ll Love This Recipe
Honestly, these creamy mini cheesecake bites aren’t just tasty—they’re a lifesaver for anyone needing a quick, eye-catching dessert. I’ve made this recipe countless times, and here’s why it keeps coming back to my kitchen:
- Quick & Easy: You can whip up these cheesecake bites in under 30 minutes, perfect for busy days when you realize you forgot the dessert.
- Simple Ingredients: No fancy or hard-to-find items—just pantry staples and a bit of food coloring to get those vibrant school colors right.
- Perfect for Game Days & Parties: These mini bites are ideal finger food for celebrations where you want something that looks festive but tastes homemade.
- Crowd-Pleaser: Kids and adults alike love the creamy texture and just-sweet-enough flavor. They’re a hit every time.
- Unbelievably Delicious: The secret is in the smooth, creamy filling that’s balanced with a buttery graham cracker crust—comfort food in bite-sized form.
This recipe stands out because of its straightforward method that doesn’t sacrifice flavor or appearance. Using a no-bake filling means you get a silky smooth cheesecake every time, while the mini size lets you play with colors without overwhelming your guests. Plus, tailoring the colors to your school’s palette adds that personal touch that turns simple cheesecake into a festive treat.
What Ingredients You Will Need
This recipe keeps things simple with ingredients that work together to create a creamy, flavorful cheesecake bite with a crunchy base. Most are pantry staples, and the colorings let you customize easily to match your school’s colors.
- For the Crust:
- Graham cracker crumbs (about 1 ½ cups) – crushed finely for the perfect crust texture
- Unsalted butter (6 tablespoons), melted – adds richness and helps bind the crust
- Granulated sugar (2 tablespoons) – balances the buttery flavor
- For the Cheesecake Filling:
- Cream cheese (16 oz / 450g), softened – the base for that classic creamy texture (I like using Philadelphia cream cheese for consistency)
- Powdered sugar (¾ cup / 90g) – for smooth sweetness without graininess
- Vanilla extract (1 teaspoon) – adds depth and warmth
- Heavy cream (¾ cup / 180ml), cold – whipped to soft peaks to lighten the filling
- Gel food coloring in your school’s colors (red, gold, or whatever you prefer) – gel works best for vibrant color without adding extra liquid
Some quick tips: If you prefer a lighter option, you can swap the heavy cream with full-fat coconut cream for a subtle twist. For a gluten-free crust, almond flour or gluten-free cookie crumbs work well too. And if you want to avoid artificial colors, beet powder or turmeric can substitute for red and yellow hues, respectively.
Equipment Needed
Making these creamy mini cheesecake bites requires only a few simple tools, which keeps the process approachable for even the most casual baker.
- Mini muffin pan: This is key for shaping the bites. I’ve tried silicone liners and regular metal tins—both work, but metal gives a slightly better crust texture.
- Electric mixer or stand mixer: For whipping the cream and blending the cream cheese smoothly. You can do it by hand, but it’ll take longer and might not be as silky.
- Mixing bowls: One large for the crust and one for the filling. Glass or stainless steel works best to avoid sticking.
- Spatula and spoon: To fold the whipped cream into the cream cheese mixture gently without deflating it.
- Measuring cups and spoons: For accuracy, especially with sugar and butter.
For budget-friendly setups, you can find basic mini muffin pans and hand mixers at most stores without breaking the bank. And if you don’t have a mini muffin pan, try silicone mini cupcake trays—they’re flexible and easy to pop the bites out.
Preparation Method
-
Prepare the crust: Preheat your oven to 350°F (175°C). In a medium bowl, combine 1 ½ cups graham cracker crumbs, 6 tablespoons melted unsalted butter, and 2 tablespoons granulated sugar. Stir until the mixture resembles wet sand.
Press about 1 tablespoon of this mixture firmly into each cup of your mini muffin pan to form the crust base.
Tip: Pressing firmly helps create a sturdy crust that won’t crumble when you bite in. -
Bake the crust: Place the pan in the oven and bake for 6-8 minutes until the crust is golden and fragrant.
Remove from oven and let cool completely while you prepare the filling.
Note: Don’t skip this step; baking ensures the crust holds up and adds a subtle toasty flavor. -
Make the cheesecake filling: In a large bowl, beat 16 oz softened cream cheese until smooth and creamy (about 2-3 minutes).
Add ¾ cup powdered sugar and 1 teaspoon vanilla extract, mixing until combined.
In a separate bowl, whip ¾ cup cold heavy cream to soft peaks.
Gently fold the whipped cream into the cream cheese mixture until just combined.
Tip: Folding carefully keeps the filling light and airy. -
Divide and color the filling: Split the filling into separate bowls depending on how many colors you want.
Add a small amount of gel food coloring to each bowl and stir gently until you get the desired shade.
Warning: Start with a little color—you can always add more, but you can’t take it out! -
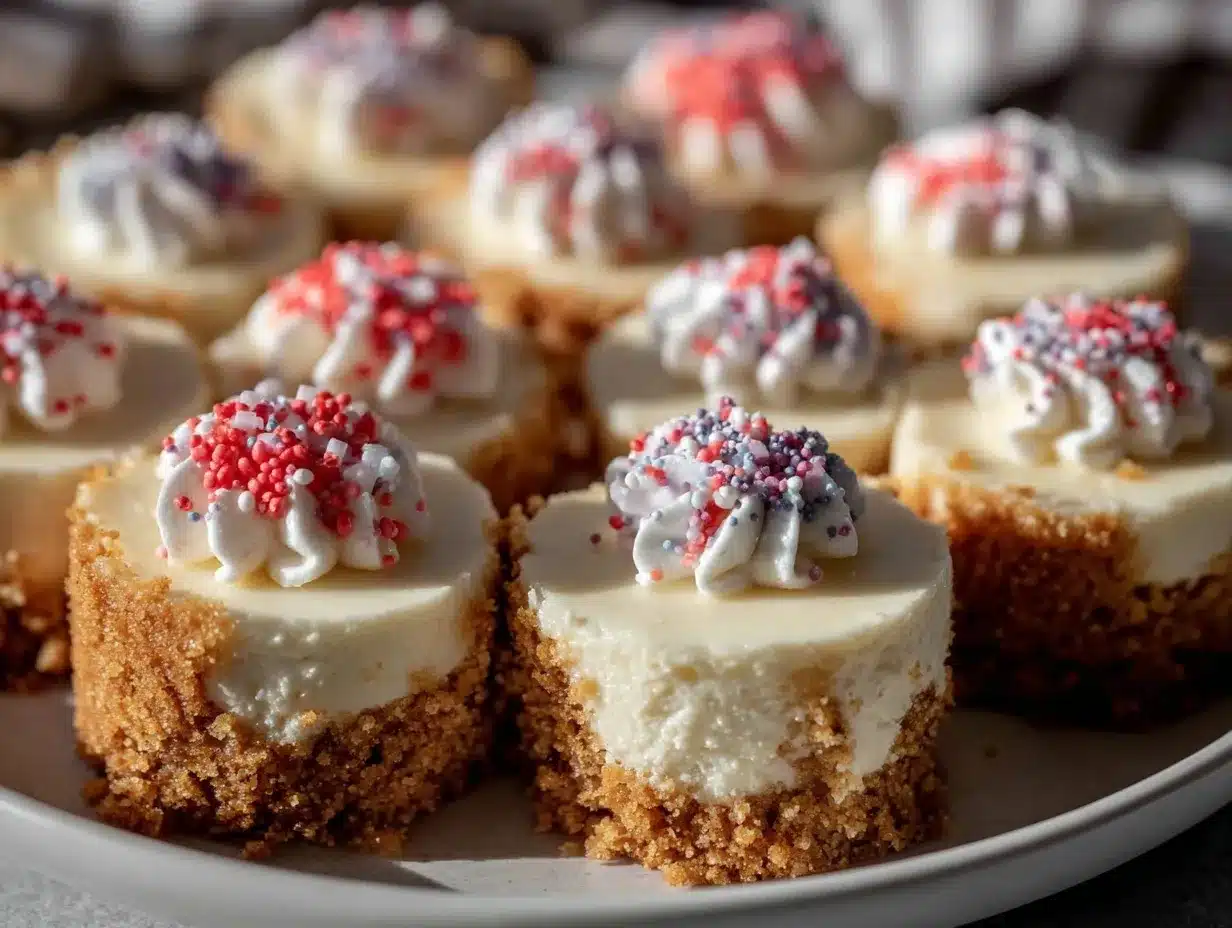
Assemble the bites: Use a small spoon or piping bag to dollop the colored filling onto the cooled crusts.
You can layer colors side-by-side or swirl them gently with a toothpick for a marbled effect.
Chill the cheesecake bites in the refrigerator for at least 2 hours before serving.
Personal tip: I find that chilling overnight helps the flavors meld and makes them easier to remove from the pan without breaking.
Cooking Tips & Techniques
Getting these creamy mini cheesecake bites just right takes a bit of care, but it’s nothing you can’t handle. Here are some pro tips I picked up along the way:
- Room temperature cream cheese: It blends smoother and prevents lumps in your filling. If you forget to take it out early, soften in short bursts in the microwave (10 seconds at a time).
- Whip the cream properly: Stop at soft peaks. Overwhipping can turn the cream grainy and make folding tricky.
- Folding technique: Use a spatula to gently fold whipped cream into the cream cheese mixture by cutting down through the middle and lifting around the sides. This keeps the airiness intact.
- Color control: Gel food coloring is your friend here. It’s stronger than liquid color and won’t thin out your filling.
- Chilling is key: Don’t rush the refrigeration. The filling firms up and flavors deepen, making the bites easier to handle and more delicious.
- Prevent color bleeding: Let each color set a bit in the fridge before adding another if you want sharp lines.
One mistake I often made was rushing the crust baking step or skipping it entirely — the crust would be soggy or fall apart. Also, I’ve learned that piping the filling makes for a much cleaner presentation compared to spooning it in.
Variations & Adaptations
These mini cheesecake bites are quite adaptable, so feel free to make them your own:
- Dairy-Free Version: Use dairy-free cream cheese and coconut cream instead of heavy cream for a vegan-friendly option.
- Seasonal Flavors: Mix in pumpkin puree and pumpkin spice for fall-themed bites, or fresh lemon zest and juice for a bright, summery twist.
- Different Crusts: Swap the graham cracker crust for crushed chocolate cookies or gluten-free nut crust to change the base flavor.
- Additional Toppings: Add fresh berries, sprinkles, or edible glitter on top to make the bites even more festive.
- Personal Try: I once tried swirling in a bit of chocolate ganache with the school colors for a marbled effect. It was a hit and gave a rich chocolate surprise inside.
Serving & Storage Suggestions
Serve these creamy mini cheesecake bites chilled for the best texture and flavor. They’re perfect finger food, so arrange them on a colorful platter that matches your school’s theme to make them pop visually.
Pair them with a hot cup of coffee or a cold glass of milk for a classic combo. If it’s game day, they also go well with sparkling water infused with fresh fruit to keep things light.
To store, keep them covered in an airtight container in the refrigerator for up to 4 days. They also freeze beautifully—just pop them in a freezer-safe container and thaw in the fridge overnight before serving.
Reheating isn’t necessary, but if you want them a bit softer, let them sit at room temperature for 10-15 minutes.
Over time, the flavors meld and the crust softens slightly, which some folks prefer. I personally like the contrast right after chilling, but both ways are delicious.
Nutritional Information & Benefits
Each creamy mini cheesecake bite (about 1 ounce / 28g) contains approximately:
| Calories | 110 |
|---|---|
| Fat | 8g |
| Carbohydrates | 8g |
| Protein | 2g |
The cream cheese provides calcium and protein, while the graham cracker crust adds some fiber. Using heavy cream means a richer flavor but also more fat, so moderation is key.
For those avoiding gluten or dairy, the recipe can be adapted easily to fit dietary needs. Just keep in mind potential allergens like dairy and gluten if serving to a crowd.
Personally, I see these bites as a treat that balances indulgence with portion control. Their mini size helps satisfy sweet cravings without going overboard.
Conclusion
These creamy mini cheesecake bites with school colors have become one of my favorite go-to recipes for celebrations that call for something both simple and special. The way they come together so quickly, with just a handful of ingredients, makes them a practical choice when time’s tight but you still want to impress.
What’s great is how you can tweak and personalize them—different colors, flavors, or crusts—to fit your occasion perfectly. I keep coming back to this recipe because it hits that sweet spot between fuss-free and festive, every single time.
If you give these a try, I’d love to hear how you customize them or what school colors you’re rocking. There’s something so satisfying about sharing food that brings a little spirit and a lot of smiles.
FAQs
Can I make these mini cheesecake bites ahead of time?
Yes! You can prepare them a day or two in advance and keep them chilled in the refrigerator. They actually taste better after the flavors meld overnight.
What if I don’t have a mini muffin pan?
You can use silicone mini cupcake molds or even small candy cups as alternatives. Just be sure to adjust the crust amount accordingly.
How do I prevent the colors from bleeding together?
Use gel food coloring for more vivid, less runny colors and chill each color layer briefly before adding the next to keep lines crisp.
Can I freeze the cheesecake bites?
Absolutely! Freeze them in an airtight container, then thaw in the fridge overnight before serving.
Is there a way to make this recipe dairy-free?
Yes, swap the cream cheese for a dairy-free version and use coconut cream instead of heavy cream. The texture will be similar and just as creamy.
Pin This Recipe!
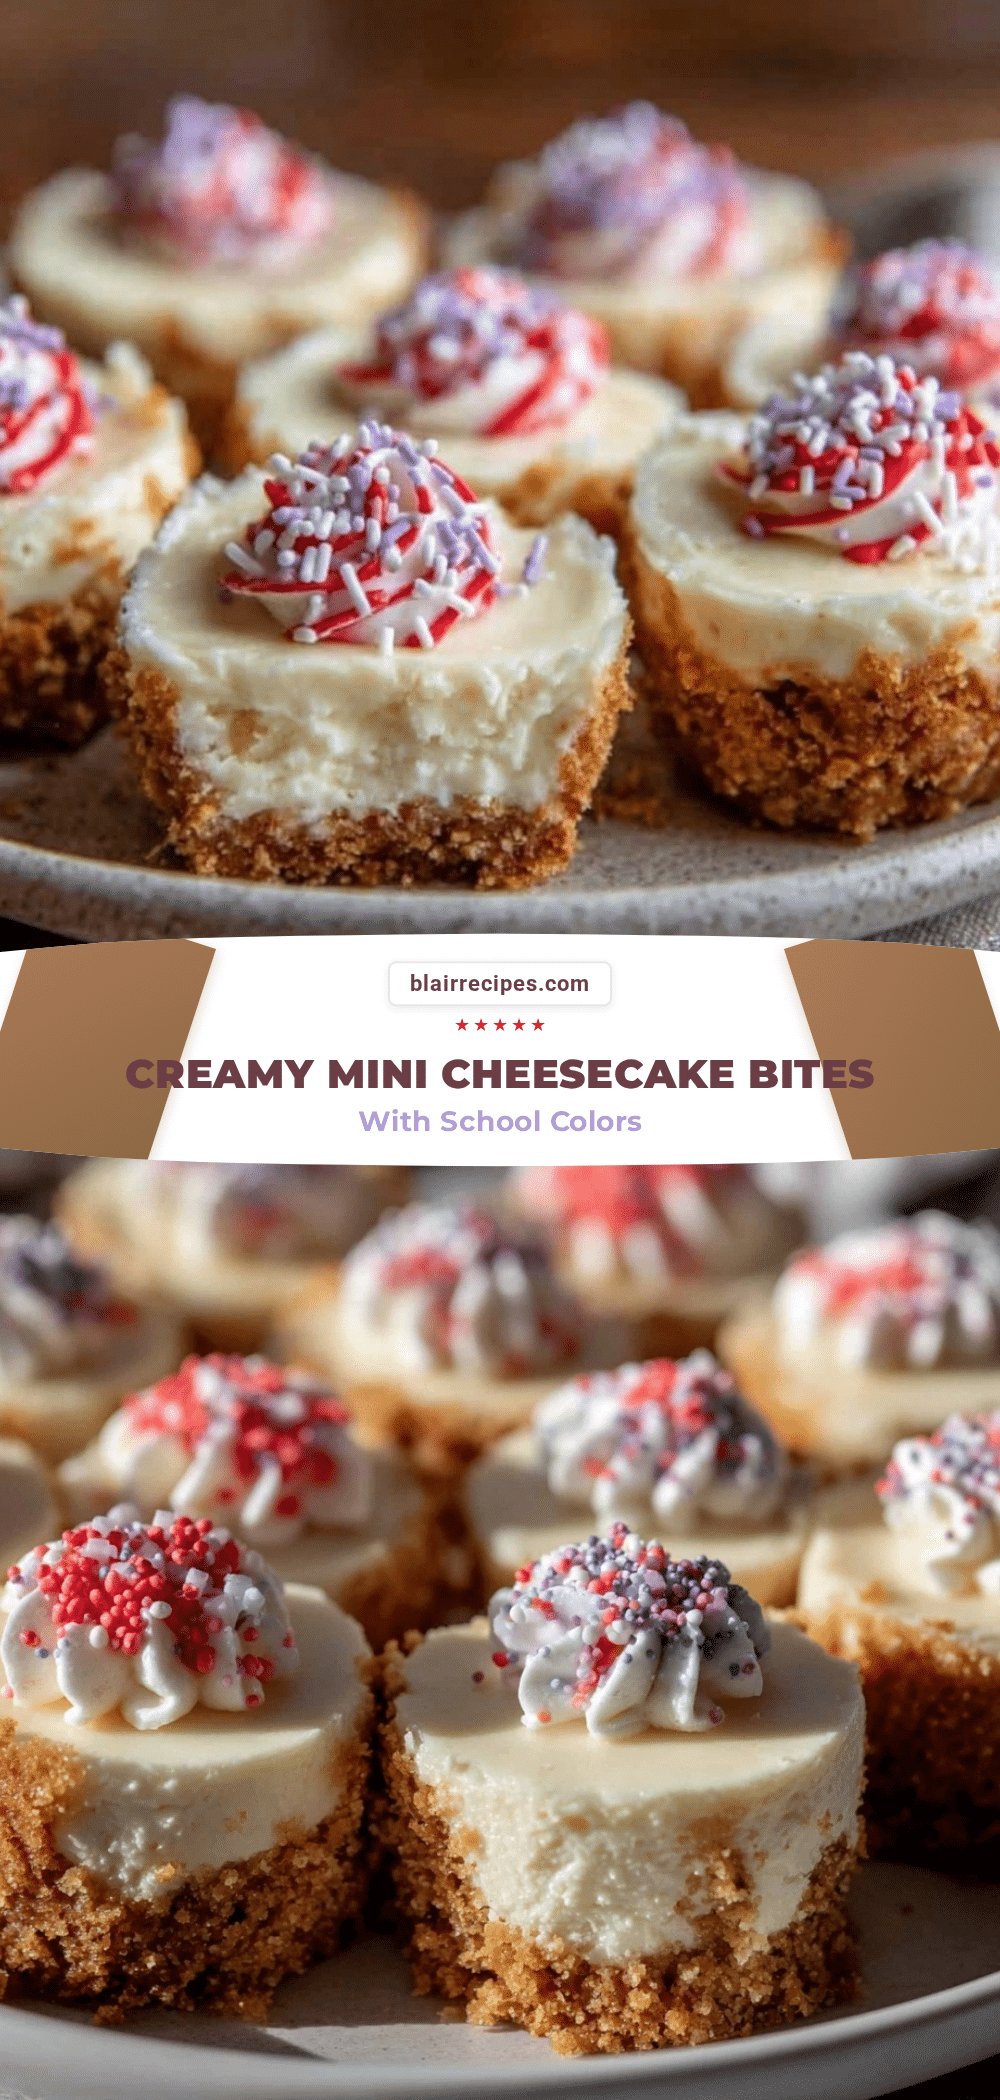
Creamy Mini Cheesecake Bites

These creamy mini cheesecake bites are a quick, easy, and festive dessert perfect for game days and parties, featuring a buttery graham cracker crust and a smooth, melt-in-your-mouth filling colored to match school colors.
- Prep Time: 15 minutes
- Cook Time: 8 minutes
- Total Time: 2 hours 23 minutes
- Yield: 24 servings 1x
- Category: Dessert
- Cuisine: American
Ingredients
- 1 ½ cups graham cracker crumbs
- 6 tablespoons unsalted butter, melted
- 2 tablespoons granulated sugar
- 16 oz cream cheese, softened
- ¾ cup powdered sugar
- 1 teaspoon vanilla extract
- ¾ cup heavy cream, cold
- Gel food coloring in desired colors (red, gold, or others)
Instructions
- Preheat oven to 350°F (175°C). In a medium bowl, combine graham cracker crumbs, melted butter, and granulated sugar until mixture resembles wet sand.
- Press about 1 tablespoon of crust mixture firmly into each cup of a mini muffin pan to form the crust base.
- Bake crusts for 6-8 minutes until golden and fragrant. Remove and let cool completely.
- In a large bowl, beat softened cream cheese until smooth (2-3 minutes). Add powdered sugar and vanilla extract, mixing until combined.
- In a separate bowl, whip cold heavy cream to soft peaks.
- Gently fold whipped cream into the cream cheese mixture until just combined.
- Divide filling into separate bowls for each color desired. Add gel food coloring to each and stir gently to achieve desired shades.
- Use a small spoon or piping bag to dollop colored filling onto cooled crusts. Layer colors side-by-side or swirl gently with a toothpick for a marbled effect.
- Chill cheesecake bites in the refrigerator for at least 2 hours before serving; overnight chilling is recommended for best flavor and easier removal.
Notes
Use room temperature cream cheese for smooth blending. Whip cream to soft peaks and fold gently to keep filling light. Use gel food coloring to prevent thinning the filling. Chill thoroughly to firm up bites and prevent color bleeding. Baking the crust is essential for texture and flavor. Piping the filling yields a cleaner presentation.
Nutrition
- Serving Size: 1 mini cheesecake bi
- Calories: 110
- Fat: 8
- Carbohydrates: 8
- Protein: 2
Keywords: mini cheesecake bites, creamy cheesecake, no-bake cheesecake, school colors dessert, game day dessert, easy cheesecake recipe, bite-sized cheesecake


