
It was one of those evenings where I just needed a little comfort — you know, the kind that hits you after a long day’s work when your brain is too fried to think about complicated recipes. I had a bag of gluten-free flour sitting in the pantry, mostly untouched, and honestly, I was skeptical. Gluten-free baking can be tricky; I’d lost hope on chewy cookies before, thinking they’d be dry or crumbly. But that night, with a few simple ingredients, I threw together what became my go-to recipe for chewy gluten-free chocolate chip cookies.
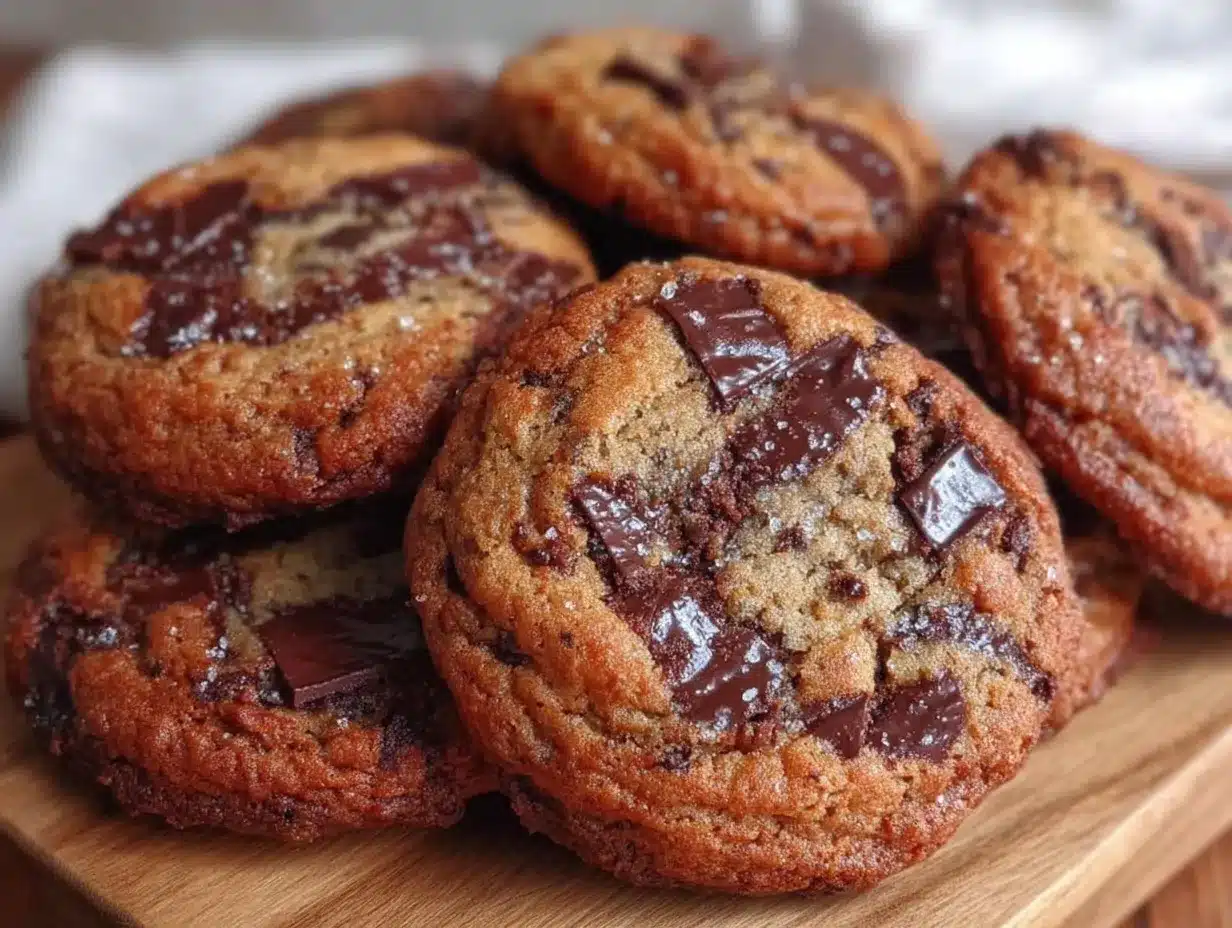
The moment they came out of the oven, warm and gooey, I admit I was surprised. Not only did they hold together perfectly, but the texture was just right — chewy, with that classic chocolate chip cookie feel. Even better, my friends who don’t avoid gluten couldn’t stop asking for more. It was a quiet little win, one that stuck with me because it proved you can have your cookie and eat it too, even on a gluten-free diet. That’s the kind of recipe that feels like a small act of kindness to yourself, one bite at a time.
Why You’ll Love This Recipe
- Quick & Easy: Comes together in under 30 minutes — perfect for those last-minute snack cravings or when life’s a bit hectic.
- Simple Ingredients: Uses pantry staples you probably already have, like gluten-free flour blends and classic chocolate chips.
- Perfect for Any Occasion: Whether it’s a cozy night in, a school snack, or a casual get-together, these cookies fit right in.
- Crowd-Pleaser: Gluten-free or not, these chewy chocolate chip cookies always get rave reviews from family, friends, and even picky eaters.
- Unbelievably Delicious: Balances chewiness and chocolatey goodness with a hint of vanilla — the texture is what sets these apart from other gluten-free attempts.
- The secret lies in a blend of gluten-free flours and a bit of cornstarch, which helps mimic that tender, chewy bite you’re after. Plus, the brown sugar adds moisture and depth.
- This recipe isn’t just about being gluten-free; it’s about really enjoying a cookie without the dry or gritty aftertaste that often comes with gluten-free baking.
- Honestly, I make these cookies multiple times a week sometimes — they’re that reliable for a quick mood lift.
What Ingredients You Will Need
This recipe uses simple, wholesome ingredients to deliver bold flavor and satisfying texture without the fuss. Most of these are pantry staples, and substitutions are easy if you need to tweak for allergies or preferences.
- Gluten-free all-purpose flour blend: 1 ¾ cups (210 g) — I recommend a blend with xanthan gum included for best texture.
- Cornstarch: 2 tablespoons (16 g) — helps keep the cookies tender and chewy.
- Baking soda: ½ teaspoon — for just the right lift.
- Salt: ½ teaspoon — balances sweetness.
- Unsalted butter: ½ cup (113 g), softened — adds richness and chewiness.
- Brown sugar: ¾ cup (150 g), packed — gives moisture and a slight caramel note.
- Granulated sugar: ¼ cup (50 g) — balances the brown sugar’s moisture for a perfect texture.
- Large egg: 1, room temperature — binds everything together.
- Pure vanilla extract: 1 teaspoon — enhances all the flavors.
- Chocolate chips: 1 cup (170 g) — semi-sweet or dark, depending on your preference. I usually go with Ghirardelli for that rich melt.
Substitution tips: Use dairy-free butter and egg replacer if you want to make these vegan. For a nutty twist, swap half the flour with almond flour, but note this changes the texture slightly. If you prefer, you can swap cornstarch for arrowroot powder for a more natural option.
Equipment Needed
- Mixing bowls (at least one large and one medium-sized) — glass or metal works fine.
- Electric mixer or sturdy whisk — to cream the butter and sugars until fluffy.
- Measuring cups and spoons — accuracy helps, especially with gluten-free flours.
- Baking sheet — lined with parchment paper or a silicone baking mat to prevent sticking.
- Cooling rack — crucial for letting cookies cool evenly and stay chewy.
- Spoon or cookie scoop — for evenly portioning dough; I find a medium cookie scoop works best for consistent sizes.
If you don’t have an electric mixer, a wooden spoon and a bit of elbow grease work just fine, though it takes longer to get the butter and sugar creamy. Silicone mats are a favorite because they make cleanup a breeze and keep bottoms from over-browning.
Preparation Method
- Preheat your oven to 350°F (175°C) and line a baking sheet with parchment paper or a silicone mat. This step ensures even baking and easy cleanup. (5 minutes prep)
- Mix dry ingredients: In a medium bowl, whisk together the gluten-free flour blend, cornstarch, baking soda, and salt. This helps distribute the leavening and prevents clumps. (3 minutes)
- Cream the butter and sugars: In a large bowl, beat the softened butter with brown and granulated sugars until light and fluffy. This usually takes about 3-4 minutes with an electric mixer. If you don’t have one, a sturdy whisk and patience will do. (5 minutes)
- Add the egg and vanilla: Beat in the egg and vanilla extract until fully combined. The mixture should look smooth and creamy. (2 minutes)
- Combine wet and dry ingredients: Gradually add the dry ingredients to the butter mixture, mixing on low speed just until incorporated. Overmixing can make cookies tough. The dough will be thick and a bit sticky. (3-4 minutes)
- Fold in the chocolate chips: Gently fold in the chocolate chips with a spatula, ensuring even distribution. (2 minutes)
- Scoop the dough: Using a cookie scoop or spoon, drop rounded tablespoons of dough onto the prepared baking sheet. Leave about 2 inches (5 cm) between each cookie to allow spreading. (5 minutes)
- Bake: Bake in the preheated oven for 10–12 minutes. The edges should be set and just beginning to turn golden, but the centers will look slightly soft — that’s the key to chewiness. (10-12 minutes)
- Cool: Let the cookies cool on the baking sheet for 5 minutes before transferring to a cooling rack. This helps them firm up without losing that chewy texture. (10 minutes)
Pro tip: If you want extra chew, slightly underbake by 1 minute and let residual heat finish the job on the tray. Also, refrigerating the dough for 30 minutes before baking can improve texture and flavor depth.
Cooking Tips & Techniques
- Measuring flour correctly: Spoon the gluten-free flour into your measuring cup and level off with a knife. Scooping directly can lead to too much flour, making cookies dry.
- Don’t overmix the dough: Once you add the dry ingredients, mix just until combined to avoid tough cookies.
- Butter temperature matters: Softened, not melted butter is best. Melted butter makes the dough too runny and can cause flat cookies.
- Brown sugar adds moisture: Using mostly brown sugar gives these cookies their chewy texture and rich flavor.
- Watch baking time carefully: Gluten-free cookies can go from chewy to dry quickly if overbaked. Pull them out when centers are just set but still soft.
- Chill the dough: This prevents excessive spreading and deepens flavor. I learned this the hard way after one batch spread into a cookie pancake.
Variations & Adaptations
- Vegan Version: Swap butter for coconut oil or vegan margarine and use a flax egg (1 tablespoon ground flaxseed + 3 tablespoons water) instead of the chicken egg.
- Nutty Twist: Add ½ cup chopped walnuts or pecans for crunch and extra flavor.
- Seasonal Flavor: Stir in ½ teaspoon cinnamon or ¼ teaspoon pumpkin pie spice for a cozy seasonal upgrade.
- Low-Sugar Option: Replace half the sugars with coconut sugar or a sugar substitute suitable for baking to reduce sweetness without sacrificing texture.
- Flour Substitutions: Use almond flour in place of part of the gluten-free blend for a nuttier, denser cookie, though baking time may need slight adjustment.
I once tried adding a tablespoon of espresso powder to amplify the chocolate flavor — it was subtle but gave the cookies a sophisticated edge that my friends loved.
Serving & Storage Suggestions
These chewy gluten-free chocolate chip cookies are best served warm or at room temperature, where their texture shines brightest. Pair them with a glass of cold milk, a cup of coffee, or herbal tea for a comforting treat. They make an easy snack for lunchboxes or a sweet finish to a casual dinner.
To store, keep cookies in an airtight container at room temperature for up to 4 days. For longer storage, freeze the baked cookies in a sealed bag or container for up to 3 months. When ready to eat, thaw at room temperature and warm briefly in the microwave (about 10 seconds) to bring back that freshly-baked softness.
Flavors actually deepen after a day or two, so if you can resist, letting them rest a bit can add to the enjoyment.
Nutritional Information & Benefits
Each cookie (based on 24 cookies per batch) contains approximately 150 calories, 8 grams of fat, 20 grams of carbohydrates, and 2 grams of protein. Using gluten-free flour blends often means a mix of rice, tapioca, or potato starches, making them lighter and easier to digest for those with gluten sensitivities.
Butter supplies healthy fats, and dark chocolate chips add antioxidants. Brown sugar keeps moisture while adding some minerals compared to refined sugar. This recipe is naturally gluten-free and can be modified to be dairy-free or vegan, making it suitable for a variety of dietary needs.
From a personal wellness view, having a reliable, tasty gluten-free cookie recipe means no need to skip dessert or snack time due to dietary restrictions — which is a small joy worth savoring.
Conclusion
Chewy gluten-free chocolate chip cookies don’t have to be a compromise. This recipe proves you can have soft, flavorful, and satisfying cookies that everyone loves, without the gluten. It’s a reliable, simple recipe that’s become a little favorite in my kitchen — especially when life calls for a sweet pick-me-up that feels homemade and comforting.
Feel free to tweak the mix-ins, sugars, or flours to make it your own. Trust me, once you get these cookies right, they’ll be the ones friends ask for again and again. Baking these is like a little moment of calm that ends with a warm, chocolatey reward — and honestly, isn’t that what good baking is all about?
FAQs
Can I use oat flour instead of gluten-free all-purpose flour?
Yes, but oat flour can make the cookies a bit denser and may change the texture. You might want to combine it with tapioca starch or another binder for best results.
How do I make these cookies dairy-free?
Substitute the butter with a plant-based margarine or coconut oil and use dairy-free chocolate chips to keep the recipe vegan and dairy-free.
Why are my gluten-free cookies crumbly?
It’s often due to overbaking or not enough binding agents. Make sure to include cornstarch or xanthan gum, avoid overmixing, and don’t bake beyond the recommended time.
Can I freeze the cookie dough?
Absolutely! Scoop the dough onto a baking sheet, freeze until solid, then transfer to a bag. Bake from frozen, adding a couple of extra minutes to the baking time.
What causes gluten-free cookies to spread too much?
Usually too much butter or not chilling the dough. Using softened (not melted) butter and chilling the dough for at least 30 minutes helps maintain shape.
Pin This Recipe!
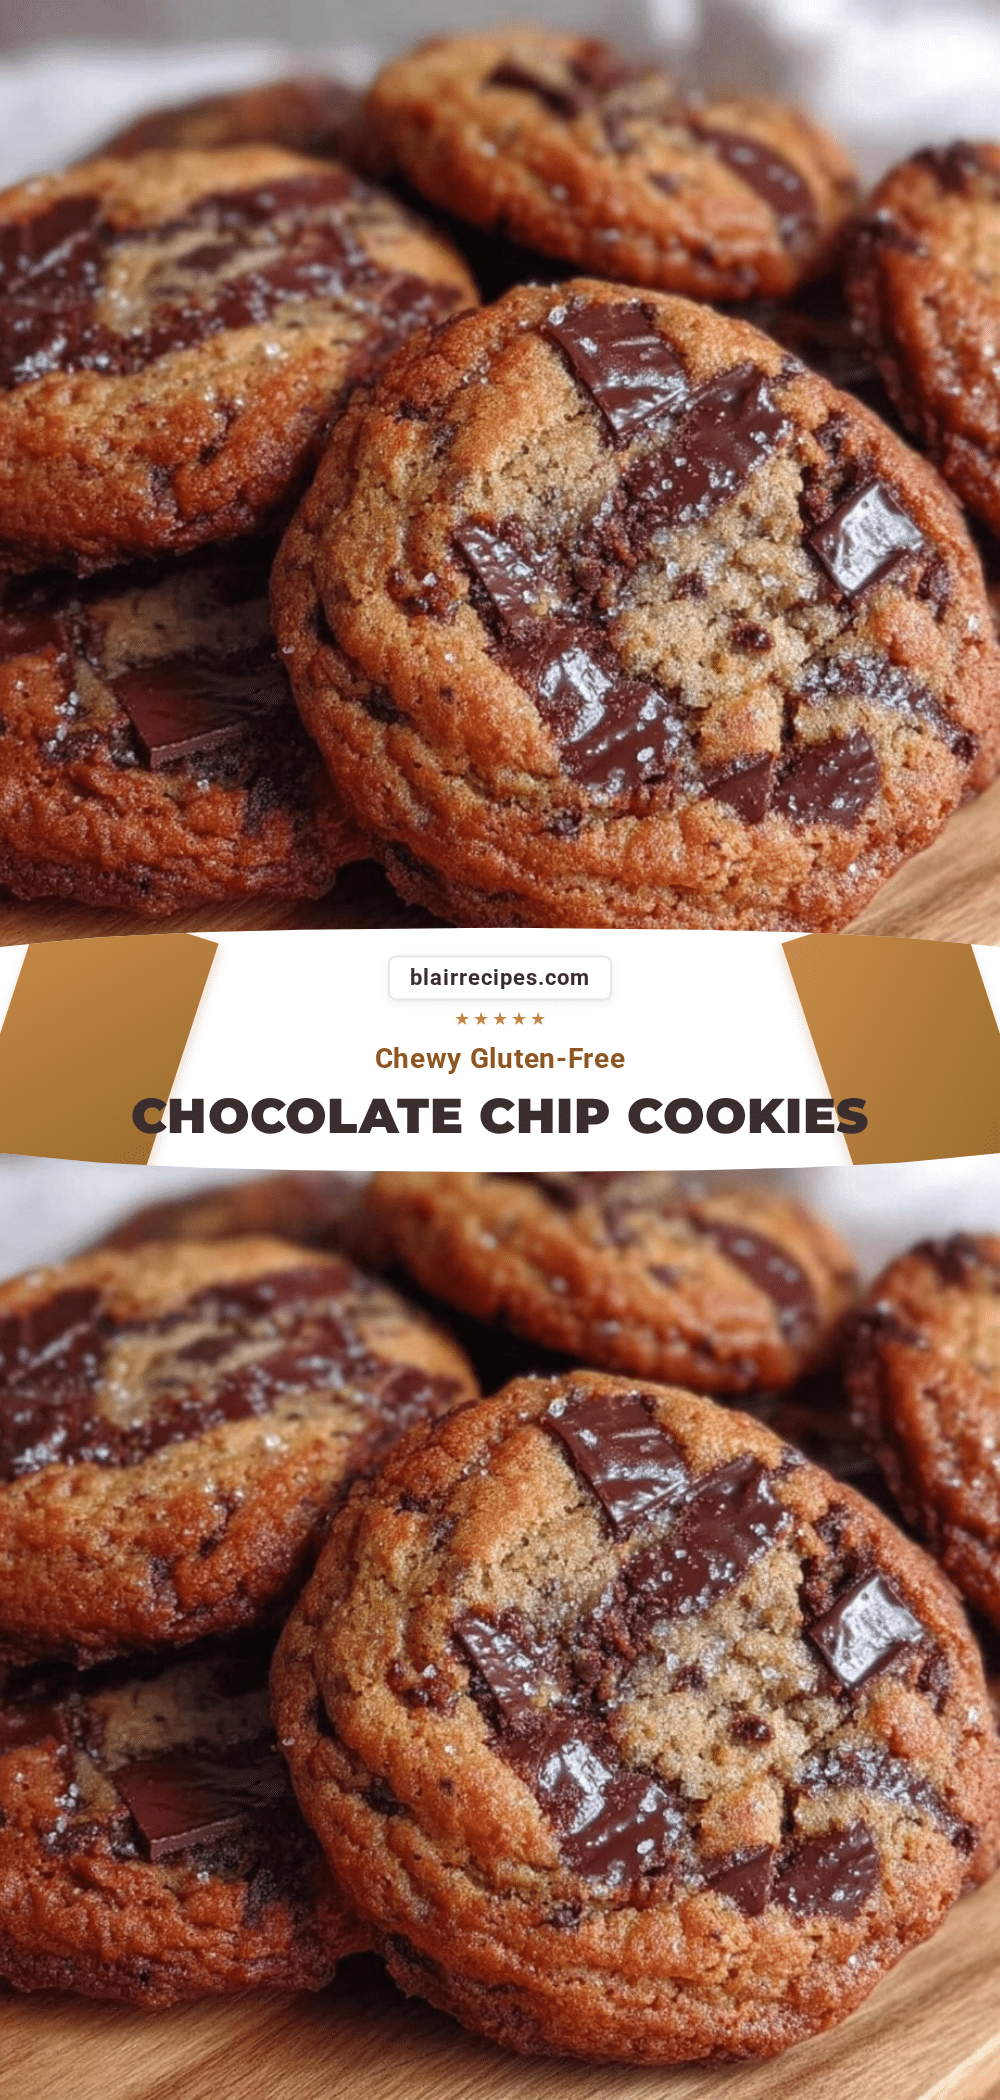
Chewy Gluten-Free Chocolate Chip Cookies

A quick and easy recipe for chewy gluten-free chocolate chip cookies that are soft, flavorful, and perfect for any occasion. These cookies use simple pantry staples and deliver a classic chocolate chip cookie texture without gluten.
- Prep Time: 20 minutes
- Cook Time: 12 minutes
- Total Time: 32 minutes
- Yield: 24 cookies 1x
- Category: Snack
- Cuisine: American
Ingredients
- 1 ¾ cups (210 g) gluten-free all-purpose flour blend (with xanthan gum included)
- 2 tablespoons (16 g) cornstarch
- ½ teaspoon baking soda
- ½ teaspoon salt
- ½ cup (113 g) unsalted butter, softened
- ¾ cup (150 g) packed brown sugar
- ¼ cup (50 g) granulated sugar
- 1 large egg, room temperature
- 1 teaspoon pure vanilla extract
- 1 cup (170 g) chocolate chips (semi-sweet or dark)
Instructions
- Preheat your oven to 350°F (175°C) and line a baking sheet with parchment paper or a silicone mat.
- In a medium bowl, whisk together the gluten-free flour blend, cornstarch, baking soda, and salt.
- In a large bowl, beat the softened butter with brown and granulated sugars until light and fluffy, about 3-4 minutes with an electric mixer.
- Beat in the egg and vanilla extract until fully combined and smooth.
- Gradually add the dry ingredients to the butter mixture, mixing on low speed just until incorporated. The dough will be thick and a bit sticky.
- Gently fold in the chocolate chips with a spatula, ensuring even distribution.
- Using a cookie scoop or spoon, drop rounded tablespoons of dough onto the prepared baking sheet, leaving about 2 inches between each cookie.
- Bake for 10–12 minutes until edges are set and beginning to turn golden but centers remain slightly soft.
- Let the cookies cool on the baking sheet for 5 minutes before transferring to a cooling rack to cool completely.
Notes
For extra chewiness, slightly underbake by 1 minute and let residual heat finish baking on the tray. Refrigerate dough for 30 minutes before baking to improve texture and flavor. Use softened butter, not melted, to avoid flat cookies. Avoid overmixing after adding dry ingredients to prevent tough cookies. Store cookies in an airtight container at room temperature for up to 4 days or freeze for up to 3 months.
Nutrition
- Serving Size: 1 cookie
- Calories: 150
- Fat: 8
- Carbohydrates: 20
- Protein: 2
Keywords: gluten-free, chocolate chip cookies, chewy cookies, easy snack, gluten-free baking, dairy-free option, vegan option


