
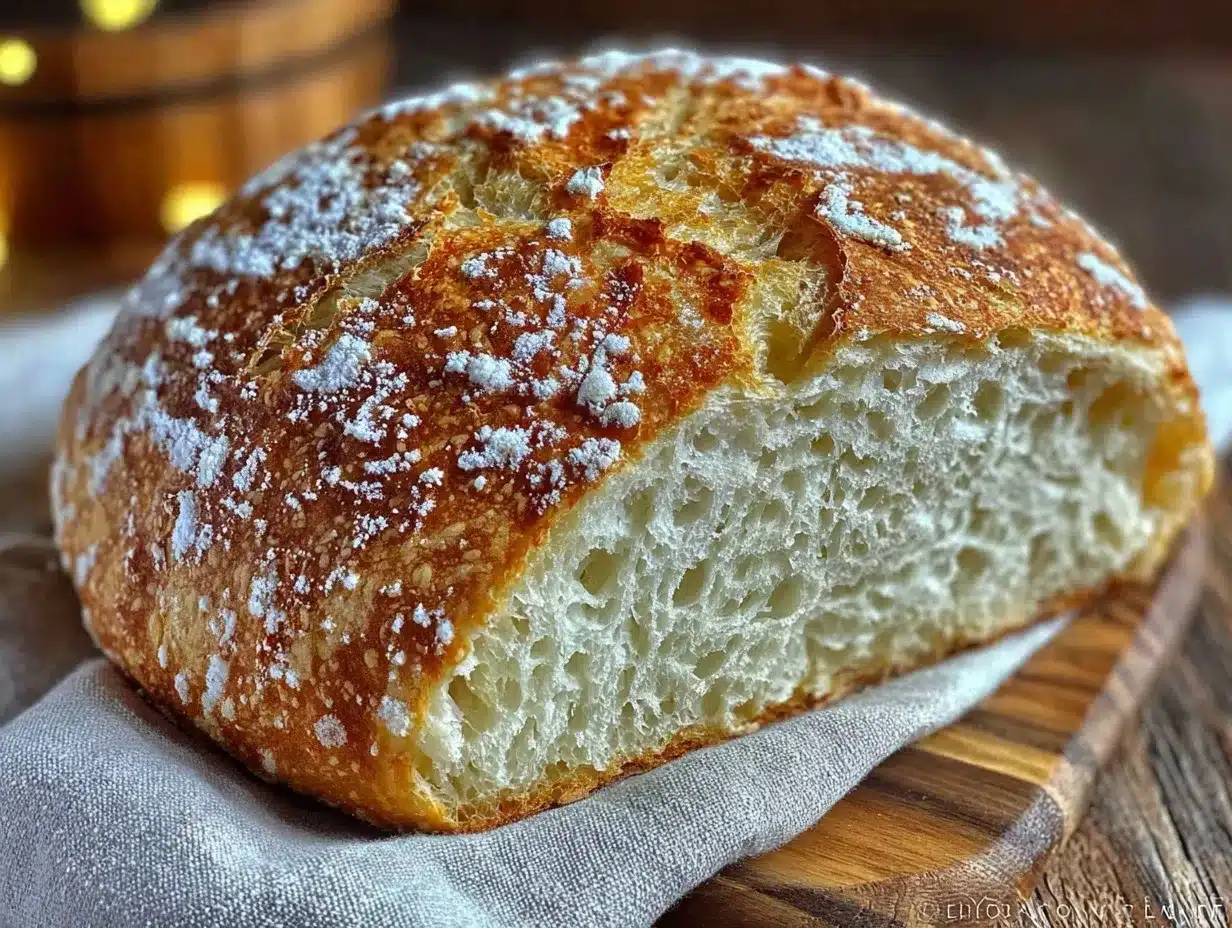
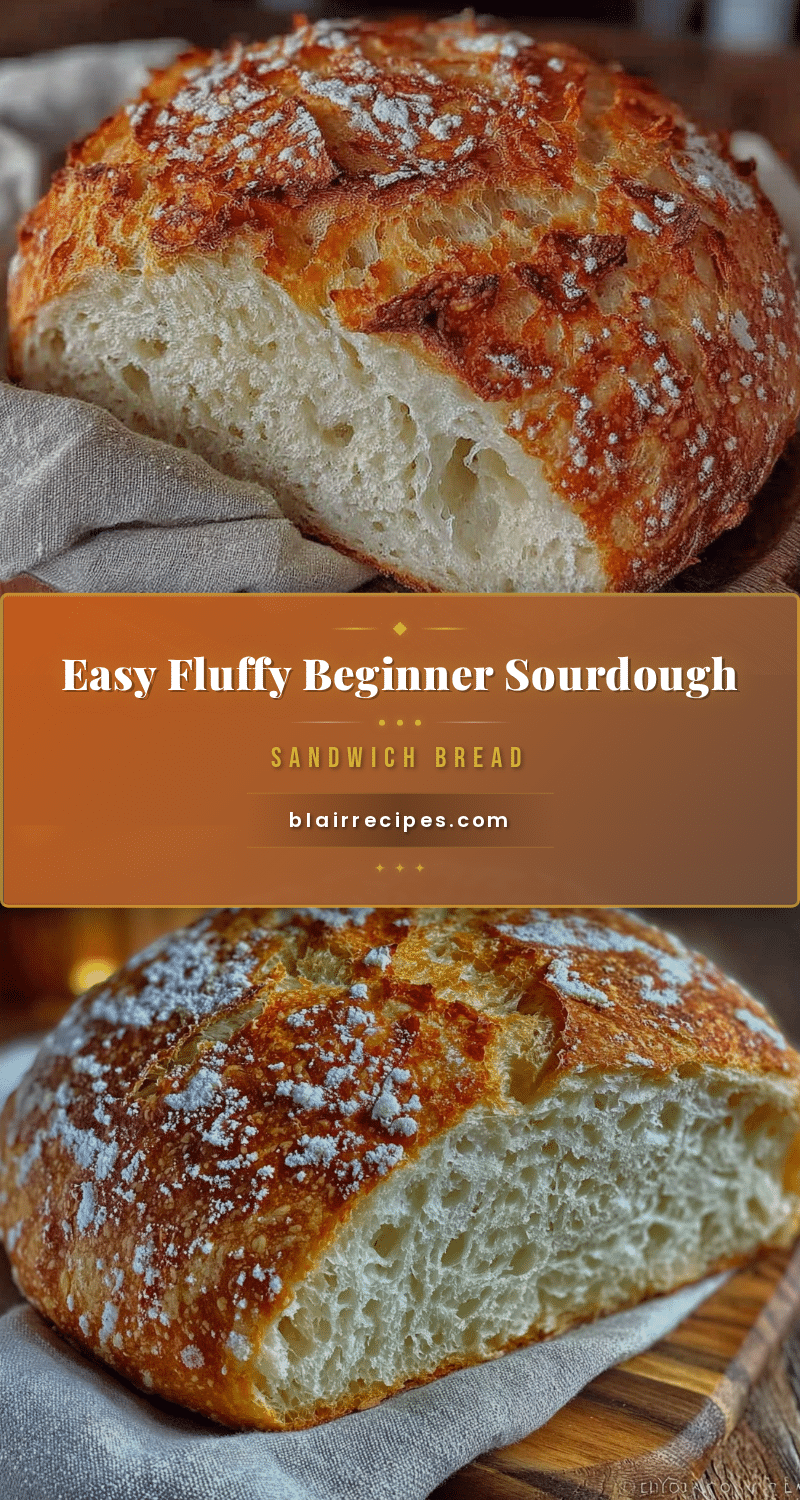
“You won’t believe how simple this is,” my friend texted me late one evening, sending a photo of a loaf that looked like it had been pulled straight from a bakery window. I’d been dithering over sourdough bread for months, convinced it was a complicated art reserved for kitchen wizards. Honestly, I was skeptical—how could something so fluffy and perfect come from my own oven, especially as a beginner? But that night, curiosity got the best of me, and I gave this easy fluffy beginner sourdough sandwich bread recipe a shot.
What surprised me most wasn’t just how the dough behaved (spoiler: it’s way more forgiving than you’d think), but how the crumb turned out—light, airy, and tender. No dense, chewy bricks here. I’ve made this loaf more times than I can count since then, tweaking the steps just enough to fit my busy schedule. And every time, it’s been a small, quiet victory—a loaf that fills the kitchen with that unmistakable tangy aroma and makes sandwiches feel like a treat rather than a chore.
There’s something grounding about pulling a fresh loaf from the oven, slicing into that soft, pillowy texture, and knowing you made it yourself. It’s the kind of recipe that stuck with me because it feels like a little act of kindness to myself on hectic days. If you’re looking for a way to tame sourdough without the fuss and get a fluffy sandwich bread that’s as reliable as it is delicious, this might just be the one you keep coming back to—just like I did.
Why You’ll Love This Recipe
After testing countless sourdough recipes and juggling a hectic schedule, this easy fluffy beginner sourdough sandwich bread won me over for good reasons:
- Quick & Easy: You can get this loaf from start to finish in about 24 hours, but with very little active work—perfect for fitting into a busy week.
- Simple Ingredients: Just a few pantry staples—flour, water, salt, and your trusty sourdough starter. No fancy add-ins or specialty flours needed.
- Perfect for Sandwiches: The soft crumb and light texture hold up beautifully to all your favorite fillings, from classic PB&J to gourmet grilled cheese.
- Crowd-Pleaser: Family and friends are always impressed when you bring this loaf to the table, especially when paired with recipes like honey-roasted butternut squash or crockpot green bean casserole.
- Unbelievably Delicious: The subtle tang from the starter combined with the soft, fluffy crumb makes this loaf comforting without being heavy.
What sets this recipe apart? It’s the little details—like folding the dough gently to keep that air bubble structure intact and timing the bulk fermentation just right so your bread rises beautifully without becoming dense. Plus, the recipe is tailored for beginners who want that bakery-quality loaf without obsessing over every step. It’s forgiving and fun, perfect if you’ve been hesitant to try sourdough sandwich bread before.
Honestly, this isn’t just bread—it’s the kind of loaf that makes you pause after the first bite and think, “I made this.” That feeling? Totally worth the effort.
What Ingredients You Will Need
This recipe uses simple, wholesome ingredients to deliver a fluffy sourdough sandwich bread that tastes complex but is easy to make. You probably already have most of these in your kitchen, and substitutions are straightforward.
- Active sourdough starter (100% hydration, fed and bubbly) – This is your natural leavening agent. I find my starter responds best when fed with unbleached all-purpose flour.
- All-purpose flour (500g / 4 cups) – For the main dough body. You can swap up to half for bread flour if you want a chewier texture.
- Water (350g / 1.5 cups, lukewarm) – Hydrates the dough. I use filtered water because chlorine can slow down fermentation.
- Salt (10g / 2 tsp, fine sea salt recommended) – Enhances flavor and strengthens gluten.
- Optional: a teaspoon of honey – Adds a touch of sweetness and helps with browning (great if you want a slightly softer crust).
For beginners, I recommend using a reliable brand of all-purpose flour like King Arthur or Bob’s Red Mill for consistent results. If you want to experiment, you can swap out the flour for a gluten-free blend, but keep in mind the texture will change quite a bit.
Seasonal note: If you’re feeling adventurous, add herbs or seeds into the dough at the last stretch and fold stage—fresh rosemary or sunflower seeds work wonders.
Equipment Needed
- Mixing bowl: A large bowl for mixing and fermenting the dough. Glass or plastic works well; just make sure it’s big enough to hold the dough as it rises.
- Dough scraper or spatula: Helps with folding and handling sticky dough without tearing it.
- Kitchen scale: Essential for measuring ingredients accurately—especially flour and water, which can make or break your bread.
- Proofing basket or bowl lined with a floured kitchen towel: For the final rise to keep the dough shape before baking.
- Baking pan or loaf tin: A standard 9×5 inch (23×13 cm) loaf pan works perfectly for sandwich bread.
- Oven thermometer (optional): Useful to check your oven temperature, especially if it tends to run hot or cold.
If you don’t have a proofing basket, no worries! A simple bowl lined with a clean, well-floured towel does the trick just fine. I usually clean and lightly oil my loaf pan after every use to prevent sticking and keep it in good shape.
Preparation Method
- Feed your starter: About 4-6 hours before you start, feed your sourdough starter so it’s bubbly and active. You want it at its peak for the best rise (usually it doubles in size and has lots of bubbles).
- Mix the dough: In your mixing bowl, combine 500g (4 cups) of all-purpose flour and 350g (1.5 cups) of lukewarm water. Stir until no dry flour remains. Cover loosely and let it rest for 30 minutes (this is called autolyse and helps hydrate the flour).
- Add starter and salt: After autolyse, add 100g (about ½ cup) of your active starter and 10g (2 tsp) fine sea salt. Mix well until combined. The dough will be sticky; that’s exactly what you want.
- Bulk fermentation & stretch and folds: Let the dough rest at room temperature (around 70°F/21°C) for about 4-5 hours. Every 30 minutes for the first 2 hours, perform a set of gentle stretch and folds: wet your hand, grab one side of the dough, stretch it upwards, and fold it over the rest. Turn the bowl and repeat 4 times. This builds gluten strength without heavy kneading.
- Shape the dough: After bulk fermentation, turn the dough out onto a lightly floured surface. Gently shape it into a tight loaf by folding the edges into the center, then roll it into a log shape that fits your loaf pan.
- Final proof: Place the shaped dough seam-side down into a greased 9×5 inch loaf pan. Cover and let it rise for 2-3 hours at room temperature, or overnight in the fridge for a slower rise and deeper flavor.
- Bake: Preheat your oven to 425°F (220°C). If you want a crispier crust, place an oven-safe dish with water on the bottom rack to create steam. Bake the loaf for 20 minutes, then reduce the temperature to 375°F (190°C) and bake for another 20-25 minutes until golden brown and internal temperature hits 200°F (93°C).
- Cool: Remove the bread from the pan and let cool completely on a wire rack before slicing. This step is crucial—cutting too soon makes the crumb gummy.
Pro tip: If your dough feels very sticky and hard to handle, dust your hands lightly with flour but avoid adding too much, or the bread can become dense. Also, if you find your kitchen is cold, bulk fermentation may take longer—just watch the dough, not the clock.
Cooking Tips & Techniques
Getting a fluffy sourdough loaf isn’t magic—it’s all about timing and technique. Here are some tips I picked up after a few failed loaves:
- Don’t rush fermentation: The dough should pass the “poke test”—when you gently press it, the indentation springs back slowly but doesn’t disappear immediately. If it springs back too fast, it needs more time.
- Stretch and folds over kneading: This method strengthens gluten without overworking the dough. It’s gentler and perfect for beginners.
- Use a kitchen scale: Measuring by weight is more consistent than volume, especially with flour.
- Steam in the oven: Adding steam (like a pan of water on the bottom rack) helps create a nice crust but keeps the crumb moist and fluffy.
- Cool completely before slicing: This is a classic mistake. Cutting warm bread can make your crumb gummy because the steam hasn’t settled yet.
Honestly, some of my earliest sourdough attempts ended up dense and disappointing because I didn’t wait long enough for fermentation or over-kneaded. This recipe’s forgiving nature lets you learn as you go without wasting ingredients.
Variations & Adaptations
Once you’ve mastered the base recipe, there are lots of ways to make this sourdough sandwich bread your own:
- Whole wheat twist: Replace up to 50% of the all-purpose flour with whole wheat flour for a nuttier flavor and denser crumb.
- Herb-infused: Add fresh herbs like rosemary or thyme during the last stretch and fold for a fragrant loaf that pairs beautifully with savory dishes.
- Seeded loaf: Mix in sunflower, pumpkin, or sesame seeds to the dough or sprinkle on top before baking for added crunch and nutrition.
- Gluten-free option: Use a gluten-free flour blend and a gluten-free sourdough starter, but expect a different texture and shorter rise times.
- Overnight cold proof: Pop the shaped dough in the fridge overnight and bake fresh the next day—this slows fermentation and deepens flavor.
I’ve tried adding a handful of walnuts and dried cranberries for a sweet-savory sandwich bread that was a hit at brunch. Feel free to get creative—this recipe is a great base for all sorts of adaptations.
Serving & Storage Suggestions
This fluffy sourdough sandwich bread is best served at room temperature—think fresh-cut slices piled high with your favorite fillings. Toasting brings out lovely nutty notes and adds a bit of crunch.
It pairs wonderfully with hearty fillings like turkey and cheese or simple spreads like butter and jam. For a cozy meal, enjoy it alongside dishes like sautéed green beans with lemon zest or a creamy soup.
Store leftover bread in a paper bag at room temperature for up to 3 days to keep the crust crisp. For longer storage, slice and freeze the bread in an airtight bag. Toast slices straight from the freezer for a fresh taste any time.
Reheating in a 350°F (175°C) oven for 5-7 minutes refreshes the crust nicely. Over time, the flavors deepen, making this loaf excellent for sandwiches that benefit from a slightly tangier bite.
Nutritional Information & Benefits
One slice (about 60g) of this sourdough sandwich bread contains approximately 150 calories, 30g carbohydrates, 5g protein, and 1g fat. It’s naturally low in sugar and free from preservatives.
The sourdough fermentation process breaks down gluten and phytic acid, making the bread easier to digest than conventional yeast breads. Plus, the slow fermentation adds beneficial probiotics and enhances mineral absorption.
This recipe is vegetarian-friendly and can be adapted to gluten-free diets with proper flour swaps. Just be mindful of potential allergens like wheat and seeds if you include them.
From a personal wellness viewpoint, baking your own bread means you control the ingredients—no hidden sugars or additives—just honest nourishment that feels good to eat.
Conclusion
This easy fluffy beginner sourdough sandwich bread recipe is a shining example of how simple ingredients, a bit of patience, and gentle technique can yield a loaf that’s soft, tangy, and perfect for everyday sandwiches. It’s approachable enough for anyone hesitant about sourdough and rewarding enough to become a staple in your kitchen.
Feel free to play with flavors, rise times, and add-ins to make it your own. I still bake this loaf when I want that comforting homemade bread smell filling the house, and it always brings a quiet joy to my day.
If you try the recipe, I’d love to hear how your loaf turns out or any special twists you add. Baking bread is one of those simple pleasures that connects us all—here’s to many warm slices ahead!
FAQs
How active should my sourdough starter be for this recipe?
Your starter should be bubbly and doubled in size about 4-6 hours after feeding. This peak activity ensures good rise and flavor.
Can I use bread flour instead of all-purpose flour?
Yes! Bread flour has higher protein and can make the crumb chewier. You can use it fully or mix half with all-purpose flour.
What if my dough feels too sticky to handle?
Lightly flour your hands and work surface, but avoid adding too much extra flour. Sticky dough is normal and helps create a soft crumb.
Can I bake this bread without a loaf pan?
Definitely. Shape it into a round boule, proof in a floured basket or towel-lined bowl, and bake on a preheated baking stone or sheet.
How long does the bread keep fresh?
At room temperature in a paper bag, it stays fresh for about 3 days. For longer storage, freeze sliced bread and toast directly from the freezer.
Pin This Recipe!
Easy Fluffy Beginner Sourdough Sandwich Bread Recipe for Perfect Homemade Loaves

A simple and forgiving sourdough sandwich bread recipe perfect for beginners, yielding a soft, fluffy, and tangy loaf ideal for everyday sandwiches.
- Prep Time: 30 minutes active + 4-6 hours starter feeding
- Cook Time: 40-45 minutes
- Total Time: Approximately 24 hours including fermentation and proofing
- Yield: 1 loaf (about 12-16 slices) 1x
- Category: Bread, Main Course
- Cuisine: American
Ingredients
- 100g active sourdough starter (100% hydration, fed and bubbly)
- 500g (4 cups) all-purpose flour
- 350g (1.5 cups) lukewarm water
- 10g (2 tsp) fine sea salt
- Optional: 1 tsp honey
Instructions
- Feed your starter about 4-6 hours before starting so it’s bubbly and active.
- In a mixing bowl, combine 500g (4 cups) all-purpose flour and 350g (1.5 cups) lukewarm water. Stir until no dry flour remains. Cover loosely and rest for 30 minutes (autolyse).
- Add 100g (about ½ cup) active starter and 10g (2 tsp) fine sea salt to the dough. Mix well until combined; dough will be sticky.
- Let dough rest at room temperature (~70°F/21°C) for 4-5 hours. Every 30 minutes for the first 2 hours, perform gentle stretch and folds: wet hand, stretch one side of dough upwards, fold over, turn bowl, repeat 4 times.
- Turn dough onto a lightly floured surface. Shape into a tight loaf by folding edges into center and rolling into a log to fit loaf pan.
- Place shaped dough seam-side down into greased 9×5 inch loaf pan. Cover and let rise 2-3 hours at room temperature or overnight in fridge for slower rise and deeper flavor.
- Preheat oven to 425°F (220°C). Optionally place oven-safe dish with water on bottom rack for steam.
- Bake loaf for 20 minutes at 425°F, then reduce temperature to 375°F (190°C) and bake another 20-25 minutes until golden brown and internal temperature reaches 200°F (93°C).
- Remove bread from pan and cool completely on wire rack before slicing.
Notes
Do not rush fermentation; use stretch and folds instead of kneading to build gluten. Use steam in oven for a crisp crust and cool bread completely before slicing to avoid gummy crumb. If dough is sticky, lightly flour hands but avoid adding too much flour.
Nutrition
- Serving Size: 1 slice (about 60g)
- Calories: 150
- Fat: 1
- Carbohydrates: 30
- Protein: 5
Keywords: sourdough bread, sandwich bread, beginner sourdough, fluffy bread, homemade bread, easy sourdough, baking bread


