“You’re not seriously eating that store-bought bar again?” my friend teased as I pulled out yet another homemade protein bar from my lunch bag. Honestly, I get it—those pre-packaged bars can be convenient, but after a few weeks of trying them, I realized most had ingredients I couldn’t even pronounce or a sugar content that made me question if they were really fueling me or just giving a quick crash. So, what started as a lazy Sunday afternoon experiment turned into this obsession phase—I couldn’t stop making these healthy homemade protein bars to fuel my day.
I remember the exact moment I nailed the recipe. I was sitting on my tiny kitchen counter, notebook in hand, tweaking the ratios of oats to nut butter, wondering if adding a pinch of sea salt would actually make a difference (spoiler: it did). The smell of toasted oats mixed with the subtle sweetness of honey hit me just right—comforting but energizing. No more mid-afternoon slumps or vending machine regrets. These bars became my go-to, whether I was rushing out for a hike or just needed a grab-and-go snack between meetings.
What stuck with me is how adaptable this recipe is. You know, sometimes I swap almonds for walnuts, or drizzle a bit of dark chocolate on top for a treat without going overboard. The texture? Just right—not too crumbly, not too sticky. And the best part: I always know what’s inside. No mystery ingredients, just honest, wholesome food that actually keeps me going. If you’ve ever been skeptical about making your own snacks, this recipe might just change your mind as it did mine.
Making these bars isn’t about perfection; it’s about having something reliable, tasty, and good for you. That quiet realization—that I could fuel my day with something homemade and satisfying—kept me coming back to this recipe, and I’m pretty sure it’ll do the same for you.
Why You’ll Love This Recipe
Having tested and tweaked this recipe more times than I can count, I can say with confidence that these healthy homemade protein bars are a winner for anyone who wants a simple, nourishing snack without the fuss. Here’s what makes them stand apart:
- Quick & Easy: Ready in under 30 minutes, including prep and chilling. Perfect for busy mornings or last-minute fuel before a workout.
- Simple Ingredients: Uses pantry staples like oats, nut butter, and honey—no specialty stores needed.
- Perfect for On-the-Go: Great for packing in lunchboxes, gym bags, or even to enjoy during a hike.
- Crowd-Pleaser: I’ve had friends and family sneak these bars away from the fridge, and they always ask for the recipe.
- Unbelievably Delicious: The balance of chewy oats, creamy nut butter, and natural sweetness hits all the right notes.
What sets this recipe apart is the simple technique of gently toasting the oats beforehand—this step really amps up the flavor and gives a lovely nutty aroma. Also, blending the nut butter with a touch of honey and vanilla makes the bars moist but firm, so they hold together without being too dense. Honestly, this recipe isn’t just another protein bar; it’s the one I trust to keep me fueled and satisfied without weighing me down.
Whether you’re looking to impress guests with a homemade snack or just want a dependable energy boost, these bars bring comfort and nutrition together in a way that feels effortless but thoughtful.
What Ingredients You Will Need
This recipe uses simple, wholesome ingredients to deliver bold flavor and satisfying texture without the fuss. Most of these are pantry staples, and you can easily swap or adjust based on what you have on hand.
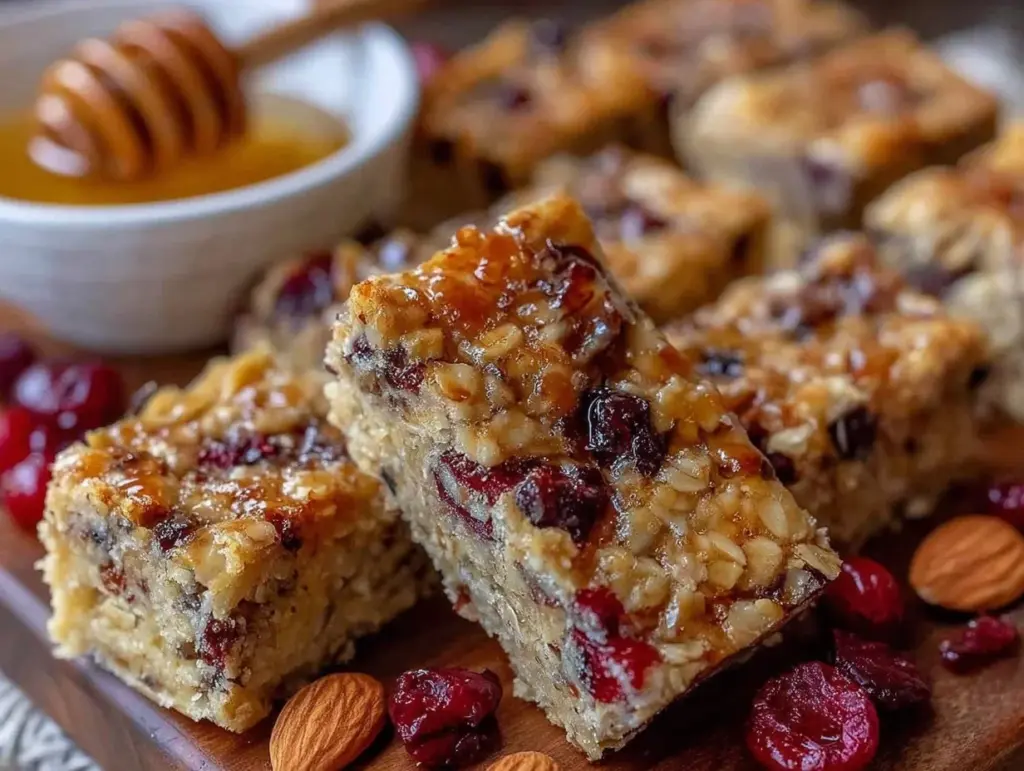
- Old-fashioned rolled oats (1 1/2 cups / 135g) — I prefer Bob’s Red Mill for the best texture.
- Natural almond butter (1/2 cup / 125g) — creamy or crunchy works; creamy gives a smoother bar.
- Honey (1/3 cup / 113g) — adds natural sweetness and binds the bars together.
- Vanilla extract (1 tsp) — enhances the flavor without overpowering.
- Ground flaxseed (2 tbsp) — boosts fiber and adds a subtle nutty taste.
- Chia seeds (1 tbsp) — for extra omega-3 and texture.
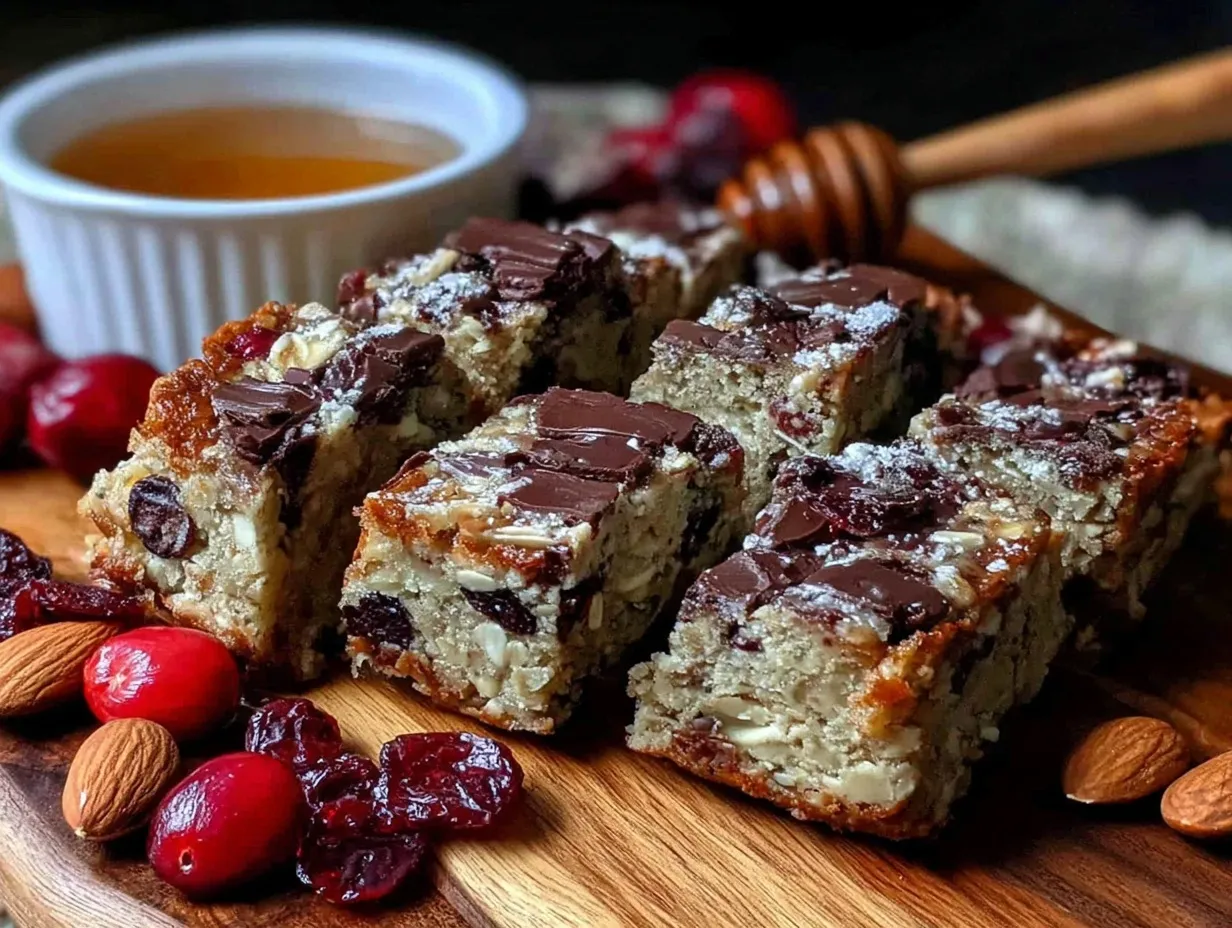
- Mini dark chocolate chips (1/3 cup / 60g) — optional, but highly recommended for a little indulgence.
- Sea salt (a pinch) — balances the sweetness and highlights the flavors.
- Optional add-ins: chopped walnuts or pecans (1/4 cup / 30g), dried cranberries or raisins (1/4 cup / 40g) for variety.
If you want to make this gluten-free, just double-check your oats are certified gluten-free. For a vegan version, swap honey with maple syrup or agave nectar. I’ve also tried swapping almond butter with peanut butter for a different twist — both work wonderfully.
Equipment Needed
- Mixing bowl: A large bowl to combine everything comfortably.
- Baking pan (8×8-inch / 20×20 cm): For setting the bars evenly. If you don’t have an 8×8, a loaf pan works too, just adjust thickness.
- Parchment paper: Essential for easy removal and clean-up.
- Measuring cups and spoons: To get precise amounts, especially for binding agents like honey.
- Wooden spoon or spatula: For mixing dense ingredients.
- Optional: food processor or blender to pulse oats for finer texture (I usually skip this for more chew).
Personally, I find parchment paper a game changer — it prevents sticking and keeps the bars intact. If you’re on a budget, lining your pan with foil works in a pinch but can be trickier when removing the bars. For best results, make sure your baking pan is square to keep bars uniform and easy to slice.
Preparation Method
- Preheat your oven to 350°F (175°C). Line your 8×8-inch pan with parchment paper, leaving some overhang for easy lifting later. This step saves lots of hassle when it’s time to cut the bars.
- Toast the oats: Spread the oats on a baking sheet and toast for about 10 minutes until golden and fragrant. This little step brings out a rich, nutty flavor that really lifts the whole bar. Watch carefully so they don’t burn!
- Mix the wet ingredients: In a large bowl, combine almond butter, honey, and vanilla extract. Stir until smooth and fully blended. If your almond butter is too stiff, warming it slightly in the microwave (10-15 seconds) helps it mix better.
- Add dry ingredients: To the wet mix, fold in toasted oats, ground flaxseed, chia seeds, sea salt, and any optional nuts or dried fruit. Stir until everything is evenly combined. The mixture should be sticky but hold together when pressed.
- Press into pan and add chocolate chips: Transfer the mixture to your prepared pan. Press down firmly with your hands or a spatula to compact the bars well. Sprinkle mini dark chocolate chips evenly on top, pressing lightly so they stick.
- Bake for 15-18 minutes. The edges should turn slightly golden but the center remains soft. Overbaking can make the bars dry, so keep a close eye near the end.
- Cool completely in the pan on a wire rack. This is crucial; warm bars will crumble when cut. After about 30 minutes, use parchment paper edges to lift bars out and transfer to a cutting board.
- Slice into 10-12 bars. Store in an airtight container in the fridge for up to a week or freeze for longer storage.
Here’s a personal tip: I like to use a sharp serrated knife and saw gently to avoid squishing the bars. Also, if you find your bars aren’t holding together well, adding a bit more honey or nut butter next time usually fixes that.
Cooking Tips & Techniques
One of the trickiest things about making homemade protein bars is getting the texture just right—chewy but firm, not crumbly or sticky. Toasting the oats is a simple technique that adds flavor and helps with the texture, so don’t skip it. I learned that the hard way after a few batches that tasted bland and felt mushy.
When mixing, make sure your nut butter isn’t rock solid. Warming it slightly softens it just enough to blend smoothly with honey. But be careful not to overheat or it can become oily and separate.
Pressing the mixture firmly into your pan ensures the bars hold together after baking. You’d be surprised how much difference a little extra pressure makes. I sometimes use the bottom of a glass to compact the surface evenly.
Timing is everything for baking. Too short, and the bars fall apart; too long, and they dry out. Keep an eye during the last few minutes—edges should be golden but the center still soft to the touch.
Lastly, let the bars cool completely before slicing. It’s tempting to cut them right away, but patience here prevents crumbling and messy edges. I often leave them to cool for at least 30 minutes on a wire rack, then refrigerate for firmer bars.
Variations & Adaptations
One thing I love about this recipe is how flexible it is. Here are some ways to make it your own:
- Nut-free version: Swap almond butter with sunflower seed butter to keep it allergy-friendly without losing creaminess.
- Seasonal twist: Add dried cranberries and a dash of cinnamon in fall for a cozy flavor that pairs well with roasted butternut squash dishes.
- Chocolate overload: Mix in cocoa powder and increase chocolate chips for a rich, chocolatey bar with a punch of protein.
- Low-carb adaptation: Replace oats with shredded unsweetened coconut and chopped nuts for a grain-free option.
For cooking method changes, I’ve tried no-bake versions by chilling the bars overnight instead of baking—great for hot days or quick prep. Just press the mix firmly, refrigerate for at least 4 hours, and slice.
Personally, my favorite variation includes a handful of chopped pecans and a sprinkle of sea salt on top to balance the sweetness. It reminds me a bit of the texture in the sautéed green beans with pine nuts I make for dinner—simple, satisfying, and just right.
Serving & Storage Suggestions
These healthy homemade protein bars are best served chilled or at room temperature. I usually grab one straight from the fridge as a mid-morning snack. They pair surprisingly well with a cup of black coffee or green tea for a balanced, energizing break.
For a quick breakfast on busy days, try crumbling a bar over Greek yogurt with fresh berries—adds texture and extra protein. They also make a thoughtful addition to a packed lunch or picnic basket.
Store bars in an airtight container in the refrigerator for up to one week. If you want to keep them longer, wrap individually in parchment or plastic wrap and freeze for up to three months. When ready to eat, let thaw at room temperature for 15 minutes or warm slightly in the microwave for a softer bite.
Over time, flavors meld and deepen, especially if you include dried fruit or nuts. I find the bars taste even better after a day or two in the fridge, so making a batch ahead is a smart move.
Nutritional Information & Benefits
Each bar (assuming 12 bars) roughly contains:
| Nutrient | Amount |
|---|---|
| Calories | 180-200 kcal |
| Protein | 6-8 g |
| Carbohydrates | 18-20 g |
| Fiber | 4-5 g |
| Fat | 8-10 g (mostly healthy fats) |
Key ingredients like almond butter and chia seeds provide heart-healthy fats and sustained energy, while oats and flaxseed offer fiber to keep you full longer. This recipe is gluten-free if you use certified oats and can be dairy-free and vegan with honey substitutions.
From a wellness perspective, these bars provide a balanced mix of macronutrients that help avoid blood sugar spikes. I appreciate having a snack that supports steady energy without processed additives or excess sugar.
Conclusion
Healthy homemade protein bars like these have become a staple in my kitchen because they strike the perfect balance of nourishment and flavor without complicated steps or weird ingredients. You can easily tweak the recipe to suit your tastes or dietary needs, making them truly your own.
Why settle for anything less when you can have a wholesome snack that fuels your day and feels like a treat? I love how these bars help me power through busy mornings or recover after a workout, always knowing what I’m putting into my body.
If you try this recipe, I’d love to hear which variations you enjoy or any tweaks you make. Sharing your experience helps keep the kitchen fun and inspiring for all of us.
Here’s to fueling your day with something real, simple, and delicious!
FAQs About Healthy Homemade Protein Bars
Can I store these protein bars at room temperature?
They’re best kept in the fridge to maintain firmness and freshness, but you can store them at room temperature for up to 2 days if well wrapped.
What’s the best nut butter to use?
Almond butter works great for a creamy texture and mild flavor, but peanut or cashew butter can be used depending on your preference.
Can I make these bars without baking?
Yes! Simply press the mixture firmly into the pan and chill in the fridge for at least 4 hours until set.
Are these bars suitable for a gluten-free diet?
Absolutely, just use certified gluten-free oats to avoid cross-contamination.
How do I prevent the bars from falling apart?
Pressing the mixture firmly into the pan and allowing the bars to cool completely before slicing are key steps to keep them intact.
Pin This Recipe!
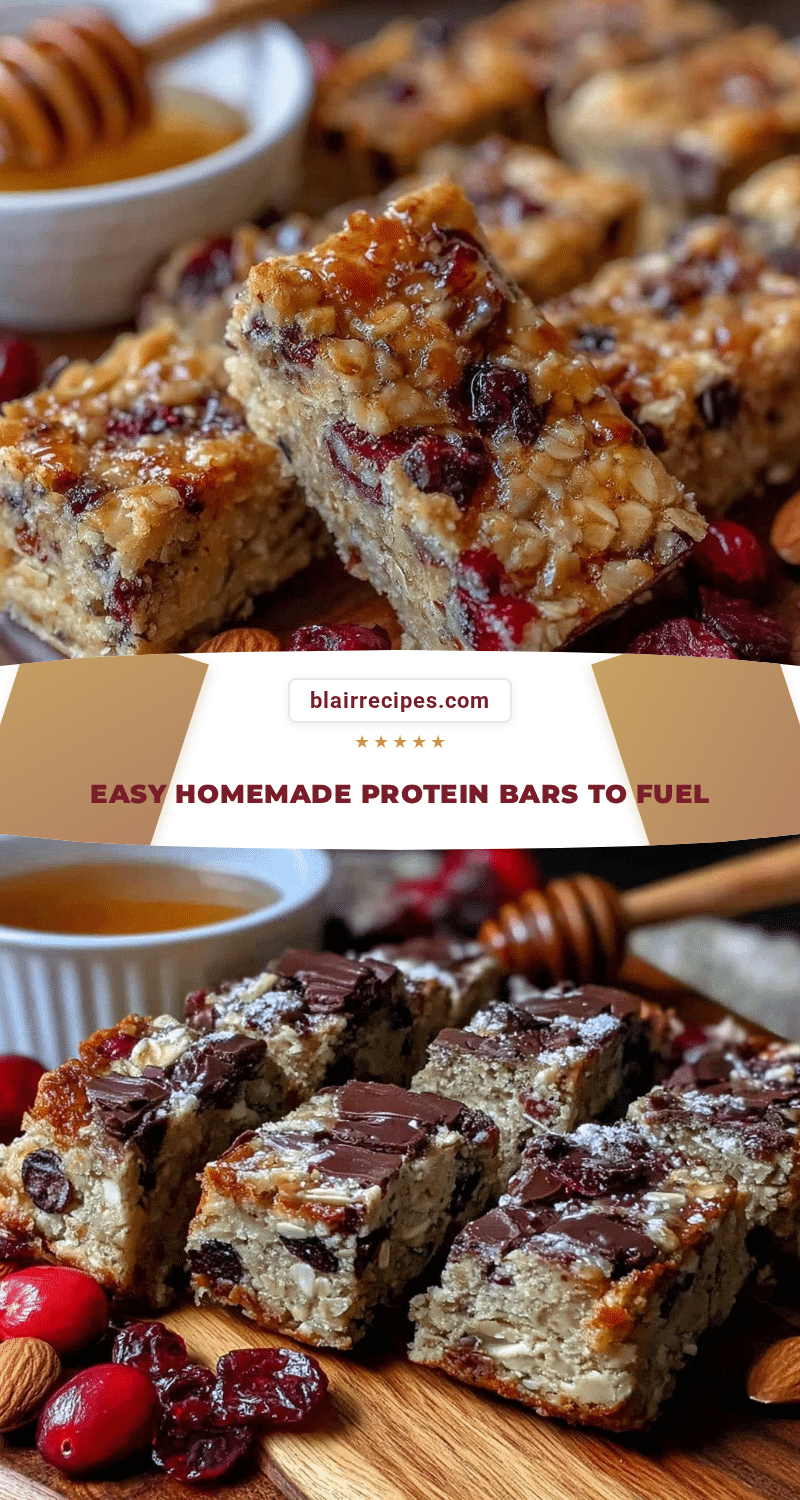
Healthy Homemade Protein Bars

These healthy homemade protein bars are a simple, nourishing snack made with wholesome ingredients like oats, almond butter, and honey. They are quick to prepare, perfect for on-the-go, and customizable to suit dietary needs.
- Prep Time: 15 minutes
- Cook Time: 18 minutes
- Total Time: 33 minutes
- Yield: 10-12 bars 1x
- Category: Snack
- Cuisine: American
Ingredients
- 1 1/2 cups (135g) old-fashioned rolled oats
- 1/2 cup (125g) natural almond butter
- 1/3 cup (113g) honey
- 1 tsp vanilla extract
- 2 tbsp ground flaxseed
- 1 tbsp chia seeds
- 1/3 cup (60g) mini dark chocolate chips (optional)
- Pinch of sea salt
- Optional add-ins: 1/4 cup (30g) chopped walnuts or pecans, 1/4 cup (40g) dried cranberries or raisins
Instructions
- Preheat your oven to 350°F (175°C). Line an 8×8-inch (20×20 cm) baking pan with parchment paper, leaving some overhang for easy lifting.
- Toast the oats on a baking sheet for about 10 minutes until golden and fragrant. Watch carefully to avoid burning.
- In a large bowl, combine almond butter, honey, and vanilla extract. Stir until smooth and fully blended. Warm almond butter slightly if too stiff.
- Fold in toasted oats, ground flaxseed, chia seeds, sea salt, and any optional nuts or dried fruit. Stir until evenly combined and sticky.
- Transfer the mixture to the prepared pan. Press down firmly with hands or spatula to compact the bars.
- Sprinkle mini dark chocolate chips evenly on top, pressing lightly so they stick.
- Bake for 15-18 minutes until edges are slightly golden but center remains soft. Avoid overbaking to prevent dryness.
- Cool completely in the pan on a wire rack for about 30 minutes. Use parchment paper edges to lift bars out.
- Slice into 10-12 bars. Store in an airtight container in the fridge for up to one week or freeze for longer storage.
Notes
Toast oats to enhance flavor and texture. Warm almond butter slightly if too stiff for easier mixing. Press mixture firmly into pan to help bars hold together. Cool bars completely before slicing to prevent crumbling. Bars can be made no-bake by chilling overnight instead of baking.
Nutrition
- Serving Size: 1 bar (if 12 bars ma
- Calories: 180200
- Sugar: 810
- Sodium: 50100
- Fat: 810
- Saturated Fat: 12
- Carbohydrates: 1820
- Fiber: 45
- Protein: 68
Keywords: protein bars, healthy snack, homemade protein bars, easy protein bars, energy bars, gluten-free, vegan options


