“Wait, are you really making a red, white, and blue cheesecake?” my neighbor asked from across the fence last summer, eyeing the layers of vivid color in my mixing bowl. I’m not gonna lie—I was skeptical myself at first. Cheesecake and patriotic colors seemed like an odd combo. But honestly, after some trial and error, this Perfect Red White and Blue Cheesecake for Patriotic Celebrations became my go-to dessert every July 4th. It started as a last-minute idea when I realized I forgot to pick up a dessert for a neighborhood barbecue. I grabbed the basics from my fridge and pantry, threw in some natural food coloring (nothing artificial, because that’s just not my style), and ended up with a crowd-pleaser that looked as good as it tasted.
The creamy tang of the cheesecake, paired with the vibrant red strawberry swirl and the deep blue blueberry topping, isn’t just eye candy—it’s a flavor punch that feels festive without being over the top. I’ve made this cheesecake so many times that it’s practically become a tradition for me—whether it’s an impromptu block party or just a quiet night watching fireworks with a slice in hand. And let’s face it, it’s pretty fun to serve a dessert that makes folks pause and ask for the recipe. What I love most is how it’s approachable—no fancy pastry skills needed, just a few simple steps and ingredients you probably already have. This isn’t just any cheesecake; it’s a little slice of American celebration you can make with your own hands, and it sticks with you like the smell of summer BBQs and sparklers in the air.
After all, the best recipes are the ones that feel like your own secret weapon for making moments special—and this cheesecake has quietly claimed that spot in my kitchen.
Why You’ll Love This Recipe
Having tested this recipe through multiple holiday gatherings and casual get-togethers, I can say it’s been a hit every single time. From a seasoned baker’s perspective and someone who’s just “not really a baker” type, this recipe bridges the gap perfectly. Here’s why it’s become an essential for patriotic celebrations:
- Quick & Easy: The whole cheesecake comes together in about 45 minutes of prep—making it ideal for busy cooks or last-minute dessert plans.
- Simple Ingredients: You won’t need to hunt down anything exotic. Basic cream cheese, fresh berries, and pantry staples are all it takes.
- Perfect for July 4th and Beyond: It’s not just for Independence Day; this cheesecake shines at Memorial Day barbecues and Labor Day picnics too.
- Crowd-Pleaser: Kids love the colors, adults love the creamy texture, and everyone appreciates the balance of sweet and tangy.
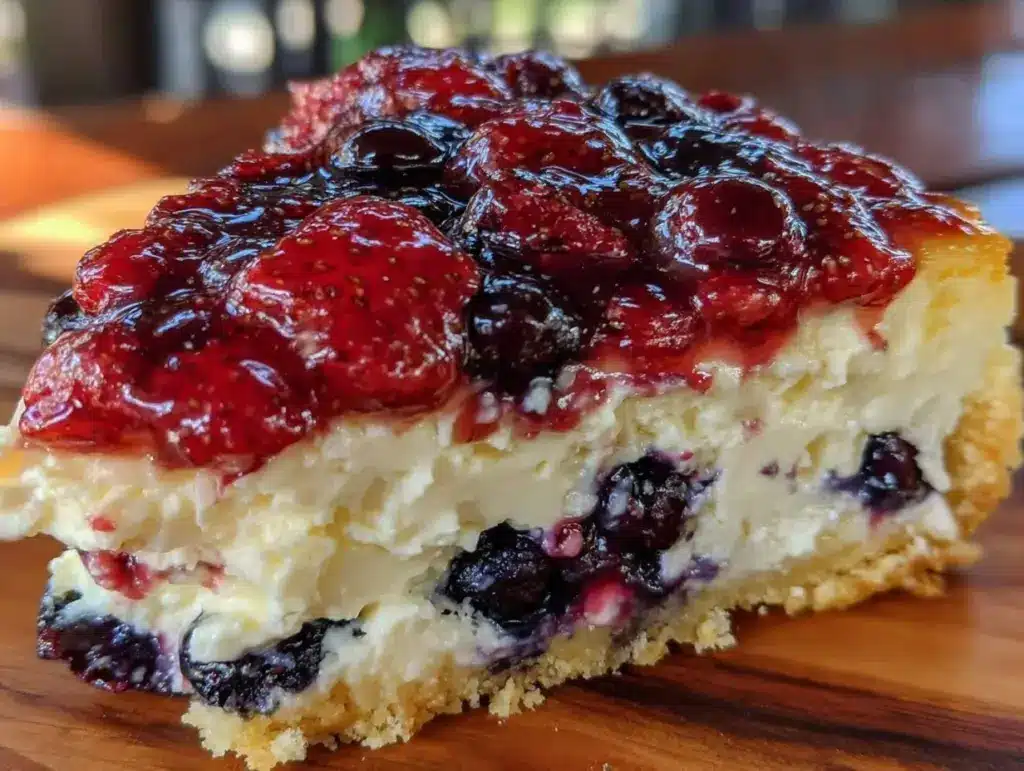
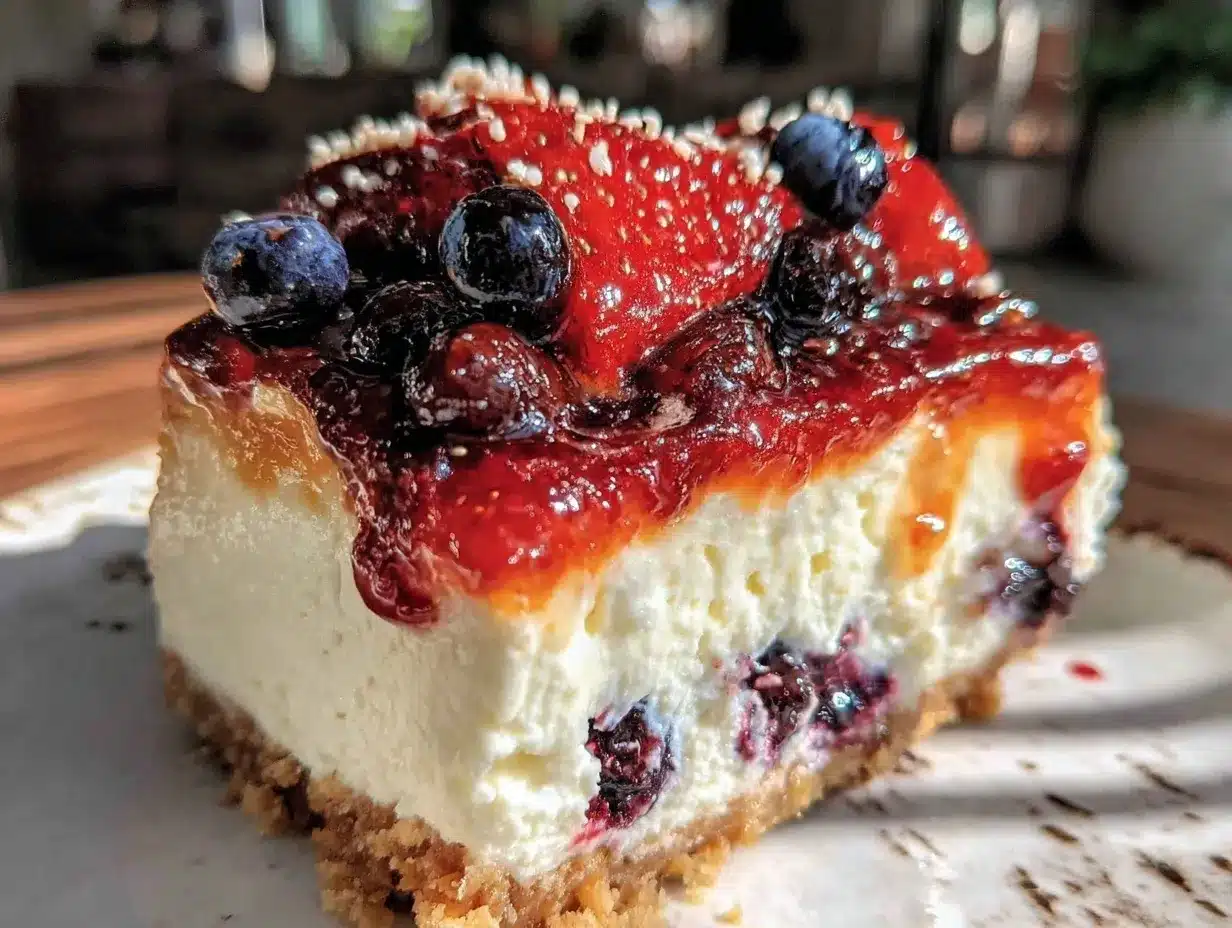
- Unbelievably Delicious: The combination of a buttery graham crust, smooth cheesecake filling, and fresh berry layers creates a flavor and texture experience that’s hard to forget.
What sets this apart from other patriotic cheesecakes? The secret lies in the layered approach and the gentle use of natural berry purées to color the cheesecake without overpowering the classic flavor. The red strawberry swirl isn’t just decoration—it gives a subtle fruity brightness that cuts through the richness. The blueberry topping adds a fresh pop of color and taste, making it a dessert that feels festive and fresh rather than heavy or overly sweet.
This cheesecake isn’t just a dish—it’s a way to make your celebration feel a little more memorable, a little more special, and honestly, a lot more fun.
What Ingredients You Will Need
This recipe uses simple, wholesome ingredients to deliver bold flavor and satisfying texture without the fuss. All the elements come together to create that classic cheesecake feel but with a festive twist. Most of these are pantry or fridge staples, and the berries can be fresh or frozen depending on what’s available.
- For the Crust:
- 1 1/2 cups (150 g) graham cracker crumbs (I prefer the honey-flavored ones for a touch of sweetness)
- 1/4 cup (50 g) granulated sugar
- 6 tablespoons (85 g) unsalted butter, melted (use European-style butter if you want extra richness)
- For the Cheesecake Filling:
- 24 oz (680 g) cream cheese, softened (Philadelphia brand works great for smooth texture)
- 1 cup (200 g) granulated sugar
- 1 cup (240 ml) sour cream, room temperature (adds creaminess and slight tang)
- 3 large eggs, room temperature (helps the cheesecake set perfectly)
- 2 teaspoons vanilla extract
- 1 tablespoon all-purpose flour (helps stabilize the filling)
- For the Red Layer (Strawberry Swirl):
- 1 cup (150 g) fresh or frozen strawberries, pureed
- 1 tablespoon sugar (optional, depending on berry sweetness)
- For the Blue Topping:
- 1 cup (150 g) fresh or frozen blueberries
- 2 tablespoons sugar
- 1 teaspoon lemon juice (balances sweetness)
- 1 teaspoon cornstarch dissolved in 1 tablespoon water (for thickening)
Ingredient tips: If you want a dairy-free version, swap cream cheese and sour cream with coconut-based alternatives, but the texture will be a bit different. For a gluten-free crust, almond flour mixed with melted butter works well. If you’re using frozen berries, thaw and drain excess liquid to avoid watery layers.
Equipment Needed
- 9-inch (23 cm) springform pan – essential for easy removal of the cheesecake without damaging the sides.
- Mixing bowls – at least two; one for crust and one for filling.
- Electric mixer or stand mixer – to get that ultra-smooth cheesecake batter. Hand mixing is possible but expect lumps.
- Food processor (optional) – helpful for crushing graham crackers super fine.
- Small saucepan – for cooking the blueberry topping.
- Spatula and wooden spoon – for folding in ingredients gently.
- Measuring cups and spoons – accuracy helps, especially for baking.
If you don’t have a springform pan, a regular cake pan lined with parchment paper can work, but be extra careful when removing the cheesecake. From experience, using a good-quality non-stick pan makes the release easier and cleanup faster. Also, keep your mixer beaters clean and free of residue for the smoothest batter possible.
Preparation Method
- Prepare the crust: Preheat your oven to 325°F (163°C). In a medium bowl, mix the graham cracker crumbs, sugar, and melted butter until evenly combined and the mixture feels like wet sand. Press this mixture firmly into the bottom of your springform pan, making sure it’s evenly distributed and packed tight. Bake for 10 minutes, then remove and let cool slightly while you prepare the filling.
- Make the strawberry purée: Blend the strawberries with sugar until smooth. If it’s too thick, add a teaspoon or two of water to loosen. Set aside.
- Prepare the blueberry topping: In a small saucepan, combine blueberries, sugar, and lemon juice over medium heat. Cook until the berries release their juices and the mixture starts to bubble. Stir in the cornstarch slurry and cook for another minute or two until thickened. Remove from heat and let cool completely.
- Make the cheesecake filling: In a large bowl, beat the softened cream cheese until smooth and creamy, about 2-3 minutes. Gradually add sugar and mix until well incorporated. Add sour cream and vanilla extract, mixing gently. Beat in eggs one at a time, mixing on low speed just until combined to avoid overbeating, which can cause cracks. Finally, add the flour and mix briefly until just incorporated.
- Divide and color the batter: Scoop about 1/3 of the batter into a separate bowl and gently stir in the strawberry purée to create the red layer.
- Layer the cheesecake: Pour half of the plain batter over the cooled crust and smooth it out. Then dollop spoonfuls of the red strawberry batter over the plain layer, swirling gently with a knife or skewer to create a marbled effect. Pour the remaining plain batter on top and spread evenly.
- Bake the cheesecake: Place the springform pan on a baking sheet and bake at 325°F (163°C) for about 55-65 minutes, or until the edges are set but the center still jiggles slightly when you shake the pan. Turn off the oven, crack the door open, and let the cheesecake cool inside for 1 hour to prevent cracks.
- Chill: Remove from oven and refrigerate for at least 4 hours or overnight for best texture and flavor.
- Add the blueberry topping: Just before serving, spread the cooled blueberry topping evenly over the cheesecake. Decorate with fresh berries if you have them on hand.
Pro tips: Use room temperature ingredients for the smoothest batter. Don’t overmix eggs or you risk a dense cheesecake. Swirling the strawberry layer gently keeps the colors distinct without blending into a single color. Cooling gradually helps avoid cracks. If you want to speed things up, chill the crust in the freezer for 10 minutes before baking.
Cooking Tips & Techniques
Cheesecake can be tricky, but after my fair share of cracked surfaces and runny centers, I’ve learned a few things to keep this recipe foolproof. First, room temperature ingredients are your best friend here. Cold cream cheese or eggs can lead to lumps that are hard to smooth out. I usually set my cream cheese out for an hour before starting.
Next, don’t overbeat the eggs. It’s tempting to get everything perfectly mixed, but overmixing introduces air bubbles that cause cracks during baking. Mix just until combined and then stop.
Using a water bath can help stabilize the temperature and prevent cracking, but I often skip it by baking at a moderate temperature and letting the cheesecake cool gently in the oven after baking. This method works well and saves a step.
For the berry layers, I found that pureeing fresh or thawed berries rather than using jams or syrups gives a fresher flavor and a more natural color. Adding a little sugar to balance tartness is optional depending on your berries.
Finally, patience is key. Cheesecake needs time to chill to develop its signature texture, so don’t rush the refrigeration step.
Sometimes, I multitask by prepping the crust and berry purées while the oven preheats, which saves time and keeps things moving without stress.
Variations & Adaptations
This cheesecake is versatile enough to fit different dietary needs and flavor preferences. Here are a few variations I’ve enjoyed:
- Gluten-Free Crust: Swap graham crackers with almond flour or gluten-free cookies crushed finely. Add a bit more butter to help bind.
- Vegan Adaptation: Use vegan cream cheese and coconut sour cream alternatives. Replace eggs with flax eggs (1 tablespoon ground flaxseed + 3 tablespoons water per egg). Note that texture will be slightly different but still delicious.
- Seasonal Berries: In place of strawberries and blueberries, try raspberries for red and blackberries for blue. This changes the flavor profile a bit but keeps the patriotic look.
- Chocolate Twist: Add a tablespoon of cocoa powder to the cheesecake batter for a subtle chocolate undertone. I’ve done this for a more decadent summer dessert.
- Mini Cheesecakes: Make individual portions using a muffin tin lined with parchment cups—perfect for picnics or smaller celebrations.
One time, I swapped the blueberry topping for a cool lemon curd layer, which added a bright zing that paired beautifully with the creamy filling. Feel free to experiment and make this cheesecake your own.
Serving & Storage Suggestions
This cheesecake is best served chilled, straight from the fridge. The creamy texture and vibrant colors really pop when cold. For presentation, a light dusting of powdered sugar over the berry topping or a few fresh mint leaves add a nice touch.
It pairs wonderfully with a cup of freshly brewed coffee or a light sparkling rosé, especially for those long summer evenings.
Store leftovers covered tightly in the refrigerator for up to 4 days. If you want to keep it longer, wrap well and freeze for up to 2 months. To thaw, move to the fridge overnight. Reheat isn’t recommended, but letting slices sit at room temperature for 10-15 minutes before serving helps soften the texture.
Interestingly, the flavors tend to meld and deepen after a day, so if you can wait, the cheesecake tastes even better the next day.
If you’re planning a full meal, this dessert would be a perfect finish after something like the crockpot green bean casserole or the sautéed green beans with lemon zest—both light enough sides to round out your celebration without weighing you down.
Nutritional Information & Benefits
One slice (about 1/12 of the cheesecake) contains approximately:
| Calories | 350-400 kcal |
|---|---|
| Protein | 7 g |
| Fat | 25 g |
| Carbohydrates | 28 g |
| Sugar | 20 g |
The cream cheese and sour cream provide a good source of calcium and protein, while the fresh berries add antioxidants and vitamins like C and K. This recipe is not low-fat, but it’s a satisfying treat that balances indulgence with fresh fruit components.
For those watching carbs, substituting a nut-based crust and reducing added sugar can help make it a bit lighter. This cheesecake is naturally gluten-free if you use gluten-free crackers for the crust.
Personally, I see this dessert as a way to enjoy a festive indulgence mindfully—setting aside treats for special moments while keeping everyday meals wholesome and balanced.
Conclusion
This Perfect Red White and Blue Cheesecake for Patriotic Celebrations is one of those recipes that sticks with you—not because it’s complicated, but because it brings a little extra joy and color to the table. It’s approachable, delicious, and carries a sense of celebration in every bite.
Feel free to tweak the berry combinations or crust to suit your taste or dietary needs. I love how this cheesecake brings people together, sparking conversations and smiles, whether at a big backyard bash or a quiet night watching fireworks.
Give it a shot this summer and see how it becomes your own go-to festive dessert. And if you have your own twists or stories, I’d love to hear about them in the comments below. Here’s to sweet moments and patriotic flavors!
Frequently Asked Questions
Can I make this cheesecake ahead of time?
Absolutely! It actually tastes better after chilling overnight. Just add the blueberry topping right before serving.
What if I don’t have fresh berries?
Frozen berries work fine—just thaw and drain them before using to avoid excess moisture.
How do I prevent cracks on my cheesecake?
Use room temperature ingredients, don’t overmix, bake at a moderate temperature, and cool gradually by leaving it in the oven with the door cracked open.
Can I use food coloring instead of berries for the colors?
You can, but natural berry purées add flavor and freshness that artificial coloring lacks. Plus, it’s a bit healthier!
How do I store leftover cheesecake?
Cover tightly and refrigerate for up to 4 days. You can also freeze it wrapped well for up to 2 months.
Pin This Recipe!
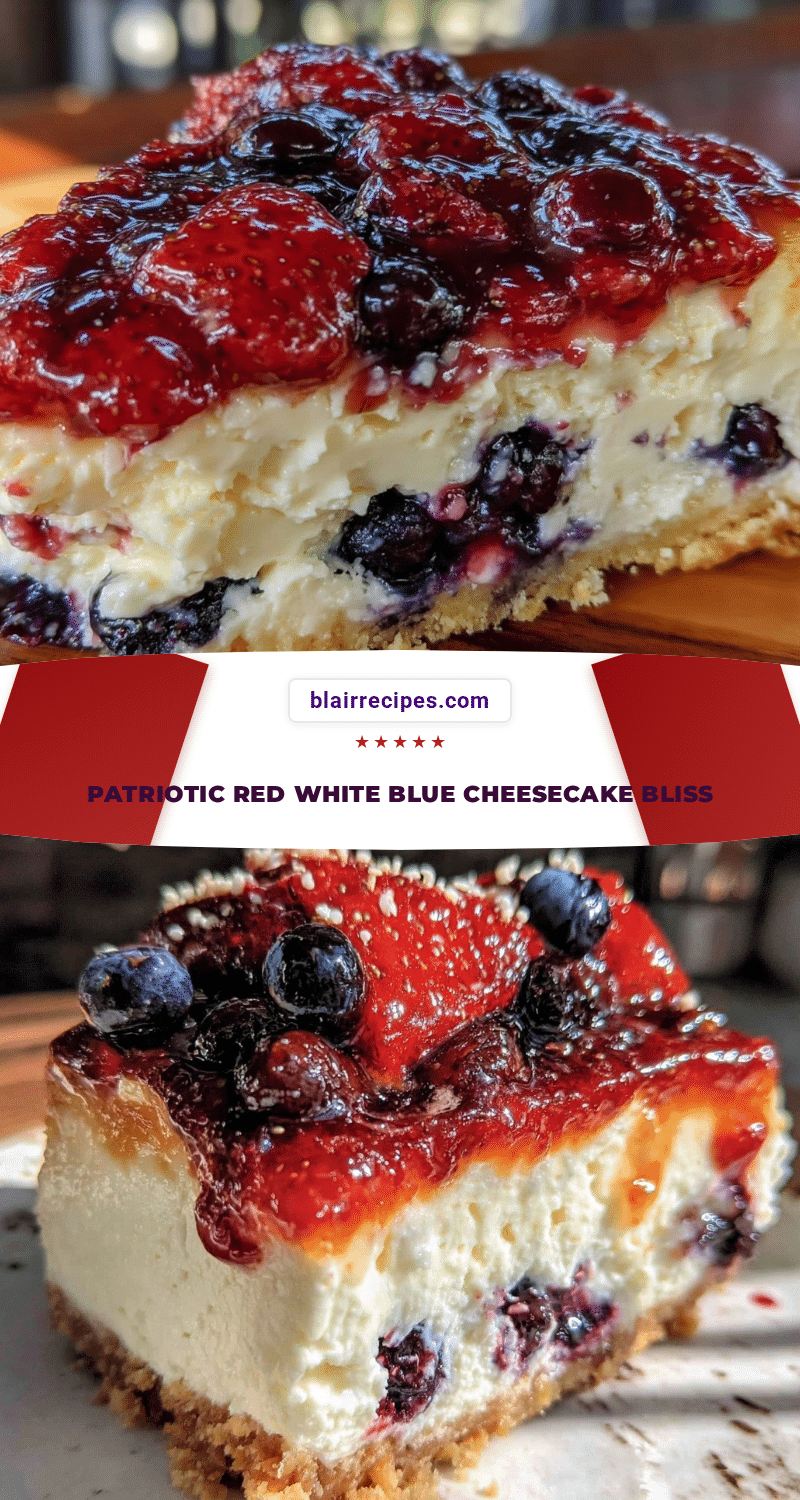
Perfect Red White and Blue Cheesecake Recipe Easy Patriotic Dessert for July 4th Celebrations

A festive and creamy cheesecake featuring a buttery graham cracker crust, a smooth cream cheese filling with a red strawberry swirl, and a fresh blueberry topping. Perfect for patriotic celebrations like July 4th, Memorial Day, and Labor Day.
- Prep Time: 45 minutes
- Cook Time: 1 hour 5 minutes
- Total Time: 5 hours 50 minutes
- Yield: 12 servings 1x
- Category: Dessert
- Cuisine: American
Ingredients
- 1 1/2 cups (150 g) graham cracker crumbs
- 1/4 cup (50 g) granulated sugar
- 6 tablespoons (85 g) unsalted butter, melted
- 24 oz (680 g) cream cheese, softened
- 1 cup (200 g) granulated sugar
- 1 cup (240 ml) sour cream, room temperature
- 3 large eggs, room temperature
- 2 teaspoons vanilla extract
- 1 tablespoon all-purpose flour
- 1 cup (150 g) fresh or frozen strawberries, pureed
- 1 tablespoon sugar (optional)
- 1 cup (150 g) fresh or frozen blueberries
- 2 tablespoons sugar
- 1 teaspoon lemon juice
- 1 teaspoon cornstarch dissolved in 1 tablespoon water
Instructions
- Preheat oven to 325°F (163°C). Mix graham cracker crumbs, sugar, and melted butter until combined. Press firmly into bottom of 9-inch springform pan. Bake 10 minutes and cool slightly.
- Blend strawberries with sugar until smooth; add water if needed. Set aside.
- Cook blueberries, sugar, and lemon juice over medium heat until juices release and mixture bubbles. Stir in cornstarch slurry and cook until thickened. Cool completely.
- Beat cream cheese until smooth. Gradually add sugar and mix. Add sour cream and vanilla, mix gently. Beat in eggs one at a time on low speed. Add flour and mix briefly.
- Scoop 1/3 of batter into separate bowl and stir in strawberry purée to create red layer.
- Pour half of plain batter over crust and smooth. Dollop red strawberry batter over plain layer and swirl gently. Pour remaining plain batter on top and spread evenly.
- Bake cheesecake on baking sheet at 325°F (163°C) for 55-65 minutes until edges set and center jiggles slightly. Turn off oven, crack door open, and cool inside 1 hour.
- Refrigerate cheesecake at least 4 hours or overnight.
- Spread cooled blueberry topping evenly over cheesecake before serving. Optionally decorate with fresh berries.
Notes
Use room temperature ingredients for smooth batter. Don’t overmix eggs to avoid cracks. Cooling gradually in oven prevents cracking. Thaw and drain frozen berries to avoid watery layers. For gluten-free crust, use almond flour. For dairy-free, substitute cream cheese and sour cream with coconut-based alternatives. Swirling strawberry layer gently keeps colors distinct.
Nutrition
- Serving Size: 1 slice (1/12 of che
- Calories: 350400
- Sugar: 20
- Fat: 25
- Carbohydrates: 28
- Protein: 7
Keywords: red white and blue cheesecake, patriotic dessert, July 4th dessert, cheesecake recipe, berry cheesecake, easy cheesecake, holiday dessert


