“You’re telling me this is sourdough bread? It looks like a crunchy masterpiece,” my friend said, eyeing the loaf cooling on the counter. Honestly, that moment caught me off guard. I’d been fiddling with sourdough recipes for weeks, chasing that perfect crispy crust without turning the crumb into a brick. This perfect crispy classic sourdough bread recipe wasn’t born out of some grand kitchen experiment, though. It started on a lazy Sunday afternoon when all I had was leftover starter, a bit of flour, and a stubborn craving for fresh bread. I almost gave up on making sourdough at home because every attempt was either too dense or too soft, but something clicked this time.
The scent of warm crust filling the kitchen was like a reset button after a long week. I found myself slicing into the loaf again and again, marveling at that crackly exterior and the chewy interior that felt just right. And you know what? It stuck. This isn’t just bread—it’s the kind that quietly reminds you why homemade is worth the fuss. No fancy gadgets, no complicated steps, just a classic sourdough loaf you can trust to be crispy and satisfying every single time.
It’s funny how something as simple as bread can turn into a small victory. This recipe is that kind of win—steady, reliable, and surprisingly easy once you get the rhythm. So if you’ve been hesitant about baking sourdough or just looking for a dependable loaf with a crispy crust that makes your morning toast sing, this is the one you’ll want to keep coming back to.
Why You’ll Love This Recipe
After countless trials and more than a few burnt loaves, I’m confident this perfect crispy classic sourdough bread recipe hits the sweet spot for home bakers. It’s the kind of recipe that feels approachable but delivers professional-level results. Here’s why it’s become a staple in my kitchen:
- Quick & Easy: While sourdough does take time to ferment, the hands-on part of this recipe is under 30 minutes. Perfect for busy folks who want homemade bread without a full day commitment.
- Simple Ingredients: Flour, water, salt, and a lively sourdough starter. Nothing fancy, no preservatives, just wholesome basics you likely have on hand.
- Perfect for Every Occasion: Whether it’s a cozy weekend brunch or accompanying a hearty stew on a chilly evening, this bread shines.
- Crowd-Pleaser: I’ve brought this loaf to family dinners and casual get-togethers; it disappears faster than I expect. Kids and adults alike love that satisfying crunch and airy crumb.
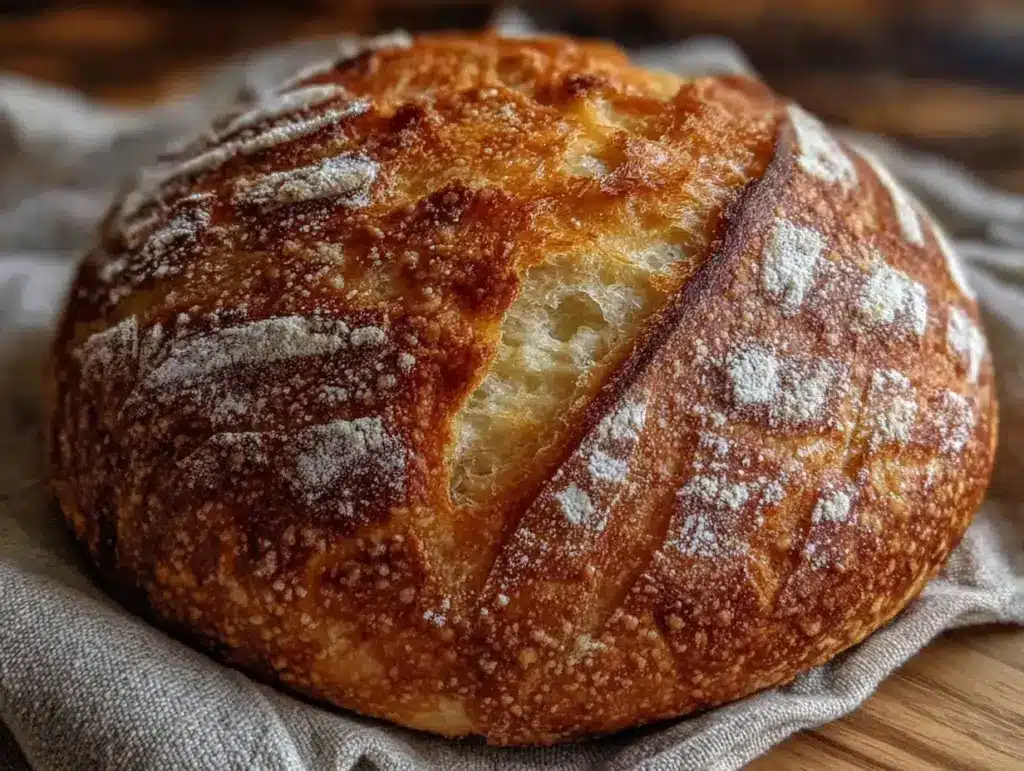
- Unbelievably Delicious: The crust crackles loudly when you slice it, and the crumb has these lovely, irregular holes that tell you it’s been fermented just right. It’s comfort food with a bit of flair.
This recipe isn’t just another sourdough loaf floating around on the internet. The key difference is the balance between hydration and fermentation time, plus a baking technique that locks in that crispy crust without drying out the bread. I’ve tweaked it to be forgiving enough for beginners but rewarding enough for seasoned bakers.
Honestly, baking this bread feels like a little achievement every time, and it might just become your quiet kitchen companion too.
What Ingredients You Will Need
This perfect crispy classic sourdough bread recipe uses simple, wholesome ingredients to deliver bold flavor and satisfying texture without the fuss. Most are pantry staples, and the few special items are easy to source or substitute.
- Active sourdough starter (about 100g / 3.5 oz) – I recommend a lively starter with a tangy aroma; if you don’t have one, check out how to make your own starter, but for this recipe, it should be bubbly and recently fed.
- Unbleached bread flour (500g / 4 cups) – Provides structure and chewiness; King Arthur or Bob’s Red Mill brands work great.
- Whole wheat flour (100g / ¾ cup) – Adds depth of flavor and a hint of nuttiness. You can swap with rye flour for a different twist.
- Water (375g / 1 ½ cups) – Lukewarm, around 75°F (24°C), to help activate the yeast without killing it.
- Sea salt (10g / 2 tsp) – Enhances flavor and controls fermentation; fine or flaky salt both work.
Optional but nice additions:
- Olive oil (1 tbsp) – For a softer crumb if you prefer, but not necessary for the classic texture.
- Rice flour or cornmeal – For dusting your proofing basket to prevent sticking.
If you want a gluten-free alternative, this recipe won’t work as-is, but swapping to a gluten-free starter and flour blend can get you close (though the texture will differ). Also, if you don’t have whole wheat flour, using all bread flour still yields tasty bread, just a bit less complex in flavor.
Equipment Needed
To bake this perfect crispy classic sourdough bread, you don’t need fancy tools, but a few kitchen essentials make the process smoother:
- Mixing bowl: A large, sturdy bowl for combining ingredients; glass or stainless steel works well.
- Dutch oven or heavy oven-safe pot with lid: This is key for getting that crispy crust by trapping steam. If you don’t have one, a baking stone plus a pan of hot water can help mimic the effect.
- Bench scraper: Super useful for folding dough and transferring it without tearing.
- Kitchen scale: Measuring by weight ensures consistent results; I swear by my digital scale.
- Proofing basket (banneton): Optional but helpful for shaping and rising. You can improvise with a bowl lined with a clean kitchen towel dusted with rice flour.
- Sharp serrated bread knife: For slicing without squashing that beautiful crust.
Personally, I started baking sourdough with just a bowl and a cast iron pot. It’s amazing how well it works without specialized gear. For maintenance, keep your Dutch oven clean and dry to prevent rusting. If you’re on a budget, thrift stores often have cast iron pots that work perfectly.
Preparation Method
- Feed your sourdough starter: About 4-6 hours before starting, feed your starter so it’s bubbly and active. This ensures good rise and flavor.
- Mix the dough: In a large bowl, combine 500g bread flour, 100g whole wheat flour, and 375g lukewarm water. Stir roughly until no dry flour remains (about 2 minutes). Cover and let rest for 30 minutes to autolyse. This step hydrates the flour and starts gluten development.
- Add starter and salt: Add 100g active starter and 10g sea salt to the dough. Mix thoroughly by hand or with a dough hook until fully incorporated (about 5 minutes). The dough will be sticky but elastic.
- Bulk fermentation with stretch & folds: Cover the bowl with a damp towel. Every 30 minutes for 2 hours, perform gentle stretch and folds: reach under the dough, stretch it up, and fold it over itself. This builds strength without kneading. After the last fold, let dough rest until it doubles in size (about 2-3 hours total).
- Shape the dough: Lightly flour your work surface. Turn the dough out and shape it into a tight round loaf by folding edges towards the center, then flipping it seam-side down and cupping your hands to create tension on the surface.
- Final proof: Place the shaped dough seam-side up in a floured proofing basket or bowl lined with a towel. Cover and refrigerate for 8-12 hours (overnight). This slow proof develops flavor and makes the dough easier to score.
- Preheat oven and Dutch oven: About 45 minutes before baking, preheat your oven to 475°F (245°C) with the Dutch oven inside. This ensures the pot is scorching hot for baking.
- Score the dough: Carefully invert the dough onto parchment paper. Using a sharp knife or lame, score the top with a few slashes about ¼ inch deep. This allows the bread to expand and creates the signature look.
- Bake: Transfer the dough with parchment into the hot Dutch oven. Cover with the lid and bake for 20 minutes to trap steam. Then remove the lid and bake for another 25 minutes until the crust is deep golden and crackly.
- Cool: Remove the bread from the pot and let cool on a wire rack for at least 1 hour before slicing. This resting time lets the crumb set and prevents gummy texture.
Pro tip: If your dough feels too sticky during shaping, wet your hands slightly to handle it without tearing. And don’t rush the cooling step—trust me, it makes all the difference in crumb quality.
Cooking Tips & Techniques
Getting that perfect crispy classic sourdough bread crust and crumb is an art, but a few tips from my experience can help you nail it:
- Hydration balance: Too much water makes the dough too slack to handle, but too little yields a dense loaf. This recipe’s 75% hydration hits the sweet spot for an open crumb with manageable dough.
- Stretch and folds over kneading: Gentle stretching every 30 minutes during bulk fermentation builds gluten without toughening the dough. I’ve found this technique easier and more forgiving than traditional kneading.
- Cold fermentation: Refrigerating the shaped dough overnight not only improves flavor but also makes scoring easier and the crumb more consistent.
- Preheat your Dutch oven: A blazing hot pot creates steam that crisps the crust. Don’t skip this step or your bread won’t get that signature crackle.
- Scoring with confidence: Use a sharp blade and quick motions to score. If you hesitate, the dough may deflate or tear unevenly.
- Don’t rush cooling: Slicing warm bread can lead to gummy texture because the crumb hasn’t set yet. Waiting at least an hour is tough but worth it.
One rookie mistake I made early on was using cold water for the dough, which slowed fermentation and gave a bland loaf. Also, I used to skip the stretch and folds because I was impatient—big mistake. Those folds are magic for crumb structure. Lastly, multitasking is key; while the dough rests, I prep sides like a honey roasted butternut squash or a simple green bean dish to round out the meal.
Variations & Adaptations
This recipe is a fantastic base for experimentation. Here are some ideas I’ve tried or recommend:
- Seeded Sourdough: Add 2 tablespoons each of sunflower, pumpkin, and flax seeds during the mix for a nutty crunch.
- Herb-Infused: Fold in fresh rosemary or thyme for an aromatic twist that pairs wonderfully with savory dishes.
- Whole Grain Boost: Replace up to 50% of bread flour with whole wheat or spelt for a heartier loaf. Expect a denser crumb but richer flavor.
- Gluten-Free Adaptation: Use a gluten-free starter and a blend of gluten-free flours like rice and tapioca starch. Adjust hydration carefully.
- Alternative Cooking Method: If no Dutch oven, bake on a pizza stone with a pan of hot water underneath to create steam.
One personal favorite is swirling in some roasted garlic cloves during shaping—adds mellow sweetness and depth. When I serve this bread alongside a simple sautéed green beans with lemon zest and pine nuts, it turns dinner into something special without extra fuss.
Serving & Storage Suggestions
This sourdough bread is best enjoyed fresh, slightly warm or at room temperature. The crispy crust and chewy interior are perfect for slathering with butter or dipping in olive oil and balsamic vinegar.
Pair it with soups, stews, or roasted veggies for a balanced meal. It’s a natural match for hearty sides like green bean casserole or a rich mushroom ragout.
To store, wrap the cooled bread in a clean kitchen towel and keep it in a bread box or paper bag at room temperature for up to 2 days. For longer storage, slice and freeze in airtight bags; thaw slices at room temperature or toast directly.
Reheating in the oven at 350°F (175°C) for 5-10 minutes brings back some crust crispness and warmth. Over time, the flavors mellow and the crumb becomes more cohesive, so it’s still great for sandwiches or croutons a day or two later.
Nutritional Information & Benefits
This perfect crispy classic sourdough bread offers more than just taste. Roughly, one slice (about 60g) provides around 150 calories, 30g carbohydrates, 5g protein, and minimal fat.
Sourdough fermentation improves nutrient absorption and may be easier on digestion due to natural lactic acid bacteria breaking down gluten and phytic acid. Whole wheat flour adds fiber and minerals like magnesium.
It’s naturally free from preservatives and additives common in store-bought bread, making it a wholesome choice. For those watching carbs, sourdough’s longer fermentation can have a slightly lower glycemic index compared to regular bread.
This recipe is vegan and can be adjusted to be gluten-free with substitutions, though traditional sourdough flavor comes from wheat-based flours. If you’re interested in more wholesome sides to pair with this bread, check out the slow cooker apple cider braised red cabbage recipe for a cozy complement.
Conclusion
Making this perfect crispy classic sourdough bread recipe has been a journey of patience, trial, and lots of tasting. But it’s one of those little kitchen victories that feels really good—especially when friends and family start asking for the recipe (like that unexpected compliment I mentioned earlier!).
The beauty of this recipe lies in its simplicity and adaptability. Feel free to tweak the flours, try out herbs, or bake it alongside your favorite dishes. Baking sourdough doesn’t have to be intimidating; it’s about enjoying the process and that rewarding crackle when you slice into it.
Give it a try, share your experience, and maybe even pass it along to someone who needs a bit of homemade comfort. I’d love to hear how your loaf turns out and any tasty variations you come up with!
Frequently Asked Questions
- How do I know when my sourdough starter is ready to use? When it’s bubbly, has doubled in size within 4-6 hours after feeding, and has a pleasant tangy smell, it’s ready.
- Can I use all-purpose flour instead of bread flour? Yes, but bread flour has more protein which helps with gluten development and gives a better rise and chew.
- Why is my sourdough bread dense? Possible reasons include under-proofing, insufficient gluten development, or inactive starter. Make sure your starter is active and don’t rush fermentation.
- Can I bake sourdough bread without a Dutch oven? Yes, bake on a preheated baking stone or sheet with a pan of hot water below to create steam, which helps the crust.
- How do I store sourdough bread to keep it fresh? Wrap in a kitchen towel and keep at room temperature for up to 2 days. For longer storage, freeze sliced bread in airtight bags.
Pin This Recipe!

Perfect Crispy Classic Sourdough Bread Recipe

A reliable and easy homemade sourdough bread recipe that delivers a crispy crust and chewy interior, perfect for beginners and seasoned bakers alike.
- Prep Time: 30 minutes (hands-on) plus starter feeding time
- Cook Time: 45 minutes
- Total Time: Approximately 12-16 hours including fermentation and proofing
- Yield: 1 loaf (about 1.5 lbs) 1x
- Category: Bread
- Cuisine: American
Ingredients
- 100g (3.5 oz) active sourdough starter
- 500g (4 cups) unbleached bread flour
- 100g (3/4 cup) whole wheat flour
- 375g (1 1/2 cups) lukewarm water (around 75°F / 24°C)
- 10g (2 tsp) sea salt
- Optional: 1 tbsp olive oil for softer crumb
- Optional: rice flour or cornmeal for dusting proofing basket
Instructions
- Feed your sourdough starter about 4-6 hours before starting so it’s bubbly and active.
- In a large bowl, combine 500g bread flour, 100g whole wheat flour, and 375g lukewarm water. Stir roughly until no dry flour remains (about 2 minutes). Cover and let rest for 30 minutes to autolyse.
- Add 100g active starter and 10g sea salt to the dough. Mix thoroughly by hand or with a dough hook until fully incorporated (about 5 minutes).
- Cover the bowl with a damp towel. Every 30 minutes for 2 hours, perform gentle stretch and folds. After the last fold, let dough rest until it doubles in size (about 2-3 hours total).
- Lightly flour your work surface. Turn the dough out and shape it into a tight round loaf by folding edges towards the center, then flipping it seam-side down and cupping your hands to create tension.
- Place the shaped dough seam-side up in a floured proofing basket or bowl lined with a towel. Cover and refrigerate for 8-12 hours (overnight).
- About 45 minutes before baking, preheat your oven to 475°F (245°C) with the Dutch oven inside.
- Carefully invert the dough onto parchment paper. Score the top with a few slashes about 1/4 inch deep using a sharp knife or lame.
- Transfer the dough with parchment into the hot Dutch oven. Cover with the lid and bake for 20 minutes to trap steam. Remove the lid and bake for another 25 minutes until crust is deep golden and crackly.
- Remove the bread from the pot and let cool on a wire rack for at least 1 hour before slicing.
Notes
Use lukewarm water (around 75°F) to activate yeast without killing it. Perform stretch and folds every 30 minutes during bulk fermentation instead of kneading. Preheat Dutch oven to trap steam for crispy crust. Let bread cool at least 1 hour before slicing to prevent gummy texture. Wet hands slightly if dough is sticky during shaping.
Nutrition
- Serving Size: One slice (about 60g
- Calories: 150
- Carbohydrates: 30
- Protein: 5
Keywords: sourdough bread, crispy crust, homemade bread, classic sourdough, easy sourdough recipe, artisan bread


