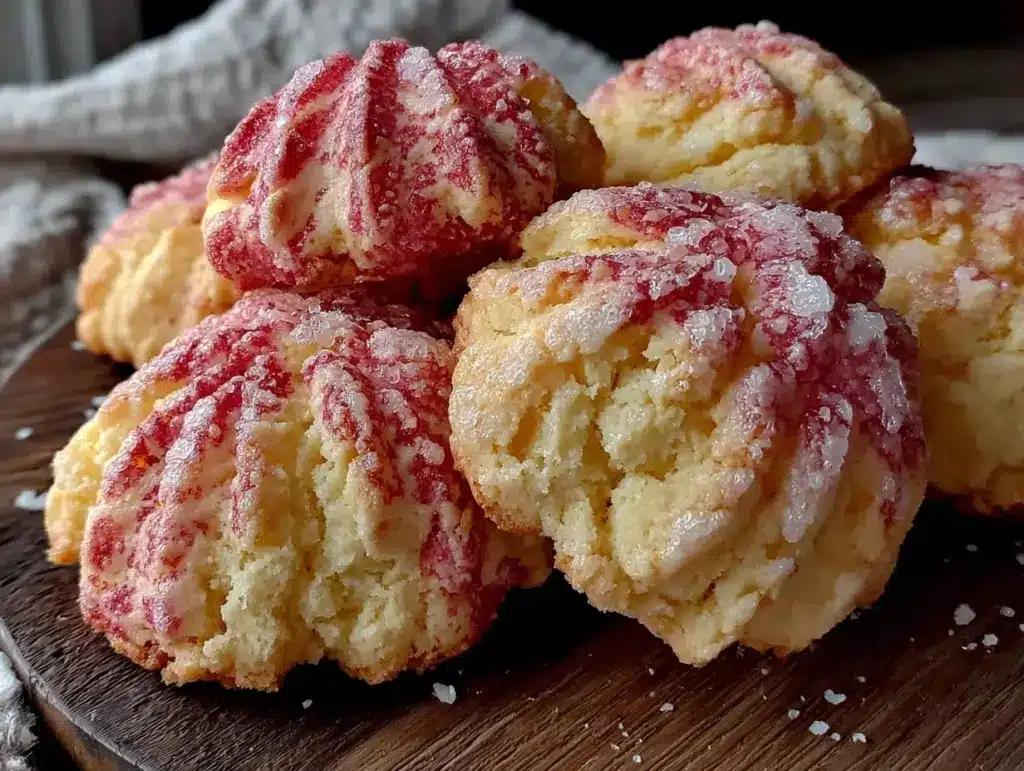
“You have to try the conchas from the bakery down the street,” my coworker had texted one dreary Monday morning. Honestly, I was skeptical—Mexican sweet bread? With a pink sugar topping? But that little nudge sent me on a mission that week, and let me tell you, it stuck with me longer than I expected. The moment I bit into that warm, softly sweet bread crowned with a crackly, colorful shell, it felt like a cozy hug on a hectic day. There’s something so comforting about the way the sugar topping crumbles ever so gently, contrasting the pillowy bread beneath. It’s the kind of treat that doesn’t just satisfy your sweet tooth but also quiets the noise running in your head.
After a few tries, experimenting with the pink sugar topping and tweaking the dough for that perfect tenderness, this cozy conchas Mexican sweet bread recipe became a weekly staple in my kitchen. It’s funny how a simple bakery recommendation turned into a full-on obsession, baking batch after batch, sharing with friends, and even sneaking one with a cup of coffee at midnight. This recipe isn’t just about making bread; it’s about capturing that moment of warmth and sweetness that feels like a tiny celebration every time you pull a fresh batch from the oven.
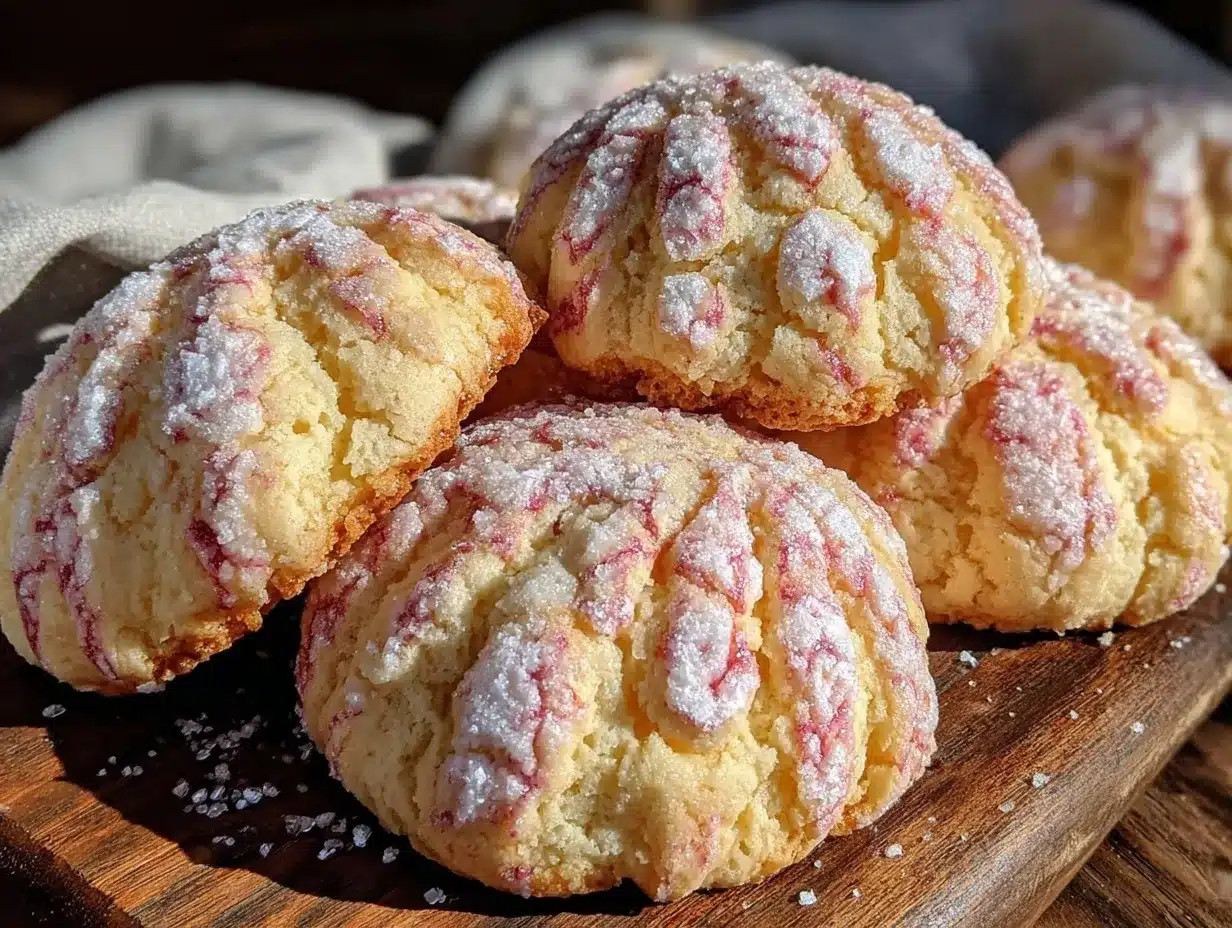
There’s a quiet magic in this recipe—no fancy techniques, just good ingredients and a little patience that reward you with that signature crackly topping and soft crumb. The pink sugar topping adds a playful pop of color and a nostalgic feel, reminding me of festive mornings and casual gatherings where food brings people together without fuss. I think that’s why this recipe has stuck with me—it’s simple, joyful, and totally cozy in the best way.
Why You’ll Love This Recipe
After testing this cozy conchas Mexican sweet bread recipe multiple times, I can confidently say it’s a keeper. Here’s what makes it stand out:
- Quick & Easy: The dough comes together in under 30 minutes, and while it needs some rising time, the hands-on work is minimal—perfect when you want fresh bread without all-day fuss.
- Simple Ingredients: No exotic or hard-to-find items here. Most are pantry staples, so you won’t need to make a special trip.
- Perfect for Cozy Mornings or Tea Time: Whether you’re serving it for breakfast, an afternoon snack, or a casual brunch, it’s always a crowd-pleaser.
- Crowd-Pleaser: Friends, family, even picky eaters love it. The pink sugar topping is playful and pretty, making it especially fun for kids.
- Unbelievably Delicious: The soft, tender crumb pairs beautifully with that sweet, crumbly shell. It’s comfort food with a festive twist.
What sets this recipe apart is the pink sugar topping. It’s not just a simple sugar sprinkle—it’s a mix that bakes into a crunchy, colorful shell that crackles when you break into the bread. You know that satisfying sound? That’s the hallmark of a great concha. Plus, the dough is tender but sturdy enough to hold its shape, which I’ve found tricky in other versions. I’ve made this recipe for friends who keep asking for more, especially after I paired it with a warm pot of butternut squash soup one chilly evening—it just felt like the perfect combo of cozy and comforting.
What Ingredients You Will Need
This recipe uses simple, wholesome ingredients that come together to create that signature soft bread and sweet pink topping. Most of these are pantry staples, and I’ve included tips for substitutions where needed.
- For the Dough:
- All-purpose flour – 4 cups (480g), plus extra for dusting (I prefer King Arthur for consistent results)
- Granulated sugar – 3/4 cup (150g), for sweetness in the dough
- Active dry yeast – 2 1/4 teaspoons (one packet), ensures a good rise
- Warm whole milk – 1 cup (240ml), warmed to about 110°F (43°C) to activate yeast
- Unsalted butter – 1/3 cup (75g), softened (adds richness)
- Large eggs – 2, room temperature (helps with dough structure)
- Salt – 1 teaspoon, balances flavors
- Vanilla extract – 1 teaspoon, adds subtle aroma
- For the Pink Sugar Topping:
- All-purpose flour – 1 cup (120g)
- Powdered sugar – 2/3 cup (85g), finely sifted for smooth texture
- Unsalted butter – 1/4 cup (60g), softened
- Pink food coloring – 4-6 drops, adjust for your preferred shade (you can use natural beet juice as a substitute)
- Ground cinnamon – 1/2 teaspoon, optional but adds a warm note
For a gluten-free twist, you can swap the all-purpose flour in the dough with a 1:1 gluten-free baking blend, though texture may vary. If dairy is a concern, use coconut or almond milk and a dairy-free butter substitute—your conchas will still turn out tender and tasty. When choosing your yeast, make sure it’s fresh and active; old yeast can cause flat dough, and no one wants that.
Equipment Needed
- Mixing bowls – A large bowl for the dough and a smaller one for the topping mix.
- Stand mixer with dough hook (optional) – I use one to save time and get a smooth dough, but you can knead by hand if you prefer.
- Measuring cups and spoons – Accurate measurements keep the dough consistent.
- Rolling pin – To roll out the pink sugar topping evenly.
- Baking sheets lined with parchment paper – For even baking and easy cleanup.
- Pastry brush – To lightly brush milk or egg wash if you want a shinier finish (optional).
- Kitchen thermometer – Helpful for checking milk temperature when activating yeast, but you can gauge by touch (milk should feel warm, not hot).
If you don’t have a stand mixer, no worries. Kneading by hand can be therapeutic! Just be prepared to work the dough for 8-10 minutes until it’s smooth and elastic. For rolling the topping, a silicone baking mat can help keep things tidy and prevent sticking. And if your oven tends to run hot or cold, an oven thermometer is a worthwhile investment to keep your baking results reliable.
Preparation Method
- Activate the yeast: Warm the milk to about 110°F (43°C). Pour it into a large bowl and sprinkle the active dry yeast over the top. Let it sit for 5-10 minutes until it’s foamy and bubbly—this means the yeast is alive and kicking.
- Make the dough: To the yeast mixture, add the sugar, softened butter, eggs, and vanilla extract. Stir gently to combine. Gradually add the flour and salt, about a cup at a time, mixing until the dough starts to come together.
- Knead: If using a stand mixer, knead with the dough hook on medium-low for 6-8 minutes. If by hand, turn the dough onto a floured surface and knead for 8-10 minutes until it’s smooth, soft, and slightly tacky but not sticky. It should stretch without tearing.
- First rise: Shape the dough into a ball and place it in a lightly greased bowl. Cover with a clean kitchen towel or plastic wrap, and let it rise in a warm spot for about 1 to 1.5 hours, or until doubled in size. You’ll notice it’ll feel pillowy and airy when ready.
- Prepare the pink sugar topping: While the dough rises, mix the topping ingredients in a bowl—flour, powdered sugar, softened butter, ground cinnamon, and pink food coloring. Use a fork or your fingers to blend everything into a crumbly, soft dough. Divide into 12 equal balls and flatten each into a thin disk about 3 inches (7.5 cm) in diameter.
- Shape the conchas: Once the dough has risen, punch it down gently to release air. Divide into 12 equal portions and shape each into a smooth ball. Place them on the parchment-lined baking sheet, spaced about 2 inches (5 cm) apart.
- Top and pattern: Place a disk of pink sugar topping on each dough ball. Using the back of a butter knife or a concha mold if you have one, gently press a shell pattern into the topping. Don’t press too hard, or the topping may stick to the dough.
- Second rise: Cover the baking sheet loosely with plastic wrap or a kitchen towel and let the conchas rise for another 30-45 minutes. The topping will puff slightly, and the dough will look soft and ready to bake.
- Bake: Preheat your oven to 350°F (175°C). Bake the conchas for 18-22 minutes, or until the bread is lightly golden and the topping has cracked beautifully. You’ll smell that warm, sweet aroma filling your kitchen—that’s when you know they’re done.
- Cool and enjoy: Transfer the baked conchas to a wire rack to cool slightly. They’re best enjoyed warm with a cup of coffee or hot chocolate, but honestly, they hold up well for a day or two if stored in an airtight container.
Keep an eye during baking—if the topping begins to brown too quickly, tent loosely with foil. Also, if your kitchen is cold, the rises may take longer, so patience pays off here. I’ve learned the hard way that rushing the rises makes the bread dense, and nobody wants that.
Cooking Tips & Techniques
Getting conchas just right can seem tricky at first, but a few insider tips will make your baking near foolproof.
- Milk temperature: Yeast is finicky. Too hot and it dies; too cold and it won’t activate. Aim for warm milk that feels like a warm bath (around 110°F/43°C).
- Kneading: Proper kneading develops gluten, giving the bread its soft but chewy texture. If you’re unsure, the dough should pass the “windowpane test” – stretch a small piece; it should become translucent without tearing.
- Covering the dough: During rising, cover your dough with a damp towel or plastic wrap to keep it from drying out. Dry dough skins ruin the tender crumb.
- Topping application: Chill the topping dough if it’s too soft to shape. You want it firm enough to spread without sticking, but not crumbly dry.
- Shell pattern: Don’t press too deeply into the topping or you’ll flatten it against the dough. Just enough to create a cracked look is perfect.
- Oven placement: Bake in the middle rack for even heat. If your oven has hotspots, rotate the tray halfway through baking.
One lesson I learned the hard way is not to skimp on the second rise after topping the dough. It helps the conchas puff nicely and lets the topping crack naturally. Also, don’t forget to let the bread cool slightly before digging in; fresh-out-of-the-oven is tempting but the crumb firms up a bit, making it easier to handle.
Variations & Adaptations
Feel free to play around with this recipe to suit your taste or dietary needs. Here are some ways I’ve mixed it up:
- Flavor Twist: Add a teaspoon of orange zest or a splash of anise extract to the dough for a subtle citrus or licorice note that pairs beautifully with the sweet topping.
- Colorful Toppings: Try other colors for the sugar topping—yellow with turmeric, green with matcha, or classic white with vanilla. Each adds a fun festive flair.
- Gluten-Free Version: Use a gluten-free baking blend in place of all-purpose flour. You might need to adjust liquids slightly depending on the blend’s absorbency.
- Dairy-Free Option: Swap whole milk for almond or oat milk and use a plant-based butter substitute in both dough and topping—just watch the rising times as dairy-free fats behave differently.
- Filled Conchas: Before adding the topping, gently press a small spoonful of sweetened cream cheese or cajeta (Mexican caramel) into the center of each dough ball for a delightful surprise inside.
One personal favorite was swapping the sugar topping with a cinnamon streusel inspired by my attempts at sweet potato casserole praline topping. It added crunch and warmth that made the conchas feel like a cozy fall treat.
Serving & Storage Suggestions
These cozy conchas Mexican sweet breads are best served warm. I like to gently reheat them in a 300°F (150°C) oven for 5-7 minutes to refresh that crackly sugar shell and soften the crumb. Pairing them with a hot cup of coffee, tea, or even a spicy Mexican hot chocolate makes for a comforting combo.
For a casual brunch, serve them alongside fresh fruit or a light spread of butter and jam. They also work beautifully as a sweet side with eggs or a mild cheese plate. If you’re planning a cozy breakfast, these conchas complement dishes like scrambled eggs or a simple avocado toast perfectly.
Store leftover conchas in an airtight container at room temperature for up to 2 days. For longer storage, wrap them tightly in plastic wrap and freeze for up to 3 months. To thaw, leave them on the counter overnight or warm them gently in the oven.
Flavors tend to deepen a bit after a day, so if you can wait, letting the conchas rest wrapped overnight can actually improve the texture and sweetness. Just pop them in the oven before serving to recapture that fresh-baked magic.
Nutritional Information & Benefits
Each cozy concha contains approximately 220 calories, with 35g of carbohydrates, 6g of fat, and 4g of protein. The bread is a moderate source of energy, balancing simple sugars in the topping with the protein and fat in the dough from eggs and butter.
The inclusion of cinnamon in the topping not only adds flavor but also provides antioxidants and may help with blood sugar regulation. Using whole milk adds calcium and vitamin D, important for bone health.
This recipe is naturally vegetarian and can be easily adapted for gluten-free or dairy-free diets, making it accessible to many. It’s a treat best enjoyed as part of a balanced diet, ideal for a special breakfast or snack.
Conclusion
This cozy conchas Mexican sweet bread with pink sugar topping is more than just a recipe—it’s a little moment of joy you can bake at home. Its tender crumb and sweet, crackly shell invite you to slow down and savor the simple pleasures of baking and sharing.
Feel free to tweak the topping colors or add your own flavor twists—that’s part of the fun I’ve found in baking this repeatedly. Whether it’s a quiet morning with coffee or a lively brunch, this recipe always brings a warm, festive touch.
So, next time you’re craving something sweet and comforting, give these conchas a try. I’d love to hear how you make them your own or any creative toppings you come up with!
FAQs
- Can I make the dough without a stand mixer? Absolutely! Kneading by hand works well; just be prepared to knead about 8-10 minutes until smooth and elastic.
- How do I store leftover conchas? Store at room temperature in an airtight container for up to 2 days, or freeze wrapped tightly for up to 3 months.
- What if I don’t have pink food coloring? You can use natural beet juice or skip the coloring for a classic white topping. Other colors like yellow or green also work well.
- Can I prepare the dough the night before? Yes! After the first rise, punch down the dough, shape it, cover tightly, and refrigerate overnight. Let it come to room temperature before the second rise.
- Why didn’t my topping crack? If the topping is too soft or applied too thickly, it may not crack properly. Chill the topping dough before shaping and press a shallow pattern on top for best results.
Pin This Recipe!
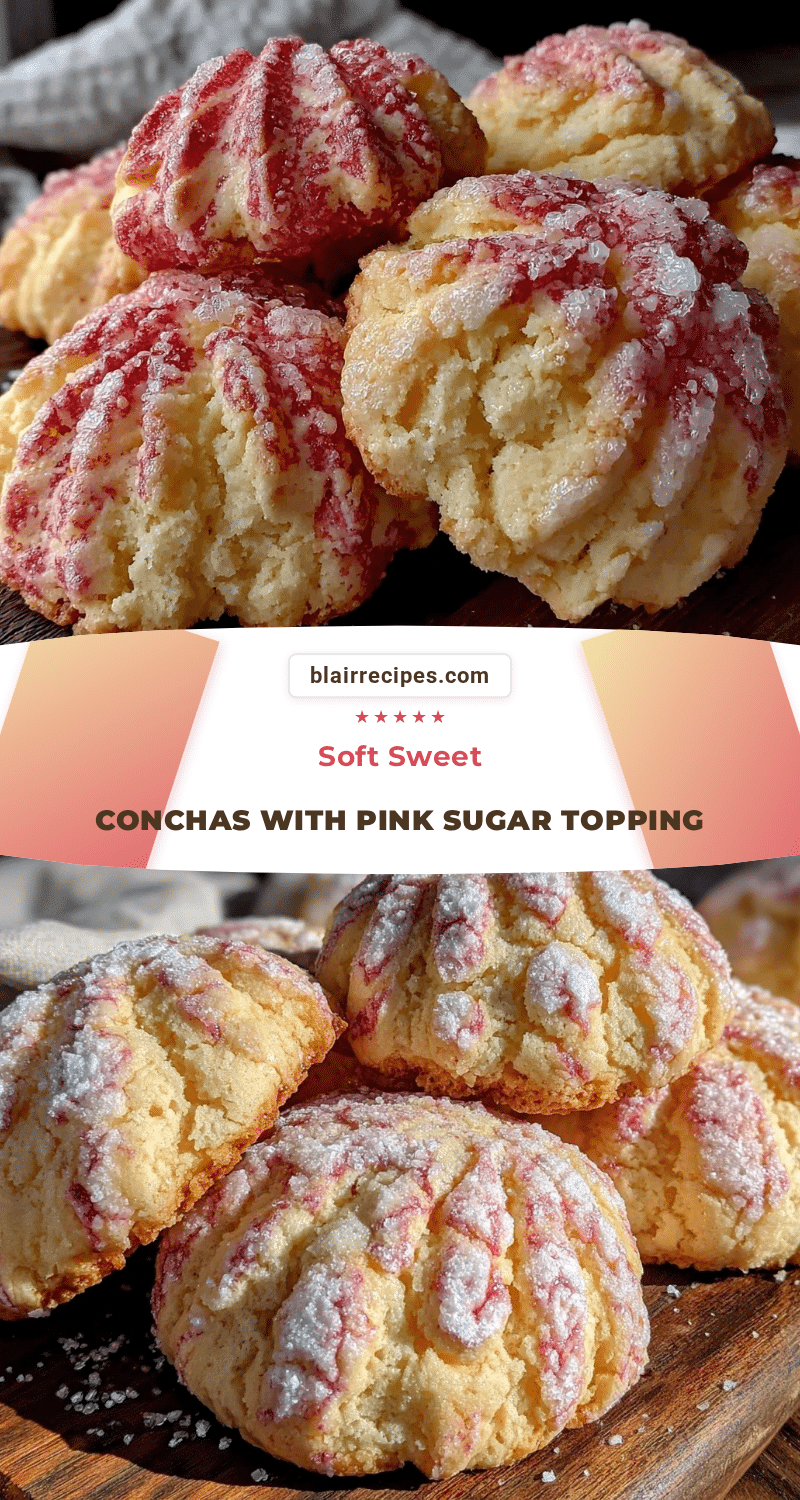
Cozy Conchas Mexican Sweet Bread Recipe with Easy Pink Sugar Topping

A comforting Mexican sweet bread with a soft, tender crumb and a crackly, colorful pink sugar topping that adds a festive touch. Perfect for cozy mornings, tea time, or casual brunches.
- Prep Time: 25 minutes
- Cook Time: 20 minutes
- Total Time: 2 hours 15 minutes
- Yield: 12 servings 1x
- Category: Breakfast, Snack, Dessert
- Cuisine: Mexican
Ingredients
- 4 cups all-purpose flour (480g), plus extra for dusting
- 3/4 cup granulated sugar (150g)
- 2 1/4 teaspoons active dry yeast (one packet)
- 1 cup warm whole milk (240ml), warmed to about 110°F (43°C)
- 1/3 cup unsalted butter (75g), softened
- 2 large eggs, room temperature
- 1 teaspoon salt
- 1 teaspoon vanilla extract
- For the Pink Sugar Topping:
- 1 cup all-purpose flour (120g)
- 2/3 cup powdered sugar (85g), finely sifted
- 1/4 cup unsalted butter (60g), softened
- 4–6 drops pink food coloring (or natural beet juice as substitute)
- 1/2 teaspoon ground cinnamon (optional)
Instructions
- Warm the milk to about 110°F (43°C). Pour into a large bowl and sprinkle the active dry yeast over the top. Let sit for 5-10 minutes until foamy and bubbly.
- Add sugar, softened butter, eggs, and vanilla extract to the yeast mixture. Stir gently to combine.
- Gradually add flour and salt, about a cup at a time, mixing until dough starts to come together.
- Knead dough with stand mixer dough hook on medium-low for 6-8 minutes or by hand on a floured surface for 8-10 minutes until smooth, soft, and slightly tacky but not sticky.
- Shape dough into a ball and place in a lightly greased bowl. Cover and let rise in a warm spot for 1 to 1.5 hours until doubled in size.
- While dough rises, mix flour, powdered sugar, softened butter, ground cinnamon, and pink food coloring for the topping until crumbly and soft. Divide into 12 balls and flatten each into a 3-inch disk.
- Punch down risen dough and divide into 12 equal portions. Shape each into a smooth ball and place on parchment-lined baking sheet, spaced 2 inches apart.
- Place a pink sugar topping disk on each dough ball. Gently press a shell pattern into the topping using the back of a butter knife or concha mold.
- Cover loosely and let rise for another 30-45 minutes until topping puffs slightly and dough looks soft.
- Preheat oven to 350°F (175°C). Bake conchas for 18-22 minutes until lightly golden and topping cracks.
- Transfer to wire rack to cool slightly. Best enjoyed warm.
Notes
Use warm milk at about 110°F to activate yeast properly. Knead dough until smooth and elastic. Chill topping dough if too soft. Do not press too hard when creating shell pattern to avoid sticking. Bake on middle rack and rotate tray if oven has hotspots. Tent with foil if topping browns too quickly. Allow second rise after topping for best crackly shell. Cool slightly before serving for easier handling.
Nutrition
- Serving Size: 1 concha (approximat
- Calories: 220
- Fat: 6
- Carbohydrates: 35
- Protein: 4
Keywords: conchas, Mexican sweet bread, pink sugar topping, bakery bread, sweet bread, festive bread, easy bread recipe, cozy bread, traditional Mexican dessert


