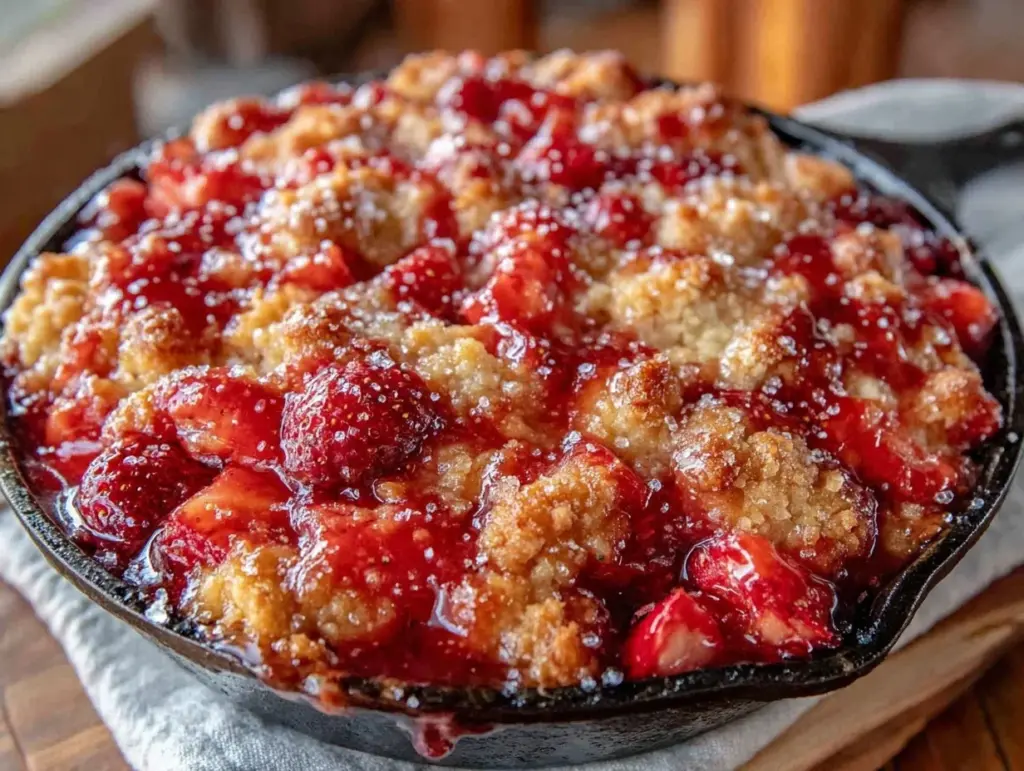
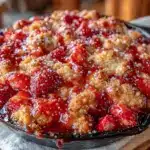
One Saturday morning last spring, I found myself standing in my kitchen with a basket full of rhubarb and strawberries from the farmer’s market, and zero idea what to do with them. I’d never baked with rhubarb before, and honestly, I was a little intimidated by its tartness. But I wanted something easy, something that felt like a cozy hug after a long week. So I grabbed my trusty cast iron skillet and threw together this strawberry rhubarb crumble recipe for an easy rustic dessert that’s now a family favorite.
This recipe is exactly what you want when fresh strawberries and rhubarb are in season — it’s simple, forgiving, and that cast iron makes the crumble come out with the perfect golden crust every single time. After testing it more than 15 times (yes, I’m obsessive), I finally nailed down the balance between sweet and tangy with a buttery topping that crisps just right. If you love desserts that feel like a warm, homey celebration of spring, this strawberry rhubarb crumble in cast iron is your new go-to.
Plus, it’s one of those recipes you can pull off even if you don’t bake much — the “easy rustic dessert” part is no joke. I promise it’s worth the few minutes it takes to prep, and the smell while it bakes? Absolutely irresistible.
Why You’ll Love This Recipe
This strawberry rhubarb crumble recipe has completely changed how I think about rustic desserts. I’ve made it for neighborhood potlucks, casual Sunday dinners, and even a last-minute holiday dessert when nothing else was ready. Everyone, from my picky kids to my in-laws, asks for seconds.
- Perfect Sweet-Tart Balance — The rhubarb’s natural tang cuts through the sweetness of the strawberries and crumble, so you get that bright, fresh flavor without it being too sugary.
- Cast Iron Magic — Baking this in cast iron isn’t just for looks. It distributes heat evenly and gives the topping a buttery, crispy edge that’s impossible to replicate in a regular pan.
- Simple Ingredients — You probably have most of these in your kitchen already: fresh fruit, oats, butter, and sugar. No fancy stuff needed.
- Feeds a Crowd — This recipe serves about 6, but the cast iron size means you can easily scale it up for a bigger group or scale down for a small family dessert.
- Great for Any Occasion — Whether it’s a weekend family meal, a potluck party, or a holiday gathering, this crumble fits right in. It’s rustic enough to feel homemade but impressive enough to serve guests without stress.
Honestly, this strawberry rhubarb crumble is my fallback dessert for busy weekends and special occasions alike. You don’t need to fuss over it, and it always turns out like a winner. If you want a little extra inspiration for sides or cozy meals to go with this, I often pair it with something like my honey roasted butternut squash with rosemary for a sweet and savory vibe.
Ingredients for Strawberry Rhubarb Crumble in Cast Iron
Here’s the best part: you likely have most of this on hand. I’m pretty picky about three ingredients here — I’ll explain why.
- Strawberries (4 cups / about 600g, hulled and quartered) — Fresh, ripe berries make all the difference. Frozen works in a pinch but adds extra moisture that can make the filling runny.
- Rhubarb (3 cups / about 375g, chopped into ½-inch pieces) — Tart and fibrous, rhubarb is the star of the show. I like to use fresh, but if you have frozen, thaw and drain well.
- Granulated sugar (¾ cup / 150g) — Balances the tartness. You can adjust depending on how sweet your strawberries are.
- Brown sugar (½ cup / 100g, packed) — Adds warmth and moisture to the crumble topping.
- Old-fashioned oats (1 cup / 90g) — Gives the topping that rustic, chewy texture. Don’t substitute with instant oats.
- All-purpose flour (¾ cup / 95g) — Binds the topping and soaks up some fruit juices.
- Butter (½ cup / 115g, cold and cubed) — Use unsalted, cold butter for a flaky topping. I never use margarine here; butter is key.
- Lemon juice (1 tablespoon / 15ml) — Brightens up the fruit filling and balances the sweetness.
- Vanilla extract (1 teaspoon / 5ml) — Adds depth to the filling’s flavor.
- Cinnamon (½ teaspoon / 1g) — Optional, but I love the warmth it gives to the crumble.
- Salt (⅛ teaspoon / a pinch) — Enhances all the flavors, don’t skip it.
Equipment Needed
You don’t need anything fancy for this. Here’s what I actually use:
- Cast iron skillet — I use a 10-inch Lodge skillet. The heavy bottom helps the crumble cook evenly and develop that perfect golden crust. If you don’t have cast iron, a 9×9-inch baking dish works too, but the texture won’t be quite the same.
- Mixing bowls — A couple of medium bowls to separate the fruit and topping prep.
- Pastry cutter or fork — For cutting the butter into the flour and oats. If you don’t have one, your clean fingers work just fine.
- Measuring cups and spoons — Accuracy helps, especially with sugar and flour.
- Rubber spatula — For folding the fruit and scraping bowls.
- Oven mitts — Cast iron gets HOT. Trust me on this.
Optional but useful:
- Food processor — If you want to speed up the crumble topping prep, a few quick pulses with cold butter in a food processor works wonders.
How to Make Strawberry Rhubarb Crumble in Cast Iron: Step by Step

Alright, let’s get into it. I’ll walk you through exactly how I make this, including the small tricks that actually make a difference.
- Prep the fruit (10 minutes)
Hull and quarter the strawberries, chop the rhubarb into ½-inch pieces, then toss both in a large bowl with granulated sugar, lemon juice, vanilla extract, cinnamon, and a pinch of salt. Stir gently until the fruit is evenly coated and set aside to macerate while you prepare the topping. You want the sugar to start drawing out the juices, but don’t let it sit too long or the fruit will get mushy. - Make the crumble topping (5 minutes)
In another bowl, combine oats, brown sugar, flour, and salt. Add the cold, cubed butter and use a pastry cutter or your fingers to work it in until the mixture resembles coarse crumbs. It should feel slightly sticky but still have visible pea-sized butter chunks. This texture is key for that flaky, crisp crumble crust. - Assemble in cast iron (2 minutes)
Pour the macerated fruit mixture into your 10-inch cast iron skillet, spreading it evenly. Then sprinkle the crumble topping over the fruit in an even layer, making sure to cover all the fruit so it bubbles up underneath the crust as it bakes. - Bake (40-45 minutes)
Place the skillet in a preheated 350°F (175°C) oven. Bake for 40 to 45 minutes, or until the topping is golden brown and crisp, and the fruit mixture is bubbling around the edges. The bubbling is a sure sign the fruit is perfectly cooked and juicy. - Cool and serve (10 minutes)
Remove from the oven and let it cool for at least 10 minutes. This helps the juices thicken slightly so you’re not left with a soggy mess. Serve warm, ideally with a scoop of vanilla ice cream or a dollop of whipped cream.
Total time: About 1 hour, with roughly 15 minutes active prep.
Expert Tips & Tricks
Here’s everything I’ve figured out from making this recipe dozens of times. These tips will save you from the mistakes I already made.
- Don’t Skip the Cast Iron — The even heating and heat retention of cast iron make the topping crispier and the fruit cook more evenly. If you bake this in a glass or ceramic dish, expect a softer crust and possibly less bubbling fruit.
- Cold Butter is Non-Negotiable — Using cold butter in the crumble topping is what creates those flaky pockets of crispiness. I’ve tried melted butter before — don’t do it. It turns the topping cakey instead.
- Save the Fruit Juices — When mixing your strawberries and rhubarb, gently toss but don’t mash. You want the fruit to release some juice but keep its shape so the crumble doesn’t turn into a soupy mess.
- Adjust Sugar Based on Fruit Ripeness — If your strawberries are super sweet, dial back the granulated sugar in the filling. If they’re tart or underripe, add a touch more. This balance is what makes this an easy rustic dessert with the perfect sweet-tart harmony.
- Let it Rest Before Serving — I know you want to dive in right away, but letting the crumble sit for 10 minutes after baking helps the filling thicken. Otherwise, you’ll have watery fruit and a soggy topping.
Mistake: Topping turns out gummy or doughy
Fix: Your butter was probably too warm or overworked. Chill your butter and mix just until crumbly.
Mistake: Filling is too watery
Fix: Make sure to macerate fruit briefly, then bake long enough for juices to bubble and thicken. A longer cool-down also helps.
Variations & Substitutions
Once you’ve got the base version down, here’s how I mix it up. I’ve actually tried all of these.
- Blueberry-Rhubarb Crumble
Swap strawberries for fresh blueberries. It’s a friendlier option if you want a slightly less tart crumble, perfect for a casual spring potluck. - Gluten-Free Version
Replace the all-purpose flour with a 1-to-1 gluten-free baking flour blend. Use certified gluten-free oats to keep it safe. I make this for friends with gluten sensitivities, and it turns out fantastic. - Vegan Version
Use coconut oil instead of butter and maple syrup instead of sugar in the topping. The texture is a little different, but the flavor is still incredible. Great for dairy-free guests. - Added Crunch
Stir in ½ cup chopped pecans or walnuts into the topping for a nutty twist. My husband loves this variation for a holiday dinner when we want something a little extra special. - Mini Cast Iron Crisps
Use individual 6-inch cast iron skillets or ramekins to make personal-sized crumbles. Perfect for dinner parties or a romantic dessert.
For a cozy side that complements this dessert beautifully, check out my crockpot green bean casserole or sautéed green beans with lemon zest. Both are simple, crowd-pleasing, and balance sweet desserts perfectly.
Serving & Storage
I usually serve this strawberry rhubarb crumble straight from the cast iron skillet — it looks rustic, stays warm, and everyone loves the presentation.
My favorite way to enjoy it is with a scoop of vanilla ice cream or some freshly whipped cream. The cold creaminess contrasts beautifully with the warm, tangy fruit and crunchy topping.
Storage:
- Fridge: Store leftovers in an airtight container for up to 4 days. The topping will soften as it sits, but reheating brings back some crispness.
- Reheating: Best is in a 350°F (175°C) oven for 10 minutes to warm through and crisp the topping again. Microwave works in a pinch but can make the topping soggy.
- Freezing: You can freeze this crumble, but the texture changes slightly. Thaw overnight in the fridge and reheat in the oven for best results.
Nutrition Information
I’m not a nutritionist, but here’s the breakdown if you’re keeping track. This is based on 6 servings.
| Calories | Protein | Carbs | Fiber | Sugar | Fat | Saturated Fat | Sodium |
|---|---|---|---|---|---|---|---|
| 320 | 3g | 50g | 5g | 28g | 12g | 7g | 150mg |
Look — this is comfort food made with butter and sugar. It’s not a diet recipe and I’m not going to pretend it is. But it’s way better than store-bought desserts, costs less, and I know exactly what’s in it. When I want something lighter, I use less sugar and add more fruit. Most nights though? I make the real thing and enjoy it without guilt.
Final Thoughts
Remember that spring morning when I had those fresh strawberries and rhubarb and no clue what to do? This strawberry rhubarb crumble in cast iron turned out to be everything I hoped for and more — simple, rustic, and delicious. It’s one of those recipes that feels like a warm hug on a plate, no matter the occasion.
Make it yours. Add more cinnamon if you’re feeling cozy, toss in some nuts for crunch, or swap out the fruit depending on what’s fresh at the market. The base is forgiving and welcomes your creativity.
If you make this, drop a comment and tell me how it went. And if something goes wrong, tell me that too — I genuinely want to help troubleshoot. That’s what the comments are for.
Happy cooking — I hope your kitchen smells amazing.
Frequently Asked Questions
Q: Can I make this strawberry rhubarb crumble without sugar?
A: Yes, you can reduce or omit the sugar, but the crumble won’t have that classic sweet-tart balance. I’ve tried using natural sweeteners like honey or maple syrup instead — they work but change the texture slightly. Start by reducing sugar by half and adjust to taste, especially if your fruit is very ripe.
Q: Why did my crumble topping turn out grainy or oily?
A: This usually happens when the butter melts too much before baking or you overmix the topping. I’ve made this mistake several times. To fix it, make sure your butter is cold and only mix until the topping looks like coarse crumbs. If it’s grainy after baking, try chilling the butter more next time.
Q: Can I make this strawberry rhubarb crumble ahead for a holiday dinner?
A: Absolutely! You can assemble it a day ahead and keep it covered in the fridge. Bake it fresh before serving so the topping stays crispy. I’ve done this for Easter brunch and it saved me so much stress.
Q: Is this recipe gluten-free or can it be made dairy-free?
A: The original recipe is not gluten-free or dairy-free, but you can easily adapt it. Use gluten-free flour and certified gluten-free oats, and swap butter for coconut oil or a vegan butter alternative. I’ve tested these swaps and the crumble still tastes great, though the texture changes slightly.
Q: Can I double this recipe to serve a larger crowd?
A: Yes, but I recommend using a larger baking dish rather than a bigger cast iron skillet to ensure even cooking. I once tried doubling in a massive skillet and the topping didn’t crisp evenly. A 9×13-inch dish works well for double the amount.
Q: How do I prevent the fruit filling from being too watery?
A: The key is to macerate the fruit just long enough to release some juices but not too long to make it mushy. Also, bake until you see bubbling around the edges — that means the juices have thickened. If it’s watery after baking, let the crumble cool longer before serving.
Q: Can I substitute other fruits for the strawberries and rhubarb?
A: Yes! Blueberries, blackberries, or peaches work well with rhubarb. I’ve made a peach-rhubarb crumble that’s fantastic for summer. Just keep in mind the sweetness and adjust sugar accordingly.
Pin This Recipe!
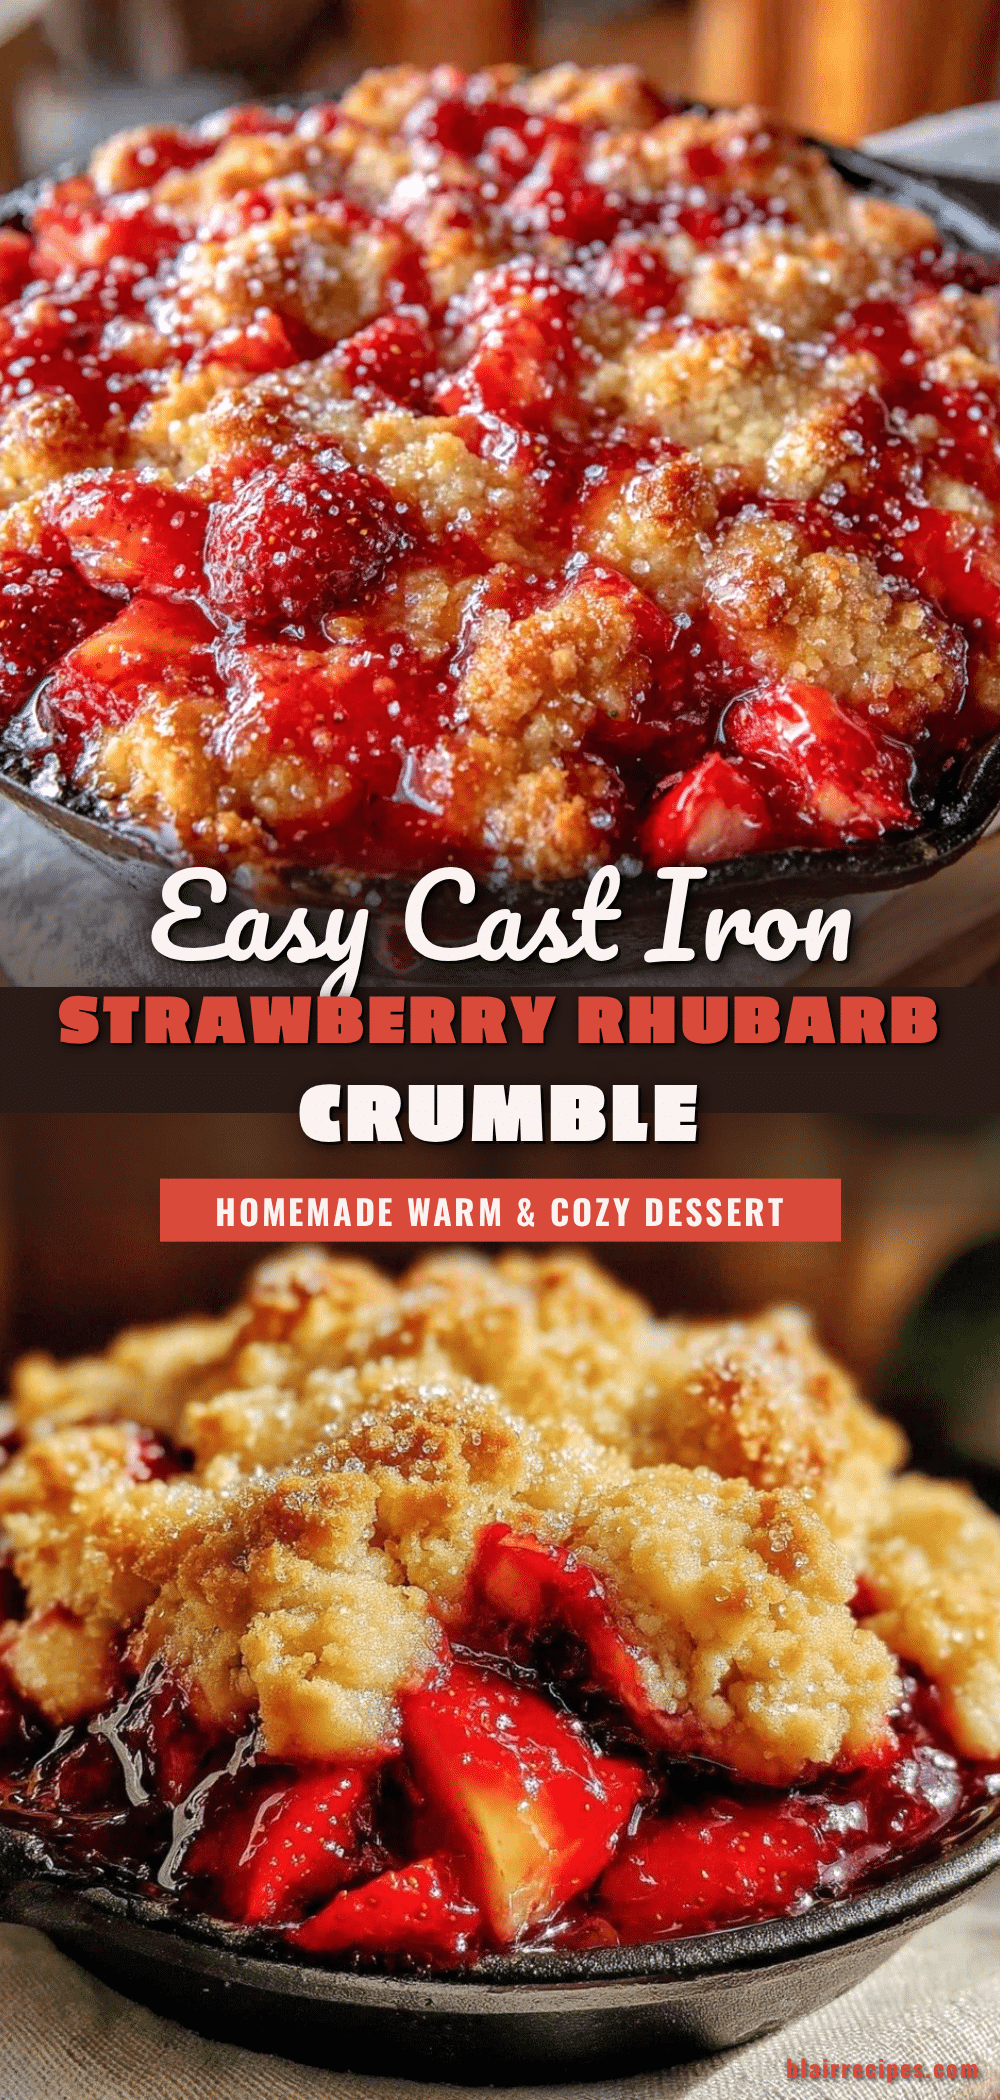
Strawberry Rhubarb Crumble Recipe Easy Rustic Cast Iron Dessert
An easy rustic dessert combining fresh strawberries and tart rhubarb baked in a cast iron skillet for a perfect sweet-tart balance with a buttery, crispy crumble topping.
- Prep Time: 15 minutes
- Cook Time: 40-45 minutes
- Total Time: 1 hour
- Yield: 6 servings 1x
- Category: Dessert
- Cuisine: American
Ingredients
- 4 cups strawberries (about 600g), hulled and quartered
- 3 cups rhubarb (about 375g), chopped into ½-inch pieces
- ¾ cup granulated sugar (150g)
- ½ cup brown sugar (100g), packed
- 1 cup old-fashioned oats (90g)
- ¾ cup all-purpose flour (95g)
- ½ cup unsalted butter (115g), cold and cubed
- 1 tablespoon lemon juice (15ml)
- 1 teaspoon vanilla extract (5ml)
- ½ teaspoon cinnamon (1g), optional
- ⅛ teaspoon salt (a pinch)
Instructions
- Prep the fruit (10 minutes): Hull and quarter the strawberries, chop the rhubarb into ½-inch pieces, then toss both in a large bowl with granulated sugar, lemon juice, vanilla extract, cinnamon, and a pinch of salt. Stir gently until the fruit is evenly coated and set aside to macerate while you prepare the topping.
- Make the crumble topping (5 minutes): In another bowl, combine oats, brown sugar, flour, and salt. Add the cold, cubed butter and use a pastry cutter or your fingers to work it in until the mixture resembles coarse crumbs with visible pea-sized butter chunks.
- Assemble in cast iron (2 minutes): Pour the macerated fruit mixture into a 10-inch cast iron skillet, spreading it evenly. Sprinkle the crumble topping over the fruit in an even layer, covering all the fruit.
- Bake (40-45 minutes): Place the skillet in a preheated 350°F (175°C) oven. Bake until the topping is golden brown and crisp, and the fruit mixture is bubbling around the edges.
- Cool and serve (10 minutes): Remove from the oven and let cool for at least 10 minutes to thicken the juices. Serve warm, ideally with vanilla ice cream or whipped cream.
Notes
[‘Use cold unsalted butter for a flaky topping; avoid margarine or melted butter.’, ‘Do not overmix the crumble topping to prevent it from becoming gummy or doughy.’, ‘Macerate fruit briefly to release juices but avoid making it mushy.’, ‘Let crumble rest for 10 minutes after baking to thicken filling and avoid sogginess.’, ‘Cast iron skillet provides even heat and a crispier crust compared to glass or ceramic dishes.’, ‘Adjust sugar based on the sweetness of your strawberries.’, ‘For gluten-free version, substitute all-purpose flour with gluten-free baking flour and use certified gluten-free oats.’, ‘For vegan version, use coconut oil instead of butter and maple syrup instead of sugar.’]
Nutrition
- Serving Size: 1/6 of the crumble
- Calories: 320
- Sugar: 28
- Sodium: 150
- Fat: 12
- Saturated Fat: 7
- Carbohydrates: 50
- Fiber: 5
- Protein: 3
Keywords: strawberry rhubarb crumble, cast iron dessert, rustic dessert, easy crumble recipe, spring dessert, sweet tart dessert


