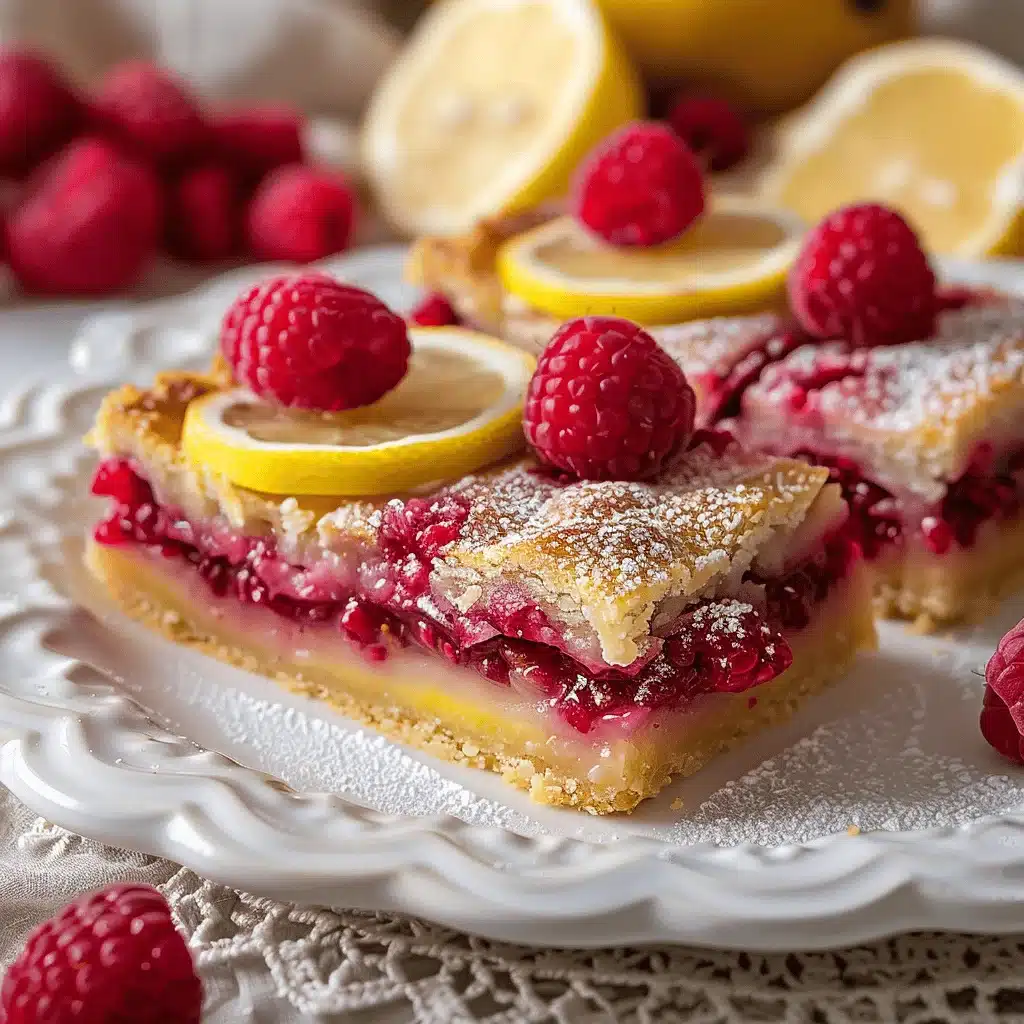
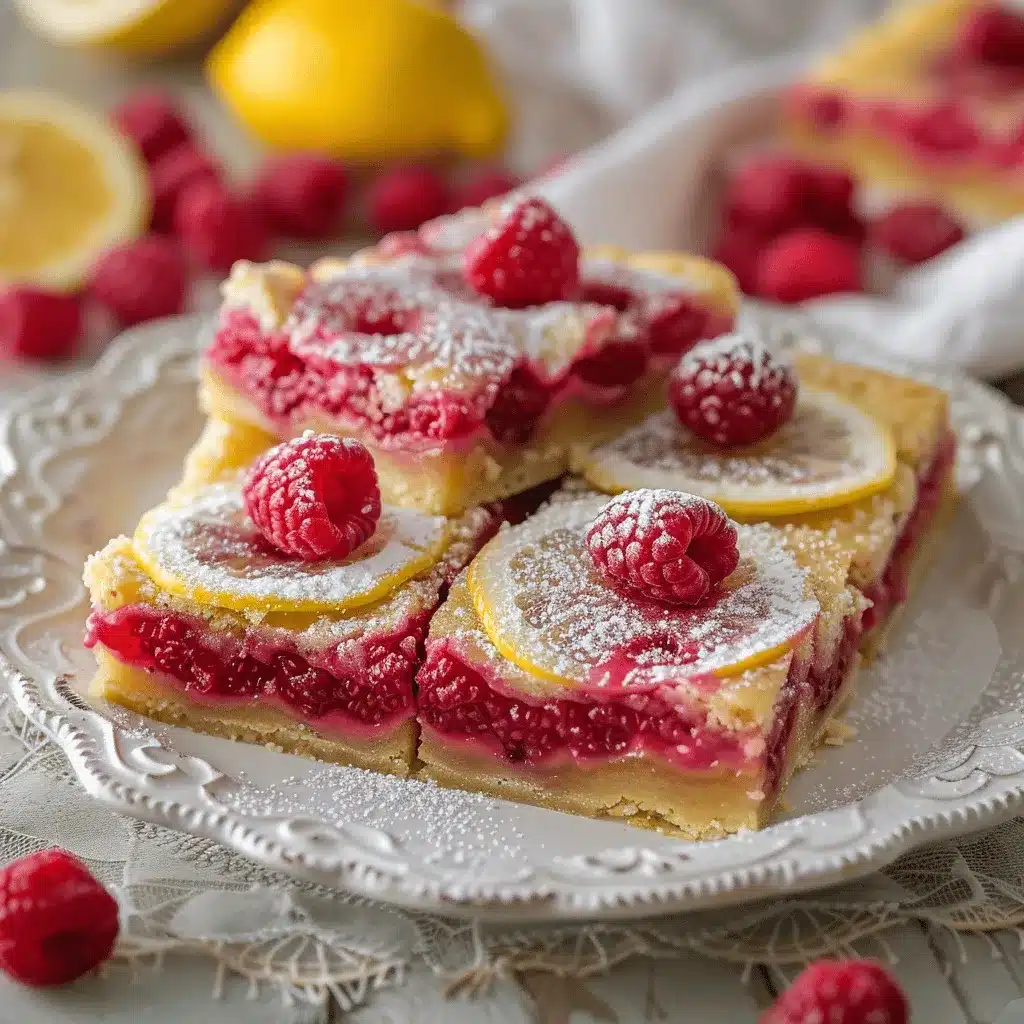
Picture this: the sun’s out, you’re sipping lemonade, and you’ve got the perfect summer dessert in hand. That’s exactly what these tangy raspberry lemon bars bring to the table. Bursting with bright citrusy lemon and sweet raspberries, they’re everything you want in a refreshing treat—light, fruity, and irresistibly delicious. Whether you’re hosting a backyard barbecue or just craving something sweet, these bars are a total showstopper.
I’ve been making these for years, and they never fail to impress. The combination of tart lemon custard and juicy raspberries on top of a buttery shortbread crust is pure magic. Trust me, you’ll keep coming back for more. Plus, they’re surprisingly easy to make! Let’s dive right into what makes this recipe a summer essential.
Why You’ll Love This Recipe
- Easy to Make: You don’t need fancy ingredients or complicated techniques to whip up these bars. They come together in about an hour, and most of the time is hands-off.
- Bright and Refreshing: The tangy lemon paired with the sweetness of raspberries is the ultimate summer flavor combo.
- Perfect for Any Occasion: Whether you’re hosting brunch, a picnic, or a potluck, these bars are guaranteed to be the star of the dessert table.
- Customizable: Don’t have raspberries? Swap them out for blueberries or strawberries for a fun twist.
- Impressive Yet Simple: They look fancy enough to wow your guests but are easy enough for a beginner baker to master.
What makes these bars different from other summer desserts is their balance of flavors. The lemon custard is tangy but not overpowering, and the raspberries add a burst of sweetness and color. Plus, the buttery shortbread crust holds everything together beautifully, giving you the perfect bite every time.
What Ingredients You Will Need
This recipe uses simple, everyday ingredients that you probably already have in your kitchen. Each one plays a crucial role in creating the perfect texture and flavor.
- For the crust:
- 1 cup (125 g) all-purpose flour
- 1/4 cup (50 g) granulated sugar
- 1/2 cup (113 g) unsalted butter, softened
- Pinch of salt
- For the lemon filling:
- 3 large eggs
- 1 cup (200 g) granulated sugar
- 1/3 cup (80 ml) fresh lemon juice (about 2 lemons)
- 2 tbsp (15 g) all-purpose flour
- 1 tsp lemon zest
- For the raspberry topping:
- 1 cup (125 g) fresh raspberries
- Powdered sugar for dusting (optional)
If you’re missing fresh raspberries, frozen ones work just as well—just thaw and pat them dry before using. And for a gluten-free option, you can substitute the all-purpose flour with almond flour in both the crust and filling.
Equipment Needed
You don’t need fancy tools to make this recipe, but here’s what will help:
- 9×9-inch baking pan: Perfect for creating evenly-sized bars.
- Mixing bowls: You’ll need separate bowls for the crust and filling.
- Whisk: Essential for a smooth lemon filling.
- Spatula: Great for pressing the crust into the pan.
- Zester: A must-have for fresh lemon zest.
If you don’t have a zester, a fine grater works just as well. And if you’re low on kitchen tools, you can mix the crust by hand—just make sure the butter is softened for easy incorporation.
Preparation Method
- Preheat the oven: Set your oven to 350°F (175°C) and grease a 9×9-inch baking pan with butter or cooking spray. You can also line it with parchment paper for easy removal.
- Make the crust: In a mixing bowl, combine the flour, sugar, and salt. Add the softened butter and mix until crumbly. Press the mixture evenly into the bottom of your prepared pan. Bake for 15 minutes or until lightly golden.
- Prepare the filling: While the crust is baking, whisk together the eggs, sugar, lemon juice, flour, and lemon zest in a separate bowl until smooth.
- Add the raspberries: Scatter the raspberries evenly over the partially baked crust.
- Pour the filling: Carefully pour the lemon mixture over the raspberries and crust, making sure it spreads evenly.
- Bake: Return the pan to the oven and bake for another 25-30 minutes, or until the filling is set and no longer jiggly.
- Cool: Let the bars cool completely at room temperature, then refrigerate for at least 2 hours for easier slicing.
- Slice and serve: Once chilled, dust with powdered sugar (optional), slice into squares, and enjoy!
Pro tip: Use a sharp knife to slice the bars cleanly, and wipe the blade between cuts for a neat presentation.
Cooking Tips & Techniques
- Don’t skip chilling: Refrigerating the bars makes them set properly and easier to slice.
- Fresh lemons are key: Bottled lemon juice won’t give you the same bright flavor as fresh lemons.
- Use parchment paper: Lining the pan makes it easy to lift the bars out without breaking them.
- Test the filling: Gently shake the pan after baking to check if the filling is set—it shouldn’t jiggle.
- Customize the sweetness: If you prefer a sweeter dessert, add an extra tablespoon of sugar to the filling.
These tips come from plenty of trial and error, so trust me—they’ll make your baking experience smoother and your bars even tastier!
Variations & Adaptations
- Berry swap: Try blueberries, blackberries, or strawberries instead of raspberries for a fun twist.
- Gluten-free option: Use almond or gluten-free flour in place of all-purpose flour.
- Extra tang: Add a splash of lime juice or zest for a citrusy kick.
- Vegan version: Replace the eggs with aquafaba or a vegan egg substitute, and use vegan butter for the crust.
One of my favorite variations is adding a layer of cream cheese filling under the lemon layer—talk about indulgent!
Serving & Storage Suggestions
These bars are best served chilled, straight from the fridge. Pair them with a tall glass of iced tea or lemonade for the ultimate summer treat. For a fancier presentation, you can garnish each slice with a fresh raspberry or a small sprig of mint.
To store, keep the bars in an airtight container in the refrigerator for up to 5 days. If you want to freeze them, wrap each slice individually in plastic wrap and store them in a freezer-safe container for up to 2 months. Thaw overnight in the fridge before serving.
Nutritional Information & Benefits
Here’s a rough estimate of the nutritional breakdown (per serving, based on 12 bars):
- Calories: 180
- Fat: 8g
- Carbohydrates: 25g
- Protein: 3g
- Vitamin C: 10% of daily value
Thanks to the fresh raspberries and lemons, these bars are packed with antioxidants and vitamin C, making them a slightly healthier indulgence. They’re also a great option for a lighter dessert that won’t weigh you down.
Conclusion
If you’re looking for a dessert that’s easy, crowd-pleasing, and bursting with summer flavors, these tangy raspberry lemon bars are it. They’re simple to make, endlessly customizable, and just plain delicious. Every bite is like a little burst of sunshine!
I hope you love this recipe as much as I do. Don’t forget to share your creations in the comments below—I’d love to hear how you customized it! And if you’re feeling generous, pin this recipe and share it with your friends. Happy baking!
FAQs
Can I use frozen raspberries instead of fresh?
Yes, frozen raspberries work great! Just thaw them and pat them dry before using to prevent excess moisture.
How do I know when the filling is done?
The filling is set when it no longer jiggles when you gently shake the pan. It should be firm but not dry.
Can I make these bars ahead of time?
Absolutely! They store well in the fridge for up to 5 days, so you can make them a day or two in advance.
What’s the best way to slice the bars neatly?
Chill the bars thoroughly, use a sharp knife, and wipe the blade clean between slices for the best results.
Can I double the recipe?
Yes, simply use a larger pan (like a 9×13-inch) and adjust the baking time slightly. Keep an eye on the crust and filling for doneness.
Pin This Recipe!