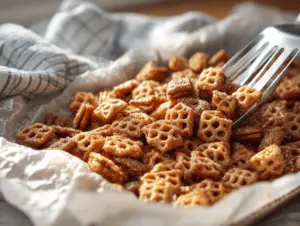
The scent of buttery, golden cheese puffs wafting from the oven is pure magic—honestly, it’s the kind of smell that gets the whole house gathering in the kitchen. The first time I baked this cheese puffs recipe was on a whim for a family movie night, and let’s just say there were zero leftovers and a lot of requests for more. If you’ve ever craved an easy homemade snack that’s a guaranteed party hit, you’re in the right place. These cheese puffs are light, crisp, and packed with real cheesy goodness, making them perfect for any celebration or cozy night in.
What I really love about this recipe is how versatile it is. Whether you’re prepping for a fancy holiday spread or just need a bowl of something irresistible for game day, this cheese puffs recipe fits the bill. As someone who’s tested a lot of savory bakes (and I mean a lot), I keep coming back to these because they check all the boxes: simple ingredients, quick prep, and a flavor that’s totally addictive.
There’s a bit of French flair here—these are based on classic gougères, but with my own tweaks for busy home bakers. I’ve played with different cheeses, tried making them gluten-free for friends, and even stashed a batch in the freezer for surprise guests. Trust me, once you try these, you’ll see why they’re my go-to for every gathering. Whether you’re a seasoned baker or just looking to impress with minimal effort, this cheese puffs recipe is a must-have in your party playbook.
Why You’ll Love This Cheese Puffs Recipe
- Quick & Easy: Comes together in about 35 minutes—no lengthy rising or fancy techniques required.
- Simple Ingredients: You probably have everything you need in your pantry and fridge right now. No hidden specialty items!
- Perfect for Parties: These cheese puffs are a guaranteed hit at birthday bashes, brunches, holiday dinners, or any gathering where snacks are a must.
- Crowd-Pleaser: Kids, adults, picky eaters—everyone raves about these little cheesy bites. They disappear fast, so make extra!
- Unbelievably Delicious: Crisp on the outside, fluffy and tender inside, and bursting with real cheese flavor. It’s basically the savory snack of your dreams.
What sets this cheese puffs recipe apart? For starters, I blend the cheese straight into the warm dough, ensuring every bite is packed with flavor—not just a sprinkle on top. My method skips unnecessary steps and makes cleanup a breeze. Plus, you can customize with your favorite cheese blends, add herbs, or even sneak in a pinch of spice for heat. After testing dozens of variations, this is the one I keep in my back pocket for when I want something foolproof and fabulous.
There’s something kind of magical about how these cheese puffs puff up in the oven, turning a handful of humble ingredients into airy, golden treats. They’re perfect for sharing (or, you know, keeping all to yourself on a lazy Sunday). Whether you’re looking to wow a crowd or just treat yourself, these cheese puffs deliver that “just one more” feeling every single time.
What Ingredients You Will Need
This cheese puffs recipe is all about simple, straightforward ingredients coming together for maximum flavor. You don’t need anything fancy—just a few pantry and fridge staples. Here’s what you’ll need:
- Water (120ml / 1/2 cup): Creates the steam that helps the puffs rise.
- Unsalted Butter (60g / 1/4 cup): Adds richness—use good quality for best flavor.
- All-Purpose Flour (75g / 2/3 cup, spooned and leveled): Gives structure to the dough. For gluten-free, swap with a 1:1 gluten-free blend.
- Large Eggs (2, room temperature): Bind everything together and help the puffs rise and brown.
- Shredded Cheese (90g / 1 cup, packed): I love sharp cheddar for classic flavor, but Gruyère or parmesan work beautifully too. Use a block and shred it fresh—pre-shredded doesn’t melt as nicely.
- Salt (1/2 tsp): Balances the flavors and brings out the cheese.
- Black Pepper (1/4 tsp, freshly ground): Optional, but adds a touch of spice.
- Dried Mustard (1/4 tsp): Totally optional, but gives a gentle tang that pairs well with cheese.
- Chopped Fresh Chives or Parsley (1 tbsp, optional): For a pop of color and extra flavor. I toss these in if I have them on hand.
For the topping (optional but fun):
- Extra shredded cheese (2-3 tbsp): For sprinkling on top before baking—makes the tops extra crispy and cheesy.
- Sesame seeds or poppy seeds: For a little crunch and visual flair. Totally optional, but they look so pretty on a party platter.
Ingredient Tips: For best results, use real butter (not margarine) and a cheese that melts well. Gruyère gives classic French flavor, while cheddar is more punchy and familiar. If you want to get creative, try blending half cheddar and half parmesan for a more complex taste. And if you’re making these for gluten-free friends, a cup-for-cup gluten-free flour blend works really well (Bob’s Red Mill is my go-to).
Don’t stress if you’re missing the fresh herbs—they’re just a bonus. And if you want to spice things up, a dash of cayenne or smoked paprika is delicious. I’ve even tossed in a handful of cooked, crumbled bacon for an extra-indulgent batch. The possibilities are endless!
Equipment Needed
- Medium Saucepan: For heating water and butter. I’ve used both stainless and nonstick—either works, but nonstick is a bit easier for cleanup.
- Wooden Spoon or Sturdy Silicone Spatula: To stir the dough as it comes together. Don’t use flimsy spoons—the dough is thick!
- Mixing Bowl (optional): If you prefer to add eggs off the heat, transfer dough here. I usually keep everything in the saucepan for fewer dishes.
- Measuring Cups and Spoons: Accuracy matters, especially for flour and water. Level off your flour for best results.
- Baking Sheet: Lined with parchment paper. If you don’t have parchment, lightly greased foil works in a pinch.
- Small Cookie Scoop or Two Teaspoons: For portioning the dough. The scoop gives perfectly round puffs, but spoons work just fine.
- Oven (preheated): Consistent heat is key for a good rise—make sure it’s fully preheated before baking.
If you’re fancy and have a pastry bag, you can pipe the dough for ultra-neat puffs, but I usually go old-school with a couple of spoons. Cleanup is easier, too! For maintenance, keep your baking sheets in good shape by lining them every time (it helps prevent sticking and extends their life). And if you’re just starting out, don’t worry about special tools—the basics will get the job done.
How to Make Cheese Puffs – Step-by-Step Preparation
-
Preheat your oven: Set to 400°F (200°C). Line a baking sheet with parchment paper.
Tip: Make sure your oven is fully preheated—cheese puffs need a blast of heat to rise! -
Heat the liquids: In a medium saucepan, combine 1/2 cup (120ml) water and 1/4 cup (60g) unsalted butter. Bring to a gentle boil over medium heat. Stir until the butter is fully melted and bubbles just begin to form.
Sensory cue: You’ll know it’s ready when you hear a soft sizzle and the butter smells rich. -
Add the flour: Reduce heat to low. Dump in 2/3 cup (75g) all-purpose flour all at once, plus 1/2 tsp salt, 1/4 tsp pepper, and 1/4 tsp dried mustard if using. Stir vigorously with a wooden spoon.
Warning: The dough will look clumpy and thick—keep stirring! In about 1-2 minutes, it will pull away from the sides and form a smooth ball. -
Cool the dough slightly: Remove from heat. Let sit for 3 minutes (this prevents the eggs from scrambling in the next step).
Efficiency tip: If you’re in a hurry, stir the dough for a minute to help it cool faster. -
Add the eggs: Crack 2 large eggs into a small bowl. Beat lightly, then add to the dough, a little at a time, stirring vigorously after each addition.
Troubleshooting: The dough will look weird and separated at first—don’t panic! Keep stirring and it’ll come together into a glossy, sticky batter. -
Fold in the cheese and herbs: Add 1 cup (90g) shredded cheese and 1 tbsp chopped herbs (if using). Stir until evenly distributed.
Personal tip: Save a little cheese for sprinkling on top if you like extra-cheesy puffs. -
Portion the dough: Use a small cookie scoop or two teaspoons to drop tablespoon-sized mounds onto your lined baking sheet, spacing about 2 inches (5cm) apart.
Note: The dough is sticky—wet your spoon or fingers to help. - Optional topping: Sprinkle reserved cheese, sesame, or poppy seeds on top for extra crunch and color.
-
Bake: Place in the preheated oven and bake for 20-25 minutes, until puffed and deep golden brown.
Sensory cue: They should feel light and hollow when tapped, with a crisp shell. -
Cool slightly and serve: Let cheese puffs cool on the pan for 5 minutes before serving warm.
Warning: Don’t open the oven door early—they might collapse!
Personal Note: The first time I made these, I pulled them out too soon and they deflated. Patience is key—wait for that deep golden color, and you’ll be rewarded with perfectly airy cheese puffs every time.
Pro Tips & Techniques for Perfect Cheese Puffs
- Temperature matters: Always preheat the oven and keep it closed during baking. Sudden temperature changes can make your puffs deflate.
- Eggs at room temp: Cold eggs can cause the dough to seize. I’ve learned to set mine out before starting—makes mixing way easier.
- Don’t overmix after adding cheese: Once the cheese is in, stir just until combined. Overmixing can flatten your puffs.
- Size consistency: Use a scoop for uniform puffs—this ensures they bake evenly. No scoop? Two teaspoons work, just try to keep them similar in size.
- Watch for doneness: Cheese puffs are ready when they’re golden and feel light. If they’re pale or heavy, give them a few more minutes.
- Personal fail: I once opened the oven early “just to check” and—poof!—flat puffs. Learn from my impatience: trust your timer and the color cues.
- Freeze before baking: For party prep, scoop the dough onto a tray and freeze. Once solid, transfer to a bag and bake straight from frozen, adding 2-3 extra minutes.
- Batch baking strategy: If making multiple trays, bake one at a time for best rise. Rotating trays mid-bake can cause uneven puffing.
Honestly, the more you make cheese puffs, the easier it gets. With a little practice, you’ll find your rhythm and get a feel for the dough. And the best part? Even if they’re not perfect, they still taste amazing.
Variations & Adaptations
- Gluten-Free Cheese Puffs: Swap all-purpose flour for a cup-for-cup gluten-free blend. I’ve done this with Bob’s Red Mill and had great results—just be sure to mix thoroughly.
- Spicy Jalapeño Cheese Puffs: Add 2 tbsp finely chopped pickled jalapeños and a pinch of cayenne to the dough. This version is a favorite for game day!
- Herb & Garlic Cheese Puffs: Toss in 1 tbsp minced fresh herbs (like rosemary or thyme) and 1/2 tsp garlic powder for a fragrant twist.
- Different cheeses: Try Gruyère, Swiss, or a blend of sharp cheddar and parmesan for bolder flavor. Smoked cheeses add a whole new dimension.
- Dairy-Free Option: Use plant-based butter and a good-quality vegan cheese. The texture isn’t quite as airy but still delicious—my cousin with dairy allergies loves them!
- Mini Cheese Puffs: Make teaspoon-sized mounds for bite-size snacks—perfect for cocktail parties or kids’ lunchboxes.
I’ve personally tried the jalapeño version for a friend’s birthday, and they were gone before I could even snap a photo. Don’t be afraid to play around—these cheese puffs are super forgiving and totally customizable to your crowd or craving.
Serving & Storage Suggestions
Cheese puffs are best served warm, straight from the oven, when the outside is crisp and the center is tender and steamy. I love piling them into a bowl lined with a colorful napkin, or arranging them on a wooden board with fresh herbs for a rustic party look.
Pair them with sparkling wine, iced tea, or a crisp lager—they’re amazing with drinks before dinner, or as a snack for movie nights. For a more elegant touch, serve with a light dipping sauce like herbed cream cheese or spicy aioli.
Leftovers? Store cooled cheese puffs in an airtight container in the fridge for up to 3 days. To reheat, pop them in a 350°F (175°C) oven for 5-7 minutes. They crisp up beautifully! For longer storage, freeze baked or unbaked puffs for up to 2 months. Bake straight from frozen, adding a couple extra minutes to the time.
Flavor tip: The cheesy flavor actually deepens overnight—so if you have any leftover (rare, but it happens), they’re even better the next day.
Nutritional Information & Benefits
Each cheese puff (based on a batch of 20) has approximately:
- Calories: 60
- Protein: 2g
- Carbohydrates: 3g
- Fat: 4g
- Sugar: 0g
Cheese puffs are naturally low in sugar, and you can make them gluten-free or dairy-free with a couple tweaks. The eggs and cheese add a little protein boost, and real cheese provides calcium for bone health. If you’re watching sodium, use a lower-salt cheese or skip extra toppings.
Allergens: Contains eggs, dairy, and (unless using gluten-free flour) wheat. As always, check your ingredient labels and adjust for your needs. Personally, I love that these can be made to fit almost any diet, so everyone at my table can enjoy them.
Conclusion
If you’re looking for a surefire party snack that’s easy, crowd-pleasing, and endlessly customizable, this cheese puffs recipe is it. I’ve made these for birthdays, brunches, and even just random Tuesday cravings—they never last long, no matter the occasion.
Don’t be afraid to tweak the recipe to your taste, whether you’re adding herbs, heat, or a new cheese blend. That’s the beauty of homemade snacks—you get to call the shots. I love these cheese puffs because they always bring people together, and there’s just something so comforting about a warm, cheesy bite fresh from the oven.
Give this recipe a try, and let me know how you make it your own! Share your photos, swap in your favorite cheeses, or toss in a secret ingredient—I’d love to hear your twists. Happy baking, and here’s to many more delicious parties (and snack breaks) ahead!
Frequently Asked Questions
Can I make cheese puffs ahead of time?
Absolutely! You can freeze unbaked puffs on a tray, then transfer to a bag for freezer storage. Bake straight from frozen, just add a few extra minutes.
What’s the best cheese for cheese puffs?
Sharp cheddar and Gruyère are classics, but feel free to use your favorite or a blend. Just make sure to shred it yourself for best melting.
How do I keep my cheese puffs from deflating?
Bake until deep golden and don’t open the oven door early. Let them cool for a few minutes in the oven with the door cracked if you want extra insurance against collapse.
Are cheese puffs gluten-free?
You can make them gluten-free by swapping in a cup-for-cup gluten-free flour blend. The texture is almost identical—I’ve tested it myself!
Can I add other flavors or mix-ins?
Definitely! Try adding fresh herbs, spices, chopped jalapeños, or even crumbled bacon. The recipe is super flexible, so get creative.
PrintCheese Puffs Recipe: Easy Homemade Snacks for Party Success
These light, crisp cheese puffs are packed with real cheesy goodness and come together quickly for a crowd-pleasing snack. Perfect for parties, brunches, or cozy nights in, they’re based on classic French gougères with easy tweaks for home bakers.
- Prep Time: 10 minutes
- Cook Time: 25 minutes
- Total Time: 35 minutes
- Yield: 20 cheese puffs 1x
- Category: Appetizer
- Cuisine: French
Ingredients
- 1/2 cup water (120ml)
- 1/4 cup unsalted butter (60g)
- 2/3 cup all-purpose flour (75g), spooned and leveled (or 1:1 gluten-free blend)
- 2 large eggs, room temperature
- 1 cup shredded cheese (90g, packed; sharp cheddar, Gruyère, or parmesan)
- 1/2 teaspoon salt
- 1/4 teaspoon black pepper, freshly ground (optional)
- 1/4 teaspoon dried mustard (optional)
- 1 tablespoon chopped fresh chives or parsley (optional)
- 2–3 tablespoons extra shredded cheese (for topping, optional)
- Sesame seeds or poppy seeds (optional, for topping)
Instructions
- Preheat oven to 400°F (200°C). Line a baking sheet with parchment paper.
- In a medium saucepan, combine water and butter. Bring to a gentle boil over medium heat, stirring until butter is melted.
- Reduce heat to low. Add flour, salt, pepper, and dried mustard (if using) all at once. Stir vigorously until dough forms a smooth ball and pulls away from the sides (about 1-2 minutes).
- Remove from heat and let dough cool for 3 minutes.
- Beat eggs lightly in a small bowl. Add to dough a little at a time, stirring vigorously after each addition until a glossy, sticky batter forms.
- Fold in shredded cheese and chopped herbs (if using) until evenly distributed.
- Use a small cookie scoop or two teaspoons to drop tablespoon-sized mounds onto the lined baking sheet, spacing about 2 inches apart.
- Sprinkle reserved cheese, sesame, or poppy seeds on top if desired.
- Bake for 20-25 minutes, until puffed and deep golden brown. Cheese puffs should feel light and hollow when tapped.
- Let cool on the pan for 5 minutes before serving warm.
Notes
For best results, use freshly shredded cheese and real butter. You can customize with different cheeses, herbs, or spices. Freeze unbaked puffs for easy party prep. Bake one tray at a time for best rise. Cheese puffs are best served warm but can be reheated in the oven. For gluten-free, use a cup-for-cup blend; for dairy-free, use plant-based butter and cheese.
Nutrition
- Serving Size: 1 cheese puff
- Calories: 60
- Fat: 4
- Carbohydrates: 3
- Protein: 2
Keywords: cheese puffs, gougères, party snacks, easy appetizer, homemade, savory baking, gluten-free option, cheddar, Gruyère, finger food


