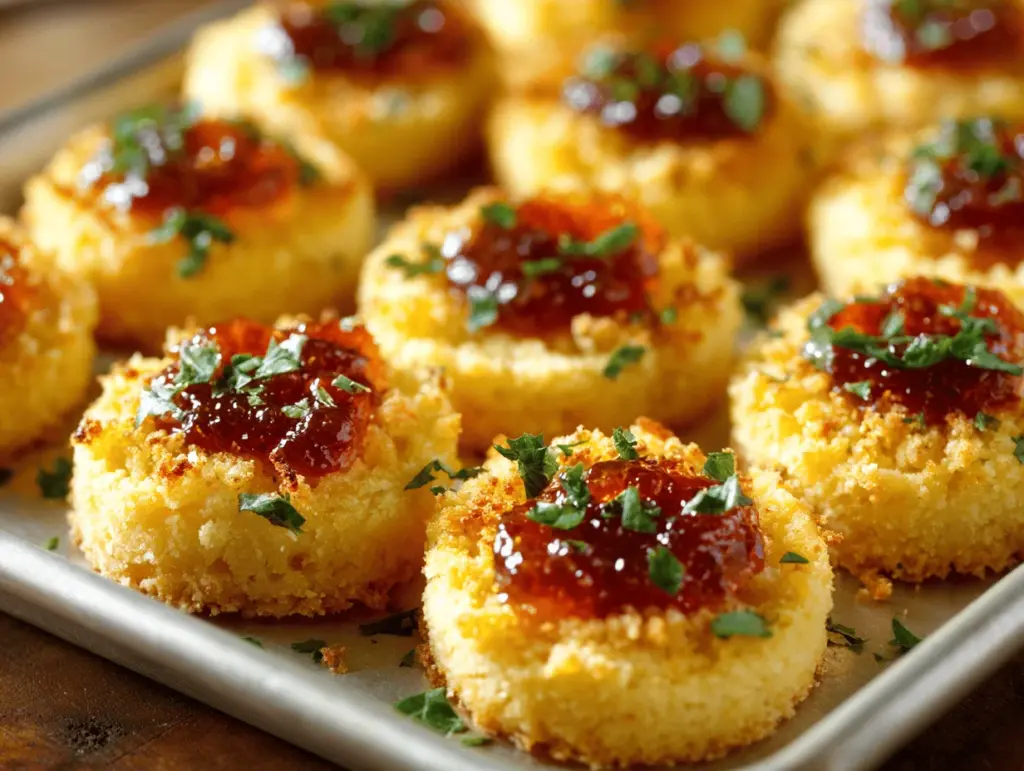
The first time I pulled a tray of these cheesy thumbprint appetizers out of the oven, the smell alone nearly caused a stampede to my kitchen. Buttery, golden, and bubbling with cheese, each little bite is finished with a glossy dollop of hot pepper jelly—sweet, spicy, and just a tad mysterious. I’ll be honest, these have become my secret party weapon. Every time I bring a plate of these easy hot pepper jelly bites to a get-together, they vanish in minutes. People beg for the recipe, and I never have leftovers to bring home. There’s something just magical about the way the cheese melts into the crumbly dough, then gets a pop of heat and sweetness from the jelly on top.
My love affair with cheesy thumbprint appetizers started thanks to my grandma’s old cheese straw recipe, which I tweaked after one fateful holiday when I ran out of crackers and decided to get creative. The idea to fill the thumbprint with hot pepper jelly? That was a total lightbulb moment—trust me, it’s the best twist you’ll ever taste. These little bites are perfect for any party, game night, or even just a snack when you want something that feels a little bit special. They’re made from simple ingredients you probably already have, and you can whip up a batch in under an hour. Whether you’re a seasoned cook or just want to impress your friends, this cheesy thumbprint appetizer recipe is about to become a staple in your kitchen. I’ve tweaked, tested, and taste-tested (a lot!) to get them just right, so you know they’re going to be good.
Why You’ll Love This Cheesy Thumbprint Appetizers Recipe
- Quick & Easy: These cheesy thumbprint appetizers come together in less than 45 minutes, which is basically a lifesaver when guests are on their way and you want something homemade but not fussy.
- Simple Ingredients: You don’t need anything fancy—just cheese, butter, flour, and a jar of hot pepper jelly. Most of this stuff is probably already lurking in your fridge or pantry.
- Perfect for Any Occasion: These are crowd-pleasers at holiday parties, potlucks, tailgates, or even as a pre-dinner nibble. I’ve even made them for movie nights at home because, why not?
- Crowd-Pleaser: I have yet to meet anyone who doesn’t reach for seconds. Kids love the cheesy base, adults go nuts for the spicy-sweet jelly combo.
- Unbelievably Delicious: The way the buttery, crumbly dough hugs the gooey cheese and holds that little well of spicy jelly? Honestly, you’ll want to eat them straight from the oven.
What really sets this cheesy thumbprint appetizer recipe apart is how the dough stays tender and rich, while the cheese gets that perfectly melty pull and the pepper jelly adds just the right zing. I blend sharp cheddar with a bit of cream cheese for that classic Southern flavor, then use my thumb (or the back of a spoon) to make a perfect little well for the jelly. It’s simple, but it feels like a mini work of art on your appetizer tray. The best part? You can totally play around with the cheese and jelly combos, making them your own. If you want a recipe that makes you look like a kitchen genius but is secretly super easy, these cheesy thumbprint appetizers with hot pepper jelly will be your new go-to. Seriously, I’ve made them with kids, for picky eaters, and even for gluten-free friends (with the right flour swap)—they always deliver.
What Ingredients You Will Need
This recipe uses simple, wholesome ingredients to deliver bold flavor and satisfying texture without the fuss. You can find everything at your local grocery store, and most of it might already be in your kitchen. Here’s what you need for cheesy thumbprint appetizers with hot pepper jelly:
- For the Dough:
- 1 cup (225 g) unsalted butter, at room temperature (adds rich, buttery flavor and helps dough hold together)
- 2 cups (250 g) all-purpose flour (regular or a good 1:1 gluten-free blend if needed)
- 1/2 teaspoon kosher salt (balances the cheese and jelly sweetness)
- 1/8 teaspoon cayenne pepper (optional, but gives a nice subtle kick)
- For the Cheesy Filling:
- 2 cups (200 g) sharp cheddar cheese, shredded (I love Tillamook or Cabot for bold flavor—pre-shredded is fine, but shredding your own melts better!)
- 4 ounces (113 g) cream cheese, softened (makes the filling extra creamy and helps it stick together)
- For the Topping:
- Hot pepper jelly (about 1/2 cup or 120 g; I use Braswell’s or Stonewall Kitchen, but any brand works—choose mild or spicy depending on your crowd)
Ingredient Tips & Substitutions:
- If you’re dairy-free, swap in plant-based butter and your favorite vegan cheddar and cream cheese (Miyoko’s is great).
- For a twist, try smoked gouda or pepper jack cheese in place of cheddar, or use a mix for extra oomph.
- If you can’t find hot pepper jelly, use red pepper jelly or even a spicy apricot or mango jam.
- Want to make it gluten-free? Use a 1:1 gluten-free flour blend—Bob’s Red Mill or King Arthur’s work well.
- Out of cream cheese? Greek yogurt or ricotta will work in a pinch, though the texture will be a bit different.
Honestly, once you see how flexible this cheesy thumbprint appetizer recipe is, you’ll start dreaming up all kinds of flavor combos. That’s half the fun, right?
Equipment Needed
You don’t need a fancy kitchen to make cheesy thumbprint appetizers with hot pepper jelly—just a few basics and maybe one or two handy extras:
- Mixing Bowls: One large for the dough, one medium for the cheese filling. Stainless steel or glass both work fine.
- Hand Mixer or Stand Mixer: A stand mixer makes creaming the butter easy, but a good old-fashioned wooden spoon and some elbow grease will do the trick.
- Baking Sheet: I use a rimmed sheet lined with parchment paper for easy cleanup. If you don’t have parchment, just lightly grease with butter or nonstick spray.
- Measuring Cups & Spoons: For accuracy, especially with flour and butter. If you have a kitchen scale, even better!
- Small Cookie Scoop (Optional): Makes it super easy to portion out even-sized dough balls. A tablespoon works, too.
- Your Thumb (or a Small Spoon): For pressing the wells into the dough for the jelly.
- Wire Cooling Rack: Not strictly necessary, but helps keep the bottoms crisp as they cool.
If you’re on a tight budget, skip the fancy gadgets. I’ve made these with just a bowl, spoon, and my own two hands plenty of times. Just be sure to keep your tools clean—cheese can get sticky! And if you use a nonstick baking mat, give it a quick wipe between batches so nothing burns on.
How to Make Cheesy Thumbprint Appetizers with Hot Pepper Jelly

-
Preheat the Oven:
Preheat your oven to 350°F (175°C). Line a baking sheet with parchment paper or lightly grease it. This step makes cleanup so much easier and helps prevent sticking. -
Cream the Butter:
In a large mixing bowl, beat 1 cup (225 g) unsalted butter with a hand mixer or stand mixer until smooth and fluffy—about 2-3 minutes. If the butter isn’t soft enough, give it a few seconds in the microwave (but don’t melt it!). -
Mix in Dry Ingredients:
Add 2 cups (250 g) all-purpose flour, 1/2 teaspoon kosher salt, and 1/8 teaspoon cayenne pepper if using. Mix on low speed just until a soft dough forms. The dough will seem crumbly at first, but keep mixing—trust the process! -
Prepare the Cheese Filling:
In a separate bowl, combine 2 cups (200 g) shredded sharp cheddar cheese and 4 ounces (113 g) softened cream cheese. Mix until smooth and evenly blended. You can do this by hand or with a mixer. The mixture should hold together when pinched. -
Shape the Dough:
Scoop out tablespoon-sized portions of dough (about 20 g each) and roll into balls. Place them 1 inch (2.5 cm) apart on the prepared baking sheet. If the dough feels sticky, dust your hands lightly with flour. -
Make the Thumbprints:
Use your thumb or the back of a small spoon to gently press a well into the center of each dough ball. Don’t press all the way through—just deep enough to hold a generous teaspoon of cheese filling. -
Fill with Cheese:
Scoop about 1 teaspoon of the cheese mixture into each well, pressing it in gently so it doesn’t spill out during baking. If you have extra cheese, go ahead and mound it up a bit—no one’s complaining! -
Bake:
Bake in the preheated oven for 18-22 minutes, or until the bottoms are golden and the cheese is bubbly. Rotate the tray halfway through if your oven bakes unevenly. You’ll know they’re done when the edges are lightly browned and your kitchen smells amazing. -
Add the Hot Pepper Jelly:
Remove the appetizers from the oven. While still warm, use a small spoon to add about 1/2 teaspoon hot pepper jelly to the top of each one. The heat helps the jelly melt slightly into the cheese—perfection! -
Cool and Serve:
Let the appetizers cool on the baking sheet for 5 minutes, then transfer to a wire rack. Serve warm or at room temperature.
Troubleshooting & Tips:
- If your dough is too dry, add a splash of milk (1 tablespoon at a time) until it comes together.
- If the cheese filling slides off, make the wells a bit deeper and press the cheese in gently.
- Dough spreading too much? Chill the shaped dough balls for 10 minutes before baking.
Don’t forget to taste-test one while they’re still warm. Honestly, that’s the baker’s reward!
Cooking Tips & Techniques for Success
- Don’t Overwork the Dough: Mix just until combined—overmixing can make the bites tough. If you’re using a mixer, keep it on low and stop when the dough holds together.
- Shred Your Own Cheese: I know, it’s tempting to grab pre-shredded, but freshly shredded cheese melts better and has more flavor. Bagged cheese has extra starch and can make the filling a bit dry.
- Chill if Needed: If your kitchen is warm or your dough feels sticky, pop the dough balls in the fridge for 10-15 minutes before shaping. This helps them keep their shape and not spread out too much.
- Make Uniform Wells: Try to press similar-sized wells so the cheese and jelly don’t overflow. If you find your thumb is too big (I have this problem!), use the back of a measuring spoon.
- Watch for Browning: Ovens can be unpredictable, so check your appetizers at the 18-minute mark. The bottoms should be lightly golden, not too dark.
- Rotate the Pan: For even baking, rotate your baking sheet halfway through. I learned this the hard way after a few too many uneven batches.
- Jelly Goes on Warm: Add the hot pepper jelly right after baking. It melts just a bit into the cheese for that perfect gooey bite.
One time, I forgot to chill my dough and ended up with little cheesy pancakes. Still tasty, but not as cute! Also, don’t skimp on the jelly—it really brings everything together. If you’re multitasking (like prepping other apps), you can make the dough and cheese filling ahead of time and assemble right before baking. That way, you’re never scrambling at the last minute. Consistency really comes down to using room temperature ingredients and measuring carefully—trust me, it makes a difference!
Variations & Adaptations
- Gluten-Free Version: Swap the all-purpose flour for a 1:1 gluten-free flour blend. I’ve had great results with King Arthur’s Measure for Measure. The texture holds up, and your gluten-free friends will be so grateful!
- Spicy Jalapeño Cheesy Thumbprints: Use pepper jack cheese and add a teaspoon of finely chopped pickled jalapeños to the cheese filling. Top with extra hot pepper jelly for a double kick.
- Sweet & Savory Holiday Version: Try swapping the hot pepper jelly for cranberry or fig preserves around the holidays. It’s a little more subtle on the heat, but still has that addictive sweet-savory thing going on.
- Dairy-Free Adaptation: Use plant-based butter and your favorite vegan cheese and cream cheese. I’ve made these for a friend with a dairy allergy, and honestly, they still disappeared in a flash.
- Different Cooking Methods: If you don’t want to turn on the oven, try making them in a countertop convection oven or air fryer—just reduce the baking time and check for golden edges after 10-12 minutes.
One of my favorite personal tweaks is to add a pinch of smoked paprika to the dough for a subtle smoky flavor, or to use a combo of cheddar and gouda for extra richness. Don’t be afraid to play around—these are super forgiving, and you might just stumble onto your own signature version!
Serving & Storage Suggestions
These cheesy thumbprint appetizers with hot pepper jelly are at their best served warm, when the cheese is still gooey and the jelly is a little runny. Arrange them on a pretty platter and sprinkle with a bit of chopped chives or parsley for a pop of color—trust me, it makes them look extra fancy. If you’re serving at a party, pair with crisp white wine, sparkling cider, or a cold beer. They also play well alongside other snacks like roasted nuts, charcuterie, or a fresh veggie platter.
If you have leftovers (rare, but it could happen!), store them in an airtight container in the refrigerator for up to 3 days. To reheat, pop them in a 350°F (175°C) oven for 6-8 minutes, or until warmed through. You can also microwave them for 10-15 seconds, but the oven keeps the bottoms crisp. For longer storage, freeze the unbaked dough balls (without cheese or jelly) for up to a month; thaw, fill, and bake as usual. The flavors deepen overnight, making them even better the next day—so don’t worry about making them ahead for a party!
Nutritional Information & Benefits
Each cheesy thumbprint appetizer (based on a batch of 24) contains roughly 120 calories, 8g fat, 9g carbs, and 3g protein. Thanks to the cheese and cream cheese, they’re a good source of calcium and a little protein boost. Using whole wheat or gluten-free flour can increase the fiber content if you’d like. If you’re watching sodium, use unsalted butter and low-sodium cheese. Allergens include dairy and wheat, but you can make swaps for both if needed. While these aren’t health food per se, enjoying them in moderation is pure joy—and sometimes that’s just as important for wellness. I love that these can fit into a balanced snack plate, especially when paired with veggies or fruit on the side.
Conclusion
If you’re looking for an appetizer that’s easy, impressive, and totally addictive, this cheesy thumbprint appetizer recipe with hot pepper jelly is it. I come back to this one time and again because it’s fuss-free, flexible, and always wins rave reviews. You can tweak the cheese, play with the jelly, or go gluten-free—whatever works for you. I love how these little bites turn any gathering into something special, and they’ve become a family tradition in my house.
Give them a try, and don’t be shy about putting your own spin on them! If you make these, I’d love to hear how they turn out—drop a comment, share a photo, or let me know what flavor combos you tried. There’s nothing better than sharing good food and new ideas. Happy baking, and may your appetizers always be the first to disappear from the table!
Frequently Asked Questions
Can I make cheesy thumbprint appetizers ahead of time?
Yes! You can shape the dough balls and prepare the cheese filling a day in advance. Store them separately in the fridge, then assemble and bake fresh for best results. You can also freeze unbaked dough balls for up to a month.
What’s the best cheese to use?
Sharp cheddar is classic and gives great flavor, but feel free to experiment with gouda, pepper jack, or a blend. Freshly shredded cheese melts best and has the boldest taste.
Can I use store-bought hot pepper jelly?
Absolutely—store-bought hot pepper jelly works just fine. If you want to make your own, go for it! Try different flavors like red pepper jelly, spicy apricot, or even jalapeño jelly.
How do I keep the cheese filling from overflowing?
Make sure to create a deep enough well in the dough and press the cheese filling in gently. Chilling the shaped dough before baking also helps the filling stay put.
Can these be made gluten-free or dairy-free?
Yes! Just use a 1:1 gluten-free all-purpose flour blend for a gluten-free version. For dairy-free, swap in plant-based butter, dairy-free cheese, and vegan cream cheese. They’ll still taste amazing!
Pin This Recipe!

Cheesy Thumbprint Appetizers – Easy Hot Pepper Jelly Bites

Buttery, golden, and bubbling with cheese, these thumbprint appetizers are finished with a glossy dollop of hot pepper jelly for a sweet and spicy bite. Perfect for parties, game nights, or anytime you want a crowd-pleasing snack that comes together in under an hour.
- Prep Time: 20 minutes
- Cook Time: 20 minutes
- Total Time: 40 minutes
- Yield: 24 appetizers 1x
- Category: Appetizer
- Cuisine: American
Ingredients
- 1 cup (225 g) unsalted butter, at room temperature
- 2 cups (250 g) all-purpose flour (or 1:1 gluten-free blend)
- 1/2 teaspoon kosher salt
- 1/8 teaspoon cayenne pepper (optional)
- 2 cups (200 g) sharp cheddar cheese, shredded
- 4 ounces (113 g) cream cheese, softened
- 1/2 cup (120 g) hot pepper jelly
Instructions
- Preheat your oven to 350°F (175°C). Line a baking sheet with parchment paper or lightly grease it.
- In a large mixing bowl, beat the unsalted butter until smooth and fluffy, about 2-3 minutes.
- Add the flour, kosher salt, and cayenne pepper (if using). Mix on low speed just until a soft dough forms.
- In a separate bowl, combine the shredded cheddar cheese and softened cream cheese. Mix until smooth and evenly blended.
- Scoop out tablespoon-sized portions of dough and roll into balls. Place them 1 inch apart on the prepared baking sheet.
- Use your thumb or the back of a small spoon to gently press a well into the center of each dough ball.
- Scoop about 1 teaspoon of the cheese mixture into each well, pressing it in gently.
- Bake in the preheated oven for 18-22 minutes, or until the bottoms are golden and the cheese is bubbly. Rotate the tray halfway through baking.
- Remove from the oven. While still warm, use a small spoon to add about 1/2 teaspoon hot pepper jelly to the top of each appetizer.
- Let cool on the baking sheet for 5 minutes, then transfer to a wire rack. Serve warm or at room temperature.
Notes
For best results, use freshly shredded cheese for optimal melting. If dough is sticky, chill before shaping. You can substitute gluten-free flour or dairy-free alternatives as needed. Add the jelly while the appetizers are still warm for the best texture. Store leftovers in an airtight container in the fridge for up to 3 days; reheat in the oven for crispness.
Nutrition
- Serving Size: 1 appetizer
- Calories: 120
- Sugar: 2
- Sodium: 120
- Fat: 8
- Saturated Fat: 5
- Carbohydrates: 9
- Protein: 3
Keywords: cheesy thumbprint appetizers, hot pepper jelly bites, party appetizer, cheese bites, easy appetizer, holiday snack, finger food, southern appetizer, gluten-free option, vegetarian appetizer


