The first time I smelled freshly cooked red velvet marble waffles wafting through my kitchen, I knew breakfast would never be the same. The aroma—sweet, a little cocoa, a hint of vanilla—reminded me of birthday mornings and lazy Sunday brunches. You know that feeling when you want something special but don’t want to spend hours in the kitchen? That’s exactly how these red velvet marble waffles came to life. I was craving the classic taste of red velvet cake, but wanted it in a form that was quick, easy, and (let’s be honest) a little more fun for brunch. So, I started experimenting with marbling the batter, and the result was a breakfast treat that’s as stunning as it is scrumptious.
I’ve tested this recipe at least a dozen times—tweaking the cocoa, fiddling with the color, and swapping in different toppings. It’s been a hit every single time, especially with my kids (who love anything with swirls and color). These waffles aren’t just about the looks; they’re packed with flavor, have the perfect balance of crisp edges and fluffy insides, and still manage to taste like dessert for breakfast. If you’re someone who loves to impress at brunch, needs a crowd-pleaser for holiday mornings, or just wants an easy homemade treat, this red velvet marble waffles recipe is your new go-to.
And here’s a fun tidbit: red velvet cake has roots going back to the 1920s, but turning it into waffles? That’s a modern twist I’m proud to share. Whether you’re a seasoned home cook or just starting out, you’ll appreciate how simple (and Instagram-worthy!) these waffles are. Trust me, after one bite, you’ll want to make them part of your breakfast routine.
Why You’ll Love This Recipe
Let’s face it—breakfast can get boring. But these red velvet marble waffles? They’re anything but ordinary. Here’s why you’ll want to make this recipe again and again:
- Quick & Easy: Ready in under 30 minutes, perfect for busy mornings or when you’re craving something special without a fuss.
- Simple Ingredients: Everything is pantry-friendly. You don’t need to hunt for rare items or spend extra cash—just basic flour, cocoa, and a little food coloring.
- Perfect for Brunch: These waffles make any brunch table pop! I’ve served them at birthdays, holiday mornings, and weekend get-togethers. They always steal the show.
- Crowd-Pleaser: Kids go wild for the swirls, and adults love the subtle cocoa flavor. It’s family-approved and picky-eater friendly.
- Unbelievably Delicious: The combination of tender crumb, crispy edges, and that hint of chocolate? It’s like eating cake for breakfast (but with less guilt).
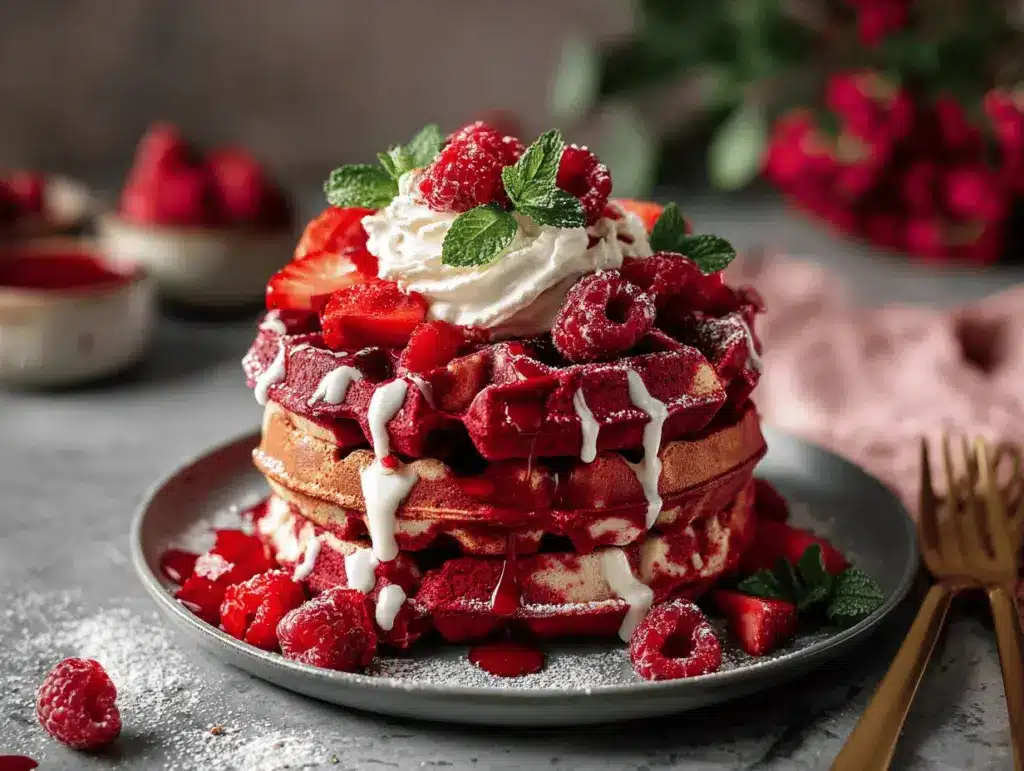
What really sets these red velvet marble waffles apart is the marbling technique. Instead of just mixing everything together, you create two batters—one classic and one red velvet—then swirl them in the waffle iron. The result is gorgeous, with beautiful streaks of red and vanilla that look almost too pretty to eat. But go on, dig in! The flavor is rich, with a hint of cocoa and a gentle sweetness that complements any topping, from whipped cream to fresh berries.
I’ve had my fair share of waffle recipes—some too dry, some too bland. This one hits the sweet spot: moist, flavorful, and visually stunning. It’s comfort food without the heaviness, and honestly, it’s so easy you’ll wonder why you haven’t tried it sooner. Whether you’re making breakfast for yourself, your family, or a whole bunch of friends, these waffles will make you look like a brunch rockstar (no fancy chef skills required!).
What Ingredients You Will Need
This red velvet marble waffles recipe uses straightforward, wholesome ingredients that deliver bold flavor and a show-stopping look. Most of them are probably already in your pantry, so no stressful grocery runs required. Here’s what you’ll need:
- For the Classic Waffle Batter:
- 2 cups (250g) all-purpose flour
- 2 tablespoons (25g) granulated sugar
- 2 teaspoons baking powder
- 1/2 teaspoon baking soda
- 1/2 teaspoon salt
- 2 large eggs (room temperature)
- 1 3/4 cups (420ml) buttermilk (or use milk + 1 tablespoon vinegar)
- 1/2 cup (115g) unsalted butter, melted and cooled slightly
- 1 teaspoon vanilla extract (I love Nielsen-Massey for intense flavor!)
- For the Red Velvet Batter:
- 1 cup (125g) of the prepared classic batter
- 2 tablespoons (12g) unsweetened cocoa powder (Dutch-process preferred)
- 1 tablespoon (15ml) red food coloring (liquid or gel—gel gives a deeper color)
- 1 teaspoon white vinegar (helps with color and tang)
- Optional: 2 tablespoons (30g) mini chocolate chips (for extra decadence)
- For Topping (Optional):
- Whipped cream or vanilla yogurt
- Fresh berries (strawberries, raspberries, blueberries)
- Powdered sugar (for a pretty dusting)
- Cream cheese glaze (mix 2 oz cream cheese, 2 tablespoons milk, and 2 tablespoons powdered sugar)
Ingredient Tips: If you’re out of buttermilk, just use regular milk with a splash of vinegar—works like a charm. For gluten-free, swap in a 1:1 gluten-free flour blend (Bob’s Red Mill is my go-to). Prefer natural food coloring? Beet powder gives a nice red hue without artificial dyes. And if you want to keep it dairy-free, you can use plant-based butter and milk; just note the texture will be a touch less rich.
Honestly, the cocoa makes all the difference—don’t skip it! I’ve tried this with regular cocoa and Dutch-process. The latter gives a deeper, more “red velvet” taste. If you want a lighter waffle, skip the chocolate chips. For more chocolate, go wild and add a handful. Make it your own!
Equipment Needed
- Waffle Maker: Any standard waffle iron works. I use a classic nonstick Belgian waffle maker. If you have a round or square model, either is fine—the marbling shines in both.
- Mixing Bowls: Two medium bowls (one for classic batter, one for red velvet batter).
- Whisk: For blending wet and dry ingredients. A balloon whisk does the trick for lump-free batter.
- Measuring Cups and Spoons: Accurate measurements mean perfect texture. I love my stainless steel set—easy to clean and lasts forever.
- Rubber Spatula: Helps fold in ingredients gently and scrape every bit of batter.
- Ladle or Ice Cream Scoop: For transferring batter to the waffle iron without making a mess.
- Cooling Rack: Keeps waffles crispy if you’re making a batch.
If you don’t own a waffle maker, a stovetop waffle pan works too—just watch the heat to avoid burning. For budget-friendly options, I’ve had great results with the Dash mini waffle maker (under $20!). Nonstick surfaces are a lifesaver; just remember to wipe down with a damp cloth after each use, and never use metal utensils inside the waffle iron to keep the coating pristine.
Preparation Method
- Prepare the Classic Batter:
In a large bowl, whisk together 2 cups (250g) flour, 2 tablespoons (25g) sugar, 2 teaspoons baking powder, 1/2 teaspoon baking soda, and 1/2 teaspoon salt. In a separate bowl, whisk 2 eggs, 1 3/4 cups (420ml) buttermilk, 1/2 cup (115g) melted butter, and 1 teaspoon vanilla. Pour wet ingredients into the dry and mix until just combined—don’t overmix! Batter should be thick, but pourable. Let it rest for 5 minutes while you prep the red velvet portion. - Make the Red Velvet Batter:
Take 1 cup (125g) of the classic batter and fold in 2 tablespoons (12g) unsweetened cocoa powder, 1 tablespoon (15ml) red food coloring, and 1 teaspoon white vinegar. Stir gently until the color is even. If using chocolate chips, fold them in now. Batter should be vibrant red and slightly thicker than the classic. - Preheat the Waffle Iron:
Set your waffle maker to medium-high (about 375°F/190°C). Spray or brush lightly with oil or butter to prevent sticking. If your iron takes a while to heat, start this step earlier. - Marble the Batters:
Using a ladle or scoop, pour half classic batter and half red velvet batter into the waffle iron. Swirl gently with a toothpick or knife for a marbled effect—don’t overdo it, or the colors will blend. (The first time I tried, I swirled too much and it turned pink. Lesson learned!) - Cook the Waffles:
Close the lid and cook for 4-5 minutes, until waffles are golden, crisp, and steam has slowed. Peek carefully—waffles should release easily. If sticking occurs, let them cook another minute. Repeat with remaining batter, alternating marble patterns for each waffle. - Serve Warm:
Transfer cooked waffles to a cooling rack so they stay crisp. Top with whipped cream, berries, or cream cheese glaze. If making ahead, keep them warm in a 200°F (93°C) oven while you finish the batch.
Troubleshooting: If your waffles come out soggy, the iron may not be hot enough. Always let the batter rest for a few minutes—this helps with fluffiness. And if you want deeper color, add a bit more food coloring or cocoa. The marbling takes practice; don’t stress if the first one isn’t perfect. Each waffle gets prettier, promise!
Personal Tip: I prep the batters the night before—cover and refrigerate. In the morning, just swirl and cook. Makes brunch a breeze!
Cooking Tips & Techniques
Getting the perfect red velvet marble waffles isn’t rocket science, but a few tricks make all the difference:
- Don’t Overmix: Mixing the batter too much can make waffles tough. Stir until just combined for a fluffy texture.
- Preheat Thoroughly: A hot waffle iron ensures crispy edges and easy release. I usually let mine heat for 5-10 minutes before starting.
- Swirl, Don’t Blend: The marbling effect comes from gentle swirling. If you mix too much, you lose those beautiful streaks. I learned this the hard way—one batch was just solid red!
- Batch Cooking Strategy: If you’re making a big batch, keep finished waffles on a rack in a warm oven. Avoid stacking them; it makes them soggy.
- Oil the Iron Sparingly: Too much oil can make waffles greasy. A light mist is plenty.
- Test for Doneness: Most waffle irons have a light or beep, but I check for steam slowing and a deep golden color. If you’re unsure, crack the waffle slightly with a fork—it should be crisp outside and soft inside.
Common mistake? Using cold ingredients. Room temperature eggs and buttermilk blend better and help waffles rise. I’ve also learned not to rush the marbling—take a moment to swirl with a toothpick for the prettiest pattern. If you’re multitasking (like making coffee while cooking), set a timer so you don’t burn a batch. Trust me, burnt waffles are a bummer!
For consistency, measure your batter for each waffle—about 1/2 cup (120ml) per standard iron. And if you’re making these for the first time, don’t worry if the first one looks a little funky. Practice makes perfect, and the taste is always top-notch!
Variations & Adaptations
Red velvet marble waffles are endlessly customizable. Here are a few favorite ideas:
- Gluten-Free: Use a 1:1 gluten-free flour blend in place of all-purpose. Bob’s Red Mill or King Arthur works beautifully—texture stays light and fluffy.
- Dairy-Free: Substitute plant-based milk and vegan butter. Almond milk (unsweetened) and Earth Balance are my go-tos. The waffles are a bit less rich, but still delicious.
- Chocolate Lovers: Add mini chocolate chips to the red velvet batter, or drizzle with chocolate sauce after cooking. My kids request this version for dessert!
- Seasonal Swaps: In spring, fold in strawberries or blueberries for a fruity twist. In winter, add a dash of cinnamon to the classic batter for warmth.
- Nut-Free: Make sure your cocoa and toppings are nut-free if serving to allergy-sensitive guests. Use sunflower seed butter as a topping for extra flavor.
I’ve also tried making these as “waffle sticks” for dipping—just slice cooked waffles into strips and serve with cream cheese dip. For a savory spin, skip the sugar and serve with bacon and eggs. The recipe is super forgiving, so don’t be afraid to play around. One time, I swapped in beet juice for color, and while the hue was lighter, the earthy flavor was surprisingly nice. That’s the magic—make it yours!
Serving & Storage Suggestions
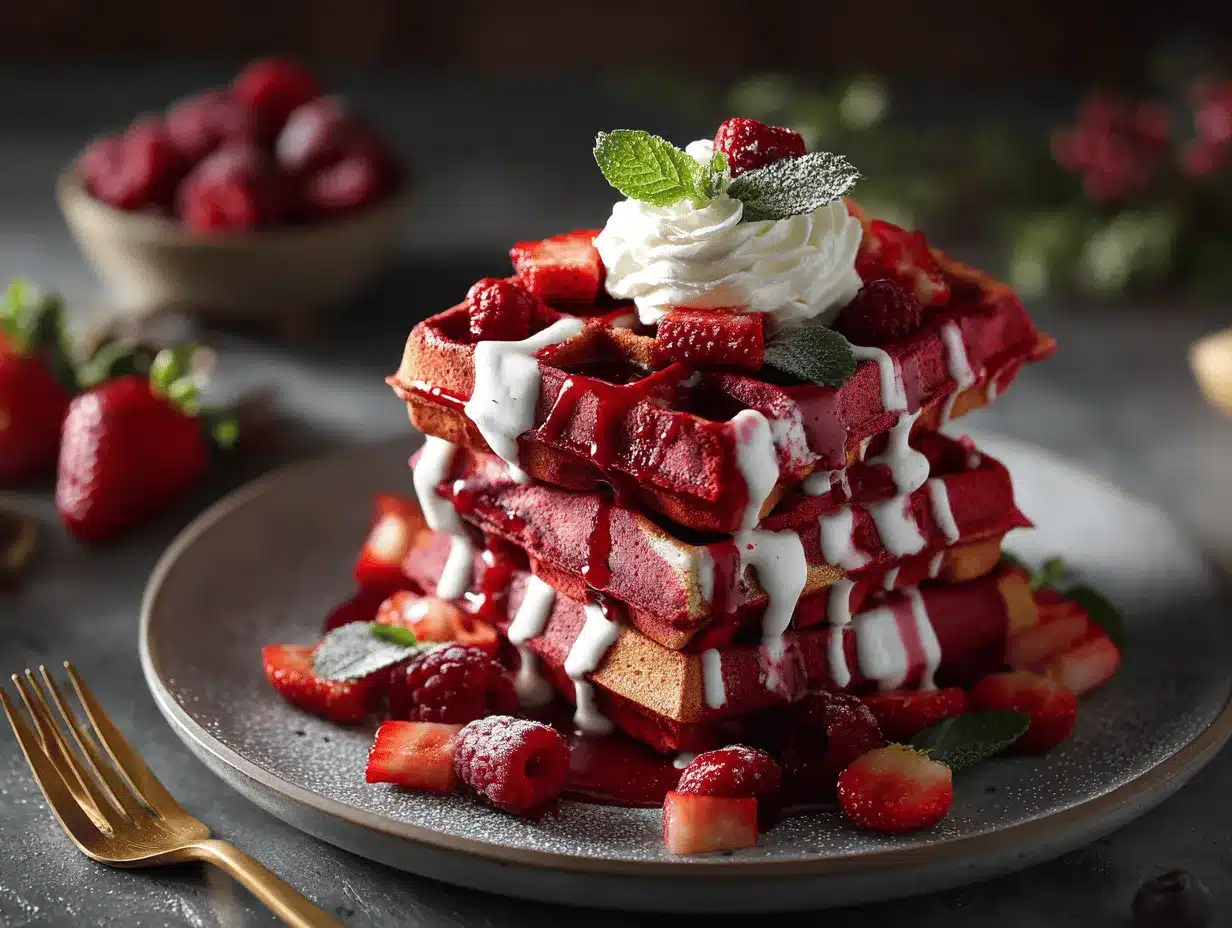
Red velvet marble waffles are best served warm, straight from the waffle iron. The crisp edges and tender inside are irresistible! I like to stack them on a pretty plate, dust with powdered sugar, and top with a dollop of whipped cream or vanilla yogurt. Fresh berries add a pop of color and tartness. For a classic brunch vibe, serve with orange juice or a sweet iced latte.
If you’re making waffles for a crowd, keep them warm in a low oven (200°F/93°C) on a cooling rack. This keeps them crisp until everyone’s ready to eat. Leftovers store well in an airtight container in the fridge for up to 3 days. To freeze, layer waffles between sheets of parchment, seal in a freezer bag, and store up to 2 months. Reheat in the toaster or oven—they’ll be almost as good as fresh.
Over time, the flavors deepen a bit (especially the cocoa). I sometimes make a double batch and freeze half for surprise breakfasts. You can even slice cold waffles and use them for ice cream sandwiches—trust me, it’s a treat worth trying!
Nutritional Information & Benefits
Each red velvet marble waffle (without toppings) clocks in at about 220 calories, with 8g fat, 32g carbs, and 6g protein. The buttermilk adds calcium and a little probiotic boost. Cocoa powder is rich in antioxidants and gives a gentle caffeine lift. Using whole milk or yogurt in the batter bumps up the protein and makes waffles more satisfying.
This recipe can easily fit a vegetarian diet and is adaptable for gluten-free or dairy-free needs. Nut allergies? Skip any nut toppings and double-check cocoa powder sourcing. If you’re watching sugar, you can reduce the amount or use a sugar substitute—just note the waffles may not crisp as much.
Honestly, I love that these waffles feel indulgent but aren’t heavy. They’re a good source of energy for busy mornings and make a cheerful addition to any breakfast spread.
Conclusion
If you’re looking for a breakfast treat that’s as beautiful as it is delicious, red velvet marble waffles are the answer. They’re quick, easy, and absolutely stunning on a brunch table. I love making these for special occasions (or just when I want to add a little color to the morning). The marbled pattern guarantees smiles, and the flavor—rich, tender, just a little chocolatey—wins over everyone.
Don’t be afraid to customize the recipe—add chocolate chips, swap in gluten-free flour, or play with toppings. The real joy is making it your own. Honestly, I never get tired of seeing the swirls come out of the iron. If you try this recipe, let me know how it went! Drop a comment with your favorite toppings, share your own adaptations, or tag me on social media so I can see your creations. Breakfast should be fun, and these waffles are proof that a little color goes a long way.
So…ready to marble up your morning? Grab your ingredients and get cooking—your brunch game just got a major upgrade!
FAQs
Can I make red velvet marble waffles without food coloring?
Yes! You can use beet powder or beet juice for a natural red hue. The color won’t be as bold, but the flavor is still great.
Can I freeze these waffles?
Absolutely. Let them cool, layer between parchment, and freeze in a bag. Reheat in the toaster or oven for best texture.
What’s the best way to get a perfect marble pattern?
Pour classic and red velvet batters side by side, then swirl gently with a toothpick. Don’t overmix, or the colors will blend.
Can I make these waffles gluten-free?
Yes! Use a 1:1 gluten-free flour blend. The texture stays light and fluffy—just check your batter for thickness and add a splash of milk if needed.
What toppings go best with red velvet marble waffles?
Whipped cream, vanilla yogurt, cream cheese glaze, and fresh berries are all fantastic. For dessert, add chocolate sauce or ice cream!
Pin This Recipe!

Red Velvet Marble Waffles

These stunning red velvet marble waffles combine the classic flavors of red velvet cake with crisp, fluffy waffles for a brunch treat that’s as beautiful as it is delicious. Quick to make and perfect for impressing guests or delighting kids, they’re a crowd-pleaser with a rich cocoa taste and gorgeous marbled swirls.
- Prep Time: 15 minutes
- Cook Time: 10 minutes
- Total Time: 25 minutes
- Yield: 6 waffles 1x
- Category: Breakfast
- Cuisine: American
Ingredients
- 2 cups (250g) all-purpose flour
- 2 tablespoons (25g) granulated sugar
- 2 teaspoons baking powder
- 1/2 teaspoon baking soda
- 1/2 teaspoon salt
- 2 large eggs, room temperature
- 1 3/4 cups (420ml) buttermilk (or milk + 1 tablespoon vinegar)
- 1/2 cup (115g) unsalted butter, melted and cooled slightly
- 1 teaspoon vanilla extract
- 1 cup (125g) prepared classic batter
- 2 tablespoons (12g) unsweetened cocoa powder (Dutch-process preferred)
- 1 tablespoon (15ml) red food coloring (liquid or gel)
- 1 teaspoon white vinegar
- Optional: 2 tablespoons (30g) mini chocolate chips
- Optional toppings: whipped cream or vanilla yogurt
- Optional toppings: fresh berries (strawberries, raspberries, blueberries)
- Optional toppings: powdered sugar
- Optional: cream cheese glaze (2 oz cream cheese, 2 tablespoons milk, 2 tablespoons powdered sugar)
Instructions
- In a large bowl, whisk together flour, sugar, baking powder, baking soda, and salt.
- In a separate bowl, whisk eggs, buttermilk, melted butter, and vanilla extract.
- Pour wet ingredients into dry ingredients and mix until just combined. Batter should be thick but pourable. Let rest for 5 minutes.
- For the red velvet batter, take 1 cup of the classic batter and fold in cocoa powder, red food coloring, and white vinegar. Stir gently until evenly colored. Fold in chocolate chips if using.
- Preheat waffle iron to medium-high (about 375°F/190°C) and lightly grease.
- Pour half classic batter and half red velvet batter into the waffle iron. Swirl gently with a toothpick or knife for a marbled effect.
- Close lid and cook for 4-5 minutes, until waffles are golden, crisp, and steam has slowed. Repeat with remaining batter.
- Transfer cooked waffles to a cooling rack to keep them crisp.
- Serve warm with whipped cream, berries, powdered sugar, or cream cheese glaze.
Notes
For gluten-free, use a 1:1 gluten-free flour blend. For dairy-free, substitute plant-based milk and butter. Beet powder or juice can be used for natural coloring. Let batter rest for fluffier waffles. Marbling takes practice—swirl gently for best results. Waffles can be made ahead and kept warm in a low oven or frozen for later.
Nutrition
- Serving Size: 1 waffle
- Calories: 220
- Sugar: 7
- Sodium: 340
- Fat: 8
- Saturated Fat: 5
- Carbohydrates: 32
- Fiber: 1
- Protein: 6
Keywords: red velvet waffles, marble waffles, brunch, breakfast, easy waffles, homemade waffles, cocoa waffles, kid-friendly, vegetarian, crowd-pleaser


