Introduction
There’s something about the first chilly snap of fall or the full-on heat of summer that just makes me crave a dessert that’s both soul-soothing and ridiculously easy. Imagine a dessert so creamy and rich, with layers of peanut butter, chocolate, and whipped bliss, that you honestly forget it never even touched the oven. That’s what no-bake peanut butter lasagna is to me—pure, spoonful-after-spoonful comfort.
I first stumbled across the idea for this creamy layered dessert at a family picnic, you know, the kind where every aunt brings her signature treat. My cousin’s wife (shoutout to Lisa!) brought a “peanut butter lasagna” and I had to laugh at the name. I mean, lasagna for dessert? But one bite in, I was hooked. Since then, I’ve tinkered with the recipe, making it smoother, a little lighter, and honestly, more peanut buttery than ever.
The best part? This no-bake peanut butter lasagna is ridiculously simple. No oven, no fuss, and you don’t even have to wait for it to cool down. It’s perfect for when you want something impressive but don’t want to break a sweat. Plus, it’s a hit with everyone—kids, peanut butter lovers, chocolate fans, even that friend who’s always “not really a dessert person.” After making this at least a dozen times, I can say with confidence that this is the one you’ll come back to for birthdays, holidays, or just because dessert is always a good idea. So, let’s talk creamy layers, easy steps, and the magic of peanut butter lasagna.
Why You’ll Love This Recipe
If you love peanut butter, chocolate, and decadent desserts that come together without turning on the oven, this no-bake peanut butter lasagna will absolutely win you over. Here’s why it’s become a staple in my dessert rotation (and why my friends always ask for the recipe):
- Quick & Easy: This dessert comes together in around 25 minutes, plus a little chill time. Perfect for busy weeknights, last-minute guests, or when you just need a treat—fast.
- Simple Ingredients: No weird specialty items here. Most of these ingredients are pantry staples, and you can find everything at a regular grocery store.
- Perfect for Any Occasion: Whether it’s a backyard BBQ, potluck, holiday dinner, or just a Tuesday night, this creamy layered dessert fits right in.
- Crowd-Pleaser: I’ve made this for picky kids and peanut butter-averse adults, and it always disappears first. Everyone loves the flavor combo!
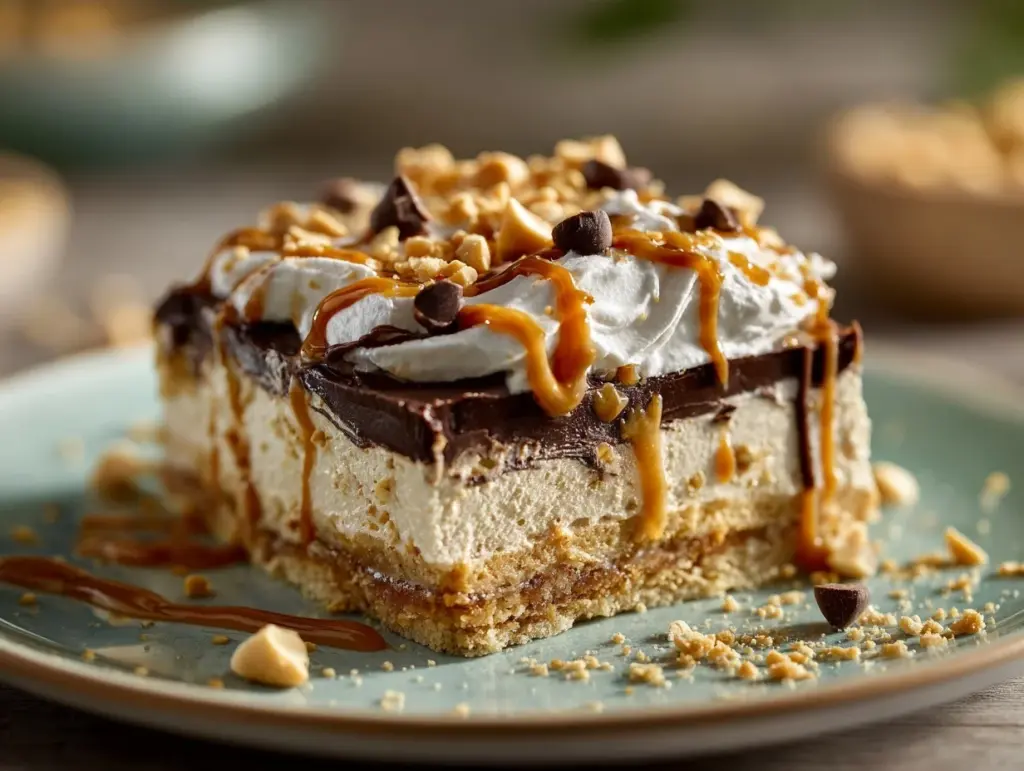
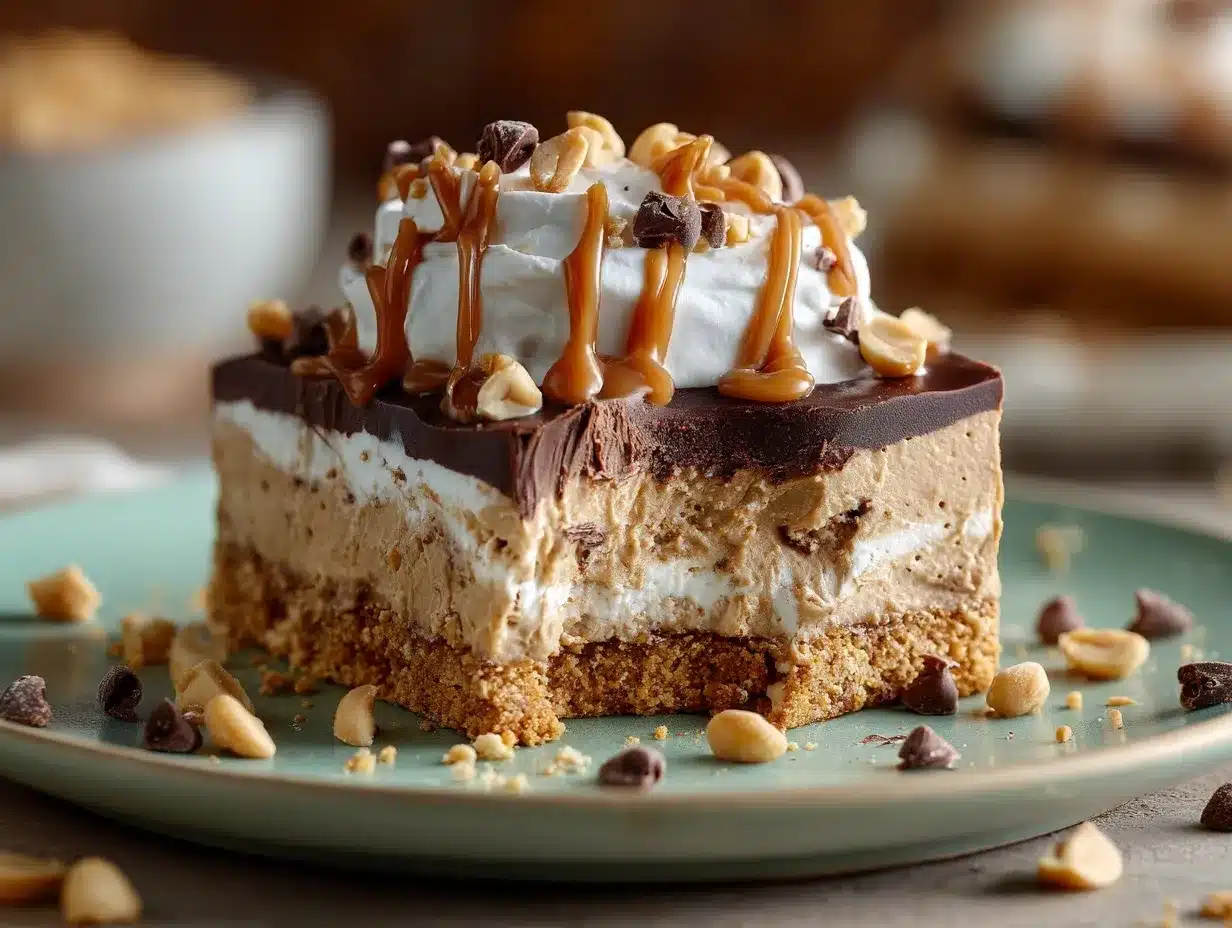
- Unbelievably Delicious: The layers of cookie crust, fluffy peanut butter, creamy pudding, and whipped topping are downright dreamy. It’s comfort food in dessert form.
What makes this no-bake peanut butter lasagna different? For starters, I use a blend of creamy and chunky peanut butter for texture. Plus, blending the peanut butter layer until it’s super smooth means each bite is melt-in-your-mouth perfection. The chocolate pudding layer is thick and rich, and I finish it with a generous sprinkle of crushed cookies and mini chocolate chips for a bit of crunch. This isn’t just another no-bake dessert—it’s the one that makes you close your eyes and savor every spoonful.
Whether you want something easy for a summer get-together or a cozy treat for movie night, this recipe brings the wow factor without the stress. Give it a try, and you’ll see why it’s become my go-to for just about every dessert emergency!
What Ingredients You Will Need
This no-bake peanut butter lasagna leans on simple, classic ingredients that work together to build layers of creamy, dreamy goodness. You won’t need anything fancy, but each element brings something delicious to the party.
-
For the Crust:
- 36 chocolate sandwich cookies (like Oreos), crushed (for that classic, chocolatey base)
- 6 tablespoons (85g) unsalted butter, melted (holds the crust together)
-
For the Peanut Butter Layer:
- 8 ounces (225g) cream cheese, softened (I love Philadelphia for the smoothest texture)
- 1 cup (250g) creamy peanut butter (classic Jif or Skippy work great)
- 1/4 cup (60g) chunky peanut butter (optional, for texture)
- 1 cup (120g) powdered sugar (adds sweetness and smoothness)
- 1 cup (240ml) heavy whipping cream (whips up the fluffiest layer)
- 1 teaspoon vanilla extract (for depth of flavor)
-
For the Chocolate Pudding Layer:
- 1 package (3.9 oz / 110g) instant chocolate pudding mix (classic or dark chocolate)
- 2 cups (480ml) cold whole milk (for richness; you can use 2% if preferred)
-
For the Topping:
- 1 ½ cups (about 180g) whipped topping (like Cool Whip, thawed; you can use homemade whipped cream if you like)
- 1/2 cup (60g) chopped peanuts (for crunch, optional)
- 1/4 cup (40g) mini chocolate chips (optional, but so good for extra chocolatey bites)
- Extra crushed chocolate cookies (for garnish, optional)
Most of these are easy to swap around. Don’t have chocolate sandwich cookies? Graham crackers or vanilla wafers work in a pinch (the flavor will change but it’s still tasty). Need it gluten-free? Look for gluten-free sandwich cookies and verify your pudding mix. Dairy-free? Use vegan cream cheese, coconut whipped topping, and a plant-based milk. I’ve even done a “healthier” version with natural peanut butter and lower sugar pudding—just keep in mind the texture may be a bit looser.
I like to use brands I trust—Philadelphia for cream cheese (always smooth), Jif for peanut butter, and Ghirardelli for chocolate chips. But honestly, use what you have! The best part about this recipe is how forgiving it is.
Equipment Needed
- 9×13-inch (23x33cm) glass or metal baking dish (for easy layering and serving)
- Mixing bowls (at least two medium or one large, one small)
- Hand mixer or stand mixer (makes creaming the peanut butter layer a breeze; a sturdy whisk works if you’re up for an arm workout)
- Rubber spatula (for smooth spreading and scraping every last bit!)
- Measuring cups and spoons (accuracy counts here, especially for the creamy layers)
- Rolling pin or food processor (for crushing cookies; a heavy mug works too in a pinch)
- Plastic wrap or foil (to cover while chilling)
I’ve made this with both glass and metal pans—glass lets you see the pretty layers but metal chills a bit faster. If you don’t have a hand mixer, a good old-fashioned wooden spoon will do, though your peanut butter layer might be a little less fluffy (nothing wrong with that). For crushing cookies, a food processor is quick, but honestly, tossing them in a zip-top bag and whacking them with a rolling pin is therapeutic. If you’re short on specialty tools, don’t stress—just adapt!
Pro tip: keep your hand mixer’s beaters clean between layers. If you only have one mixing bowl, just give it a quick rinse between steps—no need for perfection, just keep the flavors pure.
Preparation Method
-
Prepare the Crust:
Crush 36 chocolate sandwich cookies (about 3 cups/300g) into fine crumbs. I toss mine in a food processor for quick work, but a zip-top bag and rolling pin totally works. Mix the cookie crumbs with 6 tablespoons (85g) melted unsalted butter until everything looks like wet sand. Press evenly into the bottom of a 9×13-inch (23x33cm) pan. Tip: Use the bottom of a measuring cup to really pack it in. Chill in the fridge while you prep the next layer (about 10 minutes). -
Make the Peanut Butter Layer:
In a large bowl, beat 8 ounces (225g) softened cream cheese until smooth. Add 1 cup (250g) creamy peanut butter, 1/4 cup (60g) chunky peanut butter (if using), and 1 cup (120g) powdered sugar. Beat until light and fluffy, about 1-2 minutes. Pour in 1 cup (240ml) heavy whipping cream and 1 teaspoon vanilla extract. Beat until the mixture thickens and looks silky—don’t overmix, but make sure it’s spreadable. If it looks too stiff, add a splash more cream. -
Spread the Peanut Butter Layer:
Scoop the peanut butter mixture over your chilled crust. Use a spatula to spread it evenly all the way to the edges. Try to keep it level so your next layer sits nicely. Pop the pan back in the fridge while you whip up the pudding (about 5 minutes). -
Mix the Chocolate Pudding Layer:
In a clean bowl, whisk together 1 package (3.9 oz / 110g) instant chocolate pudding mix and 2 cups (480ml) cold milk. Whisk for 2-3 minutes until thickened (it should be like soft mousse). Let it sit for another minute to finish setting up. -
Layer the Chocolate Pudding:
Carefully spoon the pudding over the peanut butter layer. Spread gently with a spatula so you don’t disturb the layers. Try not to rush—if you go too fast, the layers might swirl together, which honestly still tastes great but looks a little messy. -
Spread the Whipped Topping:
Dollop 1 ½ cups (about 180g) whipped topping (or homemade whipped cream) over the pudding layer. Use your spatula to spread it evenly, covering the entire surface. Make little swoops for a pretty finish if you’re feeling fancy. -
Garnish and Chill:
Sprinkle the top with 1/2 cup (60g) chopped peanuts, 1/4 cup (40g) mini chocolate chips, and extra crushed cookies if you like. Cover the pan with plastic wrap or foil and chill for at least 4 hours (overnight is even better). This helps the layers set up and makes slicing a breeze. -
Serve:
Cut into squares using a sharp knife (wipe it between cuts for tidy pieces). Serve cold, and listen for the “mmms” and “wows.”
Troubleshooting: If your cream cheese isn’t soft enough, your peanut butter layer might look lumpy—just keep mixing, or let it sit at room temp for a bit. If your crust feels too crumbly, add another tablespoon of melted butter. Layers swirling together? Next time, chill each layer for 10 minutes before adding the next.
Personal tip: Make this early in the day or the night before. The flavors somehow get even better after a good long chill!
Cooking Tips & Techniques
- Softening Cream Cheese: Don’t rush this step; if you try to mix cold cream cheese, it’ll get lumpy. I leave mine on the counter for an hour—works every time.
- Chilling Time Matters: The longer you let your peanut butter lasagna chill, the firmer the slices. Four hours minimum, but overnight is magic. I once tried to rush it with just two hours and wound up with a delicious (but messy) spoon dessert.
- Layering Technique: Spread each layer right to the edges of the pan, pressing gently. If your spatula sticks, dip it in warm water first.
- Whipped Cream Consistency: If you make homemade whipped cream, don’t overwhip—it should be soft and billowy, not stiff.
- Cookie Crust Tips: If you’re using a food processor, pulse the cookies in short bursts to avoid turning them into dust. If the crust mixture seems dry, add a bit more melted butter.
I’ve learned (the hard way) that letting each layer chill for a few minutes before adding the next keeps the layers sharp and pretty. If you’re multitasking (like I always am), just set timers for each step—trust me, it helps! And if you make any swaps (like almond milk for dairy milk), keep in mind your pudding might set up softer.
Consistency is key: measure your ingredients, use a spatula to scrape every bit out of the bowls, and don’t be afraid to get a little messy. The best desserts are made with a little love and a lot of taste tests along the way!
Variations & Adaptations
- Gluten-Free Version: Swap in gluten-free chocolate sandwich cookies for the crust and double-check your pudding mix for hidden gluten. Everything else stays the same.
- Dairy-Free Twist: Use vegan cream cheese, coconut whipped topping, and your favorite plant-based milk for the pudding. I’ve tried this with almond milk and coconut cream, and it’s still creamy and delicious.
- Extra Chocolatey: Mix mini chocolate chips right into the peanut butter layer or use dark chocolate pudding for a richer flavor.
- Nut-Free Option: Swap peanut butter for sunflower seed butter and skip the chopped peanuts on top. Make sure your cookies and toppings are nut-free too.
- Seasonal Fun: Add a layer of sliced bananas or strawberries between the peanut butter and pudding for a fruity twist, or sprinkle crushed toffee bits on top for crunch.
One of my favorite personal tweaks? Swapping half the peanut butter for almond butter and adding a pinch of sea salt on top. It’s slightly less sweet and brings out all the nutty notes. Don’t be afraid to experiment—this recipe is super forgiving!
Serving & Storage Suggestions
No-bake peanut butter lasagna is best served chilled, straight from the fridge. The layers stay firm, the flavors meld, and every bite is cool and refreshing. I like to slice it into generous squares and use a thin spatula for lifting—presentation matters when those layers look so pretty!
Pair it with an icy glass of milk or a hot cup of coffee for a classic combo. For parties, sprinkle extra mini chocolate chips or drizzle a little chocolate syrup on each piece for pizzazz. Honestly, it’s just as good eaten straight from the pan with a fork (no judgment).
For leftovers (if you have any!), cover the pan tightly with plastic wrap or foil and keep in the fridge for up to 4 days. The crust may soften a bit over time, but the flavors get even better. To freeze, slice portions and wrap them individually—defrost in the fridge overnight before serving. Reheating isn’t necessary, but if you want a slightly softer texture, let a slice sit at room temp for 10-15 minutes before digging in.
Note: The whipped topping can pick up fridge odors, so keep it covered. I find the dessert tastes even more peanut buttery after a day or two, so go ahead and make it ahead!
Nutritional Information & Benefits
A typical serving (1/12th of the pan) of this no-bake peanut butter lasagna has around 350-400 calories, 24g fat, 35g carbs, and 6g protein. There’s a good dose of protein and healthy fats from the peanut butter, plus calcium from the dairy layers. If you use lower sugar pudding or a lighter whipped topping, you can shave off a few calories and grams of sugar.
This dessert is naturally vegetarian, and with a few easy swaps, you can make it gluten-free or dairy-free. Key allergens are peanuts, dairy, and gluten (if not using gluten-free cookies). If you’re watching your sugar intake, consider using a sugar-free pudding mix and sugar substitute in the peanut butter layer.
Personally, I love that this recipe satisfies my peanut butter cravings and gives a little energy boost from the protein—hey, it’s not breakfast, but I’m not judging if you sneak a slice in the morning!
Conclusion
If you’re looking for a show-stopping dessert with zero oven time, this no-bake peanut butter lasagna is the answer. Creamy, chocolatey, peanut buttery layers come together easily, making every bite a little celebration. It’s perfect for busy days, potlucks, and every sweet craving in between.
Feel free to tweak it with your favorite nut butters, toppings, or a gluten-free twist—this recipe is all about making it your own. I love how it brings people together (and how there’s never any left after a party). Trust me, once you try it, you’ll want to stash a secret piece in the fridge just for yourself!
If you make this no-bake peanut butter lasagna, leave a comment below or tag me on social media—I’d love to see your delicious creations! Share it with your friends, pin it for later, or add your own twist. Here’s to easy desserts and happy taste buds!
Frequently Asked Questions
Can I make no-bake peanut butter lasagna ahead of time?
Absolutely! In fact, it gets even better after a night in the fridge. Just cover it tightly and chill until you’re ready to serve.
Can I use natural peanut butter instead of regular?
You can, but natural peanut butter tends to be runnier. Make sure to stir it well and be prepared for a slightly softer texture in the peanut butter layer.
How long does no-bake peanut butter lasagna last in the fridge?
It keeps well for up to 4 days, covered tightly. The crust may soften a bit, but the flavors stay delicious.
Can I freeze this dessert?
Yes! Slice it into portions, wrap individually, and freeze for up to a month. Thaw overnight in the fridge before serving.
What can I use instead of chocolate sandwich cookies for the crust?
Graham crackers, vanilla wafers, or even gluten-free cookies all work well. Each will give a slightly different flavor, but they’re all tasty!
Pin This Recipe!
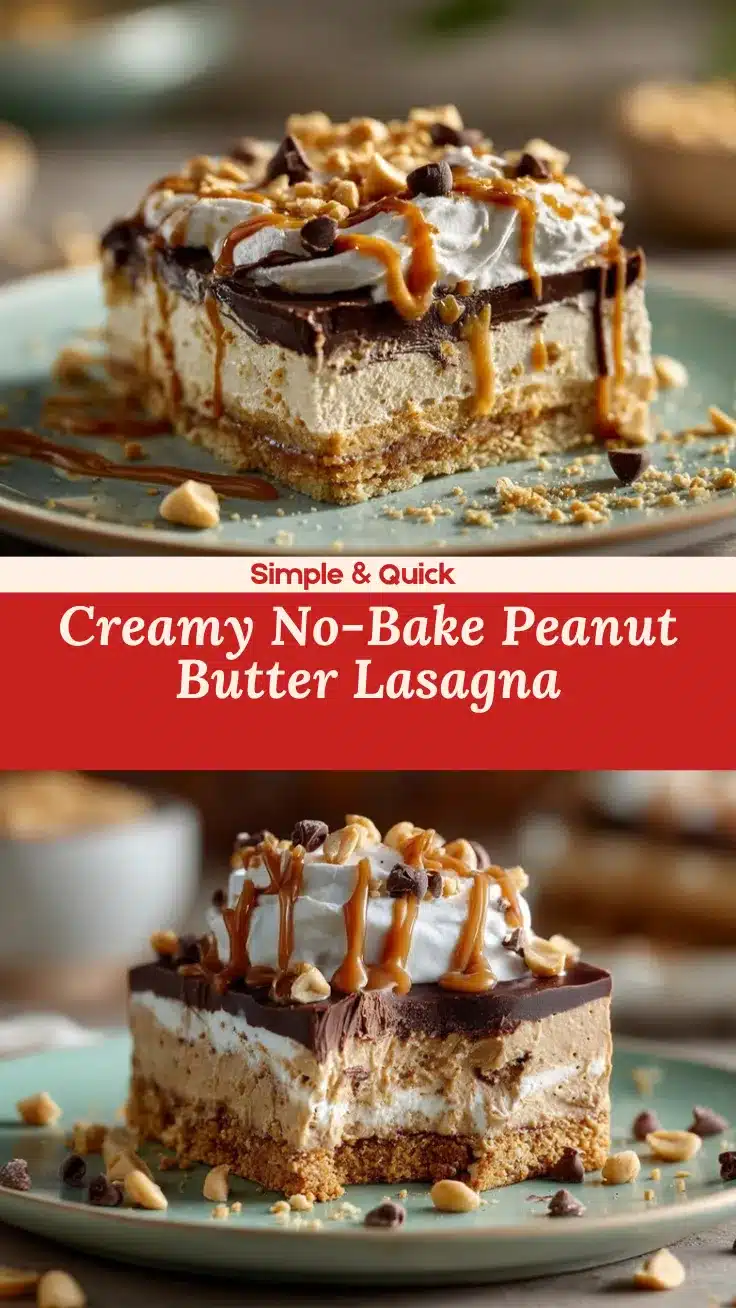
No-Bake Peanut Butter Lasagna

This easy, creamy layered dessert features a chocolate cookie crust, fluffy peanut butter and cream cheese layer, rich chocolate pudding, and a cloud of whipped topping. No oven required—just chill, slice, and enjoy a decadent treat perfect for any occasion.
- Prep Time: 25 minutes
- Cook Time: 0 minutes
- Total Time: 4 hours 25 minutes
- Yield: 12 servings 1x
- Category: Dessert
- Cuisine: American
Ingredients
- 36 chocolate sandwich cookies (like Oreos), crushed
- 6 tablespoons unsalted butter, melted
- 8 ounces cream cheese, softened
- 1 cup creamy peanut butter
- 1/4 cup chunky peanut butter (optional)
- 1 cup powdered sugar
- 1 cup heavy whipping cream
- 1 teaspoon vanilla extract
- 1 package (3.9 oz) instant chocolate pudding mix
- 2 cups cold whole milk
- 1 1/2 cups whipped topping (like Cool Whip), thawed
- 1/2 cup chopped peanuts (optional)
- 1/4 cup mini chocolate chips (optional)
- Extra crushed chocolate cookies (for garnish, optional)
Instructions
- Crush 36 chocolate sandwich cookies into fine crumbs using a food processor or by hand. Mix with 6 tablespoons melted butter until combined. Press evenly into the bottom of a 9×13-inch pan. Chill in the fridge for about 10 minutes.
- In a large bowl, beat 8 ounces softened cream cheese until smooth. Add 1 cup creamy peanut butter, 1/4 cup chunky peanut butter (if using), and 1 cup powdered sugar. Beat until light and fluffy, about 1-2 minutes.
- Pour in 1 cup heavy whipping cream and 1 teaspoon vanilla extract. Beat until the mixture thickens and is spreadable.
- Spread the peanut butter mixture evenly over the chilled crust. Return pan to fridge while preparing the next layer (about 5 minutes).
- In a clean bowl, whisk together 1 package (3.9 oz) instant chocolate pudding mix and 2 cups cold milk for 2-3 minutes until thickened. Let sit for 1 minute.
- Carefully spread the pudding over the peanut butter layer.
- Dollop 1 1/2 cups whipped topping over the pudding layer and spread evenly.
- Sprinkle with 1/2 cup chopped peanuts, 1/4 cup mini chocolate chips, and extra crushed cookies if desired.
- Cover with plastic wrap or foil and chill for at least 4 hours (overnight is best).
- Cut into squares and serve cold.
Notes
For best results, chill overnight for clean slices and well-set layers. Soften cream cheese fully before mixing for a smooth peanut butter layer. Swap in gluten-free or dairy-free ingredients as needed. Let each layer chill briefly before adding the next for sharp, defined layers. Store covered in the fridge for up to 4 days or freeze individual portions for up to a month.
Nutrition
- Serving Size: 1/12th of pan (about 1 square)
- Calories: 375
- Sugar: 22
- Sodium: 270
- Fat: 24
- Saturated Fat: 11
- Carbohydrates: 35
- Fiber: 2
- Protein: 6
Keywords: no-bake dessert, peanut butter lasagna, chocolate peanut butter dessert, layered dessert, easy dessert, potluck dessert, summer dessert, creamy dessert, peanut butter, chocolate, whipped topping


