The first time I tasted this decadent dairy-free chocolate mousse cups recipe, I was honestly amazed. The rich, velvety texture reminded me of a classic mousse, but without any dairy in sight. You know, it’s rare to find a dessert that feels indulgent yet light and fresh, especially when it’s dairy-free! I stumbled upon this recipe while trying to satisfy my sweet tooth during a week when I was avoiding dairy, and it quickly became a favorite in my kitchen.
What makes these dairy-free chocolate mousse cups so special is how simple they are to whip up, even if you’re a beginner. No complicated steps or fancy ingredients—just pure, luscious chocolate goodness you can feel good about eating. I’ve tested this recipe more times than I can count and tweaked it to get that perfect balance between creamy and airy. Plus, it’s a fantastic option for anyone with lactose intolerance, vegan friends, or those who just want a lighter dessert without sacrificing flavor.
Whether you’re making these mousse cups for a dinner party, a quick treat, or a special occasion, they’re guaranteed to impress. Trust me, once you try this dairy-free chocolate mousse cups recipe, you might just find yourself craving it again and again.
Why You’ll Love This Recipe
- Quick & Easy: Comes together in under 20 minutes, with minimal prep—perfect for those last-minute dessert emergencies.
- Simple Ingredients: No need for fancy or hard-to-find items; most are pantry staples you probably already have.
- Perfect for Any Occasion: Whether it’s a cozy night in, a casual get-together, or a holiday celebration, these mousse cups fit right in.
- Crowd-Pleaser: Everyone from kids to adults loves the rich chocolate flavor and smooth texture.
- Unbelievably Delicious: Creamy, airy, and just the right amount of sweetness—like dessert magic in a cup.
This dairy-free chocolate mousse cups recipe stands out because of a little trick I learned: using ripe avocados combined with coconut cream creates that silky mousse texture without any dairy at all. The cocoa powder and a hint of vanilla round it out perfectly. You won’t find a mousse that’s this guilt-free but still hits all the right notes.
Honestly, it’s the kind of dessert that makes you close your eyes after the first spoonful and savor every bite. It’s comfort food reimagined—lighter, healthier, but still totally satisfying. I love serving these at parties because they’re fancy in appearance but super simple to make, so no stress involved.
What Ingredients You Will Need
This recipe uses simple, wholesome ingredients to deliver rich flavor and creamy texture without any fuss. Most of these you might already have on hand, and substitutions are easy if needed.
- Ripe avocados (2 medium-sized; provides creaminess and healthy fats)
- Full-fat coconut cream (1 cup or 240 ml; I prefer brands like Aroy-D for best texture)
- Unsweetened cocoa powder (½ cup or 50 grams; choose a good-quality Dutch-processed cocoa for deeper flavor)
- Maple syrup (¼ cup or 60 ml; adds natural sweetness; you can swap with agave or honey if not strictly vegan)
- Vanilla extract (1 teaspoon; enhances the chocolate flavor)
- Pinch of sea salt (balances the sweetness and intensifies chocolate notes)
- Optional toppings: fresh berries, shaved dairy-free chocolate, chopped nuts, or coconut flakes
For a dairy-free and vegan mousse, it’s important to use full-fat coconut cream rather than coconut milk, as the cream gives you that luscious texture. If you prefer a sweeter mousse, feel free to adjust the maple syrup to taste. I usually recommend starting with ¼ cup and adding more if you like it sweeter.
Looking for gluten-free? No worries! This recipe is naturally gluten-free and free from common allergens like eggs or nuts (unless you add them as toppings). Using ripe avocados is a bit of a secret weapon here—they create that creamy, rich base without any dairy or refined ingredients.
Equipment Needed
- Food processor or high-speed blender: Essential for blending the avocados and coconut cream into a smooth mousse. I’ve tried using a regular blender, but it’s a bit harder to get the right texture.
- Measuring cups and spoons: For precise ingredient amounts—especially the cocoa powder and sweetener.
- Mixing bowls: Handy for combining ingredients or holding toppings.
- Spoons or spatulas: For scraping the sides of the blender and folding in ingredients.
- Serving cups or ramekins: Small clear cups make these mousse cups look extra fancy and perfect for portion control.
If you don’t have a food processor, a powerful blender can work well too—just be sure to scrape down the sides often to get a uniform consistency. For smaller budgets, hand mixers won’t cut it here, as the mousse needs that ultra-smooth finish. Also, if you plan to chill the mousse, make sure your cups or ramekins are freezer-safe.
Detailed Preparation Method
- Prepare the avocados: Cut 2 ripe medium avocados in half, remove the pits, and scoop the flesh into your food processor or blender. (Tip: ripe avocados should yield slightly when pressed; too hard and your mousse won’t be creamy.)
- Add the coconut cream: Measure 1 cup (240 ml) of full-fat coconut cream and add it to the blender. You want the thick cream from the top of a chilled can, not the watery milk below.
- Incorporate cocoa powder: Add ½ cup (50 grams) of unsweetened Dutch-processed cocoa powder. This gives the mousse its rich chocolate flavor. (Avoid natural cocoa powder here as it can be more bitter.)
- Sweeten it up: Pour in ¼ cup (60 ml) of maple syrup for natural sweetness. You can always adjust later after blending.
- Add vanilla and salt: Mix in 1 teaspoon of vanilla extract and a pinch of sea salt to brighten the flavors.
- Blend until smooth: Secure the lid and blend on high for about 2-3 minutes, stopping occasionally to scrape down the sides with a spatula. You’re aiming for a silky, fluffy mousse texture with no lumps.
- Taste and adjust: Give your mousse a quick taste. If you want it sweeter, add a bit more maple syrup and blend again for a few seconds.
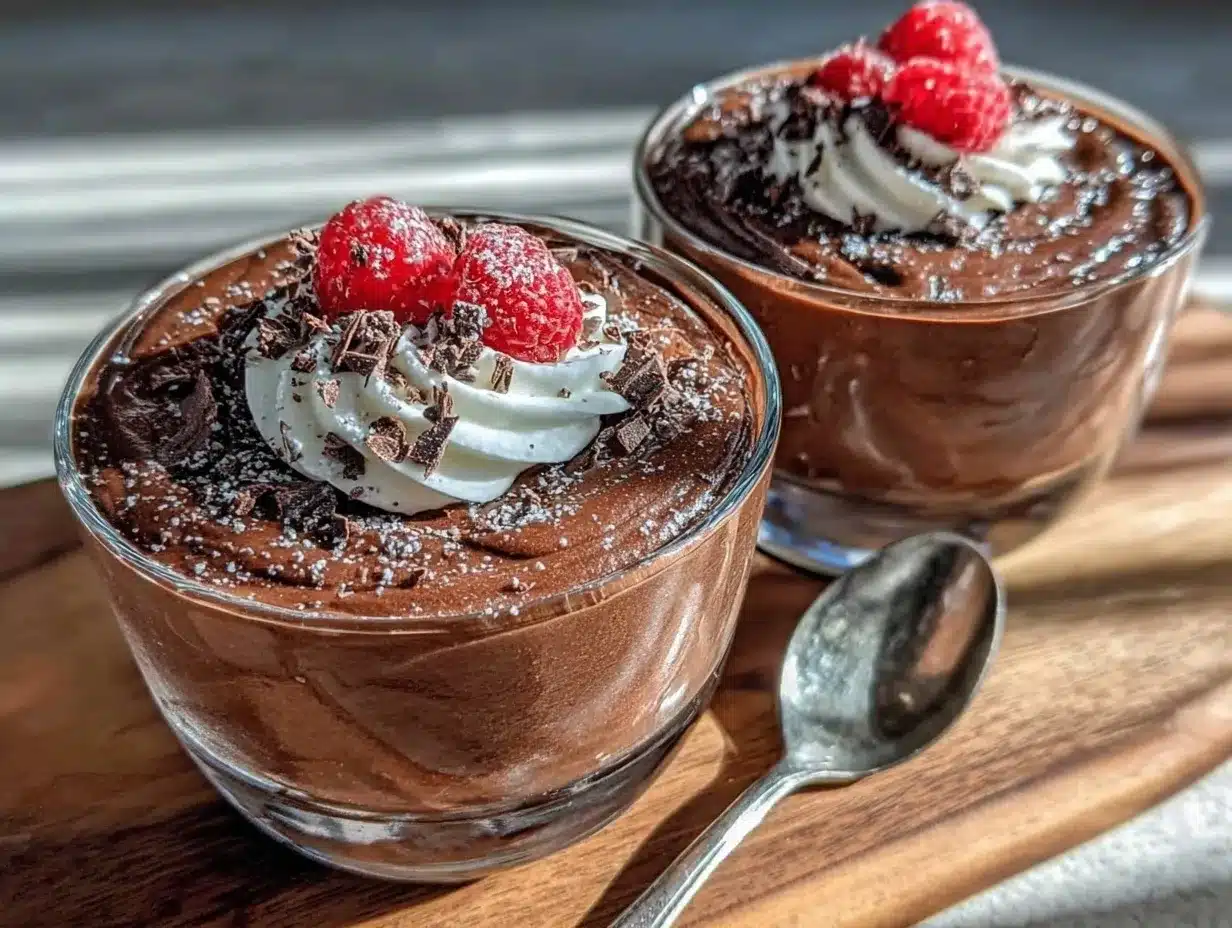
- Portion into cups: Spoon the mousse into 4-6 small serving cups or ramekins. Smooth the tops with the back of a spoon for a clean look.
- Chill: Refrigerate the mousse cups for at least 1 hour to let them set and chill thoroughly. This step helps the mousse firm up and develop its decadent texture.
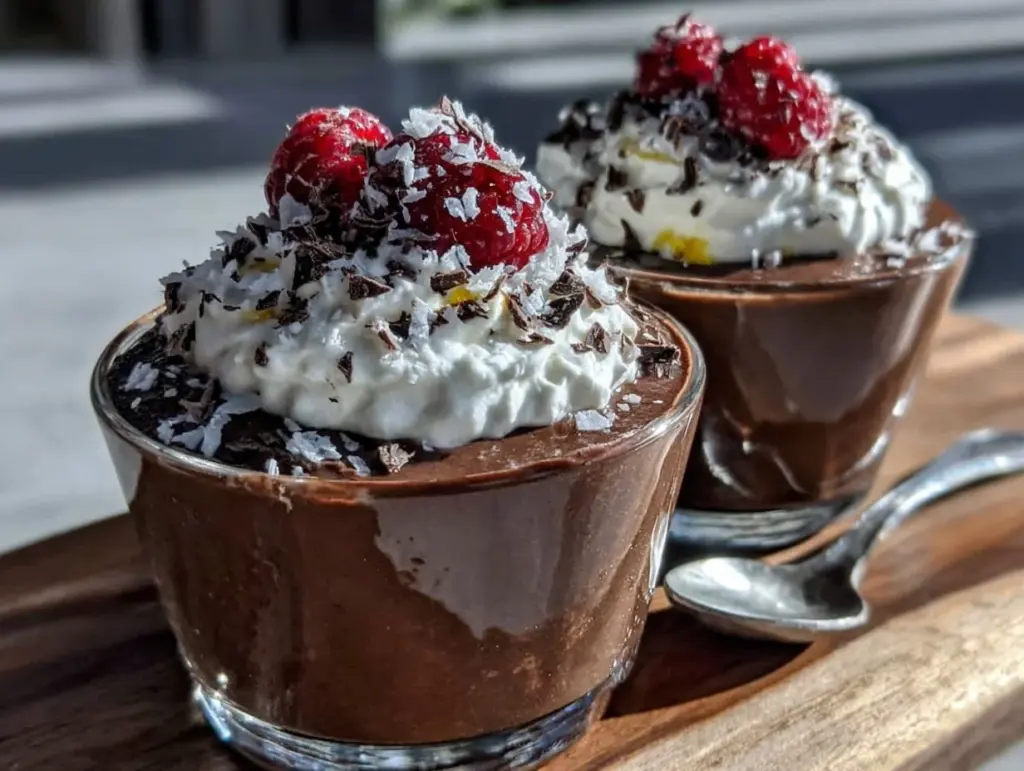
- Add toppings and serve: Right before serving, garnish with fresh berries, shaved dairy-free chocolate, or toasted coconut flakes for an extra pop of flavor and texture.
If your mousse isn’t as firm as you’d like after chilling, just give it a little more time or pop it in the freezer for 15 minutes (but watch closely so it doesn’t freeze solid). The texture should be smooth, creamy, and scoopable.
Cooking Tips & Techniques
- Choose perfectly ripe avocados: They’re the foundation for the mousse’s creaminess. Too firm and your mousse will be chunky; too soft and it might taste bitter.
- Use chilled coconut cream: Refrigerate your coconut cream can overnight to separate the thick cream from the liquid. This thick part is what makes the mousse ultra-smooth and rich.
- Blend thoroughly: Don’t rush the blending step. Scrape down the sides often and blend until completely smooth to avoid any gritty texture.
- Taste-test as you go: The amount of sweetness and chocolate intensity can vary based on your cocoa powder and personal preference. Adjust maple syrup and cocoa accordingly.
- Chill for best results: The mousse needs time to set in the fridge. Don’t skip this or you’ll miss out on that luscious, spoonable texture.
- Watch out for watery coconut cream: If you accidentally use the coconut milk layer or a low-fat version, the mousse won’t hold up well. Full-fat coconut cream is key.
- Multitasking tip: While the mousse chills, you can prep any toppings or make a quick fruit compote to serve alongside.
I’ve learned the hard way that subpar avocados or skipping the chilling step leads to a disappointing mousse, so don’t cut corners here!
Variations & Adaptations
This dairy-free chocolate mousse cups recipe is super flexible and easy to tweak based on your taste buds or dietary needs.
- Nut-free option: This mousse is naturally nut-free, but if you want to add crunch, try toasted pumpkin seeds or sunflower seeds instead of nuts.
- Seasonal flavors: Stir in a teaspoon of orange zest or a pinch of cinnamon for a festive twist. Or fold in fresh raspberries for a fruity surprise.
- Low-sugar version: Cut back on maple syrup or swap for a zero-calorie sweetener like stevia, but adjust slowly to avoid bitterness.
- Alternative bases: For a different texture, you can replace half the avocado with silken tofu (blend well) for a lighter mousse.
- Double chocolate: Add a handful of dairy-free mini chocolate chips into the mousse before chilling for some melty pockets of chocolate.
I personally love adding a little espresso powder to the batter for a mocha vibe—totally transforms the flavor and feels extra fancy without fuss.
Serving & Storage Suggestions
These dairy-free chocolate mousse cups are best served chilled, straight from the refrigerator. The cool temperature enhances the creamy texture and deep chocolate flavor.
For a pretty presentation, garnish with fresh raspberries, a sprig of mint, or a sprinkle of cocoa powder. Pair with a cup of strong coffee or a light herbal tea for a perfect after-dinner treat.
Leftovers can be stored in an airtight container in the refrigerator for up to 3 days. The mousse may firm up more over time, so let it sit at room temperature for 10 minutes before serving again for easier scooping.
If you want to keep them longer, freeze the mousse cups for up to 1 month. When ready to eat, thaw overnight in the fridge. The texture might be slightly different but still delicious.
Flavors actually mellow and deepen after a day or two, so if you can wait, prepping ahead is a great idea for parties or special occasions.
Nutritional Information & Benefits
Each serving of these dairy-free chocolate mousse cups provides a satisfying dose of healthy fats from avocado and coconut cream, which are great for brain and heart health. The natural sweetness comes from maple syrup, avoiding refined sugars.
This recipe is naturally gluten-free, vegan, and free from common allergens like eggs and nuts (unless added as toppings). At around 250-300 calories per serving, it’s a guilt-free way to enjoy a rich dessert.
Avocados add fiber, potassium, and vitamins, while cocoa powder is loaded with antioxidants that can boost mood and wellbeing. Honestly, it’s a dessert you can feel a little proud about indulging in!
Conclusion
In my book, this decadent dairy-free chocolate mousse cups recipe is a winner every time. It’s easy enough for beginners, uses simple ingredients, and delivers that rich, creamy chocolate fix we all crave. I love how it’s dairy-free but still manages to feel totally indulgent and satisfying.
Don’t be afraid to play around with the sweetness level or toppings to match your taste. Whether you’re treating yourself or impressing guests, these mousse cups hit the spot.
If you give this recipe a try, I’d love to hear how you customize it! Drop a comment below or share your favorite variations. Happy mousse-making!
FAQs
Can I make these mousse cups ahead of time?
Yes! They actually taste better after chilling for a few hours or overnight. Just cover and refrigerate until ready to serve.
What if I don’t like avocado—can I substitute it?
You can try replacing half the avocado with silken tofu or banana, but avocado really gives the best creamy texture without overpowering the chocolate.
Is this recipe suitable for kids?
Definitely! It’s naturally sweetened and dairy-free, making it a great treat for kids with dairy allergies or sensitivities.
Can I use coconut milk instead of coconut cream?
It’s best to use full-fat coconut cream for the right mousse texture. Coconut milk is too watery and won’t set properly.
How should I store leftover mousse?
Store in an airtight container in the refrigerator for up to 3 days. Let it sit at room temperature before serving for easier scooping.
Pin This Recipe!
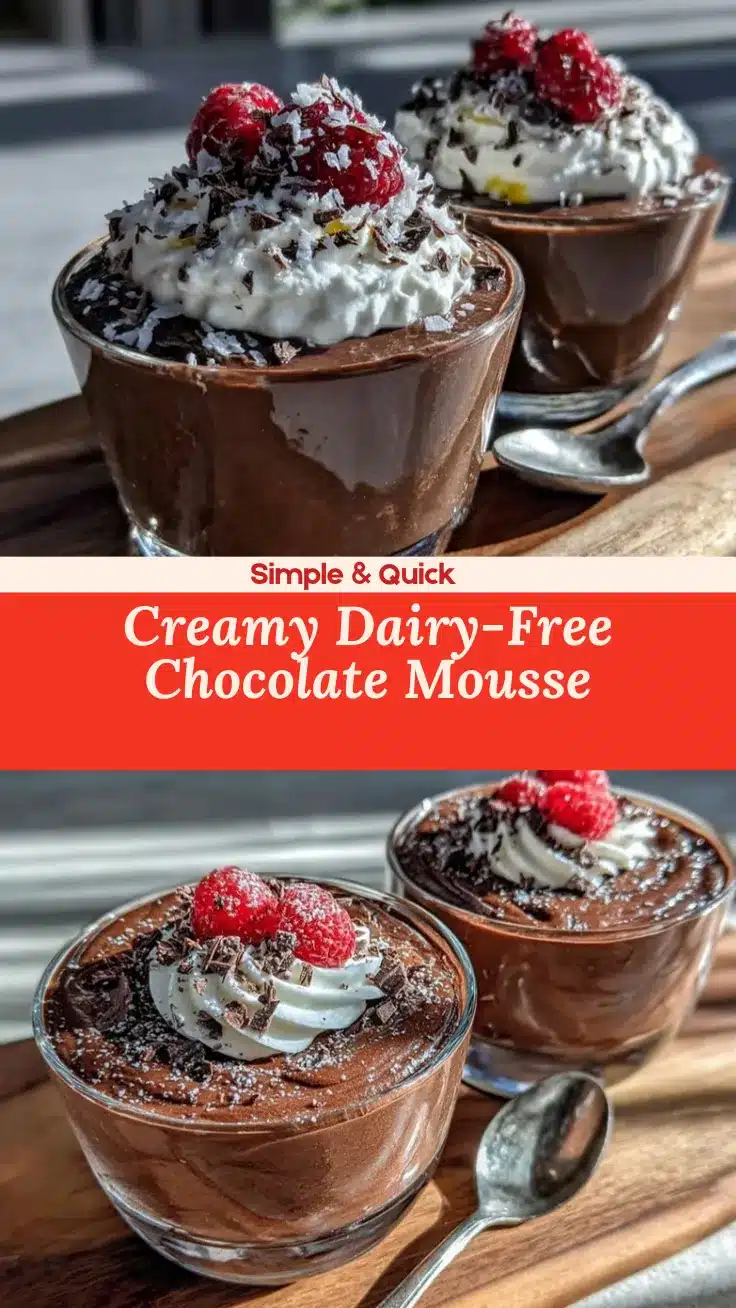
Decadent Dairy-Free Chocolate Mousse Cups

A rich, velvety dairy-free chocolate mousse made with ripe avocados and coconut cream, perfect for beginners and anyone seeking a light yet indulgent dessert.
- Prep Time: 10 minutes
- Cook Time: 0 minutes
- Total Time: 1 hour 10 minutes
- Yield: 4-6 servings 1x
- Category: Dessert
- Cuisine: Vegan
Ingredients
- 2 medium ripe avocados
- 1 cup (240 ml) full-fat coconut cream
- ½ cup (50 grams) unsweetened Dutch-processed cocoa powder
- ¼ cup (60 ml) maple syrup
- 1 teaspoon vanilla extract
- Pinch of sea salt
- Optional toppings: fresh berries, shaved dairy-free chocolate, chopped nuts, or coconut flakes
Instructions
- Cut 2 ripe medium avocados in half, remove the pits, and scoop the flesh into a food processor or blender.
- Add 1 cup (240 ml) of full-fat coconut cream to the blender.
- Add ½ cup (50 grams) of unsweetened Dutch-processed cocoa powder.
- Pour in ¼ cup (60 ml) of maple syrup.
- Mix in 1 teaspoon of vanilla extract and a pinch of sea salt.
- Blend on high for 2-3 minutes, stopping occasionally to scrape down the sides, until smooth and fluffy with no lumps.
- Taste and adjust sweetness by adding more maple syrup if desired, then blend again briefly.
- Spoon the mousse into 4-6 small serving cups or ramekins and smooth the tops.
- Refrigerate for at least 1 hour to chill and set the mousse.
- Before serving, garnish with optional toppings such as fresh berries, shaved dairy-free chocolate, or toasted coconut flakes.
Notes
Use ripe avocados for the creamiest texture. Chill coconut cream overnight to separate the thick cream. Blend thoroughly and scrape sides often for smooth mousse. Adjust sweetness to taste. Chill mousse for at least 1 hour before serving. If mousse is not firm enough, chill longer or freeze for 15 minutes but avoid freezing solid.
Nutrition
- Serving Size: 1 small mousse cup (
- Calories: 275
- Sugar: 12
- Sodium: 50
- Fat: 22
- Saturated Fat: 18
- Carbohydrates: 20
- Fiber: 8
- Protein: 3
Keywords: dairy-free, chocolate mousse, vegan dessert, avocado mousse, coconut cream, easy dessert, gluten-free, healthy dessert


