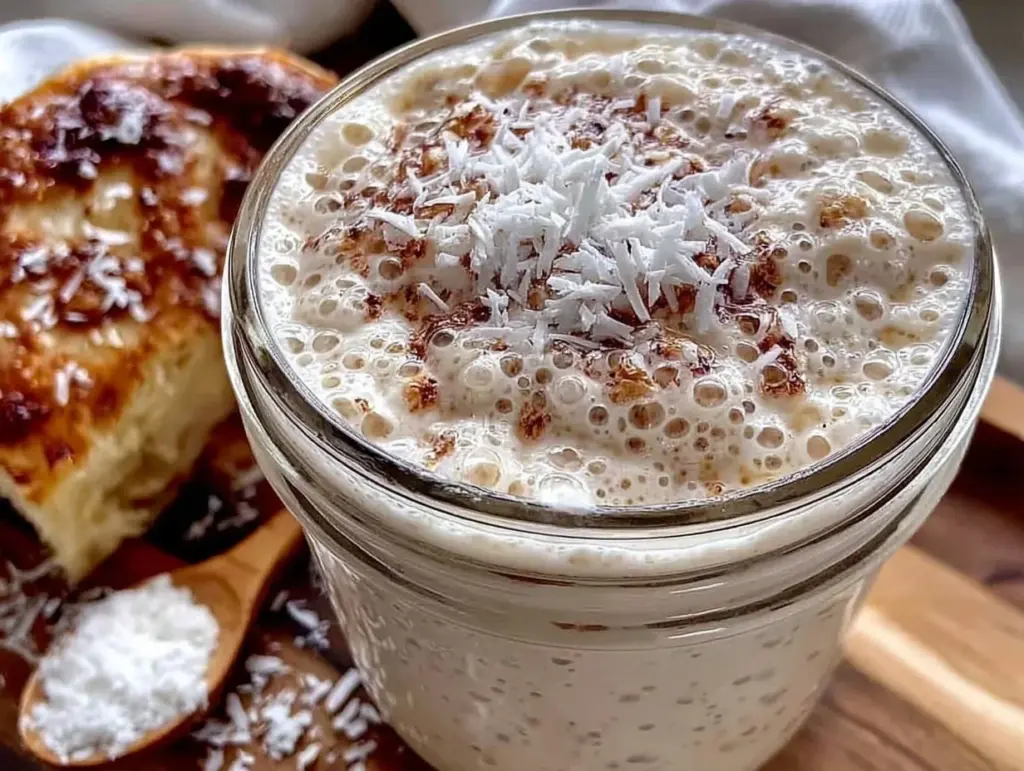
The smell of a tangy, bubbly sourdough starter fermenting on my kitchen counter instantly fills me with a cozy kind of joy. I first embarked on making my own sourdough starter from scratch during a rainy weekend when all the bakeries were closed, and honestly, it was a game-changer. There’s something deeply satisfying about cultivating this living mixture of flour and water that becomes the heart of artisan bread. If you’ve ever thought about baking your own sourdough bread but felt intimidated, this ultimate sourdough starter from scratch recipe is your new best friend.
After testing this method multiple times (and tweaking it based on what I learned), I can confidently say it’s straightforward and incredibly rewarding. This starter isn’t just a base for bread—it’s a little ecosystem you nurture that brings out complex flavors and that signature chewy crust everyone loves. Whether you’re a beginner or have dabbled in baking before, this easy 5-step artisan bread starter will have you baking like a pro in no time. Plus, it’s perfect for anyone who adores homemade bread but wants to avoid commercial yeast.
Making your own sourdough starter is more than just a recipe—it’s a journey. Trust me, once you get the hang of it, you’ll be hooked on the magic of homemade sourdough bread that’s naturally fermented and full of personality.
Why You’ll Love This Recipe
- Simple & Clear 5-Step Process: No confusing jargon or complicated techniques—just straightforward steps that guide you from zero to a bubbly starter.
- Uses Basic Ingredients: All you need is flour, water, and a little patience. No special additives or fancy equipment required.
- Perfect for Artisan Bread: This starter creates that classic tangy flavor and chewy crumb that makes artisan bread so irresistible.
- Reliable Results: After baking this starter over a dozen times, I’ve fine-tuned the process to help you avoid common pitfalls and get consistent, lively starters.
- Budget-Friendly & Sustainable: By making your own starter, you cut down on store-bought yeast and reduce waste—plus it lasts indefinitely with proper care.
- Fun & Therapeutic: Watching your starter bubble and grow feels surprisingly rewarding—you’ll find yourself checking on it like a proud parent!
This isn’t just another recipe you’ll try once and forget. I’ve included tips on how to maintain your starter long-term, so it becomes a staple in your kitchen. It’s the kind of bread base you’ll want to share with friends and family because it turns ordinary loaves into something truly special.
What Ingredients You Will Need
This ultimate sourdough starter recipe calls for just a handful of simple, wholesome ingredients that work together to cultivate wild yeast and friendly bacteria. I prefer to keep it classic and pure, but I’ll share some substitutions along the way.
- Unbleached All-Purpose Flour (120g / 1 cup): The foundation of your starter. I recommend brands like King Arthur or Bob’s Red Mill for consistent results. You can also use bread flour for more gluten development.
- Whole Wheat Flour (120g / 1 cup): Adds extra nutrients and wild yeast, speeding up fermentation. Feel free to swap with rye flour for a slightly different flavor profile.
- Filtered or Spring Water (240ml / 1 cup), room temperature: Chlorinated tap water can inhibit fermentation, so filtered water is best. Avoid distilled water since it lacks minerals needed by the yeast.
- Optional: A pinch of honey or sugar (about 1 tsp): Helps kickstart the yeast activity on day one—but this is entirely optional and not necessary for success.
All these ingredients are pantry staples or easy to find in any grocery store. No need for fancy additions or starters purchased from elsewhere. You’re literally creating a living culture from scratch with just flour and water—pretty neat, huh?
Equipment Needed
- Glass or Plastic Container (1-quart / 1-liter capacity): Wide mouth works best for easy stirring and monitoring. I use a simple mason jar or a food-safe plastic container.
- Kitchen Scale: For precise measurements. It makes this process way less guesswork-y, but measuring cups can work if you’re careful.
- Mixing Spoon or Spatula: Non-reactive materials like wood or silicone are ideal to avoid affecting fermentation.
- Clean Cloth or Coffee Filter: To cover the container and allow airflow while keeping dust and bugs out. Secure it with a rubber band.
- Optional: Thermometer: To check water temperature (ideal is about 70°F/21°C), but it’s not mandatory once you get a feel for room temperature water.
Honestly, you probably already have most of these in your kitchen. I avoid metal bowls or spoons since they can interfere with the starter’s microbes. If you’re on a budget, simple glass jars from your pantry work perfectly fine and are easy to clean.
Detailed Preparation Method

- Day 1: Mix Your Starter
In your container, combine 60g (½ cup) unbleached all-purpose flour and 60g (½ cup) whole wheat flour with 120ml (½ cup) filtered water at room temperature. Stir vigorously until smooth and no dry flour remains. Optionally add a teaspoon of honey for an extra boost. Cover loosely with a cloth and let it sit at room temperature (around 70°F/21°C) for 24 hours. - Day 2: Check and Feed
You might see a few bubbles or none at all—both are normal. Discard half of the starter (about 120g) to keep the acidity balanced and add 60g (½ cup) unbleached all-purpose flour, 60g (½ cup) whole wheat flour, and 120ml (½ cup) filtered water. Mix well, cover, and rest another 24 hours. - Day 3: Bubbles and Aroma Develop
By now, your starter should be bubbly and smell pleasantly sour or yeasty. Repeat the discard and feeding process as on Day 2. Stir well to incorporate air and cover. - Day 4: Active and Bubbling
The starter should be noticeably risen with lots of bubbles and a tangy aroma. Feed again as before, discarding half, adding fresh flour and water. You can start feeding twice a day if your kitchen is warm, about 12 hours apart, to speed up activity. - Day 5: Ready to Bake!
Your starter should double in size within 4-6 hours of feeding and have a pleasant, slightly sour smell. To test readiness, drop a spoonful in water—it should float, indicating it’s full of trapped gas. If it doesn’t float, continue feeding daily until it does.
Pro tip: Keep your starter in a warm spot, like near a sunny window but out of direct sunlight. If it develops any pink or orange hues, or smells off (like rotten), discard and start over. Patience is key—sometimes it just takes a little more time.
Cooking Tips & Techniques
- Consistent Feeding Times: Feeding your starter at the same time every day helps build a predictable fermentation cycle.
- Discarding Part of the Starter: It might seem wasteful, but discarding half keeps acidity balanced and prevents the starter from becoming too sour or sluggish.
- Warmth is Your Friend: Sourdough yeast thrives at around 70-75°F (21-24°C). If your kitchen is cool, try placing the jar on top of the fridge or inside an off oven with the light on.
- Hydration Level: This recipe is a 100% hydration starter—equal parts flour and water by weight—which is easy to maintain and works well for most artisan bread recipes.
- Watch for Signs of Activity: Bubbles, rising volume, and a pleasant sour aroma are all good indicators your starter is alive and kicking.
- Patience Pays Off: Sometimes the starter takes longer, especially in cooler climates. Don’t rush it by adding commercial yeast—that defeats the point!
When I first started, I made the mistake of using chlorinated tap water, and the starter was sluggish. Swapping to filtered water made all the difference. Also, stirring the starter a few times a day helps introduce oxygen and encourages yeast growth.
Variations & Adaptations
- Gluten-Free Starter: Use gluten-free flours like brown rice or buckwheat instead of wheat flours. Note that fermentation might be slower and texture different.
- Rye Starter: Substitute whole wheat flour with rye flour for a more earthy flavor and faster fermentation due to rye’s natural enzymes.
- Low-Hydration Starter: Use less water for a thicker starter. This can influence the bread’s crumb and crust, but it’s a matter of personal preference.
- Feeding With Different Flours: Once established, you can feed your starter with just all-purpose flour or switch to bread flour depending on your baking goals.
- Cold Fermentation: Store your starter in the fridge and feed weekly for a slower fermentation pace if you don’t bake daily.
My favorite variation is a rye-based starter—it kicks off fermentation faster and adds a lovely depth of flavor to dark rye loaves. I often adjust hydration slightly in winter when my kitchen is cooler to keep the starter lively.
Serving & Storage Suggestions
Once your ultimate sourdough starter is bubbly and active, you can use it to bake artisan bread with that wonderful crust and chewy crumb. Serve your bread warm with butter or your favorite spreads for the best experience. A fresh loaf pairs beautifully with soups, salads, or just a simple cheese plate.
To store your starter long-term, keep it in the refrigerator, feeding it once a week. When ready to bake, take it out a day or two ahead, feed it at room temperature to reactivate, and watch it bubble back to life.
Leftover starter can be refrigerated in a tightly sealed container for up to two weeks, but it’s best refreshed regularly. For longer storage, you can dry your starter on parchment paper and freeze it for months.
Reheating bread made from sourdough starter is best done in a hot oven (around 350°F/175°C) for 5-10 minutes to revive its crustiness. Over time, the flavor of the starter deepens, giving your bread more complexity the more you bake.
Nutritional Information & Benefits
While exact nutritional values depend on your flour choice, sourdough bread made from this starter tends to have a lower glycemic index than commercial bread, thanks to the natural fermentation process. This means it can be easier on blood sugar levels.
The fermentation breaks down gluten and phytic acid, making minerals more bioavailable and the bread easier to digest—great news for sensitive tummies. Plus, no commercial yeast or additives means you’re eating a more natural product.
This recipe is naturally vegan, dairy-free, and can be adapted to gluten-free flours if needed. Just keep in mind that gluten-free starters behave differently and need extra care.
As a nutrition enthusiast, I love that this method supports gut health through naturally occurring probiotics in the fermentation, making your artisan bread not just delicious but also nourishing.
Conclusion
Starting your own sourdough culture from scratch doesn’t have to be intimidating or complicated. This ultimate sourdough starter recipe breaks it down into easy, manageable steps that anyone can follow—trust me, I’ve been there! The reward is a lively, tangy starter that will give your artisan bread that authentic flavor and texture you crave.
Feel free to tweak the flours, hydration, and feeding schedule to suit your kitchen and taste. The process is as much about experimentation as it is about tradition, so have fun with it! I love this starter because it connects me to a centuries-old baking craft while filling my home with the warm smell of fresh bread.
If you try this recipe, please leave a comment sharing your experience or any twists you gave it. Sharing your sourdough journey makes the whole process even more special. Happy baking, and may your starter bubble up happily every time!
FAQs About Ultimate Sourdough Starter from Scratch
How long does it take to make a sourdough starter from scratch?
Typically, it takes about 5 to 7 days to develop a strong, bubbly starter ready for baking. Sometimes it can take longer depending on temperature and flour type.
Can I use tap water for my sourdough starter?
It’s best to avoid chlorinated tap water since chlorine can kill wild yeast. Using filtered, spring, or bottled water helps fermentation thrive.
What should I do if my starter smells bad or turns pink?
Discard the starter and start fresh. A bad smell or pink/orange discoloration means unwanted bacteria have taken over.
How do I know when my sourdough starter is ready to bake with?
When it doubles in size 4-6 hours after feeding and passes the float test (a spoonful floats in water), it’s ready to use.
Can I keep my sourdough starter in the fridge?
Yes! Storing your starter in the fridge slows fermentation. Feed it at least once a week and bring it back to room temperature before baking.
Pin This Recipe!
Ultimate Sourdough Starter from Scratch Easy 5-Step Artisan Bread Recipe

This recipe guides you through a simple 5-step process to create a tangy, bubbly sourdough starter from scratch using basic ingredients. Perfect for artisan bread lovers who want to avoid commercial yeast and enjoy homemade bread with complex flavors and chewy crust.
- Prep Time: 10 minutes
- Cook Time: 0 minutes
- Total Time: 5 days (active daily feeding time approx. 10 minutes)
- Yield: About 240g starter (enough for multiple bread recipes) 1x
- Category: Bread Starter
- Cuisine: Artisan Bread
Ingredients
- 120g (1 cup) unbleached all-purpose flour
- 120g (1 cup) whole wheat flour
- 240ml (1 cup) filtered or spring water, room temperature
- Optional: 1 tsp honey or sugar
Instructions
- Day 1: In a container, combine 60g (½ cup) unbleached all-purpose flour and 60g (½ cup) whole wheat flour with 120ml (½ cup) filtered water at room temperature. Stir vigorously until smooth and no dry flour remains. Optionally add a teaspoon of honey. Cover loosely with a cloth and let sit at room temperature (around 70°F/21°C) for 24 hours.
- Day 2: Discard half of the starter (about 120g). Add 60g (½ cup) unbleached all-purpose flour, 60g (½ cup) whole wheat flour, and 120ml (½ cup) filtered water. Mix well, cover, and rest another 24 hours.
- Day 3: Repeat the discard and feeding process as on Day 2. Stir well to incorporate air and cover.
- Day 4: Feed again as before, discarding half, adding fresh flour and water. You can start feeding twice a day if your kitchen is warm, about 12 hours apart, to speed up activity.
- Day 5: Your starter should double in size within 4-6 hours of feeding and have a pleasant, slightly sour smell. To test readiness, drop a spoonful in water—it should float. If it doesn’t float, continue feeding daily until it does.
Notes
Use filtered or spring water to avoid chlorine which inhibits fermentation. Maintain consistent feeding times and discard half the starter each feeding to keep acidity balanced. Keep starter at around 70-75°F (21-24°C) for best results. If starter develops pink or orange hues or smells off, discard and start over. Stirring a few times a day helps oxygenate the starter. For long-term storage, refrigerate and feed weekly. Dry and freeze starter for extended storage.
Nutrition
- Serving Size: Approximately 50g st
- Calories: 100
- Carbohydrates: 22
- Fiber: 1
- Protein: 4
Keywords: sourdough starter, artisan bread, homemade bread, natural yeast, fermentation, bread baking, sourdough culture


