The tangy aroma of sourdough wafting through the kitchen is something truly special. I still remember the first time I baked this irresistible sourdough pizza crust recipe—it was a game-changer. Honestly, it’s hard to believe that something so simple can taste so incredible. If you’ve ever been intimidated by making pizza dough from scratch, you’re not alone. But this recipe, perfect for beginners, breaks it down into easy steps that anyone can follow.
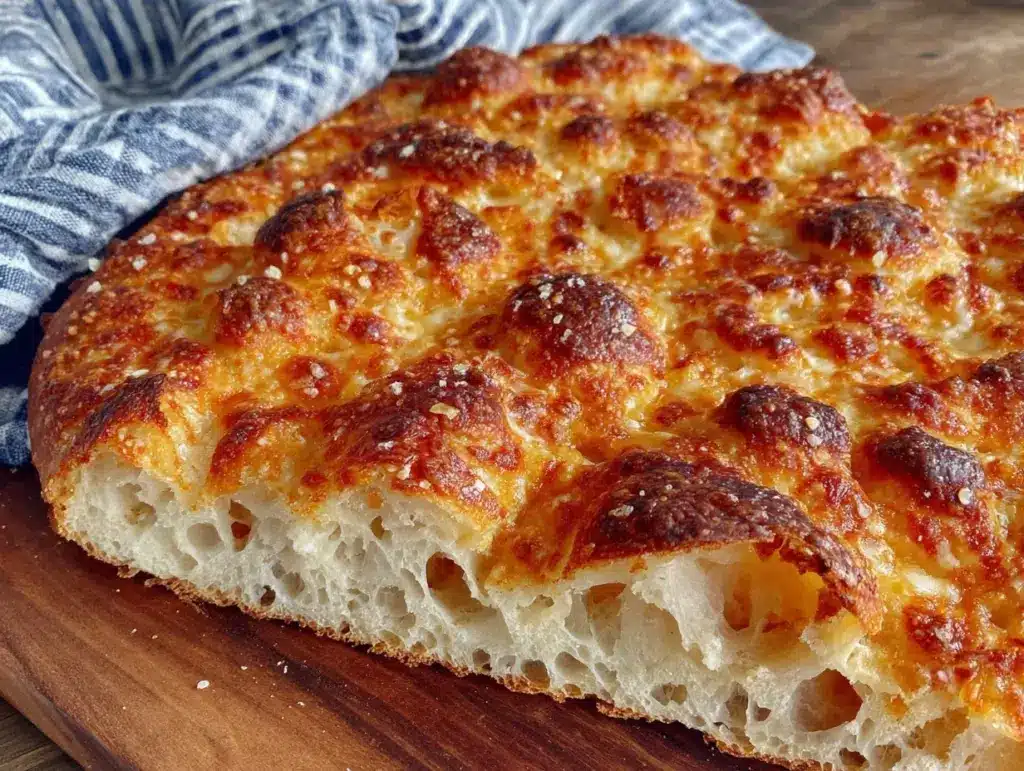
As someone who’s baked and tweaked this sourdough pizza crust over countless weekends, I can tell you this isn’t just any pizza crust. It’s got that perfect balance of chewy and crispy, with a subtle tang that only sourdough starter can bring. Plus, making your own crust means you control every ingredient—no weird preservatives or additives.
This crust is ideal for busy home cooks and pizza enthusiasts who want a homemade touch without the fuss. Whether you’re feeding a family, hosting a casual dinner, or just craving comfort food, this sourdough pizza crust will quickly become your go-to. So, grab your starter and let’s get this dough rolling!
Why You’ll Love This Recipe
- Beginner-Friendly: No fancy equipment or complicated techniques here. Just straightforward steps you can follow with confidence.
- Flavor Packed: The natural fermentation of sourdough adds a rich, tangy depth that sets this crust apart from regular pizza dough.
- Great Texture: Crispy edges with a light, airy crumb inside—exactly what you want in a pizza crust.
- Flexible Timing: You can prepare the dough in advance and refrigerate it, making it perfect for planning ahead.
- Healthier Option: Using sourdough starter helps break down gluten and may aid digestion, so it’s a friendlier choice for many.
- Customizable: Want to add herbs or garlic to the dough? Go for it! This crust is a perfect canvas for your favorite flavors.
After baking this sourdough pizza crust recipe more times than I can count, I can say it’s a reliable winner. The texture and flavor combo really makes you close your eyes after that very first bite. It feels like homemade comfort food, but it’s also impressive enough to serve guests without stressing out.
What Ingredients You Will Need
This recipe uses simple, wholesome ingredients that you probably already have in your kitchen. The magic lies in the sourdough starter, which adds that signature tang and natural rise. Here’s what you’ll need:
- Sourdough starter (active and bubbly, about 100g / 3.5 oz) – I recommend using a mature starter like King Arthur’s for the best results.
- All-purpose flour (350g / 2 ¾ cups) – You can swap half for bread flour if you want a chewier crust.
- Warm water (250ml / 1 cup) – Around 80°F (27°C) to help activate the starter without killing it.
- Olive oil (2 tablespoons) – Adds tenderness and a subtle richness.
- Salt (1 ½ teaspoons) – Essential for flavor balance.
- Honey or sugar (1 teaspoon, optional) – Helps feed the starter and adds a touch of sweetness.
If you want a gluten-free twist, you could experiment with a gluten-free flour blend, but keep in mind the texture will differ. For a dairy-free and vegan pizza, this recipe already fits the bill, which is a nice bonus.
Equipment Needed
- Mixing bowl: A large bowl for combining your ingredients comfortably.
- Dough scraper or spatula: Helpful for mixing and folding the dough without sticking.
- Kitchen scale: For precise measurements, especially with flour and starter.
- Plastic wrap or damp towel: To cover the dough while it rises.
- Baking stone or steel: If you have one, it helps create a crisp bottom crust. No worries if you don’t—an inverted baking sheet works fine.
- Pizza peel or flat baking sheet: To transfer the pizza in and out of the oven safely.
If you don’t have a kitchen scale, measuring cups will work, but weighing your flour and starter improves consistency. I’ve used both and can say the scale saves a lot of guesswork, especially with sourdough.
Detailed Preparation Method

- Activate your sourdough starter: Feed your starter 4-6 hours before you plan to mix the dough. It should be bubbly and doubled in size when ready.
- Mix the dough: In a large bowl, combine 100g (3.5 oz) of your active starter with 250ml (1 cup) warm water. Stir until the starter dissolves.
- Add flour and salt: Gradually mix in 350g (2 ¾ cups) all-purpose flour and 1 ½ teaspoons salt. Add 2 tablespoons olive oil and 1 teaspoon honey if using. Stir with a spatula or your hands until a shaggy dough forms.
- Autolyse step (optional but recommended): Let the dough rest for 30 minutes covered with a damp towel or plastic wrap. This helps hydrate the flour and improves gluten development.
- Knead the dough: Turn the dough onto a lightly floured surface. Knead for about 8-10 minutes until smooth and elastic. If it’s sticky, sprinkle a little flour, but don’t overdo it.
- Bulk fermentation: Place the dough back in the bowl, cover, and let it rise at room temperature for 4-6 hours, or until doubled in size. You can also refrigerate it overnight for a slower ferment and deeper flavor.
- Shape the dough: Gently tip the dough onto a floured surface. Divide it into two equal portions if making two pizzas. Shape each into a ball and let rest for 30 minutes, covered, so it relaxes.
- Preheat your oven: Heat to the highest temperature your oven allows, usually 475°F (245°C), with your baking stone or steel inside for at least 30 minutes before baking.
- Stretch the dough: On a floured surface or parchment paper, gently stretch or roll your dough ball into a 12-inch (30 cm) circle. Don’t worry about perfect edges—rustic is charming!
- Add toppings and bake: Transfer the dough to a pizza peel or baking sheet. Add your favorite sauce, cheese, and toppings. Slide the pizza onto the preheated stone or baking sheet. Bake for 10-14 minutes until the crust is golden and crisp.
- Cool and enjoy: Let the pizza cool for a couple of minutes before slicing. This helps the crust finish setting and keeps the toppings from sliding off.
Pro tip: If your dough feels too sticky at any point, resist the urge to add too much flour. Lightly oiling your hands can help manage stickiness without drying out the dough.
Cooking Tips & Techniques
One lesson I learned early on is that patience is key with sourdough. Trying to rush the fermentation usually leads to dense or underdeveloped dough. The slow rise is what builds flavor and texture.
Another tip—don’t overload your pizza with toppings. A thin layer lets the crust crisp up nicely and keeps everything balanced. You know that soggy middle situation? Yeah, avoid that.
When stretching the dough, use gentle hands to keep the air bubbles intact. Those bubbles bake into the perfect chewy pockets you want in a sourdough crust. If the dough resists stretching, let it rest a few more minutes—it’s like giving it a little breather.
Using a pizza stone or steel makes a big difference in crust crispiness. If you don’t have one, an inverted baking sheet preheated in the oven works surprisingly well. Just don’t forget to preheat it!
Variations & Adaptations
- Herb-Infused Crust: Add 1-2 teaspoons of dried oregano or rosemary to the dough for an herby twist.
- Gluten-Free Version: Try a gluten-free flour blend designed for yeast breads. Keep in mind the texture will be different, but still tasty.
- Whole Wheat Sourdough Crust: Swap half the all-purpose flour with whole wheat flour for a nuttier, heartier crust.
- Alternative Cooking Methods: You can also bake the pizza on a grill for a smoky flavor—just watch the heat closely.
- My Personal Favorite: I sometimes fold in finely chopped garlic and a pinch of chili flakes into the dough for subtle heat and aroma that pairs beautifully with simple tomato sauce.
Serving & Storage Suggestions
Serve this sourdough pizza crust fresh and warm for the best experience. The crust crisps up nicely when hot but can soften a bit when cooled—though honestly, it still tastes great the next day.
Pair your pizza with a crisp salad or a light beverage like sparkling water or a chilled white wine for a balanced meal. Leftover pizza slices store well in the fridge for 2-3 days.
To reheat, pop slices into a hot oven or skillet for a few minutes to refresh the crispiness. Avoid microwaving if you want to keep that lovely crust texture intact.
Flavors tend to deepen slightly after resting overnight, so if you have the patience, make the dough a day ahead. It’s worth it!
Nutritional Information & Benefits
This sourdough pizza crust recipe yields a dough that is naturally fermented, which can make it easier to digest compared to conventional yeasted doughs. A typical serving (about 1/6 of the dough) contains roughly 180-220 calories, with carbohydrates as the primary macronutrient.
Key ingredients like olive oil provide heart-healthy fats, and the sourdough fermentation process helps break down gluten and phytic acid, potentially improving nutrient absorption. This crust is free from dairy and refined sugars unless you add toppings.
For those watching gluten, remember that sourdough starter does partially break down gluten, but this recipe still contains wheat flour and isn’t gluten-free unless you substitute flours accordingly.
Conclusion
This irresistible sourdough pizza crust recipe is a keeper. It’s approachable enough for beginners, bursting with flavor, and flexible enough to suit your own taste and schedule. I love that it brings a little bakery magic right into my kitchen without complicated steps.
Give it a try, tweak it to your liking, and don’t be afraid to make it your own. Baking your own pizza crust can be incredibly satisfying—and you might just find it becoming a weekend tradition, like it did for me.
Feel free to share your experiences, tips, or creative variations in the comments. Happy baking and even happier eating!
FAQs
How long does it take to make sourdough pizza crust?
From start to finish, expect about 5-6 hours for a room temperature rise, or you can refrigerate overnight for a slower ferment. Actual hands-on time is only about 20-30 minutes.
Can I use store-bought yeast instead of sourdough starter?
You could, but the flavor and texture will be different. Sourdough starter gives that unique tang and chewiness you won’t get with commercial yeast.
What if my sourdough starter isn’t very active?
Feed it a few times over 1-2 days to get it bubbly and strong before using it in this recipe. An active starter is key to good rise and flavor.
How do I store leftover dough?
Keep it in an airtight container in the fridge for up to 3 days. Let it come to room temperature before shaping and baking for best results.
Can I freeze the dough?
Yes! Freeze dough balls in airtight bags for up to 1 month. Thaw in the fridge overnight before using.
Pin This Recipe!

Irresistible Sourdough Pizza Crust Recipe Easy Homemade Perfect for Beginners

This sourdough pizza crust recipe offers a perfect balance of chewy and crispy texture with a subtle tang from natural fermentation. Ideal for beginners, it uses simple ingredients and straightforward steps to create a flavorful, homemade pizza crust.
- Prep Time: 30 minutes (plus starter activation and resting times)
- Cook Time: 10-14 minutes
- Total Time: 5-6 hours (including fermentation) or overnight if refrigerated
- Yield: 2 pizzas 1x
- Category: Main Course
- Cuisine: Italian
Ingredients
- 100g (3.5 oz) active and bubbly sourdough starter
- 350g (2 ¾ cups) all-purpose flour (can substitute half with bread flour for chewier crust)
- 250ml (1 cup) warm water (around 80°F / 27°C)
- 2 tablespoons olive oil
- 1 ½ teaspoons salt
- 1 teaspoon honey or sugar (optional)
Instructions
- Feed your sourdough starter 4-6 hours before mixing the dough until bubbly and doubled in size.
- In a large bowl, combine 100g (3.5 oz) active starter with 250ml (1 cup) warm water and stir until dissolved.
- Gradually mix in 350g (2 ¾ cups) all-purpose flour and 1 ½ teaspoons salt. Add 2 tablespoons olive oil and 1 teaspoon honey if using. Stir until a shaggy dough forms.
- Let the dough rest covered for 30 minutes (autolyse step) to hydrate the flour and improve gluten development.
- Turn dough onto a floured surface and knead for 8-10 minutes until smooth and elastic, adding flour sparingly if sticky.
- Place dough back in bowl, cover, and let rise at room temperature for 4-6 hours or refrigerate overnight for slower fermentation.
- Divide dough into two equal portions, shape into balls, and let rest covered for 30 minutes.
- Preheat oven to 475°F (245°C) with baking stone or steel inside for at least 30 minutes.
- Stretch or roll dough ball into a 12-inch (30 cm) circle on a floured surface or parchment paper.
- Add toppings, transfer to pizza peel or baking sheet, and bake on preheated stone or sheet for 10-14 minutes until crust is golden and crisp.
- Let pizza cool for a couple of minutes before slicing and serving.
Notes
If dough is sticky, lightly oil your hands instead of adding too much flour to avoid drying out the dough. Patience during fermentation is key for flavor and texture. Avoid overloading toppings to keep crust crisp. Preheat baking stone or steel for best crust crispiness. Dough can be refrigerated overnight for deeper flavor or frozen for up to 1 month.
Nutrition
- Serving Size: About 1/6 of the dou
- Calories: 180220
- Sugar: 1
- Sodium: 350
- Fat: 5
- Saturated Fat: 0.7
- Carbohydrates: 35
- Fiber: 2
- Protein: 6
Keywords: sourdough pizza crust, homemade pizza dough, easy pizza crust, beginner pizza recipe, sourdough starter pizza, chewy pizza crust, crispy pizza crust


