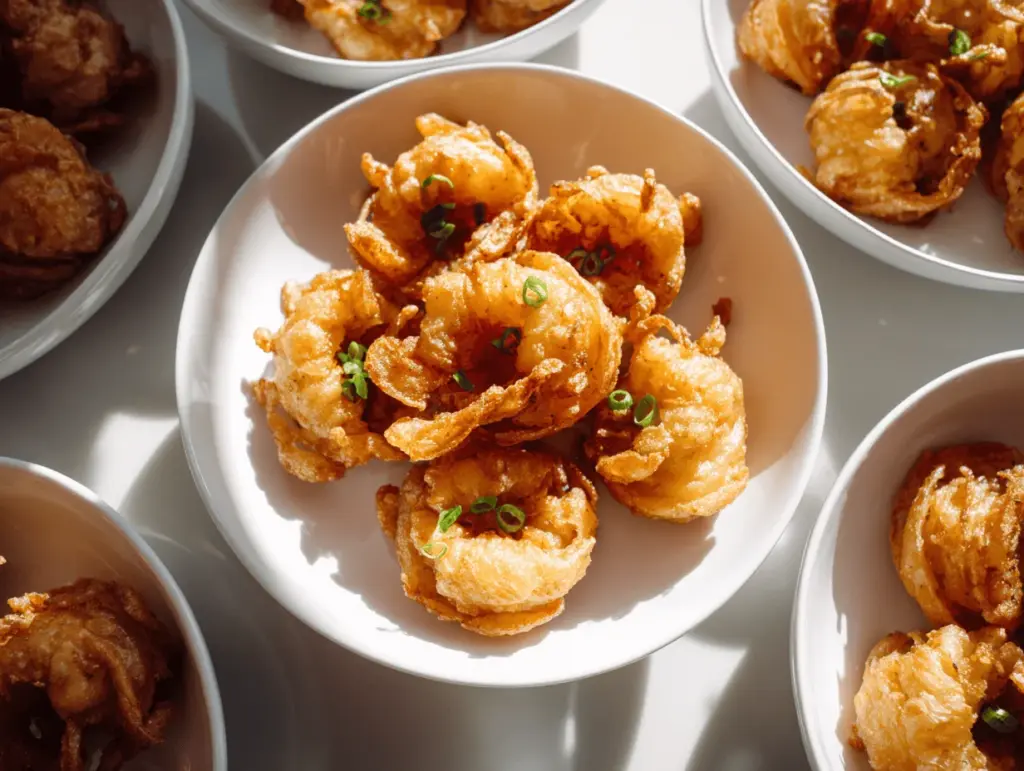
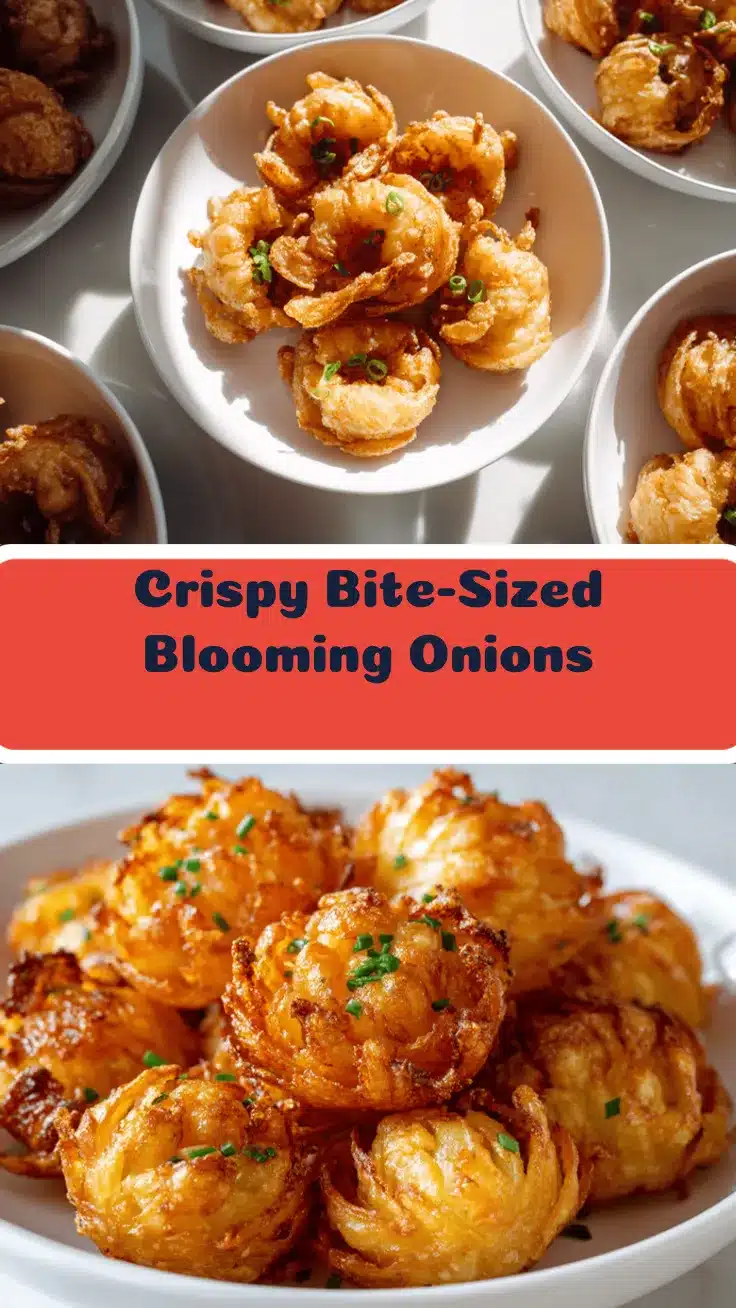
The first time I made bite-sized blooming onions, the kitchen smelled like a carnival—spicy, savory, and just a touch sweet. You know that irresistible aroma when onions sizzle in hot oil? It’s magic. Honestly, these little crispy flowers are my secret weapon for parties. They’re crunchy, golden, and fun to eat—everyone grabs one, dips it, and instantly wants another.
I stumbled on the idea for bite-sized blooming onions during a backyard barbecue when a friend requested “fun finger food—something different than chips.” You bet I got creative. Instead of making one giant blooming onion (which, let’s face it, is tricky for sharing), I started slicing smaller onions into little “blooms.” Turns out, mini versions are way easier to fry up and serve to a crowd. Plus, they look adorable piled on a platter, kind of like edible bouquets.
This blooming onions recipe isn’t just a party trick—it’s a crispy party appetizer that delivers big flavor in a small package. Each onion petal is perfectly seasoned, coated in a crunchy breadcrumb shell, and made for dunking in your favorite sauce. Great for game days, holiday gatherings, or even movie nights at home. I’ve tested this recipe a dozen times, tweaking the batter and spices until every bite hits that ideal balance of crunch and kick. If you want a showstopper snack that’s easy, fun, and guaranteed to disappear fast, you’re in the right place.
Why You’ll Love This Recipe
- Quick & Easy: These bite-sized blooming onions are ready in about 40 minutes—no marathon frying session required.
- Simple Ingredients: Every ingredient is a pantry staple. No weird stuff, no hunting down specialty items.
- Perfect for Parties: Seriously, these crispy appetizers are always the first thing to vanish at gatherings. They’re made for sharing!
- Crowd-Pleaser: Both kids and adults go wild for these. They’re crunchy, flavorful, and just plain fun to eat.
- Unbelievably Delicious: The combination of sweet onion, seasoned coating, and a hint of spice is out-of-this-world comfort food.
Unlike the classic blooming onion, which can be a little intimidating to make and serve, these mini versions are a breeze. I use a simple slicing technique so the petals “bloom” without falling apart—trust me, it took some trial and error to nail that part! Blending seasoned flour and panko breadcrumbs gives the coating that signature crunch. Plus, you can make them ahead and reheat without losing crispiness.
What really sets this blooming onions recipe apart? Each onion gets coated individually, so every bite is evenly seasoned and crispy. No soggy spots! You can spice things up with Cajun seasoning, keep it mild, or add a cheesy twist if you’re feeling adventurous. These little appetizers are comforting, festive, and just a little bit addictive. They’re my go-to for impressing guests without breaking a sweat. If you love finger food with serious crunch and flavor, you’ll be hooked after the first bite—promise!
What Ingredients You Will Need
This blooming onions recipe calls for straightforward, tasty ingredients that work together for amazing flavor and crunch. Most are pantry staples, and you can swap a few things based on what you’ve got.
- For the Onions:
- Small yellow onions (about 6-8, peeled and trimmed; choose onions roughly 2 inches across for bite-sized blooms)
- For the Flour Mixture:
- All-purpose flour (1 cup / 120g; for the base coating)
- Cornstarch (3 tbsp / 24g; adds extra crispiness)
- Garlic powder (1½ tsp / 6g)
- Smoked paprika (1 tsp / 4g; gives a subtle smoky flavor)
- Salt (1 tsp / 6g)
- Black pepper (½ tsp / 2g)
- Cayenne pepper (¼ tsp / 1g; optional, for heat)
- For the Egg Wash:
- Large eggs (2, beaten; helps the coating stick)
- Milk (½ cup / 120ml; use dairy-free if needed)
- For the Breadcrumb Coating:
- Panko breadcrumbs (1½ cups / 90g; super crispy texture)
- Parmesan cheese (¼ cup / 20g, finely grated; optional, for savory flavor)
- Dried parsley (1 tsp / 2g; adds color)
- For Frying:
- Vegetable oil (for deep frying—about 2 quarts / 2 liters; I like peanut or canola oil for their high smoke points)
- For Serving:
- Ranch dressing, spicy aioli, or your favorite dip (totally optional but highly recommended!)
If you need gluten-free, swap the flour with your favorite gluten-free blend and use gluten-free panko (I’ve had great results with Kikkoman brand). For dairy-free, skip the Parmesan and use plant-based milk. Sometimes I toss in a pinch of chili powder for an extra kick, especially for game night. The onions themselves should be firm and fresh; avoid soft or sprouting ones. In spring, sweet Vidalia onions are fantastic!
Want to experiment? Try adding a little cumin to the flour blend or sprinkle the finished onions with fresh chives. The coating is forgiving, so you can adjust seasoning to match your crowd’s taste. These ingredients work together for that classic blooming onion flavor, but you’ve got room to play!
Equipment Needed
You don’t need a fancy kitchen setup to make blooming onions, but a few key tools will make things easier. Here’s what I use:
- Sharp chef’s knife (for slicing onions—my old reliable is a sturdy 8-inch blade)
- Cutting board (any large, stable board will do)
- Mixing bowls (at least three: one for flour, one for egg wash, one for breadcrumbs)
- Slotted spoon or spider strainer (for lifting onions from hot oil—essential for safety!)
- Heavy-bottomed pot or deep fryer (needs to hold at least 2 quarts / 2 liters of oil; I use a Dutch oven when frying indoors)
- Paper towels or wire rack (for draining—helps keep the onions crispy)
- Kitchen thermometer (for monitoring oil temperature; if you don’t have one, drop a breadcrumb in the oil and see if it sizzles instantly)
If you don’t own a deep fryer, a sturdy saucepan works fine—just don’t fill it more than halfway with oil. For mixing, you can use any large bowl (even a salad bowl in a pinch). I’ve used tongs before, but a spider strainer is safer and keeps the onions intact. Cleaning up is easier if you line your draining rack with paper towels. If you want budget-friendly options, most dollar stores carry decent mixing bowls and strainers.
Preparation Method
- Prepare the onions:
Peel the small onions and trim the stem ends so they stand upright. Using a sharp knife, make 4-6 evenly spaced vertical cuts from the top down toward the root, stopping ½ inch (1.2cm) before the bottom. Rotate and make additional cuts, aiming for 12-16 petals per onion. Gently separate the layers with your fingers to “bloom” each onion. If the petals stick together, soak the onions in cold water for 10 minutes, then pat dry—this helps them open up beautifully.
- Mix the coatings:
In one bowl, combine 1 cup (120g) flour, 3 tbsp (24g) cornstarch, 1½ tsp (6g) garlic powder, 1 tsp (4g) smoked paprika, 1 tsp (6g) salt, ½ tsp (2g) black pepper, and ¼ tsp (1g) cayenne. In another bowl, whisk 2 eggs with ½ cup (120ml) milk until smooth. In a third bowl, mix 1½ cups (90g) panko breadcrumbs, ¼ cup (20g) Parmesan, and 1 tsp (2g) dried parsley.
- Coat the onions:
Dip each onion into the flour mixture, making sure to get flour between all petals. Shake off excess. Next, dip the floured onion into the egg wash, coating all surfaces. Finally, roll the onion in the breadcrumb mixture, pressing gently so the crumbs stick to every petal. Place coated onions on a tray. If the coating looks thin, repeat the egg and breadcrumb steps for extra crunch. (I always double-coat for maximum crispiness!)
- Heat the oil:
Pour about 2 quarts (2 liters) of oil into your pot or fryer. Heat to 350°F (175°C). Use a thermometer if you’ve got one. If not, drop a breadcrumb in—if it sizzles and browns within 30 seconds, your oil’s ready. Never leave hot oil unattended!
- Fry the onions:
Working in batches of 2-3 onions, carefully lower each into the hot oil. Fry for 3-4 minutes, turning once, until golden brown and crispy. If onions are browning too fast, reduce the heat slightly. Too slow? Raise the temp a notch. Remove onions with a spider strainer and drain on paper towels or a wire rack. Repeat with remaining onions. (Tip: Don’t overcrowd the pot or the oil temperature will drop, making the onions greasy.)
- Serve:
Arrange blooming onions on a platter. Serve hot with ranch, spicy aioli, or your favorite dip. If you want to keep them warm for a crowd, pop them in a 250°F (120°C) oven for up to 30 minutes—just don’t cover, or they’ll get soggy.
If your coating falls off, try drying the onions thoroughly before coating. If the onions aren’t blooming, soak longer in cold water. For extra crunch, double-fry (let them rest for a minute and fry again for 1-2 minutes). I learned the hard way—never fry more than three at a time! For efficiency, coat all onions first, then fry in batches.
Cooking Tips & Techniques
After making these bite-sized blooming onions dozens of times, I’ve picked up a few tricks. First, always dry your onions well before coating—excess moisture makes the crumbs slide off. When slicing, don’t cut all the way through; leaving that little root intact is key for keeping the “bloom” together.
Use panko breadcrumbs rather than regular—they’re lighter and create a super crispy shell. If you want extra crunch, mix in some crushed cornflakes. I once tried skipping the cornstarch and the coating ended up soggy, so don’t leave that out. For even browning, gently nudge the onions while frying. You’ll know they’re done when the coating is deep golden and the onion petals are tender but not mushy.
Timing matters—work quickly when dipping and coating. If you let the onions sit too long after coating, the breading can slip off. Fry in small batches to maintain oil temperature. I’ve burned a few by turning up the heat too much, so steady medium-high is best. For multitasking, set up a “coating station” with all bowls in a row. Clean as you go, or you’ll end up with a sticky mess (been there!). Consistency comes from keeping onion pieces uniform and not rushing the frying step. If you want to make ahead, fry lightly, then finish in the oven before serving.
Variations & Adaptations
This blooming onions recipe is super flexible. For gluten-free, use a blend like Cup4Cup for the flour and gluten-free panko. For a dairy-free option, skip the Parmesan and use plant-based milk in the egg wash.
- Spicy Cajun: Add 1 tsp Cajun seasoning to the flour mix and serve with remoulade for a Southern kick.
- Cheesy Garlic: Double the Parmesan and mix in 1 tsp garlic powder with the breadcrumbs for extra flavor.
- Herb Lovers: Stir in fresh chopped thyme or rosemary to the breadcrumb mixture before coating.
For baking instead of frying, brush coated onions with a little oil and bake at 425°F (220°C) for 15-20 minutes, turning once. They won’t be quite as crispy but are still delicious! If you’ve got air fryer fans, set at 400°F (200°C) and cook for 10-12 minutes.
I’ve tried using red onions for a sweeter, milder flavor—works great! If you have allergies, substitute almond milk for dairy and use egg replacer if needed. Personal favorite? A sprinkle of smoked sea salt right after frying. These little tweaks let you tailor the recipe for any crowd or dietary need.
Serving & Storage Suggestions
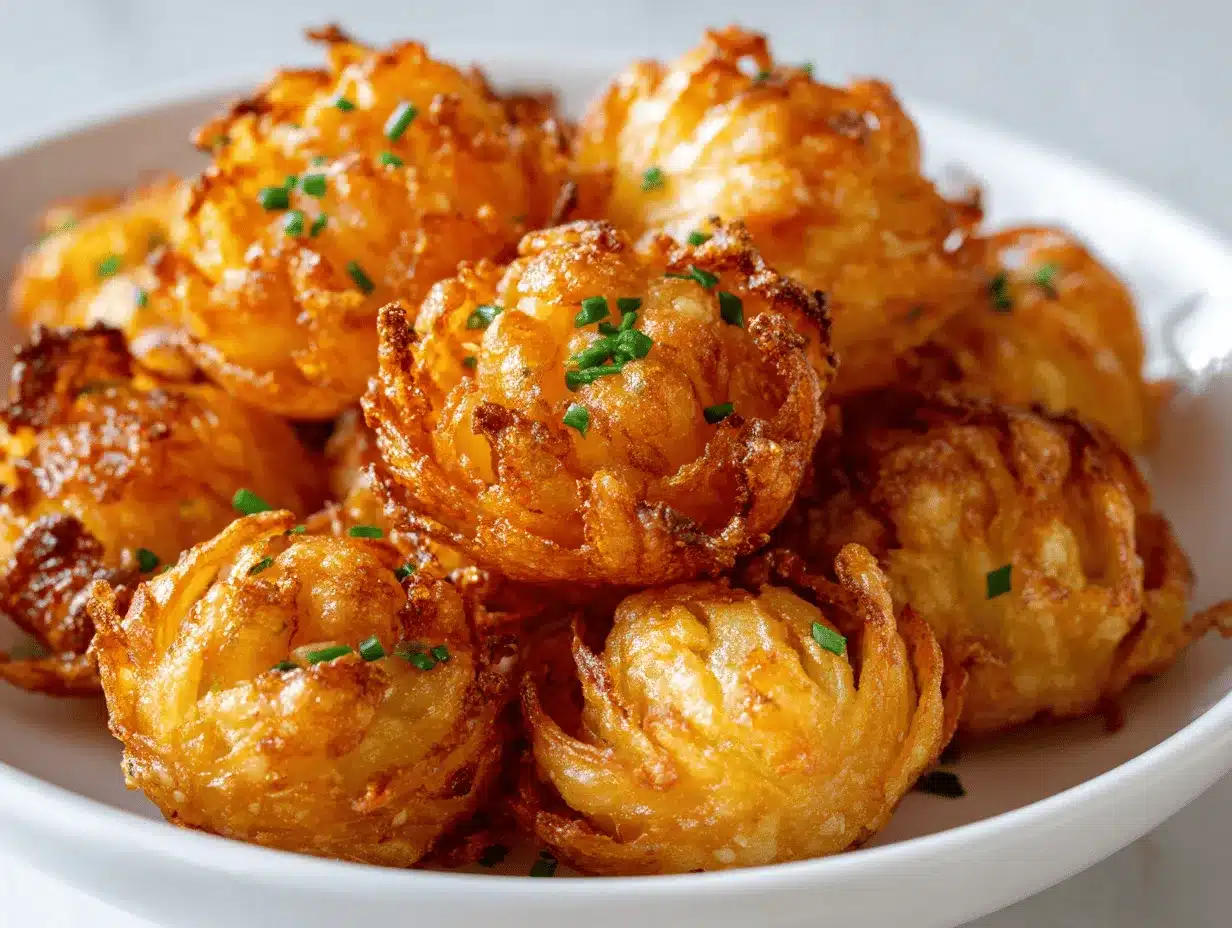
Serve bite-sized blooming onions hot, right off the rack, for max crunch. I like to pile them high on a platter, sprinkle with chopped parsley, and nestle little bowls of ranch or sriracha aioli nearby. For parties, arrange them in a ring around the dip—makes for easy grabbing and great presentation.
If pairing with other dishes, blooming onions go amazing with sliders, grilled chicken skewers, or fresh veggie sticks. For drinks, a cold beer or sparkling lemonade is perfect. If you want to make ahead, fry the onions, then store in an airtight container in the fridge for up to 2 days. Reheat in a 350°F (175°C) oven for 8-10 minutes, uncovered, to restore crispiness—never microwave, or they’ll get soggy.
Freeze extra fried onions by placing in a single layer on a baking sheet until solid, then transfer to a freezer bag. Reheat straight from frozen in a hot oven for 12-15 minutes. Honestly, the flavor gets even better as the spices meld, so leftovers (if you have any!) are a treat the next day.
Nutritional Information & Benefits
Each serving of bite-sized blooming onions (about 2 mini onions) has roughly 180 calories, 10g fat, 19g carbs, and 4g protein. The onions provide fiber, vitamin C, and antioxidants—plus, you get the happiness boost from crunchy comfort food.
If you use gluten-free flour and dairy-free milk, this recipe works for most dietary needs. Allergens to note: eggs, wheat, and dairy (if using Parmesan). The onions themselves are low-calorie and nutrient-rich, so you can feel good about indulging in moderation. As someone who tries to balance treats with healthy choices, I love that these are veggie-based and baked or air-fried versions are even lighter. They fit right into party menus without blowing up your nutrition goals.
Conclusion
If you’re looking for a party appetizer that’s crispy, fun, and guaranteed to wow guests, this blooming onions recipe is it. Bite-sized and easy to share, each mini onion is packed with flavor and crunch. Customize the spices, swap coatings, or try different dips—make it your own!
I love these because they turn simple ingredients into something special (and they always remind me of backyard gatherings). Whether you’re hosting game night or just want a snack that makes you smile, blooming onions will win everyone over.
Ready to give them a try? Share your results, comment below with your favorite variation, or tag me if you post your blooming onions on Pinterest! Happy frying, and may your kitchen always smell amazing.
FAQs
Can I make blooming onions ahead of time?
Absolutely! Fry them, cool completely, and store in the fridge. Reheat in a hot oven (never microwave) to bring back the crispiness.
What’s the best onion type for blooming onions?
Small yellow or sweet onions work best—they bloom easily and have great flavor. Avoid really large onions for bite-sized snacks.
Can I bake blooming onions instead of frying?
Yes! Brush with oil and bake at 425°F (220°C) for 15-20 minutes. They won’t be quite as crispy as fried but still delicious.
How do I prevent the coating from falling off?
Dry your onions well before coating and double-dip in egg and breadcrumbs for extra crunch. Don’t skip the cornstarch in the flour blend!
Are blooming onions gluten-free?
You can make them gluten-free by using gluten-free flour and panko. They’re easy to adapt for allergies—just check your ingredients.
Pin This Recipe!
Blooming Onions Recipe: Easy Bite-Sized Crispy Party Appetizer
These bite-sized blooming onions are a crispy, golden party appetizer with seasoned onion petals coated in a crunchy breadcrumb shell. Perfect for sharing at gatherings, game days, or movie nights, they’re easy to make and irresistibly delicious.
- Prep Time: 20 minutes
- Cook Time: 20 minutes
- Total Time: 40 minutes
- Yield: 6-8 servings 1x
- Category: Appetizer
- Cuisine: American
Ingredients
- 6–8 small yellow onions (about 2 inches across, peeled and trimmed)
- 1 cup all-purpose flour
- 3 tablespoons cornstarch
- 1 1/2 teaspoons garlic powder
- 1 teaspoon smoked paprika
- 1 teaspoon salt
- 1/2 teaspoon black pepper
- 1/4 teaspoon cayenne pepper (optional)
- 2 large eggs, beaten
- 1/2 cup milk (dairy or plant-based)
- 1 1/2 cups panko breadcrumbs
- 1/4 cup Parmesan cheese, finely grated (optional)
- 1 teaspoon dried parsley
- Vegetable oil for deep frying (about 2 quarts)
- Ranch dressing, spicy aioli, or your favorite dip (optional for serving)
Instructions
- Peel and trim the small onions. Stand upright and make 4-6 evenly spaced vertical cuts from the top down toward the root, stopping 1/2 inch before the bottom. Rotate and make additional cuts for 12-16 petals per onion. Gently separate layers to ‘bloom.’ If petals stick, soak onions in cold water for 10 minutes, then pat dry.
- In one bowl, combine flour, cornstarch, garlic powder, smoked paprika, salt, black pepper, and cayenne. In a second bowl, whisk eggs and milk until smooth. In a third bowl, mix panko breadcrumbs, Parmesan, and dried parsley.
- Dip each onion into the flour mixture, coating between all petals. Shake off excess. Dip into egg wash, coating all surfaces. Roll in breadcrumb mixture, pressing gently so crumbs stick to every petal. Place coated onions on a tray. For extra crunch, repeat egg and breadcrumb steps (double-coat).
- Pour oil into a heavy-bottomed pot or deep fryer and heat to 350°F. Use a thermometer or test with a breadcrumb (should sizzle and brown in 30 seconds).
- Working in batches of 2-3 onions, carefully lower each into hot oil. Fry for 3-4 minutes, turning once, until golden brown and crispy. Remove with a spider strainer and drain on paper towels or a wire rack. Repeat with remaining onions.
- Arrange blooming onions on a platter and serve hot with ranch, spicy aioli, or your favorite dip. To keep warm for a crowd, place in a 250°F oven for up to 30 minutes, uncovered.
Notes
Dry onions thoroughly before coating to prevent crumbs from sliding off. Double-coat for extra crunch. For gluten-free, use gluten-free flour and panko. For dairy-free, skip Parmesan and use plant-based milk. Bake at 425°F for 15-20 minutes or air fry at 400°F for 10-12 minutes for a lighter version. Fry in small batches to maintain oil temperature. Make ahead and reheat in oven for best crispiness.
Nutrition
- Serving Size: About 2 mini onions per serving
- Calories: 180
- Sugar: 3
- Sodium: 350
- Fat: 10
- Saturated Fat: 2
- Carbohydrates: 19
- Fiber: 2
- Protein: 4
Keywords: blooming onions, party appetizer, crispy onions, finger food, fried onions, game day snacks, easy appetizer, vegetarian option, gluten-free option