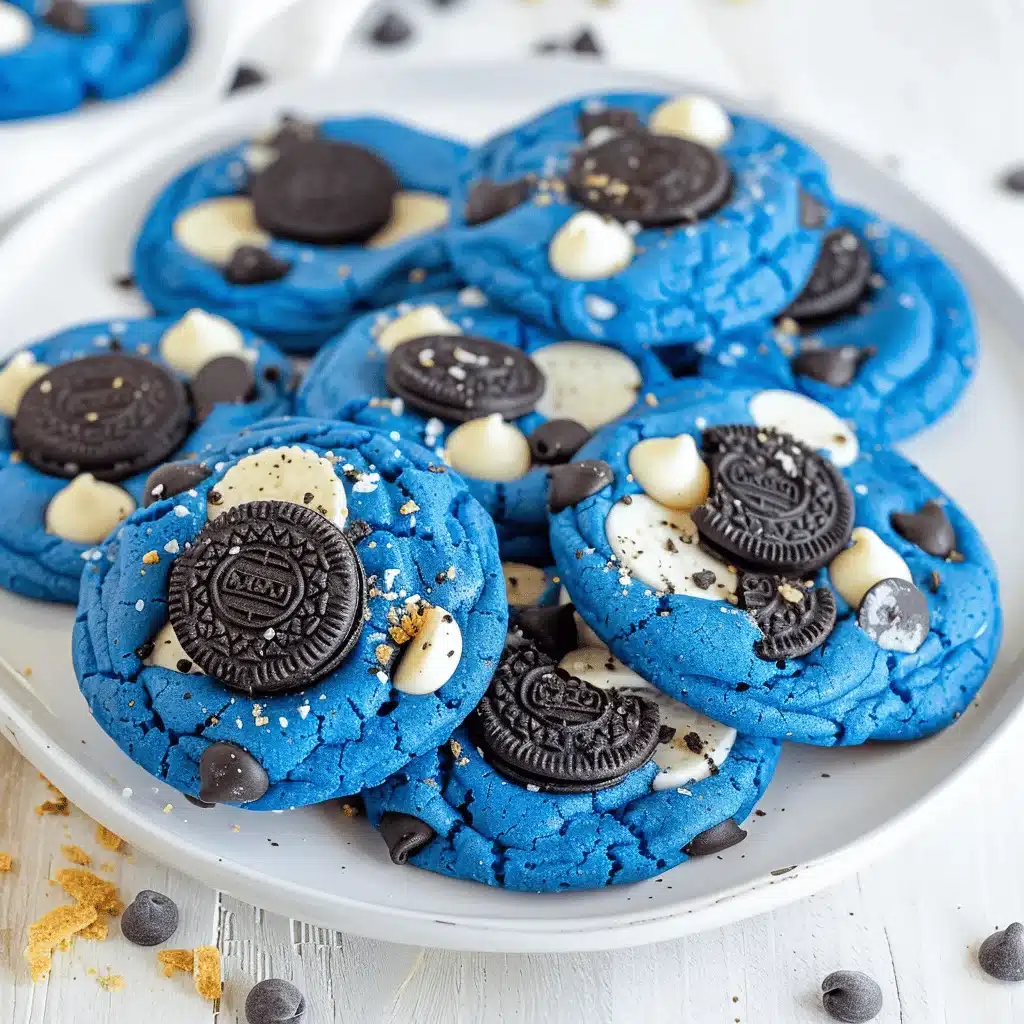
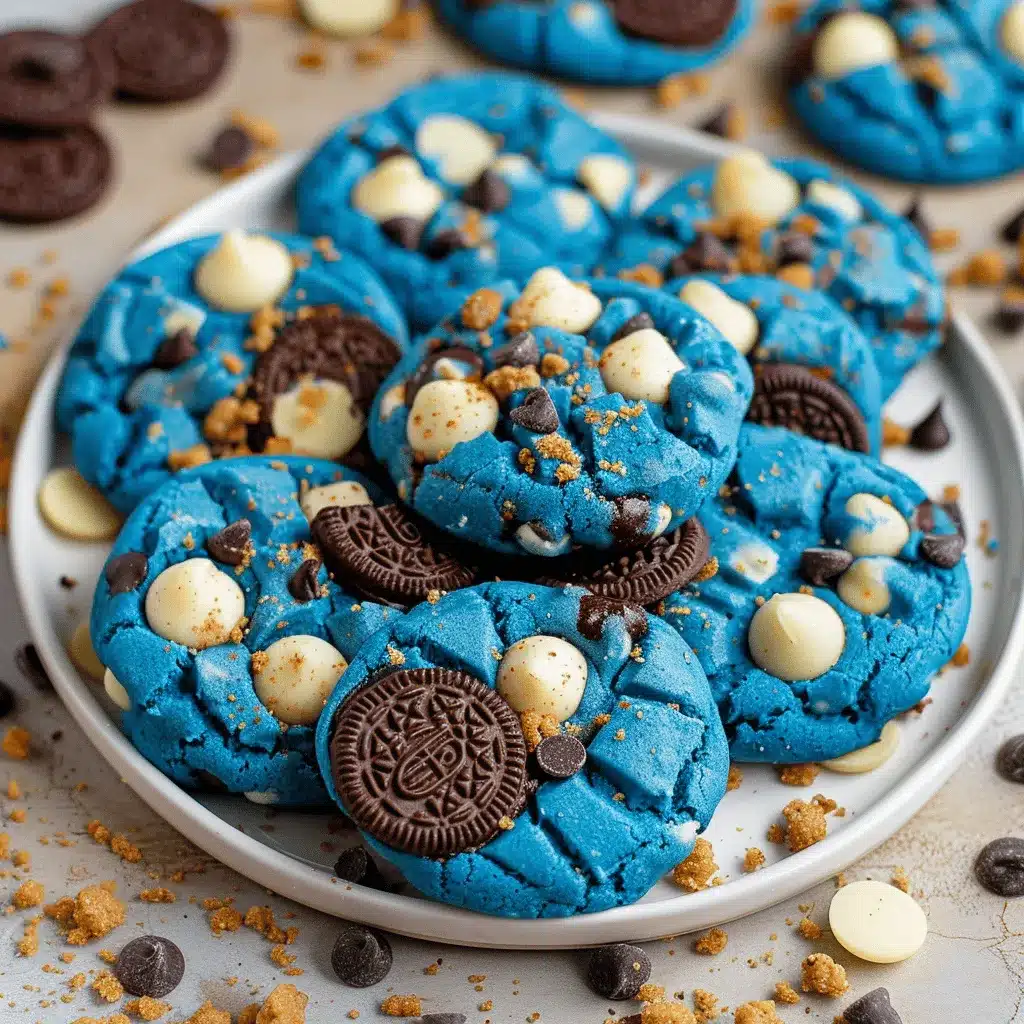
The first time I made Cookie Monster cookies, I knew I’d found my go-to party treat. These soft and chewy blue cookies, dotted with chocolate chunks, mini cookies, and candy eyes, are just as fun to look at as they are to eat. They’re like a sugar-fueled hug for your inner child! Whether you’re hosting a kids’ birthday party or just need a whimsical dessert for a holiday potluck, these cookies are guaranteed to steal the show. Plus, they’re way easier to make than they look. Let’s dive into the recipe and bring a little Cookie Monster magic to your next celebration!
Why You’ll Love This Recipe
- Whimsical and Fun: Bright blue cookies with candy eyes and cookie chunks bring a playful charm to any gathering.
- Perfect Texture: Soft, chewy centers with slightly crisp edges make these cookies irresistibly good.
- Party-Perfect: They’re a hit with kids and adults alike, making them ideal for birthdays, holidays, or even themed events.
- Customizable: Swap in different candies or colors to match your party theme or preferences.
- No Fancy Equipment: All you need are basic baking tools to whip up these beauties.
These Cookie Monster cookies aren’t just cute—they’re delicious. The balance of sweetness, the soft texture, and the fun candy eyes make them a standout treat. Plus, they’re surprisingly simple to make, even if you’re a beginner in the kitchen!
What Ingredients You Will Need
This recipe uses simple ingredients, many of which you probably already have in your pantry. Let’s break it down:
- Unsalted Butter: Softened to room temperature for a creamy, rich base.
- Brown Sugar: Adds moisture and a deep, caramel-like sweetness.
- Granulated Sugar: For just the right amount of sweetness and structure.
- Eggs: Helps bind the dough and adds richness.
- Vanilla Extract: Enhances the overall flavor.
- All-Purpose Flour: The foundation of the cookies.
- Baking Soda: Gives the cookies their soft, chewy texture.
- Salt: Balances the sweetness.
- Blue Gel Food Coloring: For that signature Cookie Monster hue—gel works best for vibrant color without thinning the dough.
- Semi-Sweet Chocolate Chunks: For gooey, chocolatey goodness in every bite.
- Mini Chocolate Chip Cookies: Adds a fun, meta-cookie twist.
- Candy Eyes: The finishing touch to bring out the Cookie Monster theme.
If you’re missing anything, don’t worry! I’ve included substitution tips below to help you adapt the recipe.
Equipment Needed
- Mixing Bowls: One large for the dough and a smaller one for dry ingredients.
- Electric Mixer: A hand mixer or stand mixer will make creaming the butter and sugar a breeze.
- Measuring Cups and Spoons: For precise measurements—baking is all about accuracy!
- Baking Sheets: Line them with parchment paper for easy cleanup.
- Cookie Scoop: Ensures evenly sized cookies that bake perfectly.
If you don’t have a cookie scoop, a tablespoon works just fine for portioning the dough. Oh, and don’t forget a cooling rack to let the cookies set properly!
How to Make Soft & Chewy Cookie Monster Cookies
- Preheat the Oven: Set your oven to 350°F (175°C) and line your baking sheets with parchment paper.
- Cream Butter and Sugars: In a large bowl, beat the softened butter, brown sugar, and granulated sugar together until light and fluffy. This should take about 2-3 minutes.
- Add Wet Ingredients: Mix in the eggs one at a time, followed by the vanilla extract. Add in the blue gel food coloring and mix until the color is evenly distributed.
- Combine Dry Ingredients: In a separate bowl, whisk together the flour, baking soda, and salt. Gradually add this mixture to the wet ingredients, mixing just until combined.
- Fold in Mix-Ins: Gently fold in the chocolate chunks and mini cookies, reserving a few pieces to press on top of the cookies before baking.
- Portion and Shape: Use a cookie scoop or a tablespoon to drop rounded dough balls onto the prepared baking sheets. Leave about 2 inches of space between each cookie.
- Add Candy Eyes: Press candy eyes into the top of each cookie. This is where the fun really starts to come to life!
- Bake: Bake for 10-12 minutes or until the edges are set but the centers look slightly underbaked. They’ll firm up as they cool.
- Cool: Let the cookies cool on the baking sheet for 5 minutes, then transfer to a wire rack to cool completely.
And there you have it—soft, chewy, and oh-so-cute Cookie Monster cookies!
Cooking Tips & Techniques
- Don’t Overbake: The secret to soft cookies is taking them out of the oven while the centers are still slightly underdone.
- Chill the Dough: If your dough feels too sticky, pop it in the fridge for 20-30 minutes before baking. This also helps the colors stay vibrant.
- Use Gel Food Coloring: Liquid food coloring can water down the dough and affect the texture.
- Get Creative: Don’t have candy eyes? Use white chocolate chips with a dot of melted dark chocolate as a DIY alternative.
These little tips will make sure your Cookie Monster cookies turn out perfect every time.
Variations & Adaptations
- Gluten-Free: Swap the all-purpose flour for a 1:1 gluten-free baking flour blend.
- Different Colors: Not feeling the blue? Try pink or green for a different character-inspired look.
- Mix-In Madness: Add peanut butter chips, M&Ms, or crushed Oreo pieces for extra fun.
I once made these with red food coloring for an Elmo-inspired version, and they were just as adorable!
Serving & Storage Suggestions
Serve these cookies at room temperature for the best texture. They pair perfectly with a cold glass of milk or hot cocoa. For parties, arrange them on a platter with mini cookies scattered around for extra flair.
To store, place the cookies in an airtight container for up to 5 days at room temperature. You can also freeze them for up to 3 months—just thaw at room temperature before serving. If they lose a bit of softness, a quick zap in the microwave (10-15 seconds) will bring them back to life.
Nutritional Information & Benefits
While these cookies are a treat, they do offer some nutritional value:
- Calories: Approximately 180 per cookie (depending on size and mix-ins).
- Protein: Contains 2g of protein thanks to the eggs and flour.
- Allergen Info: Contains gluten, dairy, and eggs—be sure to adapt for allergies if needed.
Remember, these cookies are all about joy and indulgence—a little balance is key!
Conclusion
If you’re looking for a show-stopping party treat, these soft and chewy Cookie Monster cookies are it. They’re fun, delicious, and surprisingly easy to make. Whether you’re baking with kids, impressing party guests, or just treating yourself, these cookies are guaranteed to bring smiles all around.
Go ahead and give this recipe a try! I’d love to hear how they turned out for you. Leave a comment below, share your pictures on social media, and don’t forget to pin this recipe for later. Happy baking!
FAQs
Can I make these cookies ahead of time?
Yes! You can prepare the dough in advance and refrigerate it for up to 2 days or freeze it for up to 3 months.
Do I have to use gel food coloring?
Gel food coloring is recommended for vibrant color, but liquid food coloring will work in a pinch—just reduce the amount to avoid altering the dough’s texture.
What if I can’t find candy eyes?
No problem! Use white chocolate chips with a dot of melted dark chocolate as a DIY alternative.
Can I make these cookies without an electric mixer?
Yes, you can mix everything by hand, but it will take a bit more effort, especially when creaming the butter and sugar.
How do I keep these cookies from spreading too much?
Chilling the dough for 20-30 minutes before baking helps the cookies hold their shape better in the oven.
Pin This Recipe!