The rich, velvety texture of homemade chocolate truffles melting on your tongue is honestly one of those little joys that makes life sweeter. I remember the first time I made these irresistible homemade chocolate truffles — it was a chilly winter evening, and I craved something indulgent but simple. Turns out, whipping up these luscious treats is easier than you think, and the results are downright addictive.
What I love about the homemade chocolate truffles recipe is how it transforms just a few basic ingredients into a decadent delight perfect for gifting or treating yourself. After testing this recipe several times (and sneaking a few too many bites), I’ve nailed a method that’s straightforward, quick, and yields truffles silky enough to impress even the most discerning chocoholic. Plus, they’re great for anyone who appreciates the magic of handmade sweets without fussing over complicated steps.
If you’re looking for an easy 5-step guide to make perfect homemade chocolate truffles, you’ve landed in the right place. Whether it’s for a special occasion, a cozy night in, or just a way to satisfy your sweet tooth, this recipe brings a little bit of luxury into your kitchen without needing a professional pastry chef’s skills. Let’s get started on crafting these melt-in-your-mouth gems!
Why You’ll Love This Recipe
- Quick & Easy: Comes together in under 30 minutes, making it perfect for last-minute dessert cravings or quick gifts.
- Simple Ingredients: No need for fancy chocolates or odd flavorings — just good-quality basics you likely already have at home.
- Perfect for Gifting: These truffles are elegant and customizable, ideal for birthdays, holidays, or just because.
- Crowd-Pleaser: Family, friends, and coworkers all rave about them — they vanish fast at any gathering.
- Unbelievably Delicious: The creamy ganache center with a delicate cocoa or nut coating delivers a rich, satisfying bite every time.
What sets this homemade chocolate truffles recipe apart is the silky ganache that’s smooth yet firm enough to shape, thanks to the perfect chocolate-to-cream ratio. I experimented with different chocolates to find the one that provides the right balance of sweetness and depth, and honestly, it’s the little tweaks like chilling time and rolling technique that make these truffles shine. This isn’t just another chocolate recipe; it’s the one that turns you into the go-to chocolatier among your circle.
Plus, making these truffles feels like a mini self-care ritual — a way to slow down and enjoy the process while promising a sweet reward at the end. Trust me, once you try these, they’ll be your easy, impressive dessert staple.
What Ingredients You Will Need
This homemade chocolate truffles recipe calls for simple, wholesome ingredients that come together to create a rich, creamy filling with a luscious coating. Most are pantry staples, so no need to run to a specialty store.
- Good-quality dark chocolate (8 ounces / 225 grams): Use 60-70% cocoa for a perfect bittersweet flavor. I prefer brands like Valrhona or Ghirardelli for smooth texture.
- Heavy cream (½ cup / 120 ml): Adds richness and helps create that silky ganache center.
- Unsalted butter (2 tablespoons / 28 grams): Softened — this adds creaminess and a subtle sheen to the truffles.
- Pure vanilla extract (1 teaspoon): For a hint of warm, comforting aroma.
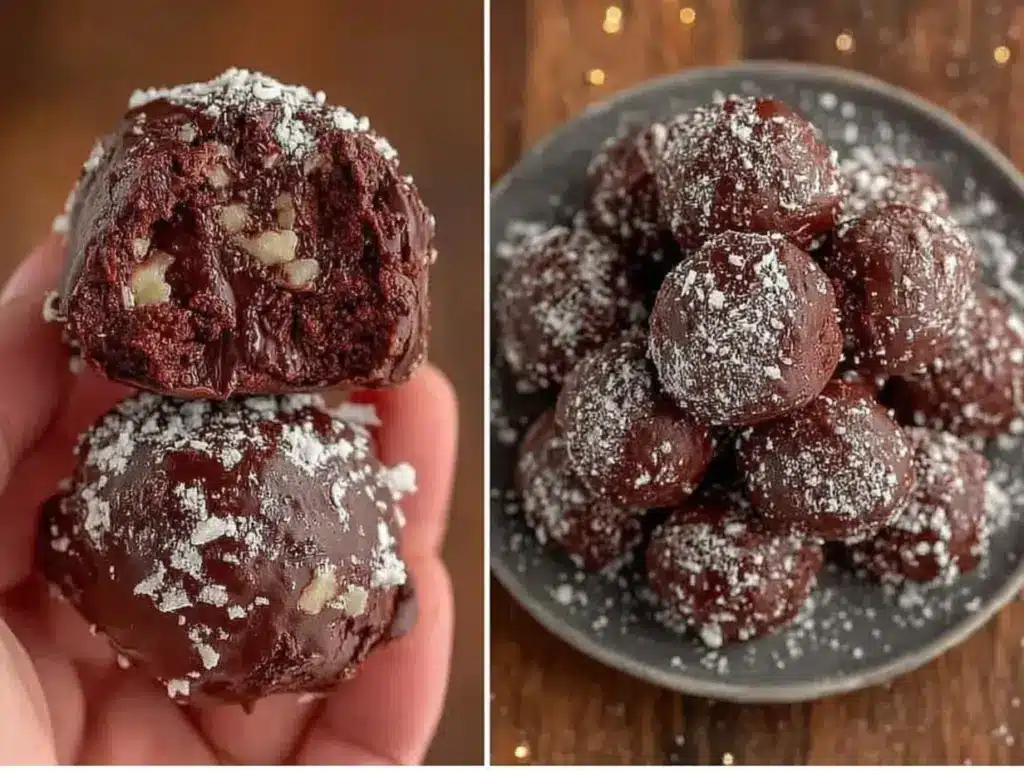
- Cocoa powder (½ cup / 50 grams): For rolling the truffles, choose Dutch-processed cocoa for less bitterness.
- Optional coatings: Finely chopped toasted nuts, shredded coconut, or powdered sugar (for variety and texture).
You can swap the dark chocolate for milk chocolate if you prefer a sweeter, creamier truffle, or mix in a teaspoon of espresso powder to deepen the chocolate flavor. For dairy-free versions, try coconut cream instead of heavy cream, and use vegan butter substitutes — the texture will still be divine!
Pro tip: Look for firm, high-quality chocolate bars rather than chips, as they melt more evenly and give you that glossy finish. Also, let the butter soften at room temperature for easier blending — this little step makes a big difference in the final texture.
Equipment Needed
- Heatproof mixing bowl: For melting chocolate and mixing ingredients. A glass or stainless steel bowl works best.
- Saucepan: For gently heating the cream.
- Whisk and rubber spatula: To combine and scrape down the sides.
- Baking sheet lined with parchment paper: For chilling and shaping truffles.
- Small cookie scoop or teaspoon: To portion the ganache evenly.
- Fine mesh sieve (optional): For dusting cocoa powder evenly.
If you don’t have a cookie scoop, a tablespoon or even a clean finger works fine — just keep your hands cool by dipping them in cold water. I’ve made these truffles with a simple teaspoon for years, so no fancy tools required. For those on a budget, these basic kitchen staples are all you need to create a stunning treat.
Detailed Preparation Method
-
Chop the chocolate: Finely chop 8 ounces (225 grams) of dark chocolate and place it in your heatproof bowl. The smaller the pieces, the quicker and more evenly it melts. (Time: 5 minutes)
-
Heat the cream: In a small saucepan, gently warm ½ cup (120 ml) of heavy cream over medium heat until it just begins to simmer — tiny bubbles around the edges, but don’t let it boil. Remove from heat immediately. (Time: 3-4 minutes)
-
Make the ganache: Pour the hot cream over the chopped chocolate. Let it sit undisturbed for 2 minutes to soften the chocolate, then whisk gently until smooth and glossy. Stir in 2 tablespoons (28 grams) of softened unsalted butter and 1 teaspoon of vanilla extract until fully combined. The ganache should be silky and thick enough to hold its shape. (Time: 5 minutes)
-
Chill the ganache: Cover the bowl with plastic wrap and refrigerate for at least 2 hours, or until firm but scoopable. This step is key for shaping perfect truffles. (Time: 2+ hours)
-
Shape and coat: Using a small cookie scoop or teaspoon, portion out the ganache and quickly roll it between your palms to form smooth balls. Roll each truffle in cocoa powder or your choice of coating, then place on a parchment-lined baking sheet. Chill for another 30 minutes to set. (Time: 20-30 minutes)
Tip: If the ganache gets too soft while shaping, pop it back in the fridge for 10-15 minutes. Also, keep your hands cool to prevent melting — dipping your fingers in cold water between rolls helps a lot.
Cooking Tips & Techniques
One key to perfect homemade chocolate truffles is patience with the chilling process. Rushing ganache that’s not fully set makes it sticky and hard to work with. I’ve learned this the hard way — trying to roll soft ganache led to a chocolatey mess on my counters!
Use a sharp knife to chop the chocolate finely; uneven chunks can lead to lumps in the ganache. When whisking the cream and chocolate, start gently — you don’t want to incorporate air bubbles, which can affect texture.
For consistent truffle size, a small cookie scoop is a game changer. It speeds up the shaping process and ensures even chilling and coating. If you want a shinier finish, try rolling truffles in tempered chocolate instead of cocoa powder — but that’s a bit more advanced.
Timing-wise, make these truffles on a day when you have a couple of hours to spare for chilling. Multitasking by prepping other dishes or cleaning the kitchen during this time works well. Lastly, store truffles in an airtight container in the fridge and pull them out 10 minutes before serving to let their flavor bloom.
Variations & Adaptations
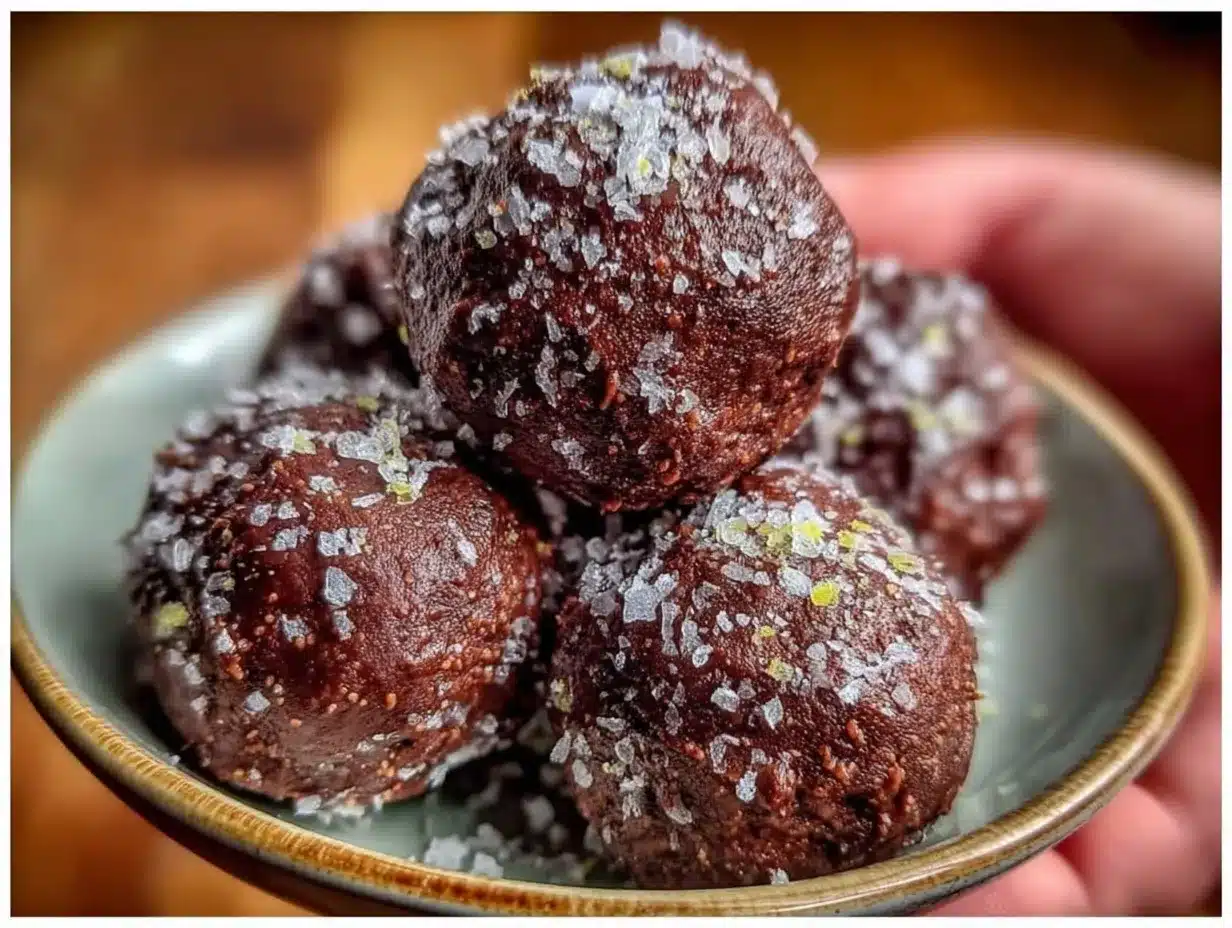
- Flavored truffles: Add a teaspoon of liqueur like Grand Marnier, Chambord, or Kahlua to the ganache for an adult twist.
- Nutty delight: Mix finely chopped toasted hazelnuts or almonds into the ganache before chilling for added crunch and flavor.
- Dairy-free version: Substitute coconut cream for heavy cream and use vegan chocolate and butter alternatives. The texture remains creamy and satisfying.
- Spiced chocolate: Stir in a pinch of cinnamon, chili powder, or espresso powder to the ganache for a subtle kick.
- Coating variations: Instead of cocoa powder, try rolling truffles in crushed freeze-dried raspberries, powdered sugar, or shredded coconut for diverse flavors and textures.
I once tried a batch with sea salt sprinkled on top after rolling in cocoa powder — the salty-sweet combo was a hit at a dinner party. Feel free to experiment with your favorite flavors or coatings to make these truffles uniquely yours.
Serving & Storage Suggestions
Serve homemade chocolate truffles slightly chilled or at room temperature to best enjoy their creamy texture and rich flavor. Present them in small paper candy cups for a fancy touch, or arrange them elegantly on a decorative plate.
Pair these truffles with a robust cup of coffee, a glass of red wine, or even a lightly sweetened herbal tea to complement their chocolatey goodness. They also make a thoughtful gift — just box them up in a pretty tin or jar with a ribbon.
Store truffles in an airtight container in the refrigerator for up to two weeks. For longer storage, freeze them for up to three months — thaw in the fridge overnight before serving. Over time, the flavors deepen, so truffles often taste even better a day after making.
Reheat gently by letting them sit at room temperature about 15 minutes before serving to soften the ganache and release the aroma.
Nutritional Information & Benefits
Each homemade chocolate truffle (about 1 inch diameter) roughly contains 90-110 calories, with 7-8 grams of fat, primarily from cream and butter, and 5-6 grams of carbohydrates. They’re a treat that’s rich but can be enjoyed in moderation as part of a balanced diet.
Dark chocolate, a key ingredient, is packed with antioxidants and may support heart health when eaten wisely. Using high-quality chocolate ensures you’re getting the best flavor and benefits. Plus, homemade truffles let you control sugar content, unlike many store-bought options.
If you’re mindful of allergens, note these truffles contain dairy; however, dairy-free alternatives can be used to accommodate sensitivities or vegan diets. This flexibility makes the recipe great for sharing with friends and family of various dietary needs.
Conclusion
Making these irresistible homemade chocolate truffles is a delightful way to treat yourself and others with something truly special yet surprisingly easy. The rich, smooth ganache combined with a simple cocoa powder coating delivers a classic indulgence that’s hard to resist.
Feel free to customize the flavors and coatings to your taste — I love how versatile this recipe is, allowing you to get creative while keeping things straightforward. Honestly, these truffles have become my go-to gift and comfort food, especially when life calls for a little extra sweetness.
If you give this recipe a try, I’d love to hear how you make it your own! Leave a comment below sharing your favorite variations or tips, and don’t forget to share with friends who appreciate a homemade treat. Happy truffle making!
FAQs
How long do homemade chocolate truffles last?
Stored in an airtight container in the fridge, truffles last about two weeks. For longer storage, freeze them up to three months.
Can I use milk chocolate instead of dark chocolate?
Yes! Milk chocolate works well for a sweeter, creamier truffle, but adjust the sugar if needed to balance flavors.
What’s the best way to roll truffles without melting them?
Keep your hands cool by dipping them in cold water between rolling, and work quickly to prevent the ganache from softening too much.
Can I add flavors like liqueurs or spices to the ganache?
Absolutely! Adding a teaspoon of liqueur or a pinch of spices like cinnamon or espresso powder enhances the flavor beautifully.
Is there a dairy-free option for making these truffles?
Yes, use coconut cream instead of heavy cream, vegan chocolate, and dairy-free butter substitutes to make a delicious vegan-friendly version.
Pin This Recipe!
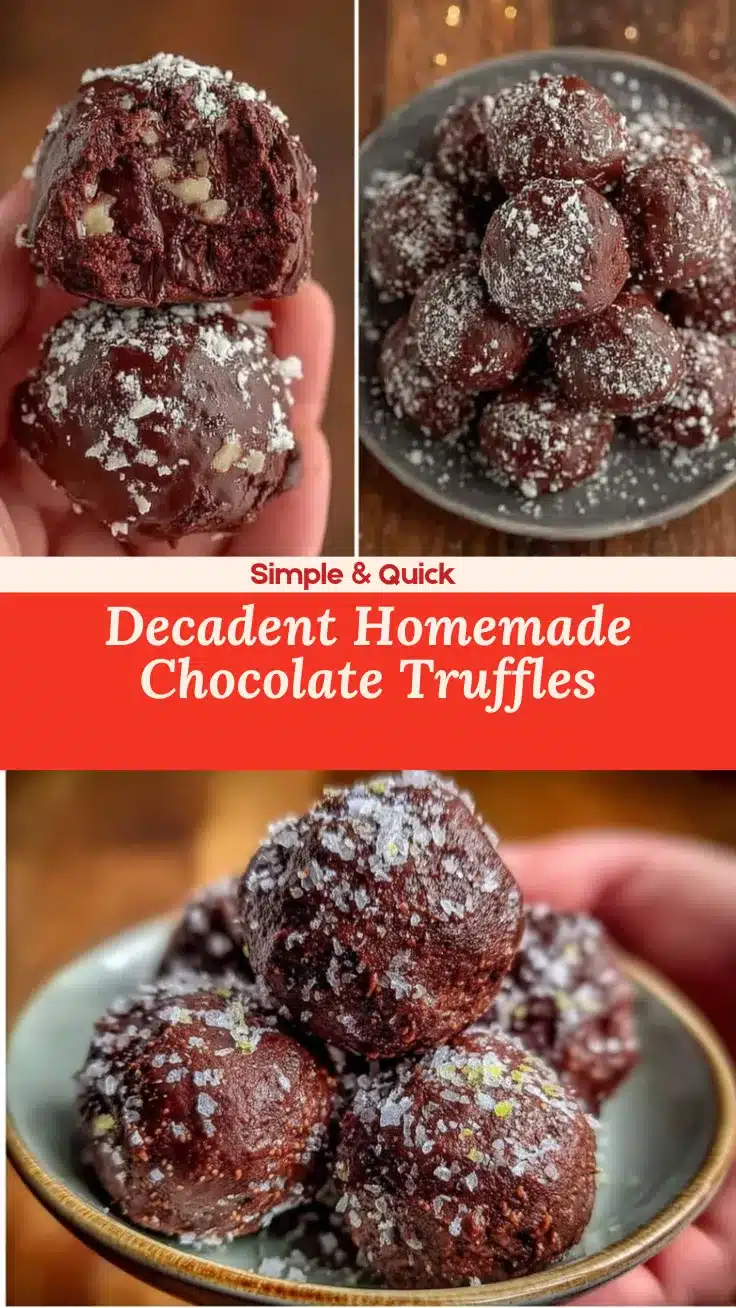
Homemade Chocolate Truffles

Rich, velvety homemade chocolate truffles with a silky ganache center and a delicate cocoa powder coating, perfect for gifting or indulging yourself.
- Prep Time: 15 minutes
- Cook Time: 5 minutes
- Total Time: 2 hours 50 minutes
- Yield: 24 truffles 1x
- Category: Dessert
- Cuisine: French
Ingredients
- 8 ounces (225 grams) good-quality dark chocolate (60-70% cocoa)
- ½ cup (120 ml) heavy cream
- 2 tablespoons (28 grams) unsalted butter, softened
- 1 teaspoon pure vanilla extract
- ½ cup (50 grams) Dutch-processed cocoa powder for rolling
- Optional coatings: finely chopped toasted nuts, shredded coconut, powdered sugar
Instructions
- Finely chop 8 ounces (225 grams) of dark chocolate and place in a heatproof bowl.
- Gently warm ½ cup (120 ml) of heavy cream in a small saucepan over medium heat until it just begins to simmer; remove from heat immediately.
- Pour the hot cream over the chopped chocolate. Let sit undisturbed for 2 minutes, then whisk gently until smooth and glossy. Stir in 2 tablespoons (28 grams) softened unsalted butter and 1 teaspoon vanilla extract until fully combined.
- Cover the bowl with plastic wrap and refrigerate for at least 2 hours, or until firm but scoopable.
- Using a small cookie scoop or teaspoon, portion out the ganache and roll between palms to form smooth balls. Roll each truffle in cocoa powder or chosen coating, place on parchment-lined baking sheet, and chill for another 30 minutes to set.
Notes
Use firm, high-quality chocolate bars for better melting and glossy finish. Keep hands cool by dipping in cold water when shaping truffles. Chill ganache thoroughly before shaping to avoid sticky mess. Store truffles in airtight container in fridge up to two weeks or freeze up to three months.
Nutrition
- Serving Size: 1 truffle (about 1 i
- Calories: 100
- Sugar: 45
- Sodium: 10
- Fat: 78
- Saturated Fat: 45
- Carbohydrates: 56
- Fiber: 1
- Protein: 1
Keywords: chocolate truffles, homemade truffles, easy chocolate dessert, ganache, chocolate treats, gift ideas, quick dessert


