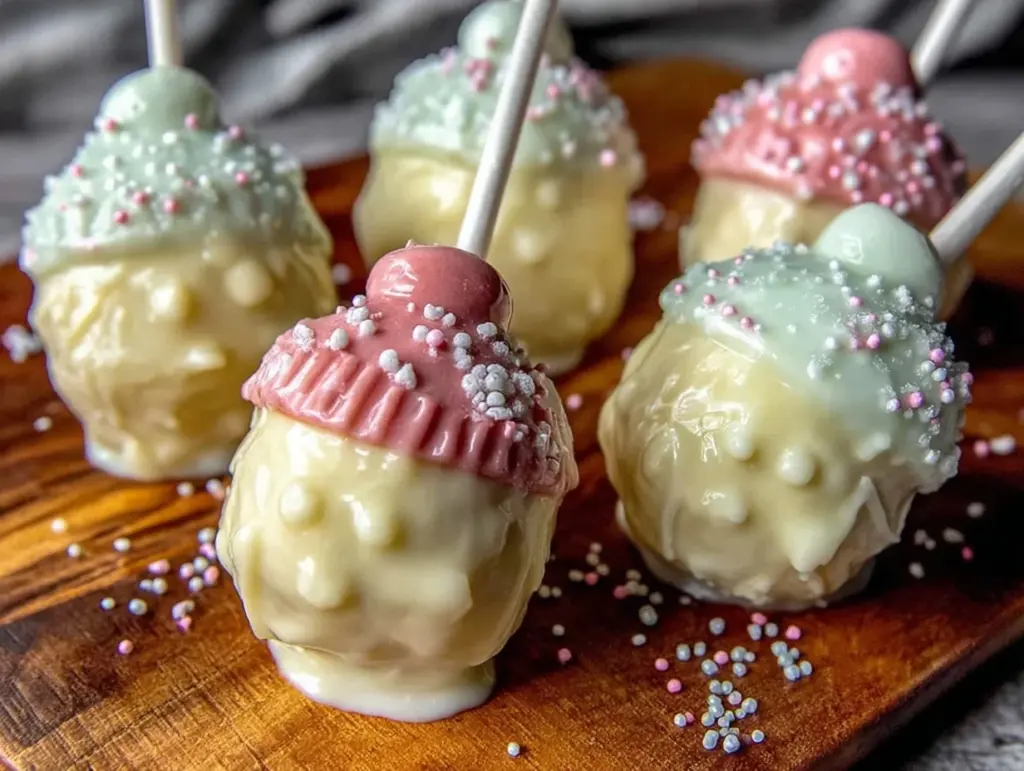
The soft sweetness of cake combined with creamy frosting, all shaped into adorable baby bottles — honestly, it’s hard to resist these baby bottle cake pops. I remember the first time I made them for my sister’s baby shower. The room was buzzing with excitement, and these little treats stole the show, sparking smiles and “aww” moments everywhere. They’re not just cute; they’re downright delicious, and they bring a playful charm to any baby shower table.
Making baby bottle cake pops became my go-to party trick because they’re fun to create and even more fun to share. I’ve whipped up dozens over the years, tweaking the frosting-to-cake ratio and perfecting the coating so they have that dreamy, smooth finish. These pops are perfect for busy hosts who want a memorable, yet easy dessert that guests of all ages adore. Plus, they’re customizable — you can match any baby shower theme with colors and decorations.
Whether you’re celebrating a first baby, a gender reveal, or just want to add some sweetness to your gathering, these baby bottle cake pops are a fantastic choice. They blend nostalgic comfort with a modern twist and are sure to become a favorite treat. Trust me, once you try this baby bottle cake pops recipe, you’ll find yourself making them again and again!
Why You’ll Love This Baby Bottle Cake Pops Recipe
After making baby bottle cake pops countless times, I can say these little delights have some serious perks:
- Quick & Easy: You’ll have these ready in under an hour — perfect for last-minute party planning or sweet cravings.
- Simple Ingredients: No need for fancy shopping trips; basic pantry staples and a few fun decorations are all you need.
- Perfect for Baby Showers: Their adorable appearance makes them the star of any baby shower dessert table.
- Crowd-Pleaser: Kids and adults both love them — they’re fun to eat and look too cute to resist!
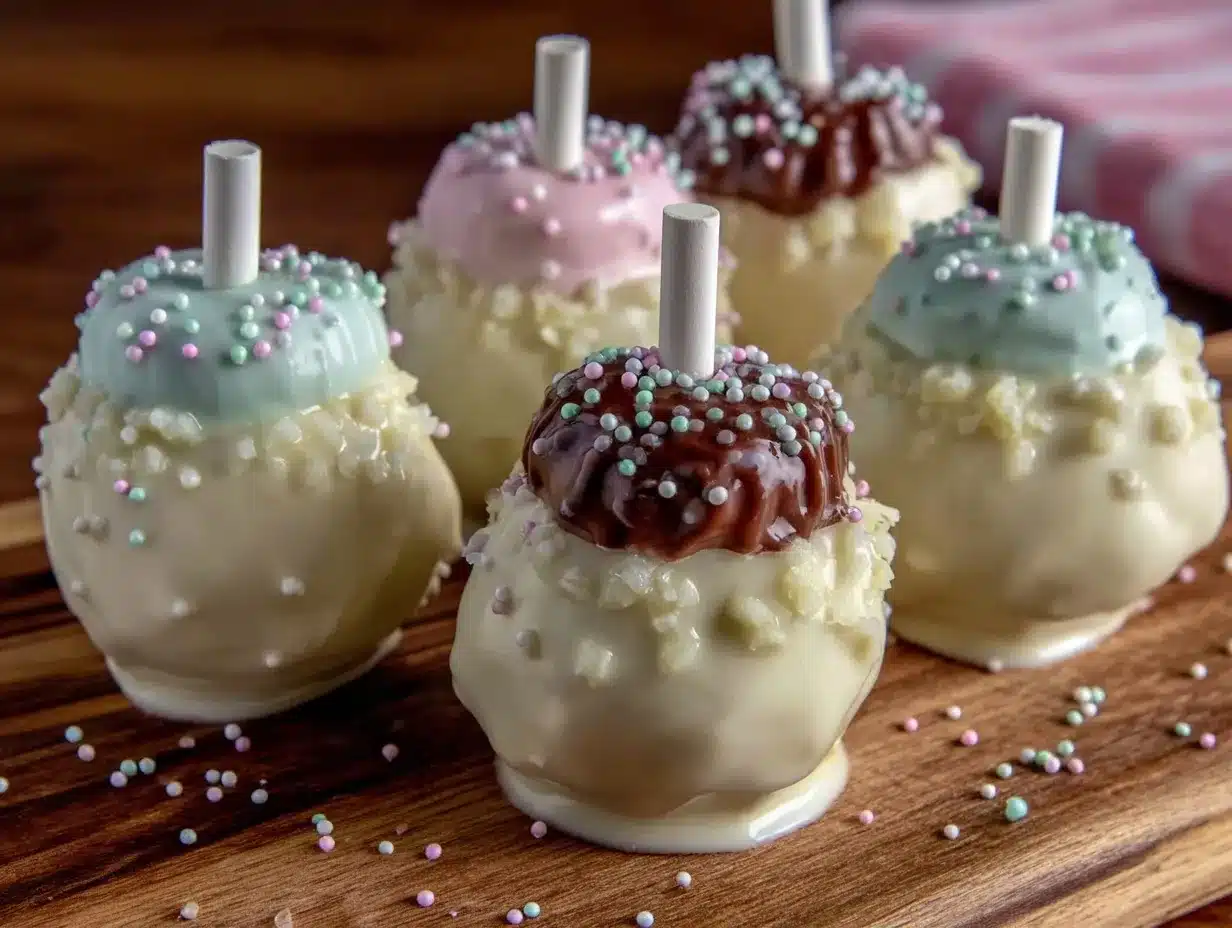
- Unbelievably Delicious: Moist cake meets creamy frosting, all wrapped in a shiny candy coating — it’s like a party in your mouth.
What sets this baby bottle cake pops recipe apart is the special balance I’ve found between cake and frosting — not too dry, not too gooey. Plus, the candy coating gets that perfect smooth finish, with just the right snap when you bite in. I also love how customizable the decorations are — from pastel pinks and blues to glittery sprinkles. Honestly, these pops make every baby shower feel extra special without the stress.
It’s not just a recipe — it’s a sweet memory maker, a conversation starter, and a little burst of joy on a stick.
What Ingredients You Will Need
This baby bottle cake pops recipe relies on simple, easy-to-find ingredients that come together to create that perfect taste and texture. Here’s what you’ll gather before you get started:
- Cake:
- 1 box of yellow or white cake mix (or homemade equivalent for that extra touch)
- Ingredients listed on the cake mix box (usually eggs, oil, water)
- Frosting:
- 1 cup (225g) of cream cheese frosting or buttercream (store-bought or homemade)
- Candy Coating:
- 12 oz (340g) of white candy melts or almond bark (choose a brand like Wilton for smooth coating)
- Food coloring in pastel shades (pink, blue, yellow) for decorating
- Decoration:
- Baby shower-themed sprinkles or edible glitter
- Miniature candy pearls or sugar decorations
- Tools & Extras:
- Cold water or vegetable shortening (to thin candy melts if needed)
- Baby bottle shaped cake pop molds or a cake pop shaping tool (optional, but handy!)
- Food-safe lollipop sticks
Look for firm, good-quality candy melts to get that smooth finish on your pops. If you want a gluten-free option, pick a gluten-free cake mix — it works just as well. And if you’re dairy-free, swapping cream cheese frosting for a vegan buttercream is a breeze. The key is balancing the moisture in the cake with enough frosting to hold the pops together without making them too soft.
Equipment Needed
- Baking Pan: A 9×13 inch (23×33 cm) pan works perfectly for baking the cake.
- Mixing Bowls: At least two medium bowls for the cake batter and frosting mixing.
- Electric Mixer: Handheld or stand mixer to make the frosting smooth and to mix the cake batter thoroughly.
- Baby Bottle Cake Pop Mold: Optional but a huge time-saver for shaping the pops uniformly.
- Baking Sheet: For chilling the shaped cake pops before dipping.
- Lollipop Sticks: Essential for holding your cake pops and for that classic party presentation.
- Microwave-Safe Bowl: For melting the candy coating easily.
- Styrofoam Block or Cake Pop Stand: To hold the pops upright while the coating sets.
If you don’t have a cake pop mold, you can shape the cake mixture by hand — I’ve done it plenty of times! Just keep your hands slightly damp and work quickly before the mixture dries out. For melting candy melts, a double boiler works well too if you don’t want to risk overheating in the microwave. And if you’re on a budget, any sturdy plate or tray lined with parchment paper can hold your pops while chilling.
Detailed Preparation Method
- Prepare the Cake: Preheat your oven to 350°F (175°C). Bake the cake mix according to the package instructions, usually about 30-35 minutes in a greased 9×13 inch (23×33 cm) pan. Use a toothpick to check doneness; it should come out clean. Let the cake cool completely, at least 1 hour. Cooling is crucial to avoid melting your frosting later.
- Crumble the Cake: Once cooled, crumble the entire cake into a large mixing bowl. Use your hands or a fork to break it down into fine crumbs. It’s okay if there are a few larger pieces — they add a nice texture to the pops.
- Mix with Frosting: Add about 1 cup (225g) of cream cheese or buttercream frosting to the cake crumbs. Stir gently with a spoon or use your hands to combine until the mixture holds together when pressed. If it feels too dry, add frosting a tablespoon at a time. Too sticky? Add a few more cake crumbs. The goal is a moldable dough-like consistency.
- Shape the Cake Pops: Using your hands or a baby bottle cake pop mold, form the mixture into small baby bottle shapes, about 1.5 inches (4 cm) tall. Insert a lollipop stick into each shape, pushing it halfway through. Place the shaped pops on a baking sheet lined with parchment paper. Chill them in the refrigerator for 30 minutes to firm up — this helps them hold their shape when dipped.
- Melt and Dip: Melt the candy melts in a microwave-safe bowl in 30-second bursts, stirring between each, until smooth. Don’t overheat or it will seize. If needed, add a teaspoon of vegetable shortening or a few drops of warm water to thin it out. Dip each chilled cake pop into the melted candy, covering completely. Tap off excess coating gently. While still wet, decorate with sprinkles or edible pearls. Place the dipped pops upright in a styrofoam block or cake pop stand to set fully, about 20 minutes.
Quick tip: If your candy coating thickens too much while dipping, reheat it gently to keep it smooth. Also, chill your cake pops well before dipping to avoid cracking or melting. After dipping, avoid touching or moving the pops too much — patience here pays off with a flawless finish.
Cooking Tips & Techniques
Making baby bottle cake pops is a fun process, but a few tricks help keep everything smooth and stress-free.
- Balance Moisture: The cake and frosting ratio is key. Too much frosting, and the pops get mushy. Too little, and they crumble. I always add frosting gradually until the mixture feels just right — like play dough.
- Chill Thoroughly: Don’t skip chilling. Cold cake pops hold together better when dipped and prevent your candy coating from cracking or separating.
- Use Candy Melts Properly: Melt in short bursts and stir well. If they seize, a tiny bit of vegetable shortening rescues the texture without affecting flavor.
- Dipping Technique: Dip the pop straight down and pull it out smoothly. Tap off excess coating by gently tapping the stick on the bowl edge. Avoid swirling or shaking, which can cause uneven coating or cracking.
- Decorate Quickly: Add sprinkles or decorations immediately after dipping, before the coating sets, or they won’t stick.
- Storage: Keep cake pops in an airtight container at room temperature or in the fridge. Avoid humid spots to keep the coating crisp.
Trust me, I’ve had my share of cracked coatings and crumbly pops before learning these tips — but once you get the hang of it, it’s pure joy!
Variations & Adaptations
These baby bottle cake pops can be tweaked in many ways to suit your style or dietary needs:
- Flavor Swaps: Try chocolate cake with chocolate frosting for a richer bite, or lemon cake with cream cheese frosting for a fresh twist.
- Dietary Options: Use gluten-free cake mixes or dairy-free frosting alternatives to accommodate allergies or preferences.
- Decorating Styles: Customize colors and decorations to fit the baby shower theme — think pastel ombré, glittery finishes, or themed edible toppers.
- Different Shapes: If baby bottles aren’t your thing, shape the pops as rattles, pacifiers, or simple balls for variety.
- Alternative Coatings: Swap candy melts for melted white chocolate or colored chocolate bark for a different flavor profile.
Personally, I once made these with a combo of strawberry cake and cream cheese frosting, dipped in pink candy melts, and decorated with tiny sugar flowers — it was a hit at a spring baby shower!
Serving & Storage Suggestions
Serve your baby bottle cake pops at room temperature for the best flavor and texture. Arrange them upright in a decorative stand or bouquet-style for a charming presentation. They pair wonderfully with light beverages like sparkling water or fruit punch, adding that sweet touch to the celebration.
For storage, keep the cake pops in an airtight container at room temperature if serving within 2 days. For longer storage, refrigerate for up to a week or freeze for up to a month. When refrigerated or frozen, bring them back to room temperature before serving to avoid a hard coating and chilled cake center.
Reheating is not necessary — just patience! Flavors often deepen and meld beautifully after a day or two, so making them a day ahead can actually improve the taste.
Nutritional Information & Benefits
These baby bottle cake pops are a delightful treat best enjoyed in moderation. Each pop (about 1.5 oz / 43g) typically contains:
| Nutrient | Amount |
|---|---|
| Calories | 150-180 |
| Fat | 7-9g |
| Sugar | 18-22g |
| Protein | 1-2g |
While not a health food per se, using cream cheese frosting adds a bit of calcium and protein compared to plain buttercream. You can also make small adjustments for dietary needs, such as using sugar-free or gluten-free ingredients. Just a reminder, these cake pops contain dairy, gluten (unless substituted), and eggs, so keep allergies in mind when serving.
From my experience as someone who loves both baking and mindful eating, these cake pops are a joyful indulgence — perfect for celebrating special moments without overdoing it.
Conclusion
This baby bottle cake pops recipe is a charming, easy way to bring sweetness and smiles to any baby shower. With simple ingredients, straightforward steps, and plenty of room for creativity, it’s a recipe you’ll want to keep in your party arsenal. I love how these pops manage to be both playful and delicious — they truly make any celebration feel extra special.
Give them a try, and don’t hesitate to tweak the flavors or decorations to match your style. I’d love to hear how your baby bottle cake pops turn out, so please share your tips, photos, or variations in the comments! Sweet celebrations are better when shared.
Happy baking and cheers to all the joyful moments ahead!
FAQs About Baby Bottle Cake Pops
Can I make baby bottle cake pops ahead of time?
Absolutely! You can prepare and dip the pops up to 2 days before your event. Store them in an airtight container at room temperature or in the fridge. Just bring them back to room temp before serving.
What if I don’t have a baby bottle cake pop mold?
No worries! You can shape the cake mixture by hand into baby bottle shapes or simple balls. Slightly dampen your hands to prevent sticking and work quickly.
Can I use homemade cake instead of box mix?
Yes! Homemade cake works great and adds a personal touch. Just make sure it’s fully cooled and crumbled finely before mixing with frosting.
How do I prevent cracks in the candy coating?
Chill your cake pops well before dipping, and avoid swirling the coating. Tap off excess coating gently and let the pops set in a cool place.
Are these cake pops suitable for dietary restrictions?
You can adapt the recipe with gluten-free cake mixes and dairy-free frosting to suit allergies or preferences. Just choose candy melts that fit your dietary needs as well.
Pin This Recipe!
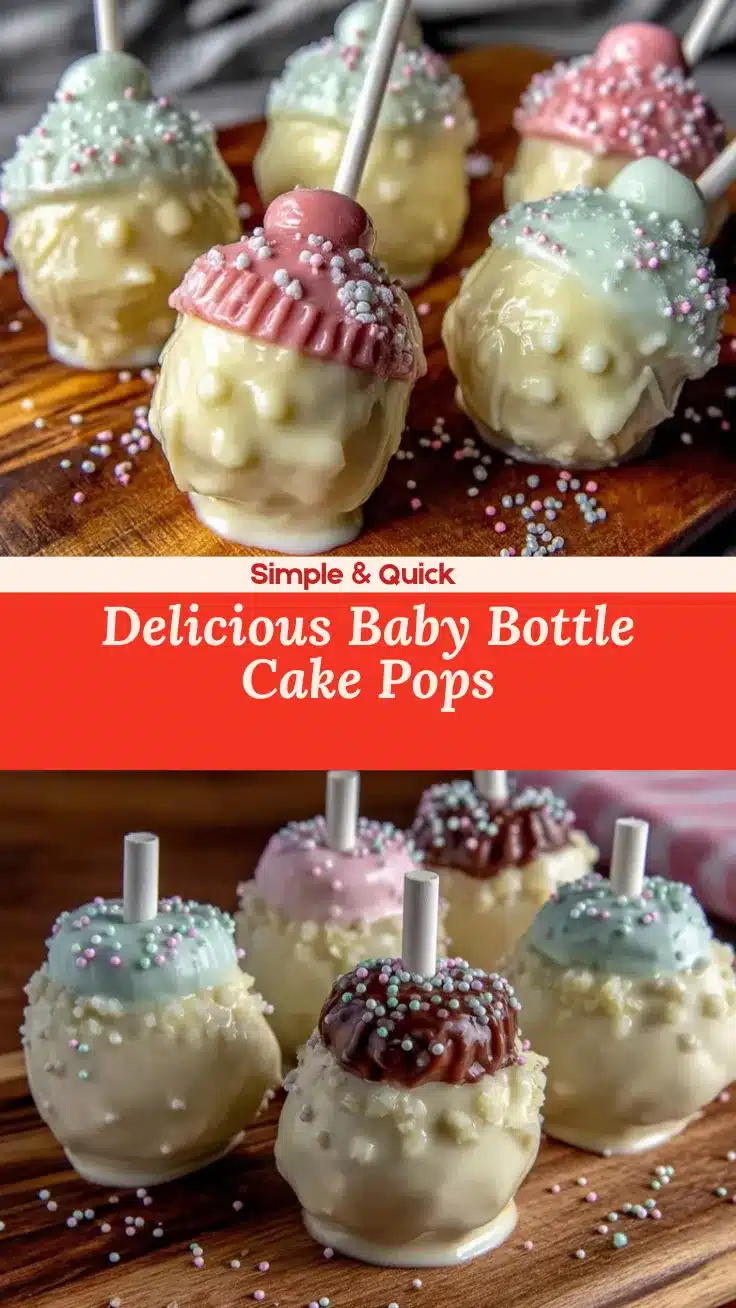
Baby Bottle Cake Pops

Adorable baby bottle-shaped cake pops combining moist cake and creamy frosting, coated in smooth candy melts, perfect for baby showers and celebrations.
- Prep Time: 20 minutes
- Cook Time: 35 minutes
- Total Time: 1 hour 55 minutes
- Yield: 24 cake pops 1x
- Category: Dessert
- Cuisine: American
Ingredients
- 1 box yellow or white cake mix (or homemade equivalent)
- Ingredients listed on the cake mix box (usually eggs, oil, water)
- 1 cup (225g) cream cheese frosting or buttercream (store-bought or homemade)
- 12 oz (340g) white candy melts or almond bark
- Food coloring in pastel shades (pink, blue, yellow)
- Baby shower-themed sprinkles or edible glitter
- Miniature candy pearls or sugar decorations
- Cold water or vegetable shortening (to thin candy melts if needed)
- Baby bottle shaped cake pop molds or cake pop shaping tool (optional)
- Food-safe lollipop sticks
Instructions
- Preheat oven to 350°F (175°C). Bake cake mix according to package instructions in a greased 9×13 inch pan for 30-35 minutes. Let cake cool completely, at least 1 hour.
- Crumble cooled cake into a large bowl, breaking into fine crumbs with hands or fork.
- Add 1 cup cream cheese or buttercream frosting to cake crumbs. Mix gently until mixture holds together when pressed. Adjust frosting or crumbs to achieve moldable dough-like consistency.
- Shape mixture into baby bottle shapes about 1.5 inches tall using hands or mold. Insert lollipop sticks halfway through each shape. Place on parchment-lined baking sheet and chill in refrigerator for 30 minutes.
- Melt candy melts in microwave-safe bowl in 30-second bursts, stirring until smooth. Thin with vegetable shortening or warm water if needed. Dip chilled cake pops into melted candy coating, covering completely. Tap off excess coating gently. Decorate immediately with sprinkles or edible pearls. Place pops upright in styrofoam block or cake pop stand to set for about 20 minutes.
Notes
Balance cake and frosting moisture for best texture. Chill cake pops thoroughly before dipping to prevent cracking. Melt candy melts in short bursts and stir well. Decorate immediately after dipping. Store in airtight container at room temperature for up to 2 days or refrigerate up to 1 week.
Nutrition
- Serving Size: 1 cake pop (about 1.
- Calories: 150180
- Sugar: 1822
- Fat: 79
- Protein: 12
Keywords: baby bottle cake pops, baby shower dessert, cake pops recipe, easy cake pops, party treats, candy coated cake pops


