“You really have to try this before you judge,” my friend insisted over the phone, her voice buzzing with excitement. I was skeptical—coconut pudding squares? That sounded like something my grandma might have made, all soft and a bit too sweet. But something about her enthusiasm nudged me to give it a shot.
The first time I made these Creamy Hawaiian Haupia Coconut Pudding Squares, I remember the kitchen filling with the gentle aroma of coconut milk simmering gently on the stove. It was late afternoon, and the sun was just starting to dip, casting a warm glow through the window. I was tired from a long day, and honestly, whipping up something so simple felt like a small act of kindness to myself.
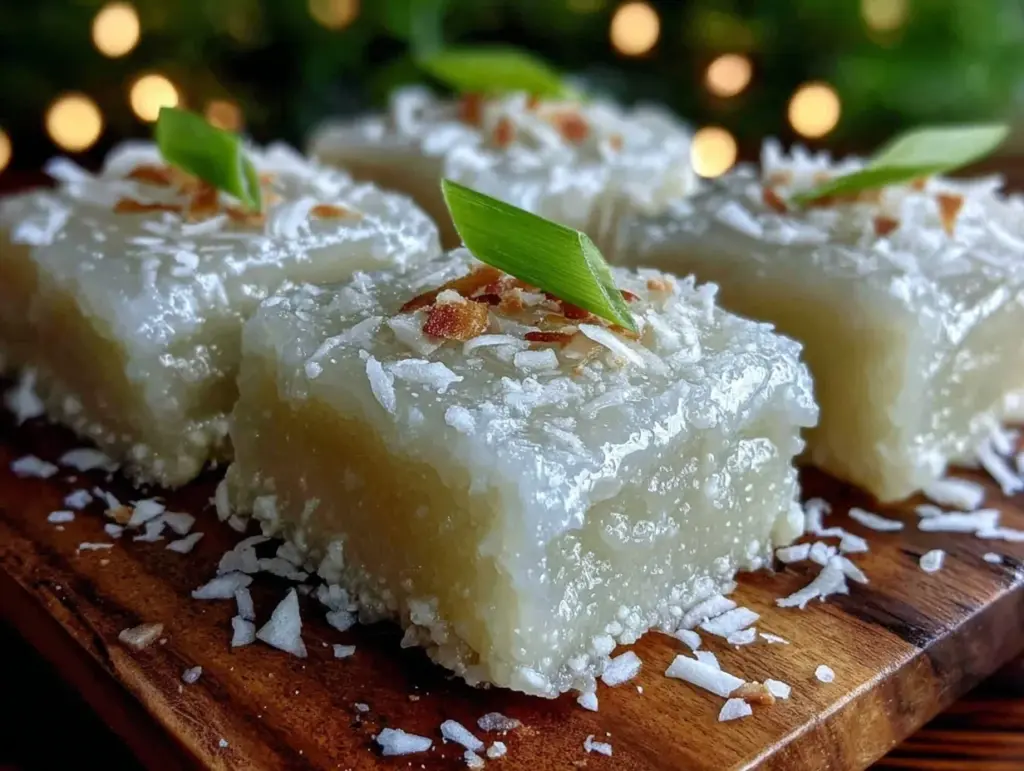
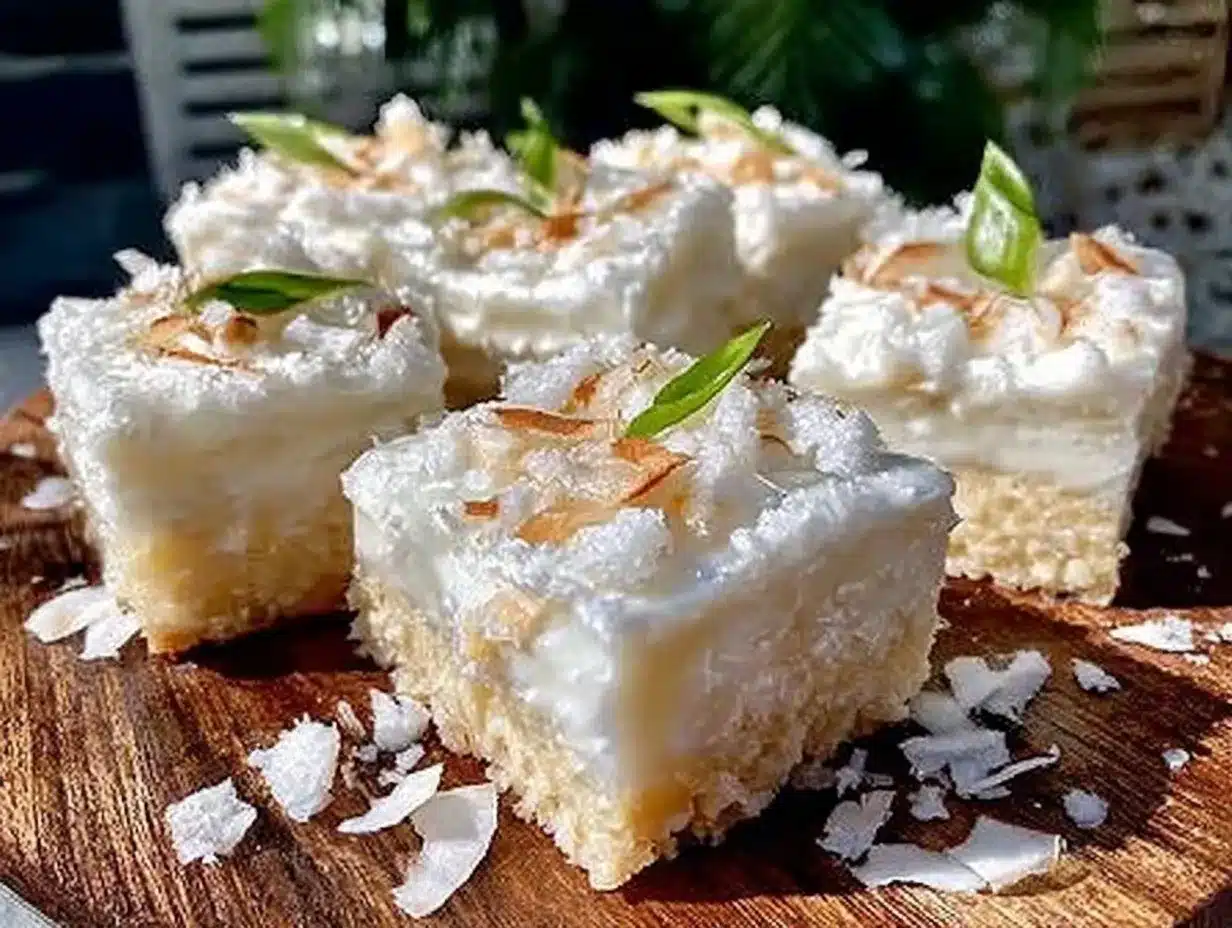
When I finally let the pudding set and cut the squares, the texture surprised me—silky, smooth, and just firm enough to hold its shape. The subtle sweetness paired with the creamy coconut flavor reminded me of a soft breeze on a Hawaiian beach, far from the chaos of everyday life. My initial skepticism faded, replaced by a quiet appreciation for a recipe that’s humble but full of heart.
This recipe stuck with me because it’s more than just a dessert—it’s a little island getaway in every bite, quick enough to make on any random evening, yet special enough to bring out when friends drop by unexpectedly. No fuss, no complicated ingredients, just that creamy comfort that invites you to pause and savor.
Why You’ll Love This Recipe
Having tested this recipe multiple times (yes, more than once a week!), I can say the Creamy Hawaiian Haupia Coconut Pudding Squares have become a staple in my dessert rotation. Here’s why they stand out:
- Quick & Easy: Ready in under an hour, including chilling time—perfect when you want something sweet without the wait.
- Simple Ingredients: You probably already have most of what you need in your pantry, including coconut milk and cornstarch.
- Perfect for Gatherings: These squares make a lovely, mess-free dessert for potlucks or casual get-togethers.
- Crowd-Pleaser: Both kids and adults ask for seconds without fail—there’s something universal about that creamy coconut flavor.
- Unbelievably Delicious: The pudding’s texture is silky, not gelatinous, with just the right amount of sweetness balanced by the coconut’s natural richness.
What makes this recipe different from others is the way the haupia sets—firm yet creamy—thanks to a precise balance of coconut milk and cornstarch. I also like to add a pinch of salt to cut through the sweetness and bring out the coconut notes more vividly. It’s not just a coconut pudding; it’s a little celebration of Hawaiian flavors that’s both comforting and refreshing.
Honestly, this recipe feels like a gentle reminder that simple ingredients can bring so much joy, and it’s the kind of dessert that makes you close your eyes after the first bite, savoring that smooth, tropical goodness.
What Ingredients You Will Need
This recipe uses simple, wholesome ingredients to deliver bold flavor and satisfying texture without the fuss. The ingredients are mostly pantry staples, with a couple of tropical essentials that give it authentic Hawaiian flair.
- Coconut Milk: 4 cups (960 ml) full-fat canned coconut milk (I recommend brands like Native Forest or Chaokoh for rich flavor)
- Sugar: 3/4 cup (150g) granulated sugar (adjust to taste; less if you prefer it less sweet)
- Cornstarch: 1/2 cup (60g) cornstarch (this is the thickener—no gelatin needed)
- Salt: 1/4 teaspoon fine sea salt (brings out the coconut’s natural sweetness)
- Vanilla Extract: 1 teaspoon pure vanilla extract (optional, adds warm aroma)
Optional garnishes:
- Toasted coconut flakes (for a bit of crunch)
- Fresh pineapple chunks or mango slices (to serve alongside)
- Edible flowers for presentation (if you want to impress guests)
Ingredient tips: Use full-fat coconut milk for the creamiest texture—light or diluted versions won’t set properly. If you prefer a dairy-free option, this recipe is naturally vegan and gluten-free, which is a nice bonus.
Seasonal variation: In the summer, I like pairing these squares with fresh tropical fruit. You could also swap sugar for coconut sugar if you want a deeper caramel note.
Equipment Needed
- Medium Saucepan: For gently heating the coconut milk and thickening the pudding. A heavy-bottomed pan helps prevent scorching.
- Whisk: Essential for mixing the cornstarch slurry smoothly and avoiding lumps.
- Mixing Bowl: To combine ingredients and prepare the cornstarch slurry.
- Measuring Cups and Spoons: Accurate measurements ensure the pudding sets perfectly every time.
- Baking Dish or Pan: An 8×8-inch (20×20 cm) square pan works best for setting and cutting pudding squares.
- Plastic Wrap or Lid: For covering the pudding while it chills.
If you don’t have a square pan handy, a shallow glass or ceramic dish will do, just adjust the thickness of the pudding layer accordingly. I’ve made this pudding in everything from vintage Pyrex dishes to disposable aluminum pans—the results are reliable as long as the heat is evenly distributed.
Tip: When whisking, a balloon whisk is best, but a fork works in a pinch.
Preparation Method
- Prepare the Cornstarch Slurry: In a small bowl, whisk together 1/2 cup (120 ml) of the coconut milk with the 1/2 cup (60g) cornstarch until smooth and lump-free. Set aside. (This step is crucial—take your time to avoid lumps.)
- Heat the Coconut Milk: Pour the remaining 3 1/2 cups (840 ml) of coconut milk into a medium saucepan. Add the sugar and salt, and warm over medium heat, stirring occasionally, until the sugar dissolves and the mixture is hot but not boiling. (You’ll notice a sweet coconut aroma starting to fill your kitchen.)
- Thicken the Pudding: Slowly whisk the cornstarch slurry into the hot coconut milk. Continue stirring constantly to prevent lumps, and cook for about 5–7 minutes, or until the mixture thickens to a pudding-like consistency. You’ll see it coat the back of a spoon and hold its shape when stirred.
- Add Vanilla: Remove the pan from heat and stir in the vanilla extract if using. This adds a subtle warmth that complements the coconut beautifully.
- Pour and Set: Transfer the pudding into your prepared 8×8-inch (20×20 cm) pan. Smooth the surface with a spatula. Cover with plastic wrap, pressing it gently onto the pudding’s surface to prevent a skin from forming.
- Chill: Refrigerate for at least 3 hours, or until the pudding is firm enough to cut into squares. (If you’re in a hurry, pop it in the freezer for about an hour, but watch closely so it doesn’t freeze solid.)
- Serve: Once set, use a sharp knife dipped in warm water to slice the pudding into neat squares. Garnish with toasted coconut or fresh fruit if you like.
Pro tip: When cooking, keep the heat moderate and stir constantly—cornstarch thickens quickly but can scorch if left unattended. If lumps form, strain the pudding through a fine sieve before pouring it into the pan.
Cooking Tips & Techniques
One of the trickiest parts of making haupia is getting that perfect pudding texture—silky but firm. Here’s what I’ve learned through a few kitchen mishaps:
- Slow and steady wins the race: Heat the coconut milk gradually and stir often to avoid scorching or curdling.
- Whisk before adding: Always mix the cornstarch with a portion of the coconut milk cold before adding it to the hot mixture. This keeps lumps at bay.
- Don’t rush the chill: Haupia needs time to set properly. Resist the urge to cut it too soon or it will be too soft and sticky.
- Use a warm knife: Running your knife under hot water between slices helps cut cleaner edges without sticking.
- Balancing sweetness: Taste your coconut milk before adding sugar. Some brands are naturally sweeter. You can adjust accordingly.
I once tried to speed things up by turning the heat to high and stirring less. Ended up with a lumpy mess—lesson learned! Also, I find that a pinch of salt really rounds out the flavor, making it taste less one-dimensional.
Multitasking tip: While the pudding chills, it’s a great time to prep a fresh salad or whip up a side like my sautéed green beans with lemon zest and pine nuts to balance the sweetness.
Variations & Adaptations
This recipe is a great base to customize for different tastes and dietary needs. Here are a few ideas I’ve tried or recommend:
- Chocolate Haupia: Stir in 1/4 cup (25g) unsweetened cocoa powder with the sugar for a tropical chocolate twist.
- Vegan & Gluten-Free: Naturally vegan, just double-check your sugar source if you’re strict. For gluten-free, the recipe already fits the bill.
- Fruit-Infused: Layer the pudding with fresh mango or pineapple slices for a fruity surprise in every bite.
- Low-Sugar: Swap sugar with a natural sweetener like maple syrup or coconut sugar but be mindful it may affect the setting slightly.
- Mini Cup Puddings: Pour pudding into muffin tins lined with cupcake liners for cute individual servings—perfect for parties.
I once made a batch with a sprinkle of toasted macadamia nuts on top, which added a lovely crunch and a nod to Hawaiian flavors. It was a hit at a summer barbecue.
Serving & Storage Suggestions
These pudding squares are best served chilled, straight from the fridge. They’re refreshing and cool, ideal after a spicy meal or on a warm day.
For presentation, arrange the squares on a platter with a scattering of toasted coconut flakes or fresh tropical fruits like kiwi or papaya. A light dusting of powdered sugar can add a pretty touch.
Store leftover haupia in an airtight container in the refrigerator for up to 4 days. The pudding might firm up a bit more with time, which some people prefer. If you want to soften it slightly before serving, let it sit at room temperature for about 15 minutes.
For longer storage, you can freeze the squares wrapped individually in plastic wrap and placed in a freezer bag. Thaw overnight in the fridge before serving. Note that texture might be a touch grainier after freezing but still delicious.
Over time, the flavors mellow and deepen, making it an even more comforting treat the next day.
Nutritional Information & Benefits
Each serving of these Creamy Hawaiian Haupia Coconut Pudding Squares is a modest indulgence, balancing rich coconut flavor with relatively simple ingredients.
| Nutrition (per square, approx.) | Amount |
|---|---|
| Calories | 150 kcal |
| Fat | 8g (mostly healthy fats from coconut) |
| Carbohydrates | 20g |
| Sugar | 15g |
| Protein | 1g |
Coconut milk provides medium-chain triglycerides (MCTs), which can support energy and metabolism. The recipe is naturally gluten-free and vegan, making it suitable for many dietary preferences.
Keep in mind the sugar content if you’re watching intake, but the recipe can be adjusted with alternative sweeteners.
Personally, I appreciate this dessert as a light, dairy-free treat that satisfies sweet cravings without feeling heavy or overly processed.
Conclusion
If you’re looking for a dessert that’s creamy, tropical, and straightforward to make, these Creamy Hawaiian Haupia Coconut Pudding Squares are a winner. They bring just the right balance of sweet and silky texture without any fuss or complicated steps.
Feel free to tweak the sweetness, add your favorite toppings, or even try the chocolate variation I mentioned. What I love most is how this recipe invites a moment of calm and simple pleasure, no matter how busy the day has been.
Give it a try, and you might find yourself making it again and again—just like I did. And if you enjoy this, you might appreciate pairing it with something fresh and vibrant like the green bean and tomato salad with feta for a light meal that balances sweet and savory.
Don’t forget to share your own takes or questions below—I love hearing how these recipes become part of your kitchen stories!
Frequently Asked Questions
What is haupia?
Haupia is a traditional Hawaiian coconut pudding made with coconut milk and a starch thickener, usually cornstarch or arrowroot. It’s known for its creamy texture and subtle sweetness.
Can I use other types of milk instead of coconut milk?
This recipe relies on full-fat coconut milk for its signature flavor and texture. Using dairy or other plant milks will change the taste and may prevent the pudding from setting properly.
How do I store leftover haupia pudding squares?
Keep them in an airtight container in the refrigerator for up to 4 days. You can also freeze the squares individually wrapped for up to a month.
Can I make haupia without cornstarch?
Cornstarch is the thickener here, but you could try arrowroot powder or tapioca starch as alternatives. Just keep in mind the texture might vary slightly.
Is this recipe vegan and gluten-free?
Yes! The recipe uses plant-based ingredients and no gluten-containing components, making it suitable for vegan and gluten-free diets.
Pin This Recipe!
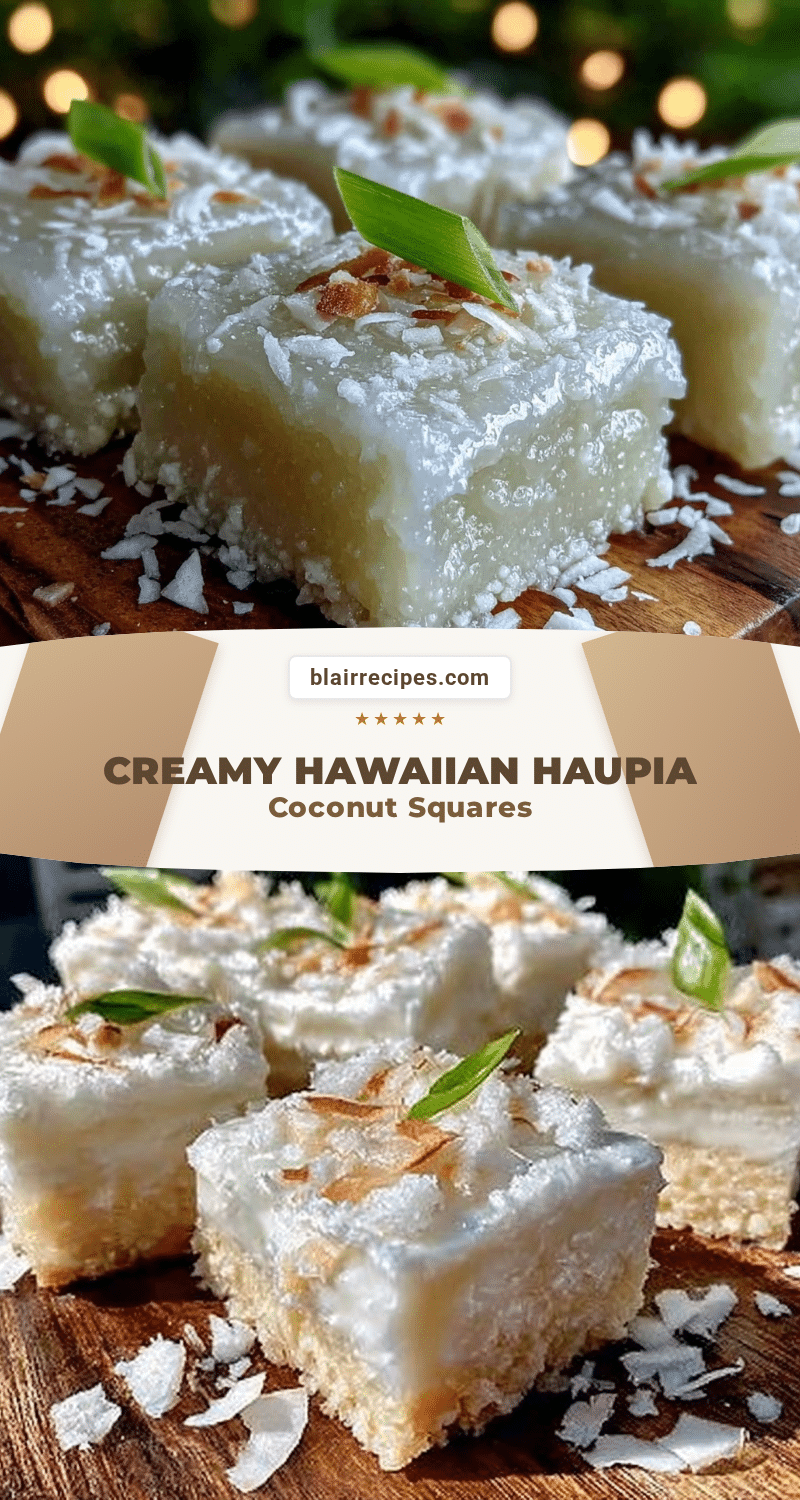
Creamy Hawaiian Haupia Coconut Pudding Squares

A silky, smooth, and creamy coconut pudding dessert that sets firm enough to cut into squares. This easy recipe uses simple ingredients and offers a taste of Hawaiian flavors, perfect for gatherings or a quick sweet treat.
- Prep Time: 15 minutes
- Cook Time: 15 minutes
- Total Time: 3 hours 30 minutes
- Yield: 16 squares 1x
- Category: Dessert
- Cuisine: Hawaiian
Ingredients
- 4 cups (960 ml) full-fat canned coconut milk
- 3/4 cup (150g) granulated sugar
- 1/2 cup (60g) cornstarch
- 1/4 teaspoon fine sea salt
- 1 teaspoon pure vanilla extract (optional)
- Optional garnishes: toasted coconut flakes, fresh pineapple chunks or mango slices, edible flowers
Instructions
- Prepare the cornstarch slurry by whisking together 1/2 cup (120 ml) of the coconut milk with 1/2 cup (60g) cornstarch until smooth and lump-free. Set aside.
- Pour the remaining 3 1/2 cups (840 ml) of coconut milk into a medium saucepan. Add sugar and salt, warm over medium heat, stirring occasionally until sugar dissolves and mixture is hot but not boiling.
- Slowly whisk the cornstarch slurry into the hot coconut milk. Stir constantly and cook for 5–7 minutes until mixture thickens to pudding-like consistency.
- Remove from heat and stir in vanilla extract if using.
- Pour pudding into a prepared 8×8-inch (20×20 cm) baking dish. Smooth the surface with a spatula. Cover with plastic wrap pressed onto the surface to prevent skin formation.
- Refrigerate for at least 3 hours until firm enough to cut into squares. Alternatively, chill in freezer for about 1 hour but do not freeze solid.
- Use a sharp knife dipped in warm water to slice pudding into squares. Garnish with toasted coconut or fresh fruit if desired.
Notes
Use full-fat coconut milk for best texture. Whisk cornstarch with cold coconut milk before adding to hot mixture to avoid lumps. Use a warm knife for clean cuts. Chill pudding fully for best firmness. Can substitute arrowroot or tapioca starch for cornstarch but texture may vary.
Nutrition
- Serving Size: 1 square (approximat
- Calories: 150
- Sugar: 15
- Fat: 8
- Carbohydrates: 20
- Protein: 1
Keywords: haupia, coconut pudding, Hawaiian dessert, creamy pudding, coconut milk dessert, vegan dessert, gluten-free dessert


