
“Do you really need a fancy bento box when you have this?” my friend joked as we unpacked our picnic under the cherry blossoms. The sun was warm but gentle, petals fluttering down like soft confetti. I smiled, clutching my homemade creamy Japanese egg sandwich—Tamago Sando—wrapped neatly in wax paper. Honestly, I wasn’t sure what to expect the first time I tried making this sandwich for a hanami picnic, but it ended up stealing the show.
It all started on a whim one spring afternoon. I’d been scrolling through food blogs, vaguely curious about Japanese sandwiches, when the Tamago Sando caught my eye. The idea of creamy, pillowy egg filling tucked between fluffy white bread sounded almost too simple to be good. Skeptical but intrigued, I gave it a shot for a casual picnic with friends. The moment I bit into that soft, velvety sandwich, I realized how something so unassuming could feel so comforting and satisfying.
Since then, it became my go-to picnic treat for hanami season. Not only does it travel well, but the subtle sweetness of the egg salad paired with the delicate bread feels like a little secret shared with nature. Plus, it’s light enough to enjoy alongside other picnic staples, like a crisp green bean salad or a sweet potato mash. (If you love green beans, this sautéed green beans with lemon zest and pine nuts has been a lovely companion.)
There’s something about the quiet simplicity of the creamy Japanese egg sandwich that sticks with me—the kind of comfort that feels both nostalgic and fresh. It’s not flashy, but it’s exactly what you want on a peaceful spring day, with cherry blossoms overhead and good company beside you.
Why You’ll Love This Recipe
From my many attempts perfecting the creamy Japanese egg sandwich, I can say this recipe is truly something to keep in your picnic arsenal. Here’s why it’s become so beloved among my friends and family:
- Quick & Easy: Whips up in about 15 minutes, ideal for last-minute picnic prep or a satisfying snack.
- Simple Ingredients: Uses pantry staples like eggs, Japanese milk bread (or soft white bread), and mayonnaise—nothing fancy needed.
- Perfect for Hanami Picnics: Its soft texture and delicate flavors pair beautifully with springtime vibes and light outdoor meals.
- Crowd-Pleaser: Kids and adults alike adore the creamy, slightly sweet filling that’s not overpowering.
- Unbelievably Delicious: The velvety egg salad filling blends with pillowy bread for a melt-in-your-mouth experience.
This isn’t just another egg sandwich; it’s the Japanese version that balances creaminess with a slight sweetness, thanks to a touch of sugar and a special mayonnaise blend. It’s also built on the foundation of soft, crustless shokupan bread that adds to the dreamy texture. Honestly, once you try this, you’ll see why it’s a staple in Japan’s convenience stores and a beloved picnic treat.
And if you want to round out your hanami spread, pairing this with a refreshing side like vibrant green bean and tomato salad with feta makes for a delightful balance of flavors and textures.
What Ingredients You Will Need
This recipe uses simple, wholesome ingredients to deliver bold flavor and satisfying texture without the fuss. Most are pantry staples, and substitutions are easy if you need to adapt.
- Eggs: 4 large eggs, preferably room temperature (for a smooth, creamy filling)
- Japanese Milk Bread (Shokupan): 8 slices, crusts removed (if unavailable, use soft white sandwich bread)
- Japanese Mayonnaise: 3 tablespoons (I recommend Kewpie for its mild, slightly sweet flavor)
- Milk: 1 tablespoon (adds richness)
- Granulated Sugar: 1 teaspoon (balances the savory notes)
- Salt: 1/4 teaspoon (to taste)
- White Pepper: A pinch (optional, for subtle warmth)
- Butter: Softened, for spreading on bread (about 1 tablespoon)
Ingredient Tips: For the best texture, use firm, freshly boiled eggs. If you cannot find Japanese milk bread, a good-quality white sandwich bread with a soft crumb works well. Japanese mayonnaise like Kewpie is key to authentic flavor, but regular mayo mixed with a pinch of MSG or a dash of rice vinegar can be a decent substitute. For a dairy-free version, swap milk for almond or oat milk and use dairy-free mayo.
Equipment Needed
- Medium saucepan or pot (for boiling eggs)
- Mixing bowl
- Fork or potato masher (to mash eggs)
- Whisk (optional, for mixing filling)
- Sharp serrated knife (for cutting bread cleanly)
- Cutting board
- Plastic wrap or wax paper (for wrapping sandwiches)
- Measuring spoons and cups
I usually use a non-stick pot for boiling eggs because it’s easy to clean and helps prevent cracking. If you have an egg slicer, it can make the slicing neater, but a sharp knife works just fine. For spreading the butter evenly, a small offset spatula is handy but not necessary. If you’re preparing multiple sandwiches, assembling on a large cutting board makes the process smoother. Keeping the sandwiches wrapped tightly helps maintain their delicate texture, especially if you’re packing them for a picnic.
Preparation Method
- Boil the eggs: Place 4 large eggs in a medium saucepan and cover with cold water (about 1 inch above eggs). Bring to a gentle boil over medium-high heat, then reduce heat to low and simmer for 10 minutes. This gives firm yolks perfect for mashing.
- Cool and peel: Transfer eggs immediately to an ice bath (cold water with ice cubes) for 5 minutes. This stops cooking and makes peeling easier. Gently tap and peel the shells off, being careful not to break the eggs too much.
- Mash the eggs: Place peeled eggs in a mixing bowl. Use a fork or potato masher to break them into small pieces but not completely smooth—you want some texture. Add 3 tablespoons Japanese mayonnaise, 1 tablespoon milk, 1 teaspoon sugar, 1/4 teaspoon salt, and a pinch of white pepper. Stir gently to combine into a creamy filling. Taste and adjust seasoning if needed.
- Prepare the bread: Remove crusts from 8 slices of Japanese milk bread or soft white bread. Spread a thin layer of softened butter on each slice to add richness and prevent sogginess.
- Assemble sandwiches: Evenly divide the egg filling onto 4 slices of bread. Top each with another buttered slice, pressing gently but firmly to seal. The sandwiches should feel soft but hold together.
- Wrap and chill: Wrap each sandwich tightly in plastic wrap or wax paper. Refrigerate for at least 30 minutes to let the flavors meld and bread absorb moisture for that perfect creamy bite.
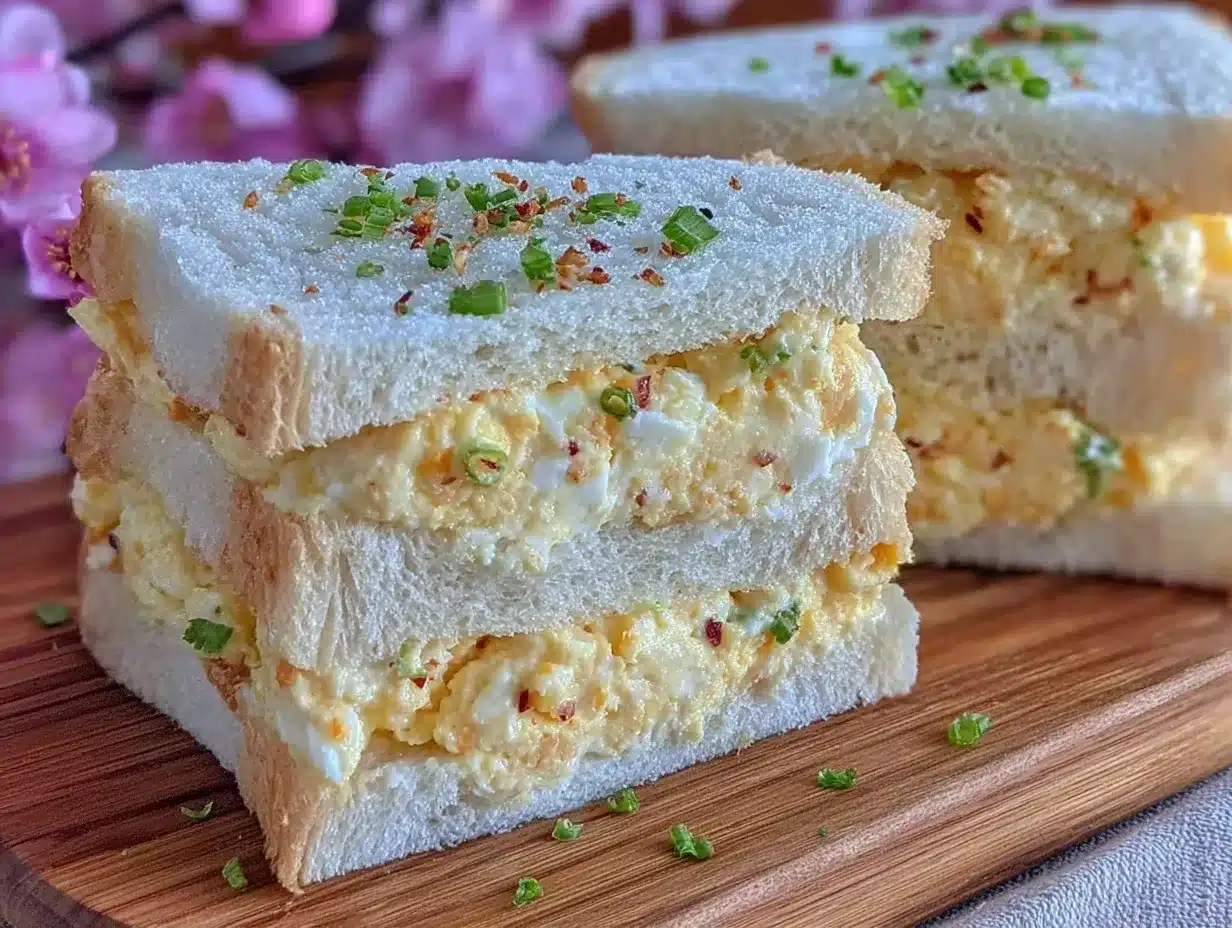
- Slice and serve: Just before serving, use a sharp serrated knife to cut each sandwich diagonally into halves or thirds. The cross-section should show a thick, fluffy layer of creamy egg filling.
Pro tip: If your filling feels too runny, add a bit more mayonnaise or mash the eggs less for extra texture. For even creamier results, you can fold in a tiny bit of softened cream cheese. Just don’t overmix or your sandwiches might become too dense.
Cooking Tips & Techniques
Getting the creamy Japanese egg sandwich just right is all about balancing texture and flavor. Based on my experience, here are some tips to keep in mind:
- Don’t overboil your eggs: Ten minutes is ideal for firm but not chalky yolks. Overcooked eggs can get dry and crumbly, ruining that creamy filling texture.
- Cool eggs quickly: The ice bath isn’t just for easy peeling—it also halts cooking, preventing greenish yolk rings and maintaining flavor.
- Mash with care: Leaving some small chunks in the filling gives a nice mouthfeel. Over-mashing leads to a paste-like texture that feels heavy.
- Choose the right bread: Japanese milk bread (shokupan) is soft, slightly sweet, and elastic—perfect for this recipe. If you can’t find it, go for a high-quality sandwich bread, but avoid dense or crusty varieties.
- Wrap tightly and chill: Wrapping sandwiches snugly helps keep moisture inside and lets the flavors marry. Chilling also firms up the filling slightly, making slicing cleaner.
- Use Japanese mayonnaise: Its umami and mild sweetness sets this apart from other egg sandwiches. I’ve tried regular mayo, but it’s just not the same. Kewpie brand is widely available and worth seeking out.
- Be gentle when spreading: Use a butter knife or small spatula to avoid tearing the bread. The sandwiches should look neat and inviting.
Once, I made the mistake of skipping the chilling step. The filling oozed out everywhere when slicing, turning a delicate, creamy sandwich into a messy plate. Lesson learned: patience pays off!
Variations & Adaptations
This creamy Japanese egg sandwich is quite versatile. Here are a few ways I’ve tweaked it to suit different tastes or dietary needs:
- Avocado Tamago Sando: Mash half an avocado into the egg mixture for a buttery twist with healthy fats.
- Spicy Kick: Add a dash of Sriracha or Japanese karashi mustard for a subtle heat that contrasts the creamy sweetness.
- Gluten-Free Version: Use gluten-free soft sandwich bread and ensure your mayonnaise is gluten-free. Almond milk works well in place of dairy milk.
- Herb Infusion: Fold in finely chopped chives or shiso leaves to brighten the flavor profile with fresh herbaceous notes.
- Vegan Adaptation: Replace eggs with firm tofu mashed with black salt (kala namak) for that eggy flavor, and use vegan mayo. The texture won’t be identical but still delicious.
I once tried a version with a light wasabi mayo twist for a picnic, which paired surprisingly well with a sesame green beans side dish. It added a playful heat that balanced the creamy egg filling beautifully.
Serving & Storage Suggestions
Serve these sandwiches chilled or at room temperature. For a hanami picnic, I find they’re perfect straight from the cooler, wrapped in wax paper for easy handling among cherry blossom petals.
Presentation-wise, slicing diagonally showcases the thick, fluffy egg layer and invites sharing. Pair with light, refreshing sides like a crisp green bean salad or even some sweet roasted butternut squash for contrast. (The honey roasted butternut squash with rosemary is a personal favorite.)
For storage, keep sandwiches tightly wrapped in the fridge for up to 24 hours. The bread might absorb some moisture over time, making it softer but still enjoyable. If you want to prep ahead for a picnic, wrap them the night before and keep chilled.
Reheating isn’t recommended because the bread loses its delicate texture, but if you must, a quick toast or warming in a pan with a little butter can revive some freshness.
Flavors tend to deepen after chilling, so resting the sandwiches for at least 30 minutes before eating is well worth it.
Nutritional Information & Benefits
Each creamy Japanese egg sandwich contains approximately:
| Nutrient | Amount per Sandwich |
|---|---|
| Calories | 280–320 kcal |
| Protein | 12 g |
| Fat | 18 g |
| Carbohydrates | 22 g |
| Fiber | 1 g |
Eggs provide high-quality protein and essential nutrients like choline and vitamin D. The inclusion of Japanese mayonnaise adds flavor but also fat, so moderation is key for those watching intake. Using milk bread keeps the carbohydrate content moderate and offers a light base.
This recipe is naturally gluten-free if you swap the bread for a gluten-free alternative. It’s not low-carb but offers balanced energy for an active day outdoors during hanami celebrations.
I appreciate this sandwich as a wholesome, satisfying snack that fills you without weighing you down—perfect for spring picnics when you want something light but comforting.
Conclusion
The creamy Japanese egg sandwich (Tamago Sando) has quietly become one of my favorite picnic treats, especially for hanami outings. It’s simple, unpretentious, and just so satisfying—one of those recipes that feels like a small luxury wrapped in soft bread. You can tweak it to fit your tastes, but the classic version always hits the spot.
Whether you’re packing a casual lunch or looking for a delicate accompaniment to your outdoor feast, this recipe deserves a spot in your rotation. I hope you enjoy making it as much as I do—and if you do, I’d love to hear how you personalize it or how it fits into your spring celebrations.
Why not give it a try next time you head out for a picnic? It might just become your own little hanami tradition.
FAQs About Creamy Japanese Egg Sandwich (Tamago Sando)
What makes Tamago Sando different from a regular egg sandwich?
Its creamy texture comes from Japanese mayonnaise and milk, combined with soft Japanese milk bread, creating a delicate balance of sweet and savory that’s lighter than typical egg sandwiches.
Can I use regular mayonnaise instead of Japanese mayo?
You can, but Japanese mayo like Kewpie has a milder, slightly sweet flavor that’s key to authentic taste. Mixing regular mayo with a pinch of sugar or rice vinegar can help mimic it.
How do I prevent the bread from getting soggy?
Spreading a thin layer of softened butter on the bread before adding the egg filling creates a moisture barrier, keeping the bread soft but not soggy.
Can I make these sandwiches ahead of time?
Yes! Wrap them tightly and refrigerate for up to 24 hours. Chilling helps flavors meld, just keep them well wrapped to preserve texture.
What bread works best for Tamago Sando?
Japanese milk bread (shokupan) is ideal for its soft, fluffy crumb. If unavailable, use a high-quality soft white sandwich bread without a thick crust.
Pin This Recipe!
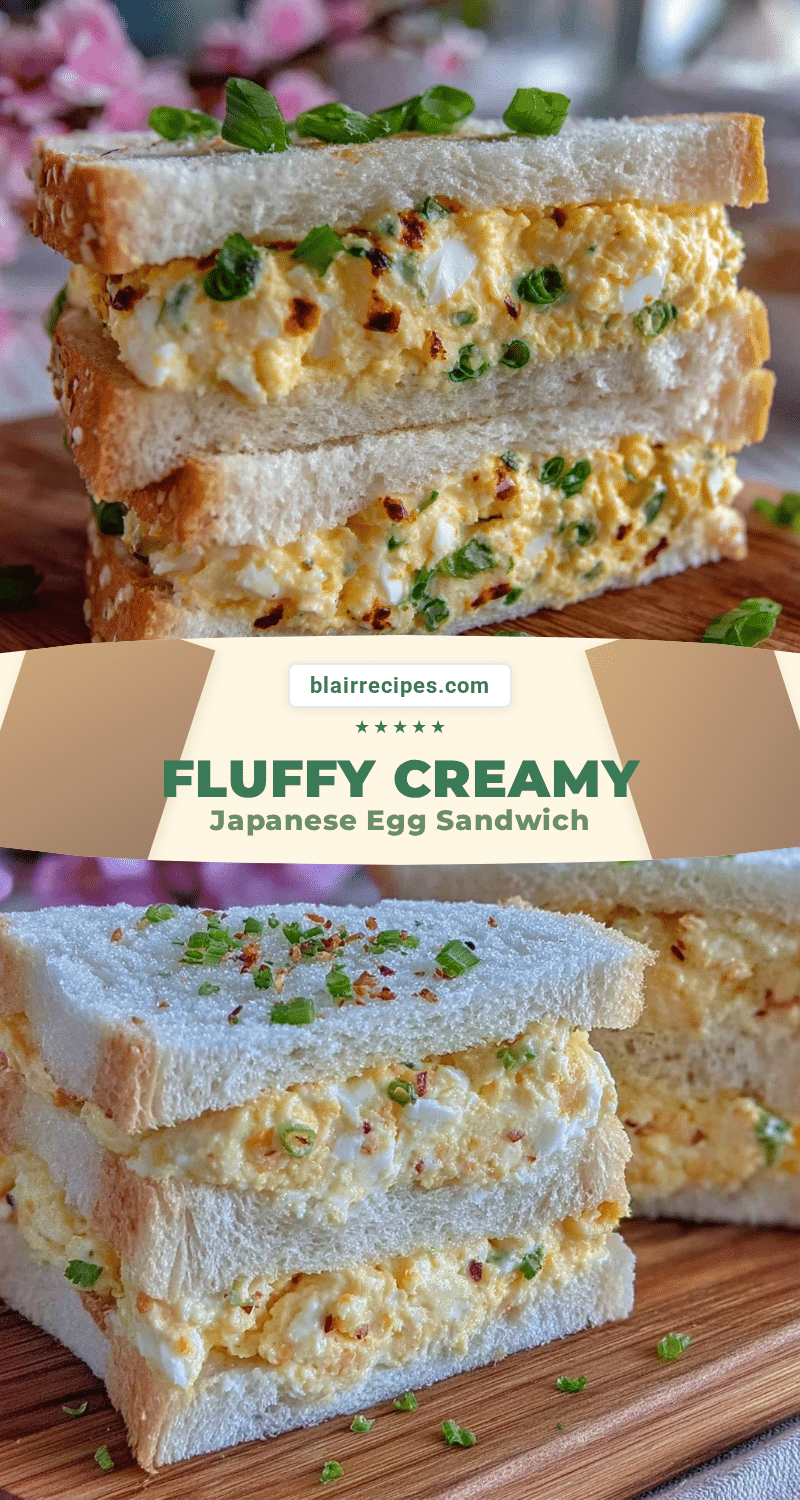
Creamy Japanese Egg Sandwich Recipe Tamago Sando for Perfect Hanami Picnic

A creamy, slightly sweet Japanese egg sandwich made with soft milk bread and a velvety egg salad filling, perfect for hanami picnics and light outdoor meals.
- Prep Time: 15 minutes
- Cook Time: 10 minutes
- Total Time: 55 minutes
- Yield: 4 sandwiches 1x
- Category: Snack
- Cuisine: Japanese
Ingredients
- 4 large eggs, preferably room temperature
- 8 slices Japanese milk bread (Shokupan), crusts removed (or soft white sandwich bread)
- 3 tablespoons Japanese mayonnaise (e.g., Kewpie)
- 1 tablespoon milk
- 1 teaspoon granulated sugar
- 1/4 teaspoon salt
- A pinch of white pepper (optional)
- 1 tablespoon softened butter (for spreading on bread)
Instructions
- Place 4 large eggs in a medium saucepan and cover with cold water about 1 inch above eggs. Bring to a gentle boil over medium-high heat, then reduce heat to low and simmer for 10 minutes.
- Transfer eggs immediately to an ice bath for 5 minutes. Gently tap and peel the shells off carefully.
- Place peeled eggs in a mixing bowl. Mash with a fork or potato masher, leaving some texture.
- Add 3 tablespoons Japanese mayonnaise, 1 tablespoon milk, 1 teaspoon sugar, 1/4 teaspoon salt, and a pinch of white pepper. Stir gently to combine into a creamy filling. Adjust seasoning to taste.
- Remove crusts from 8 slices of bread. Spread a thin layer of softened butter on each slice.
- Evenly divide the egg filling onto 4 slices of bread. Top each with another buttered slice, pressing gently but firmly to seal.
- Wrap each sandwich tightly in plastic wrap or wax paper. Refrigerate for at least 30 minutes to let flavors meld and bread absorb moisture.
- Just before serving, cut each sandwich diagonally into halves or thirds using a sharp serrated knife.
Notes
Do not overboil eggs to avoid dry yolks; 10 minutes is ideal. Cool eggs quickly in ice bath to stop cooking and ease peeling. Leave some texture in mashed eggs for better mouthfeel. Use Japanese mayonnaise like Kewpie for authentic flavor. Spread butter thinly on bread to prevent sogginess. Chill sandwiches wrapped tightly for at least 30 minutes before slicing to firm up filling and improve slicing.
Nutrition
- Serving Size: 1 sandwich
- Calories: 280320
- Fat: 18
- Carbohydrates: 22
- Fiber: 1
- Protein: 12
Keywords: Tamago Sando, Japanese egg sandwich, creamy egg sandwich, hanami picnic, Japanese milk bread, Kewpie mayonnaise, soft sandwich, picnic recipe


