“Hey, what’s for dinner?” That’s the question that popped up from my teenager’s room just as I was wiping down the kitchen counter after a long day. Honestly, I wasn’t in the mood for anything complicated—just something quick and comforting. So, I rummaged through the fridge and pantry, aiming for a bit of a shortcut. The result? This crispy chicken katsu curry with rich Japanese sauce, a dish that surprised me with its easy prep and soul-satisfying flavors. At first, I was skeptical about making my own Japanese curry sauce—thinking it’d be a long, fiddly process. But after a few tries, it became a go-to recipe that even my picky eaters request on their own.
The magic really happens when the golden, crunchy chicken meets the thick, savory curry sauce. It’s that crispy and saucy combo that makes you pause and savor every bite. I found myself making this dish multiple times in one week, just tweaking the sauce a little here and there. The aroma of the curry bubbling on the stove is oddly comforting, especially on those evenings when you just need a reset. It’s not fancy, but it’s honest food with a punch of flavor and texture that sticks with you. No wonder it quickly earned a permanent spot in my recipe rotation.
What’s cool is how this recipe turned an ordinary weeknight into something a bit special without the fuss. It’s the kind of meal that feels like a warm hug after a busy day, and honestly, that’s why it stuck with me so much.
Why You’ll Love This Recipe
This crispy chicken katsu curry recipe has become a favorite for so many reasons—here are just a few:
- Quick & Easy: You can have this meal ready in about 40 minutes, which is perfect when you’re juggling work, kids, or last-minute plans.
- Simple Ingredients: No need for fancy or hard-to-find products; most of these staples are probably already sitting in your pantry or fridge.
- Perfect for Weeknight Dinners: It’s hearty and satisfying without demanding hours in the kitchen—ideal for busy evenings.
- Crowd-Pleaser: My family always gives this dish rave reviews, especially the crunchy chicken paired with the rich, velvety curry sauce.
- Unbelievably Delicious: The contrast between the crispy exterior and juicy chicken inside, soaked in that flavorful curry, makes every bite a delight.
What really sets this recipe apart is the homemade Japanese curry sauce. Instead of relying on pre-made curry roux blocks, this sauce builds layers of flavor with a blend of spices, veggies, and a touch of sweetness that balances the savoriness. Plus, the technique for the chicken katsu ensures a light, crunchy coating that doesn’t get soggy quickly—trust me, I’ve learned from past soggy failures!
It’s a dish that’s more than just dinner; it’s comfort food with a little flair, perfect for impressing guests or just turning a simple meal into something memorable. Honestly, there’s something about the way the sauce clings to the crispy chicken that makes you want to close your eyes and savor the moment. It’s one of those recipes that feels like a small celebration in your own kitchen.
What Ingredients You Will Need
This recipe uses straightforward, wholesome ingredients to create bold flavor and satisfying texture without any fuss. Most of these are pantry staples or easy-to-find items, with room for simple swaps if needed.
- For the Chicken Katsu:
- Boneless, skinless chicken breasts (about 1 pound / 450g), pounded thin for even cooking
- All-purpose flour (about ½ cup / 60g) for dredging
- Large eggs (2), beaten, room temperature
- Panko breadcrumbs (1 cup / 110g) – I recommend Kikkoman brand for best crunch
- Salt and freshly ground black pepper, to taste
- Vegetable oil or canola oil, for frying (about 1 ½ cups / 350ml)
- For the Curry Sauce:
- Yellow onion (1 medium, finely chopped)
- Garlic cloves (3), minced
- Carrot (1 medium, peeled and diced)
- Potato (1 medium, peeled and diced)
- Unsalted butter (2 tablespoons / 30g)
- All-purpose flour (2 tablespoons / 16g)
- Chicken broth (2 cups / 475ml), low sodium preferred
- Soy sauce (1 tablespoon / 15ml), I like Kikkoman for authenticity
- Worcestershire sauce (1 tablespoon / 15ml)
- Honey (1 teaspoon / 5ml) or brown sugar for a subtle sweetness
- Japanese curry powder or a mild curry powder blend (2 tablespoons / 16g)
- Ground ginger (½ teaspoon / 1g)
- Salt and pepper, to taste
- For Serving:
- Steamed white rice or Japanese short-grain rice (about 2 cups cooked / 360g)
- Optional: Pickled ginger or sliced scallions for garnish
If you want a gluten-free version, swap the all-purpose flour with rice flour and use gluten-free panko breadcrumbs. For dairy-free, replace butter with a neutral oil like grapeseed or coconut oil. I’ve found that using fresh, firm chicken breasts and good-quality panko really makes a difference in texture. When in season, you can swap the carrot and potato with chunks of sweet potato for a twist.
Equipment Needed
- Large non-stick skillet or deep frying pan – I prefer a heavy-bottomed pan for even heat distribution
- Medium saucepan for cooking the curry sauce
- Meat mallet or rolling pin to pound chicken breasts evenly
- Mixing bowls for dredging station (flour, egg wash, and panko)
- Sharp knife and cutting board for prepping vegetables
- Slotted spoon or tongs for frying and draining chicken
- Wire rack or paper towels for draining excess oil (wire racks help keep the chicken crispy longer)
If you don’t have a meat mallet, a rolling pin or even the bottom of a heavy skillet works just fine. For frying, maintaining the oil temperature is key; a kitchen thermometer can be super helpful but isn’t mandatory if you keep an eye on the oil behavior. I’ve used both cast iron and stainless steel pans for frying and found cast iron holds heat better, giving a more consistent golden crust.
Preparation Method
- Prepare the Chicken: Start by trimming any excess fat from the chicken breasts. Place each breast between two sheets of plastic wrap or parchment paper. Using a meat mallet or rolling pin, gently pound the chicken to about ½ inch (1.3 cm) thickness. This helps the chicken cook evenly and stay juicy. Season both sides with salt and pepper.
- Set Up the Dredging Station: Place the flour in a shallow dish. In another dish, beat the eggs until smooth. In a third dish, spread out the panko breadcrumbs evenly. This three-step process ensures a crisp coating.
- Coat the Chicken: Dredge each chicken piece first in flour, shaking off excess. Next, dip into the beaten eggs, letting any extra drip off gently. Finally, press firmly into the panko, coating evenly on all sides. Set aside on a plate.
- Heat the Oil: Pour vegetable oil into a large skillet to a depth of about ½ inch (1.25 cm). Heat over medium heat until the oil reaches around 350°F (175°C). If you don’t have a thermometer, test by dropping a small breadcrumb into the oil—if it sizzles and floats, it’s ready.
- Fry the Chicken: Carefully place the chicken pieces into the hot oil, working in batches if necessary to avoid overcrowding. Fry for about 3-4 minutes per side until golden brown and cooked through. The internal temperature should reach 165°F (74°C). Remove and drain on a wire rack or paper towels to keep crisp.
- Make the Curry Sauce: In a medium saucepan, melt butter over medium heat. Add the chopped onions and sauté until translucent and slightly caramelized, about 5-7 minutes. Stir in minced garlic, diced carrot, and potato; cook for another 2 minutes.
- Add Flour and Spices: Sprinkle flour over the vegetables, stirring constantly to form a roux. Cook for 2-3 minutes to remove the raw flour taste. Then add curry powder, ground ginger, salt, and pepper, stirring to coat.
- Simmer the Sauce: Gradually pour in chicken broth, whisking constantly to avoid lumps. Add soy sauce, Worcestershire sauce, and honey. Bring to a gentle boil, then reduce heat and simmer uncovered for 15-20 minutes until the sauce thickens and the vegetables are tender.
- Blend the Sauce (Optional): For a silky texture, you can use an immersion blender to puree the sauce partially or fully, depending on your preference. This step is optional but recommended for a smooth, rich curry sauce.
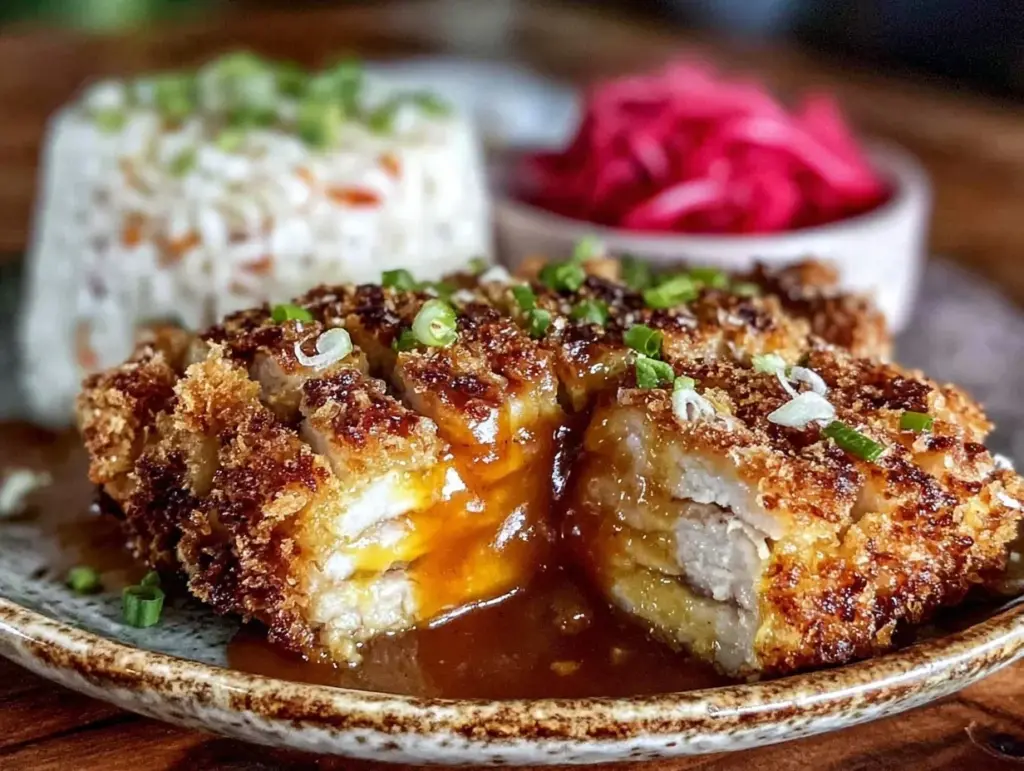
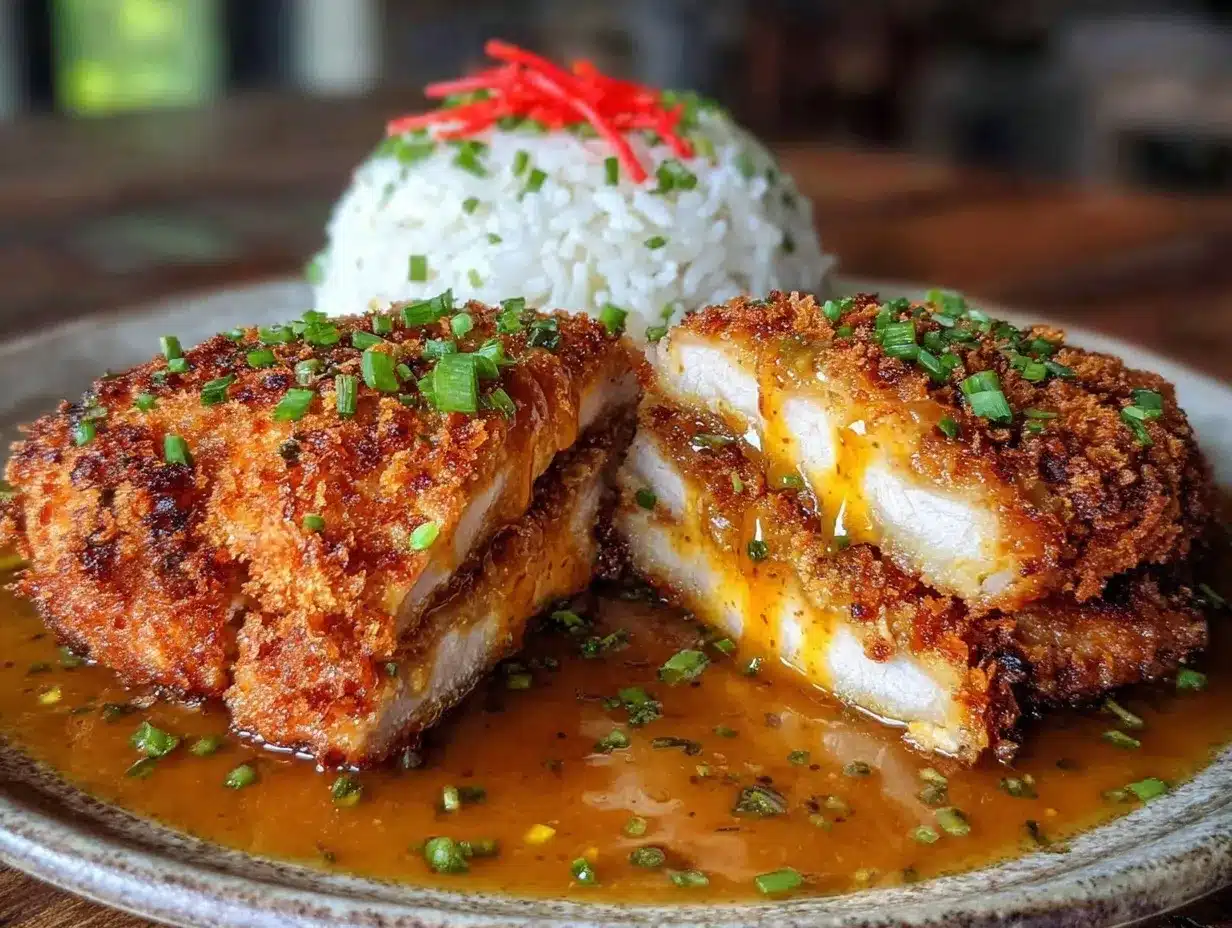
- Serve: Slice the chicken katsu into strips and arrange on a plate over steamed rice. Ladle the warm curry sauce generously over the chicken. Garnish with pickled ginger or scallions if desired.
If your sauce seems too thick, add a splash of broth or water to loosen it. If too thin, let it simmer a little longer uncovered. I always keep a close eye on the frying oil temperature to avoid greasy chicken—too hot and it burns, too cool and it soaks oil.
Cooking Tips & Techniques
Perfecting crispy chicken katsu curry comes down to a few key tips I’ve picked up over time. First, pounding the chicken evenly is non-negotiable; uneven pieces cook unevenly and can dry out. Don’t skip this step.
When coating the chicken, press the panko breadcrumbs firmly but not too thickly—think light, even coverage that crisps without weighing down. For frying, maintaining medium heat keeps the crust golden and the chicken juicy inside. I learned the hard way that overcrowding the pan drops oil temperature, resulting in soggy coating, so I always fry in batches.
For the curry sauce, patience matters. Letting the onions caramelize slowly brings out the natural sweetness that balances the spices. When adding the flour, stirring constantly prevents lumps and creates a velvety base. Adjust seasoning gradually; the soy and Worcestershire sauces add depth without overpowering.
Multi-tasking is doable here: while the sauce simmers, you can prep the chicken and set up your frying station. It keeps things moving without stress. Also, resting the fried chicken on a wire rack rather than paper towels keeps it crispier longer—a small detail that makes a big difference.
Variations & Adaptations
This recipe is versatile and adapts well to different preferences or dietary needs.
- Vegetarian Version: Swap chicken for thick slices of fried tofu or eggplant. Coat and fry using the same method. The curry sauce works beautifully with these options.
- Spice Level: If you like heat, add a pinch of cayenne or a diced chili to the curry sauce while cooking, or serve with a drizzle of chili oil.
- Gluten-Free: Use rice flour or cornstarch for dredging and gluten-free panko breadcrumbs. Ensure soy sauce is gluten-free (tamari is a great substitute).
- Air Fryer Option: For a lighter version, air fry the breaded chicken at 400°F (200°C) for 12-15 minutes, flipping halfway, until crisp and cooked through.
- Personal Twist: I sometimes add a splash of coconut milk to the curry sauce for a creamy, slightly tropical note that pairs wonderfully with the crunchy chicken.
Serving & Storage Suggestions
This chicken katsu curry is best served hot, right after frying and sauce preparation. The crispy texture and warm sauce combo hit their peak right away. Serve over freshly steamed Japanese short-grain rice for that classic pairing.
For sides, a simple cucumber salad or lightly sautéed green beans—like my vibrant sautéed green beans with lemon zest and pine nuts—adds freshness and crunch. Pickled ginger or scallions on top add a nice zing and color contrast.
Store leftovers in an airtight container in the fridge for up to 3 days. Keep rice and chicken separate if possible to retain crispiness. Reheat chicken in a skillet or air fryer to revive the crunch, and warm the curry sauce gently on the stove.
Over time, the flavors in the curry sauce deepen, making it even tastier the next day. I often make extra sauce to use as a dip or with other dishes like my honey roasted butternut squash with rosemary for a cozy meal twist.
Nutritional Information & Benefits
This crispy chicken katsu curry offers a balanced meal with lean protein from the chicken and complex carbohydrates from the rice and vegetables. The homemade curry sauce includes turmeric and ginger, known for their anti-inflammatory properties.
Estimated nutrition per serving (including rice): approximately 550-600 calories, 35g protein, 50g carbohydrates, and 20g fat. You can adjust portion sizes or swap ingredients like brown rice for added fiber or use low-sodium broth to reduce salt intake.
This recipe suits a moderate-carb diet and can be adapted for gluten-free or dairy-free needs as mentioned. The fresh ingredients and controlled seasoning make it a wholesome choice that feels indulgent but not heavy.
Conclusion
All in all, this crispy chicken katsu curry with rich Japanese sauce has become a staple in my kitchen for its ease, flavor, and comforting vibe. It’s the perfect mix of crunchy, saucy, and savory that hits the spot every time. Feel free to tweak the spice levels or try different variations to make it your own. I personally love adding a touch of coconut milk or serving it alongside a fresh green bean dish for balance.
If you give this recipe a try, I’d love to hear what you think or how you made it your own. Sharing those little tweaks and kitchen moments makes cooking even more fun! Here’s to many cozy meals and happy taste buds ahead.
FAQs
- Can I use chicken thighs instead of breasts? Yes! Boneless, skinless chicken thighs work well and tend to stay juicier. Just adjust cooking time slightly if they’re thicker.
- How do I keep the chicken katsu crispy after frying? Drain on a wire rack instead of paper towels and serve immediately. If storing, reheat in a skillet or air fryer to revive the crispness.
- Is it possible to make the curry sauce vegan? Absolutely. Use vegetable broth instead of chicken broth and substitute butter with vegan margarine or oil.
- Can I prepare the curry sauce in advance? Yes, the sauce can be made a day or two ahead and refrigerated. Reheat gently before serving and stir in a little broth if it thickens too much.
- What’s the best rice to serve with chicken katsu curry? Japanese short-grain rice is ideal for its sticky texture that holds the sauce well, but jasmine or basmati rice can work if that’s what you have.
Pin This Recipe!
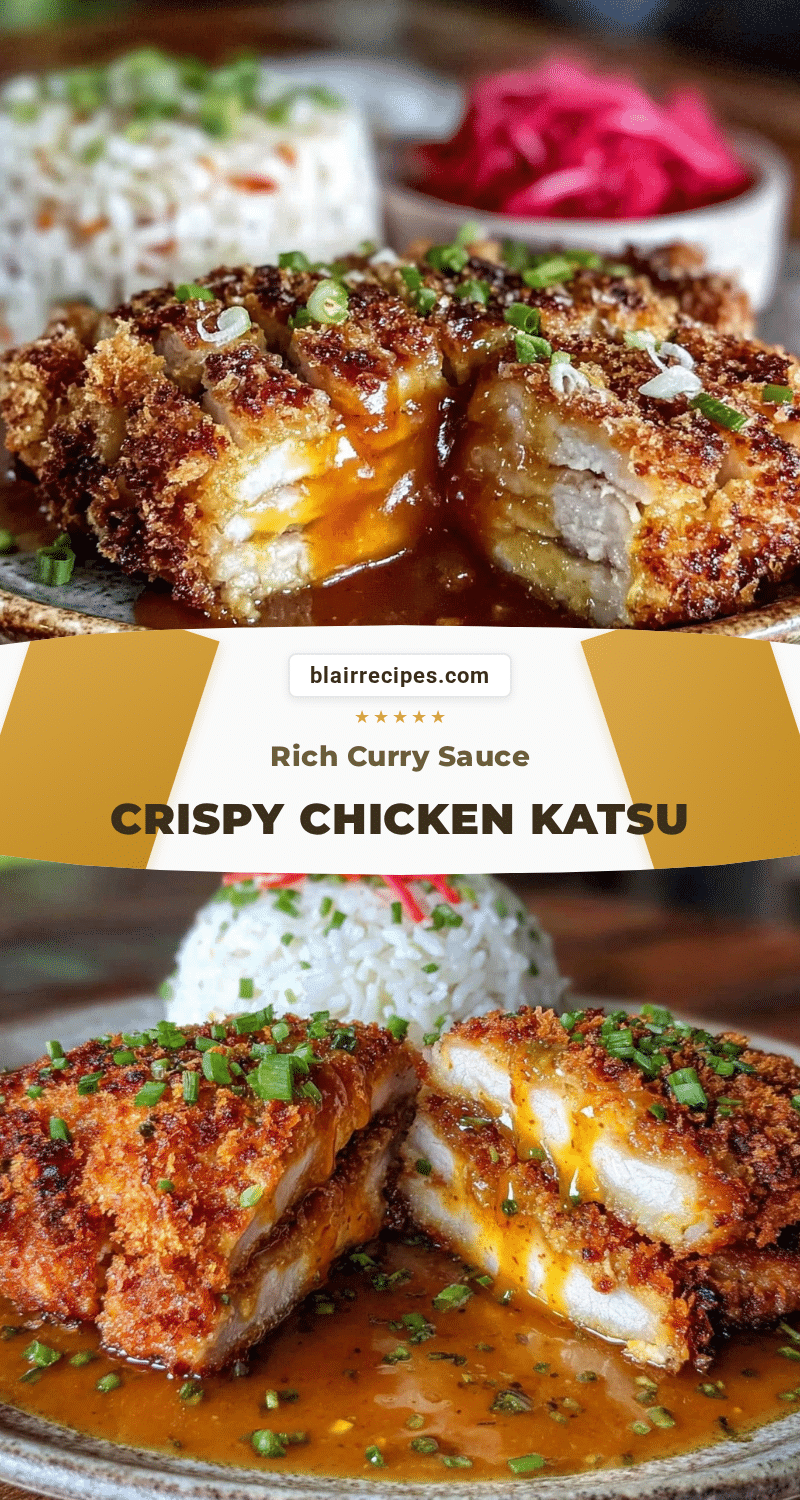
Crispy Chicken Katsu Curry Recipe Easy Homemade Japanese Sauce

A quick and comforting Japanese dish featuring crispy breaded chicken breasts served with a rich, homemade curry sauce. Perfect for weeknight dinners with simple ingredients and satisfying flavors.
- Prep Time: 15 minutes
- Cook Time: 25 minutes
- Total Time: 40 minutes
- Yield: 4 servings 1x
- Category: Main Course
- Cuisine: Japanese
Ingredients
- 1 pound (450g) boneless, skinless chicken breasts, pounded thin
- ½ cup (60g) all-purpose flour (or rice flour for gluten-free)
- 2 large eggs, beaten, room temperature
- 1 cup (110g) panko breadcrumbs (gluten-free if needed)
- Salt and freshly ground black pepper, to taste
- 1½ cups (350ml) vegetable or canola oil, for frying
- 1 medium yellow onion, finely chopped
- 3 garlic cloves, minced
- 1 medium carrot, peeled and diced
- 1 medium potato, peeled and diced
- 2 tablespoons (30g) unsalted butter (or neutral oil for dairy-free)
- 2 tablespoons (16g) all-purpose flour
- 2 cups (475ml) low sodium chicken broth (or vegetable broth for vegan)
- 1 tablespoon (15ml) soy sauce (gluten-free tamari if needed)
- 1 tablespoon (15ml) Worcestershire sauce
- 1 teaspoon (5ml) honey or brown sugar
- 2 tablespoons (16g) Japanese curry powder or mild curry powder blend
- ½ teaspoon (1g) ground ginger
- Salt and pepper, to taste
- About 2 cups cooked steamed white or Japanese short-grain rice (360g)
- Optional: Pickled ginger or sliced scallions for garnish
Instructions
- Trim excess fat from chicken breasts. Place each between plastic wrap or parchment paper and pound to about ½ inch (1.3 cm) thickness. Season both sides with salt and pepper.
- Set up dredging station with flour in one shallow dish, beaten eggs in another, and panko breadcrumbs in a third.
- Dredge each chicken piece in flour, shaking off excess. Dip into beaten eggs, letting extra drip off. Press firmly into panko breadcrumbs to coat evenly. Set aside.
- Pour vegetable oil into a large skillet to about ½ inch (1.25 cm) depth. Heat over medium heat until oil reaches about 350°F (175°C).
- Fry chicken pieces carefully in batches to avoid overcrowding. Cook 3-4 minutes per side until golden brown and internal temperature reaches 165°F (74°C). Drain on wire rack or paper towels.
- In a medium saucepan, melt butter over medium heat. Add chopped onions and sauté 5-7 minutes until translucent and slightly caramelized. Stir in garlic, carrot, and potato; cook 2 more minutes.
- Sprinkle flour over vegetables, stirring constantly to form a roux. Cook 2-3 minutes to remove raw flour taste. Add curry powder, ground ginger, salt, and pepper; stir to coat.
- Gradually whisk in chicken broth to avoid lumps. Add soy sauce, Worcestershire sauce, and honey. Bring to gentle boil, then reduce heat and simmer uncovered 15-20 minutes until sauce thickens and vegetables are tender.
- Optional: Use an immersion blender to partially or fully puree the sauce for a smooth texture.
- Slice chicken katsu into strips. Serve over steamed rice and ladle warm curry sauce over the chicken. Garnish with pickled ginger or scallions if desired.
Notes
Maintain oil temperature around 350°F (175°C) to avoid greasy or burnt chicken. Drain fried chicken on a wire rack to keep it crispy longer. For gluten-free, use rice flour and gluten-free panko. For dairy-free, substitute butter with neutral oil. Optional immersion blending of sauce creates a silky texture. Air fryer option: cook breaded chicken at 400°F (200°C) for 12-15 minutes, flipping halfway.
Nutrition
- Serving Size: 1 serving includes 1
- Calories: 575
- Sugar: 7
- Sodium: 600
- Fat: 20
- Saturated Fat: 6
- Carbohydrates: 50
- Fiber: 4
- Protein: 35
Keywords: chicken katsu, Japanese curry, crispy chicken, homemade curry sauce, easy dinner, weeknight meal, panko chicken, Japanese comfort food


