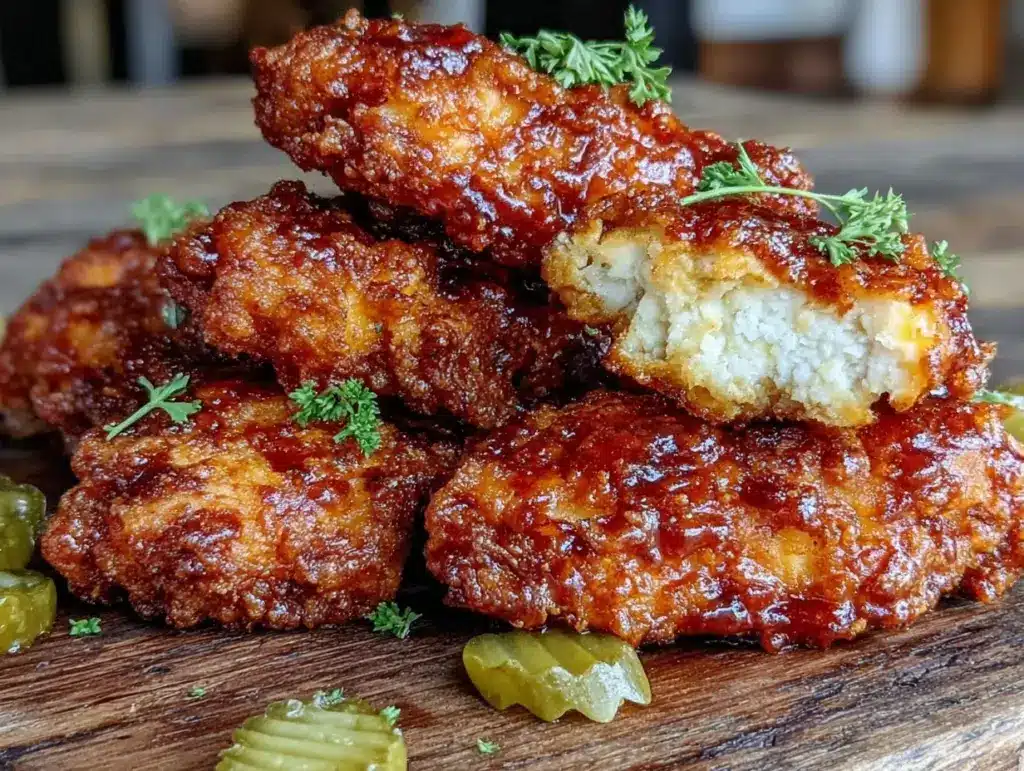
“You’ve got to try soaking them in pickle brine,” my coworker said, waving a half-eaten chicken tender like a trophy. Honestly, I raised an eyebrow—pickle brine in fried chicken? It sounded like one of those quirky kitchen ideas that might flop. But after a long, chaotic day, with dinner plans fading fast and the fridge looking bare, I figured, why not? I grabbed some chicken tenders, found a leftover jar of dill pickle juice lurking in the back of the fridge, and gave it a shot.
That first bite was a game-changer. The chicken was juicy beyond expectation, and the crust? Oh, so crispy, with just the right tangy hint sneaking through. It wasn’t the usual fried chicken, but something with a little more personality—like the kind of recipe that surprises you and quickly becomes a secret weapon for weeknight dinners. Since then, I’ve made these crispy pickle brine fried chicken tenders more times than I can count, and they always disappear fast—whether it’s a quick solo dinner or a casual get-together.
What stuck with me was how the pickle brine didn’t just add flavor; it kept the chicken tender and juicy, even under that crunchy golden coating. It’s a simple trick that turns the usual fried chicken tender into something memorable without extra fuss. Plus, the briny bite pairs surprisingly well with classic sides, like a fresh green bean salad or some buttery mashed sweet potatoes (I often think about how they’d go perfectly with the vibrant green bean and tomato salad with feta I made last week).
So yeah, it’s not just fried chicken—it’s the kind of dish that quietly earns its place on your regular menu, the one you feel confident sharing with friends and family. And honestly, it’s proof that sometimes the best recipes come from a little kitchen improvisation and a trusty jar of pickle brine.
Why You’ll Love This Recipe
After testing this recipe a handful of times, I can say with confidence: these crispy pickle brine fried chicken tenders hold their own as a true crowd-pleaser. The combination of tang and crunch creates a flavor profile that’s refreshingly different from your usual fried chicken, but still comforting and familiar enough to satisfy everyone at the table.
- Quick & Easy: The entire process takes less than 45 minutes, including marinating time. Perfect for those nights when you want something tasty without spending hours in the kitchen.
- Simple Ingredients: No fancy or hard-to-find items here—just pantry staples and a jar of pickle brine. If you keep dill pickles in your fridge, you’re already halfway there.
- Perfect for Casual Gatherings: Whether it’s a game day snack or a family dinner, these tenders are finger-licking good and always a hit.
- Crowd-Pleaser: Kids and adults alike can’t get enough. The pickle brine adds just the right zing without overpowering the classic fried chicken flavor.
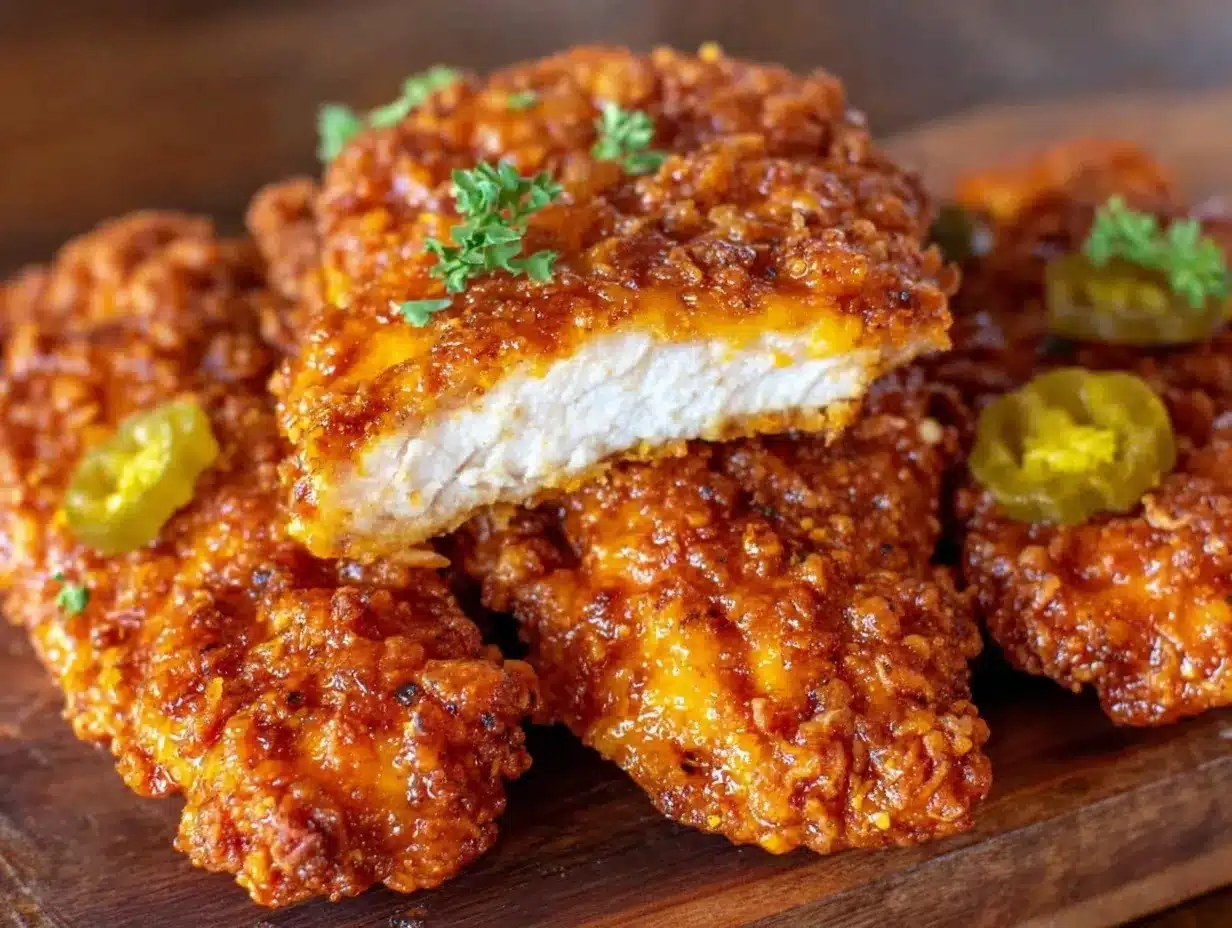
- Unbelievably Delicious: The crispy crust combined with juicy, tender chicken creates a texture that’ll have you reaching for seconds (or thirds).
What sets this recipe apart is the pickle brine soak—it’s not just a marinade but a secret weapon that locks in moisture while infusing subtle acidity. Unlike other fried chicken recipes that can sometimes turn out dry or bland, this method delivers a juicy interior that contrasts perfectly with the crunchy exterior. Plus, the seasoning blend in the breading is balanced just right, giving you a little kick without being too spicy.
Honestly, it’s the kind of dish that makes you pause and savor the bite, and if you want to switch up your usual fried chicken routine, this is a fantastic way to do it. If you love experimenting with flavor combos, you might also enjoy the crispy garlic chicken recipe I tried recently—it shares that same crave-worthy crunch but with a garlic twist.
What Ingredients You Will Need
This recipe uses simple, wholesome ingredients to deliver bold flavor and satisfying texture without the fuss. The pickle brine soak is the star here, tenderizing the chicken and adding that signature tang. Most of these items are pantry staples, so you won’t need to run to the store last minute. If you want, you can tweak a few ingredients to suit your tastes or dietary needs.
- Chicken Tenders: About 1.5 pounds (680 grams) of boneless, skinless chicken tenders. You can also slice chicken breasts into strips if you prefer.
- Pickle Brine: 1 cup (240 ml) of dill pickle juice from a jar of pickles. This adds moisture and tangy flavor. If you don’t have pickle juice, you can mix 1 cup water with 2 tablespoons vinegar and a pinch of salt as a substitute.
- Buttermilk: 1/2 cup (120 ml) for the marinade mix. If you don’t have buttermilk, plain yogurt or milk with a splash of lemon juice works well.
- All-Purpose Flour: 1.5 cups (190 grams) for the breading. For a gluten-free option, use almond or rice flour.
- Cornstarch: 1/2 cup (60 grams) mixed with flour to help achieve extra crispiness.
- Seasonings for Breading:
- 1 teaspoon paprika (smoked or regular)
- 1 teaspoon garlic powder
- 1 teaspoon onion powder
- 1/2 teaspoon cayenne pepper (optional, for a mild kick)
- 1 teaspoon salt
- 1/2 teaspoon black pepper
- Eggs: 2 large eggs, beaten, to help the breading stick.
- Oil for Frying: About 3 cups (700 ml) of vegetable oil, peanut oil, or canola oil. I prefer peanut oil for its high smoke point and neutral flavor.
Look for firm, fresh chicken tenders for best results. The seasoning blend here is balanced to give a little heat and depth, but you can always adjust it if you’d rather keep things mild or ramp it up. I usually keep a good-quality paprika like McCormick on hand for consistent flavor.
Equipment Needed
- Large Mixing Bowls: You’ll need these for marinating and breading the chicken. Glass or stainless steel bowls work best since plastic can sometimes hold onto odors.
- Deep Fryer or Heavy Pot: A deep fryer makes frying easier, but a heavy-bottomed pot like a Dutch oven works just fine. Just be sure it’s deep enough to hold about 3 inches of oil safely.
- Cooking Thermometer: Essential for keeping the oil temperature steady at 350°F (175°C). This helps the chicken cook evenly without absorbing too much oil.
- Wire Rack and Baking Sheet: For draining the chicken once it’s fried. I never skip this step because it keeps the crust super crispy instead of soggy.
- Tongs: For safely lowering and flipping the chicken in hot oil.
- Measuring Cups and Spoons: For accuracy in seasoning and breading.
If you don’t have a thermometer, keep a close eye on the oil and test with a small piece of bread or batter to check the temperature before frying the tenders. Maintaining the right oil temperature is the trickiest part, but trust me, it’s worth the effort. Also, if you want a slightly lighter option, you can try frying these in an air fryer, though the texture won’t be quite the same as traditional frying.
Preparation Method
- Marinate the Chicken: In a large bowl, combine 1 cup (240 ml) pickle brine and 1/2 cup (120 ml) buttermilk. Add the chicken tenders, making sure they’re fully submerged. Cover and refrigerate for at least 1 hour, ideally 2-3 hours. This soak tenderizes the chicken and infuses it with flavor.
- Prepare the Breading Station: In one shallow bowl, mix 1.5 cups (190 g) all-purpose flour with 1/2 cup (60 g) cornstarch, 1 teaspoon paprika, 1 teaspoon garlic powder, 1 teaspoon onion powder, 1/2 teaspoon cayenne pepper (optional), 1 teaspoon salt, and 1/2 teaspoon black pepper.
- In a second bowl, beat 2 large eggs until smooth.
- Drain Chicken: Remove tenders from the marinade and pat each piece lightly with paper towels. Excess moisture can make breading slip off, so a gentle pat is key without drying out the chicken.
- Coat the Chicken: First, dip each tender into the beaten eggs, allowing any excess to drip off. Then dredge thoroughly in the seasoned flour mixture, pressing gently to make sure the breading sticks well.
- Place the breaded chicken on a plate or wire rack while you heat the oil.
- Heat the Oil: Pour about 3 cups (700 ml) of oil into your deep fryer or heavy pot. Heat to 350°F (175°C). Use a thermometer to maintain temperature. If too hot, the crust will burn before the chicken cooks; too cool and the breading will soak up oil and get greasy.
- Fry the Tenders: Working in batches to avoid overcrowding, carefully lower chicken tenders into the hot oil using tongs. Fry for 3-4 minutes per side, or until golden brown and cooked through (internal temperature of 165°F / 74°C). Flip once halfway through cooking.
- Drain and Rest: Use tongs to transfer the fried tenders to a wire rack set over a baking sheet. This keeps the crust crisp while excess oil drains off. Let rest for 5 minutes before serving.
Quick tip: If the breading starts to get patchy, toss the tenders back briefly in the egg and flour mixture to refresh the coating. Also, don’t skip the resting step—it lets the juices redistribute and the crust stay crunchy.
Cooking Tips & Techniques
Cooking fried chicken tenders can be a little tricky but worth mastering. Here are some tips I’ve picked up:
- Maintain Oil Temperature: This is everything. The magic number is around 350°F (175°C). Too low and your chicken will absorb oil, ending up soggy. Too high and the crust burns before the inside cooks. Use a reliable thermometer and adjust heat as needed.
- Don’t Overcrowd the Pan: Fry in small batches to keep the oil temperature consistent. Overcrowding drops the temperature and leads to greasy, limp tenders.
- Pat Dry Before Breading: After marinating, gently pat the chicken dry. Too wet, and the breading won’t stick well. If you rush this step, you’ll regret soggy breading.
- Double-Dip for Extra Crunch: For a thicker crust, dip tenders twice in egg and flour before frying. Just be careful not to create a coating so thick it overwhelms the chicken.
- Use Cornstarch: Blending cornstarch with flour helps create that extra-crispy texture everyone loves on fried chicken.
- Let Rest on a Wire Rack: Avoid paper towels for draining—they trap steam and soften the crust. Wire racks keep air circulating so the crust stays crisp.
One kitchen mishap I learned from was frying all the tenders at once in a shallow pan without a thermometer. The oil temperature dropped so low that the tenders soaked up too much oil and tasted heavy. After that, I invested in a simple digital thermometer and never looked back. It’s a small gadget that makes a huge difference!
Variations & Adaptations
This recipe is pretty flexible, so feel free to tailor it to your taste or dietary needs.
- Spice It Up: Add smoked paprika, chipotle powder, or cayenne to the breading for a smoky, spicy kick. I sometimes toss in a pinch of cumin for a subtle earthiness.
- Gluten-Free Option: Substitute all-purpose flour with a gluten-free blend or almond flour. Cornstarch is naturally gluten-free and helps maintain crispiness.
- Air Fryer Version: For a lighter take, coat the tenders the same way but air fry at 400°F (205°C) for about 10-12 minutes, flipping halfway. The texture is still crispy but with less oil.
- Dairy-Free: Swap buttermilk with coconut milk mixed with a tablespoon of vinegar, and use a dairy-free egg substitute or flax egg for the egg wash.
- Herb-Infused: Mix fresh herbs like thyme or rosemary into the breading. This adds a fresh, fragrant note that pairs well with the pickle tang.
One variation I tried recently was adding a dash of Old Bay seasoning to the breading—it gave the tenders a slightly different but delicious flavor that my family loved. If you want to complement the tangy fried chicken, consider serving it alongside a side like the crockpot green bean casserole for a hearty meal.
Serving & Storage Suggestions
These crispy pickle brine fried chicken tenders are best served hot and fresh for maximum crunch. Serve them right off the wire rack with your favorite dipping sauces—ranch, honey mustard, or a spicy aioli all work beautifully.
For sides, they pair well with fresh, bright salads like the sautéed green beans with lemon zest and pine nuts or a creamy mash like sweet potatoes or mashed potatoes.
If you have leftovers, store the tenders in an airtight container in the refrigerator for up to 3 days. To reheat without losing the crisp, pop them in a 375°F (190°C) oven for 10-12 minutes instead of microwaving. This helps bring back that golden crunch.
Flavors do mellow a bit after refrigeration, so if you like, add a squeeze of fresh lemon or a sprinkle of flaky sea salt when serving leftovers to brighten things up.
Nutritional Information & Benefits
Each serving of these crispy pickle brine fried chicken tenders (about 4-5 pieces) contains approximately:
| Calories | 350-400 kcal |
|---|---|
| Protein | 30 grams |
| Fat | 18 grams |
| Carbohydrates | 20 grams |
| Sodium | 600-700 mg |
The chicken is an excellent source of lean protein, and the pickle brine provides a small amount of electrolytes like sodium and potassium. Using peanut or vegetable oil with a high smoke point helps keep the fat stable during frying.
This recipe is naturally gluten-friendly if you swap the flour for gluten-free alternatives, and you can reduce sodium by choosing low-sodium pickle brine or making your own. For those watching carbs, the breading can be modified with almond flour or crushed pork rinds for a keto twist.
Conclusion
These crispy pickle brine fried chicken tenders are an easy way to transform simple chicken into a juicy, flavorful, and crunchy delight. The pickle brine soak adds a surprisingly fresh tang that keeps every bite juicy and satisfying. Whether you’re feeding a hungry family or looking for a tasty snack, this recipe is a dependable crowd-pleaser that doesn’t require hours in the kitchen.
I love how adaptable it is, from spice levels to cooking methods, and it always delivers that perfect texture—the golden crust with tender chicken inside. It’s become a staple in my kitchen, especially when I need something quick that doesn’t feel basic.
If you give this recipe a try, I’d love to hear how you make it your own or what sides you pair it with. Sharing those little tweaks makes cooking more fun and personal, don’t you think? Here’s to many crispy, juicy chicken dinners ahead!
FAQs About Crispy Pickle Brine Fried Chicken Tenders
Can I use regular chicken breast instead of tenders?
Yes! Just slice the chicken breast into strips about the size of tenders. The marinade and frying times stay the same.
How long can I marinate the chicken in pickle brine?
Ideally, 1-3 hours. Marinating longer than 4 hours can start to break down the meat too much and affect texture.
Is it necessary to use pickle brine, or can I skip it?
The pickle brine is key for juicy flavor and tenderness, but if you don’t have any, you can use buttermilk or a vinegar-water mix instead.
What’s the best oil for frying these chicken tenders?
Peanut oil or vegetable oil with a high smoke point works best. Avoid olive oil as it smokes at lower temperatures.
Can I bake these instead of frying?
You can bake them at 425°F (220°C) for 15-20 minutes, flipping halfway. The texture won’t be as crispy but still tasty and easier on the oil.
Pin This Recipe!
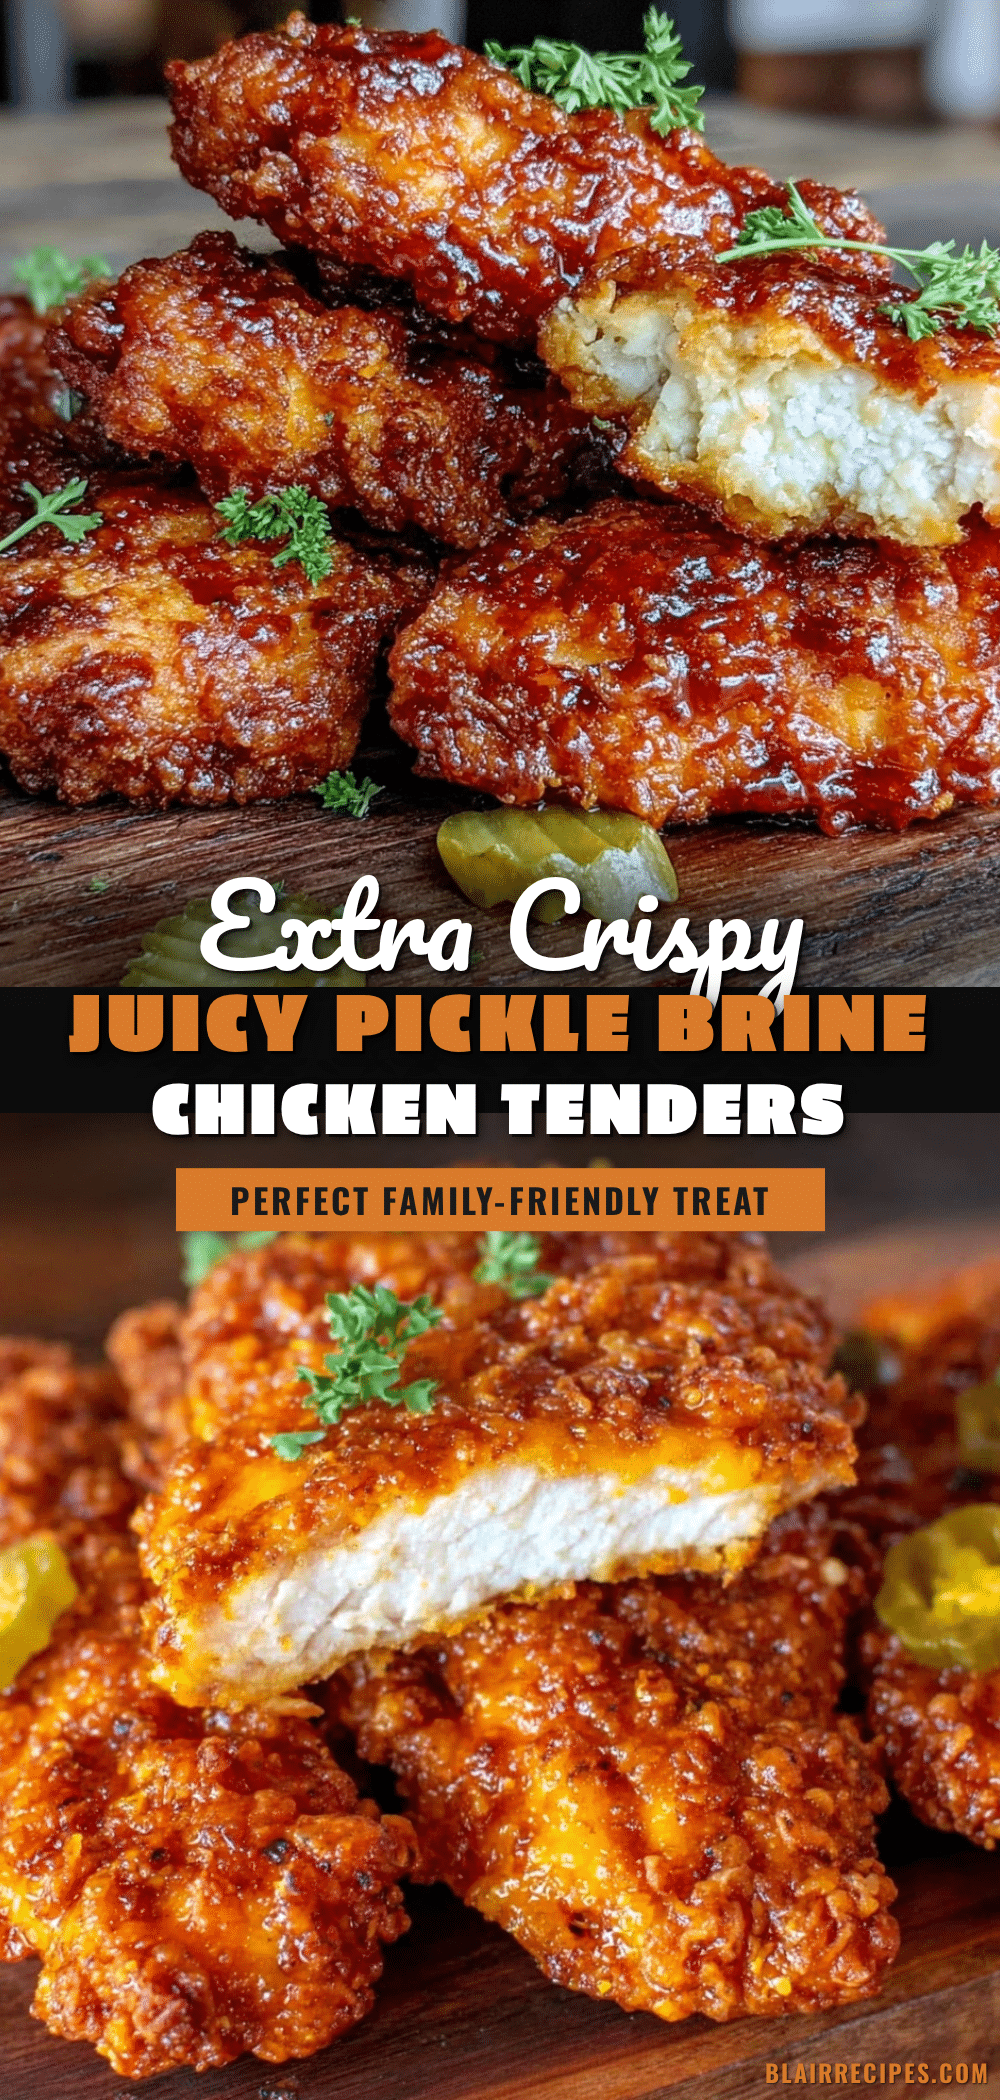
Crispy Pickle Brine Fried Chicken Tenders

These crispy pickle brine fried chicken tenders are juicy, flavorful, and have a crunchy golden crust with a tangy hint from the pickle brine soak. Perfect for quick weeknight dinners or casual gatherings.
- Prep Time: 10 minutes
- Cook Time: 15 minutes
- Total Time: 1 hour 25 minutes
- Yield: 4 servings 1x
- Category: Main Course
- Cuisine: American
Ingredients
- 1.5 pounds boneless, skinless chicken tenders
- 1 cup dill pickle juice (pickle brine)
- 1/2 cup buttermilk
- 1.5 cups all-purpose flour
- 1/2 cup cornstarch
- 1 teaspoon paprika
- 1 teaspoon garlic powder
- 1 teaspoon onion powder
- 1/2 teaspoon cayenne pepper (optional)
- 1 teaspoon salt
- 1/2 teaspoon black pepper
- 2 large eggs, beaten
- About 3 cups vegetable oil, peanut oil, or canola oil for frying
Instructions
- In a large bowl, combine 1 cup pickle brine and 1/2 cup buttermilk. Add chicken tenders, fully submerge, cover and refrigerate for at least 1 hour, ideally 2-3 hours.
- In a shallow bowl, mix 1.5 cups all-purpose flour, 1/2 cup cornstarch, 1 teaspoon paprika, 1 teaspoon garlic powder, 1 teaspoon onion powder, 1/2 teaspoon cayenne pepper (optional), 1 teaspoon salt, and 1/2 teaspoon black pepper.
- In a second bowl, beat 2 large eggs until smooth.
- Remove chicken tenders from marinade and pat dry lightly with paper towels.
- Dip each tender into beaten eggs, letting excess drip off, then dredge thoroughly in the seasoned flour mixture, pressing gently to adhere.
- Place breaded chicken on a plate or wire rack while heating oil.
- Heat about 3 cups of oil in a deep fryer or heavy pot to 350°F (175°C). Maintain temperature with a thermometer.
- Fry chicken tenders in batches, avoiding overcrowding, for 3-4 minutes per side until golden brown and internal temperature reaches 165°F (74°C). Flip once halfway through.
- Transfer fried tenders to a wire rack set over a baking sheet to drain excess oil and keep crust crispy. Let rest for 5 minutes before serving.
Notes
Maintain oil temperature at 350°F to avoid greasy or burnt crust. Pat chicken dry before breading to help coating stick. Rest fried tenders on wire rack to keep crust crispy. For extra crunch, double-dip in egg and flour mixture. Air fryer option: cook at 400°F for 10-12 minutes, flipping halfway.
Nutrition
- Serving Size: About 4-5 pieces per
- Calories: 350400
- Sodium: 600700
- Fat: 18
- Carbohydrates: 20
- Protein: 30
Keywords: fried chicken tenders, pickle brine chicken, crispy chicken, quick dinner, easy fried chicken, tangy chicken tenders


