“Are you seriously making Jello cups again?” my niece teased as I pulled out the colorful containers from the fridge. Honestly, I can’t blame her—I’ve whipped up these festive red white blue Jello cups with whipped topping more times than I can count during summer get-togethers. It all started one Fourth of July when I was scrambling through the pantry, trying to find a last-minute dessert for a spontaneous backyard barbecue. I didn’t have the time or patience for baking, and the heat was relentless, making anything heavy feel like a mistake.
Then, I spotted the three Jello packets in patriotic colors, just sitting there like a forgotten reminder of a simpler dessert. Skeptical at first if layered gelatin could really impress, I gave it a shot. The result? A refreshing, light, and eye-catching treat that had everyone asking for the recipe (including my niece, who was all smiles by then). The fluffy whipped topping added just the right creamy contrast, turning what could’ve been a simple kids’ snack into a crowd favorite for all ages.
That moment stuck with me. This isn’t just a recipe for red white blue Jello cups; it’s a quick fix that brings a bit of fun and nostalgia to any party. It’s one of those dishes I return to when I want a dessert that’s colorful, no-fuss, and ready to brighten the mood without turning on the oven. Somehow, these cups carry the spirit of summer celebrations in a way that feels effortless but satisfying. No frills, just pure, simple joy in every spoonful.
Why You’ll Love This Recipe
After making these festive red white blue Jello cups with whipped topping multiple times, I’ve uncovered why they keep becoming a staple in my summer gatherings:
- Quick & Easy: You can have these ready in under an hour, including chilling time—perfect for last-minute parties or when you just want a sweet treat without fuss.
- Simple Ingredients: No complicated shopping required! Mostly pantry staples like gelatin packets and canned whipped topping (though fresh cream works beautifully too).
- Perfect for Patriotic Occasions: Whether it’s the Fourth of July, Memorial Day, or any summer BBQ, these jello cups fit the festive bill effortlessly.
- Crowd-Pleaser: Kids adore the vibrant colors, and adults enjoy the light, refreshing sweetness—making it a versatile dessert everyone asks for.
- Unbelievably Delicious: The layered effect isn’t just pretty; it creates a fun combination of flavors and textures. The whipped topping balances the jello’s firmness with a silky smooth finish.
What makes this recipe stand out? It’s the layering technique that takes simple gelatin and turns it into a mini masterpiece. Instead of mixing flavors together, the distinct layers keep each taste bright and separate, offering a playful experience in every bite. Plus, I usually add a pinch of freshly squeezed lemon juice to the blue layer, which gives it a slight zing and prevents it from tasting overly sweet.
Honestly, this recipe isn’t just about dessert. It’s about capturing a moment—a little celebration in a cup that’s easy, nostalgic, and totally fuss-free. It’s the kind of recipe that makes you feel like you’re holding a piece of summer in your hand.
What Ingredients You Will Need
This recipe uses simple, wholesome ingredients to deliver bold flavor and satisfying texture without the fuss. Most of these are pantry staples, so you won’t need to run to specialty stores. Here’s what you’ll gather for your festive red white blue Jello cups with whipped topping:
- Red Jello Mix (e.g., strawberry or cherry flavor, 3 oz packet) – This forms the vibrant, sweet first layer
- Blue Jello Mix (e.g., blueberry or berry blue flavor, 3 oz packet) – The bold blue layer that adds a touch of tartness
- Unflavored Gelatin (1 tablespoon) – Used in the white layer to achieve that perfect creamy set without color
- Sweetened Condensed Milk (1 cup) – For the creamy, sweet white layer in the middle (I recommend Eagle Brand for consistent results)
- Water (boiling and cold, about 6 cups total) – For dissolving the gelatin packets
- Whipped Topping (1 cup, about 8 oz) – Use canned whipped topping or homemade whipped cream for a fresh finish
- Lemon Juice (1 teaspoon, optional) – Adds brightness to the blue layer, balancing sweetness
Ingredient Tips: If you want a healthier twist, you can swap sweetened condensed milk for coconut milk condensed version or full-fat coconut cream for a dairy-free white layer. For gluten-free needs, all these ingredients are naturally gluten-free—just double-check brands when in doubt.
Seasonal Variation: In summer, I sometimes toss fresh berries on top of the whipped topping for an extra burst of color and freshness.
Equipment Needed
- Mixing Bowls – At least three medium bowls to prepare each layer separately. Glass or heatproof bowls work best for dissolving gelatin in hot water.
- Measuring Cups & Spoons – Precision with water and gelatin ensures perfect set and texture.
- Whisk or Spoon – For stirring gelatin mixtures smoothly (I prefer a whisk to avoid lumps).
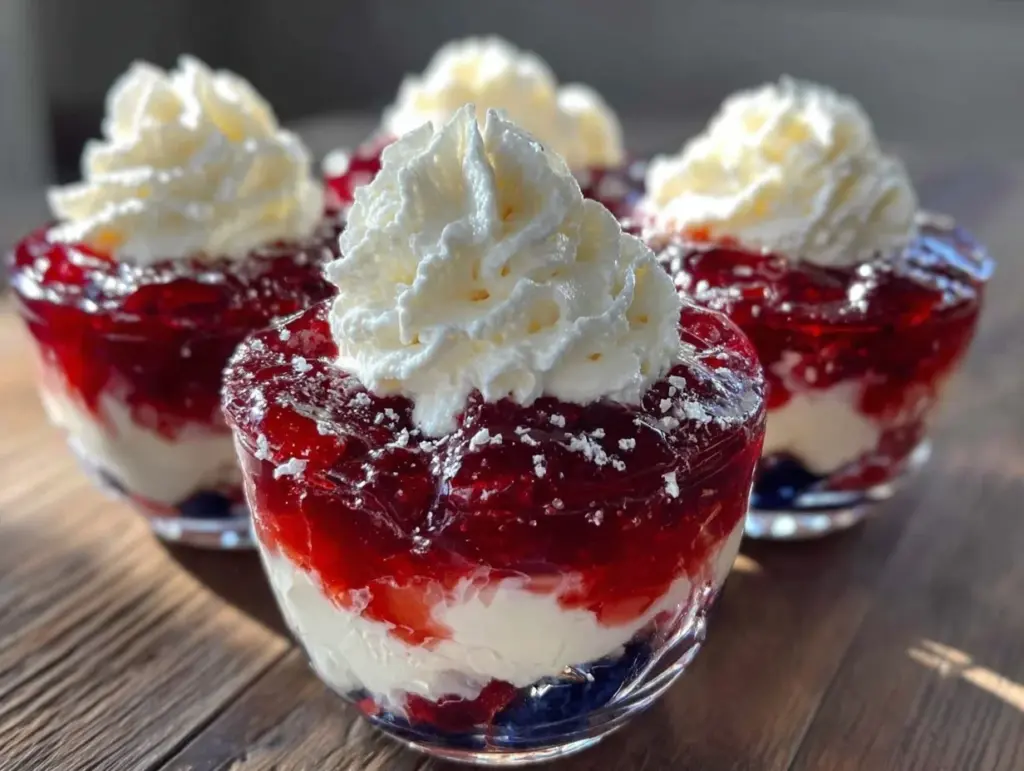
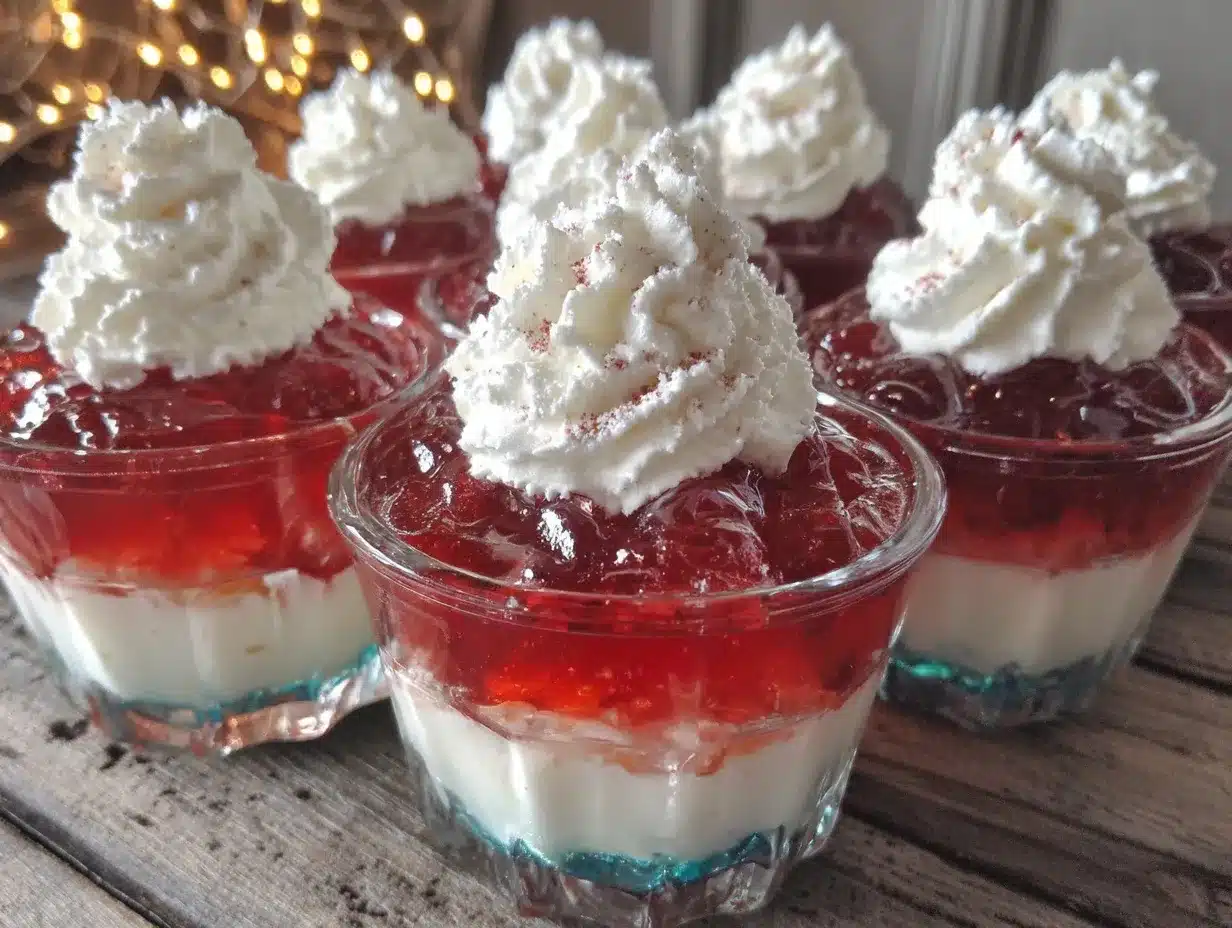
- Clear Plastic or Glass Cups – To showcase the beautiful red white blue layers. I like using 8-ounce clear plastic cups for portion control and easy serving.
- Refrigerator Space – You’ll need a flat surface to chill and set the layers without disturbing the colors.
If you don’t have fancy clear cups, small mason jars or even silicone molds can work as fun alternatives. Just be sure they’re sturdy enough for chilling. Keeping your mixing bowls warm initially (rinse with hot water) helps the gelatin dissolve faster, saving you time and frustration.
Preparation Method
- Prepare the Red Jello Layer: Boil 1 cup (240 ml) water and stir in the red Jello powder until completely dissolved (about 2 minutes). Add 1/2 cup (120 ml) cold water and mix well. Pour evenly into your clear cups, filling about one-third of each cup. Place the cups in the refrigerator to chill for about 20 minutes, or until firm but still slightly tacky to the touch. This helps the next layer stick better.
- Make the White Layer: In a medium bowl, sprinkle unflavored gelatin over 1/4 cup (60 ml) cold water and let it bloom for 5 minutes. Meanwhile, in a saucepan, heat 3/4 cup (180 ml) boiling water. Stir the bloomed gelatin into the hot water until fully dissolved. Add the sweetened condensed milk and whisk until smooth. Let the mixture cool slightly but not set. Gently pour over the red layer in each cup, filling another third. Return to the refrigerator for 20-25 minutes until set but still tacky.
- Prepare the Blue Jello Layer: Boil 1 cup (240 ml) water and stir in the blue Jello powder until dissolved. Add 1/2 cup (120 ml) cold water and lemon juice (if using) for brightness. Let the mixture cool slightly, then pour over the white layer carefully to avoid mixing. Chill for at least 30 minutes or until fully firm.
- Add the Whipped Topping: Once the jello layers are completely set, top each cup with a generous dollop of whipped topping. You can pipe it on with a pastry bag for a pretty swirl or simply spoon it generously. For a final festive touch, sprinkle with red or blue sugar crystals, mini stars, or fresh berries if desired.
- Chill Before Serving: Let the finished cups chill for an additional 10-15 minutes to help the whipped topping set slightly. Serve cold, straight from the fridge.
Pro Tip: Timing is key—if any layer is too soft when you add the next, the colors will bleed. Patience pays off, and it’s worth the wait to get those crisp, distinct layers.
When I first made these, I learned the hard way that rushing the setting time turns the layers into a colorful mess (lesson learned!). Now, I set reminders so I don’t get impatient. It really makes a difference in presentation and taste.
Cooking Tips & Techniques
Making these festive red white blue Jello cups with whipped topping isn’t complicated, but a few tricks can save you from common pitfalls:
- Bloom Your Gelatin: Always sprinkle gelatin powder over cold water and let it sit for a few minutes before heating. This step prevents clumps and ensures smooth layers.
- Cool Your Mixtures: Before pouring a new layer, let the gelatin cool but not set. Pouring hot jello on a firm layer will melt it, ruining the effect.
- Use Clear Cups: The visual impact is everything here. Clear plastic or glass cups show off the red, white, and blue layers beautifully.
- Layer Patience: Set timers and resist the urge to rush. Waiting for each layer to become tacky helps them stick together nicely without mixing.
- Whipped Topping Options: If you have a bit more time, try making homemade whipped cream with a touch of vanilla extract. It adds freshness and cuts the sweetness a bit.
One blunder I made was pouring the blue layer too soon once—colors bled, and it looked like a tie-dye disaster. Since then, layering carefully became my obsession, turning these cups into a real showstopper.
Variations & Adaptations
This recipe is flexible and easy to tweak, depending on your dietary needs or flavor preferences:
- Dairy-Free Option: Swap sweetened condensed milk with coconut cream or use a dairy-free whipped topping. This keeps the creamy layer without dairy concerns.
- Low-Sugar Version: Use sugar-free gelatin mixes and replace sweetened condensed milk with a mix of coconut milk and a natural sweetener like maple syrup or agave.
- Flavor Twists: Try different Jello flavors while keeping the red, white, and blue theme. Raspberry, vanilla pudding, and blueberry are tasty combos. Adding a splash of fresh fruit juice to the blue layer can deepen flavor.
- Different Presentation: Use silicone molds in star shapes for a fun twist, perfect for kids’ parties. Alternatively, layer the Jello in a large trifle bowl for a communal dessert.
- Alcohol-Infused: For adult parties, add a splash of clear liquor like vodka or rum to each gelatin layer before chilling. Just avoid this if serving children.
I once made a batch substituting the white layer with creamy Greek yogurt mixed with a bit of honey, which added tang and a protein boost. It was a hit and felt a bit more grown-up.
Serving & Storage Suggestions
These festive red white blue Jello cups taste best chilled and fresh. Serve them straight from the fridge for that cool, refreshing bite that’s perfect on a hot day. For presentation, arrange them on a white platter or a patriotic-themed tray to enhance the festive vibe.
Pair these Jello cups with light, savory sides like sautéed green beans with lemon zest or bring in a crunchy salad like green bean and tomato salad with feta for a well-rounded party spread.
For storage, keep the cups covered in the refrigerator to prevent the whipped topping from drying out. They’ll stay fresh for up to 3 days—though, honestly, they rarely last that long! If you need to store longer, the jello layers can be frozen, but whipped topping should be added fresh after thawing.
Reheating isn’t recommended, but letting the cups sit at room temperature for 10 minutes before serving can soften the gelatin slightly for easier spooning. Over time, the flavors meld subtly, making the dessert even more enjoyable after a few hours.
Nutritional Information & Benefits
Each festive red white blue Jello cup is a light dessert option with approximately 150-200 calories, depending on the size and whipped topping used. The gelatin provides a low-calorie, protein-rich base that’s easy on digestion.
The sweetened condensed milk adds richness, but you can adjust with dairy-free or lower-sugar alternatives if you’re watching sugar intake. The red and blue layers often contain fruit flavors, which bring a hint of antioxidants from natural fruit extracts.
This recipe is naturally gluten-free and can be adapted for dairy-free or vegan diets by swapping ingredients. It’s a refreshing way to enjoy a sweet treat without the heaviness of cakes or pies, making it ideal for summer celebrations when you want something light but satisfying.
Conclusion
These festive red white blue Jello cups with whipped topping have become my go-to for easy, cheerful desserts that please a crowd without stress. They’re colorful, fun, and just the right balance of sweet and creamy. Whether you’re hosting a patriotic bash or simply craving something cool and nostalgic, this recipe fits the bill perfectly.
Feel free to tweak the flavors or presentation to suit your style—this dessert is forgiving and welcomes creativity. I love how it brings smiles and sparks little moments of joy at my gatherings, reminding me that sometimes simple is best.
Give it a try, and if you experiment with your own variations, I’d love to hear about them in the comments below. Here’s to sweet celebrations and easy desserts that make life a little brighter!
FAQs
Can I make these Jello cups ahead of time?
Yes! You can prepare the layered Jello cups a day in advance and keep them refrigerated. Just add the whipped topping right before serving for the freshest look and taste.
What if I don’t have sweetened condensed milk?
You can substitute with equal parts heavy cream mixed with sugar, or try coconut cream for a dairy-free option. Just whisk well to maintain a smooth white layer.
How do I prevent the layers from mixing?
Make sure each layer is fully chilled and slightly firm before adding the next. Also, pour the next layer slowly over the back of a spoon to reduce splashing and blending.
Can I use homemade whipped cream instead of canned topping?
Absolutely! Homemade whipped cream with a bit of vanilla adds a fresh, light touch that pairs wonderfully with the Jello.
Are these Jello cups kid-friendly?
Definitely! Kids love the bright colors and fun layers. Just avoid alcohol if serving to children, and consider using fruit juice-based gelatin for a more natural option.
Pin This Recipe!
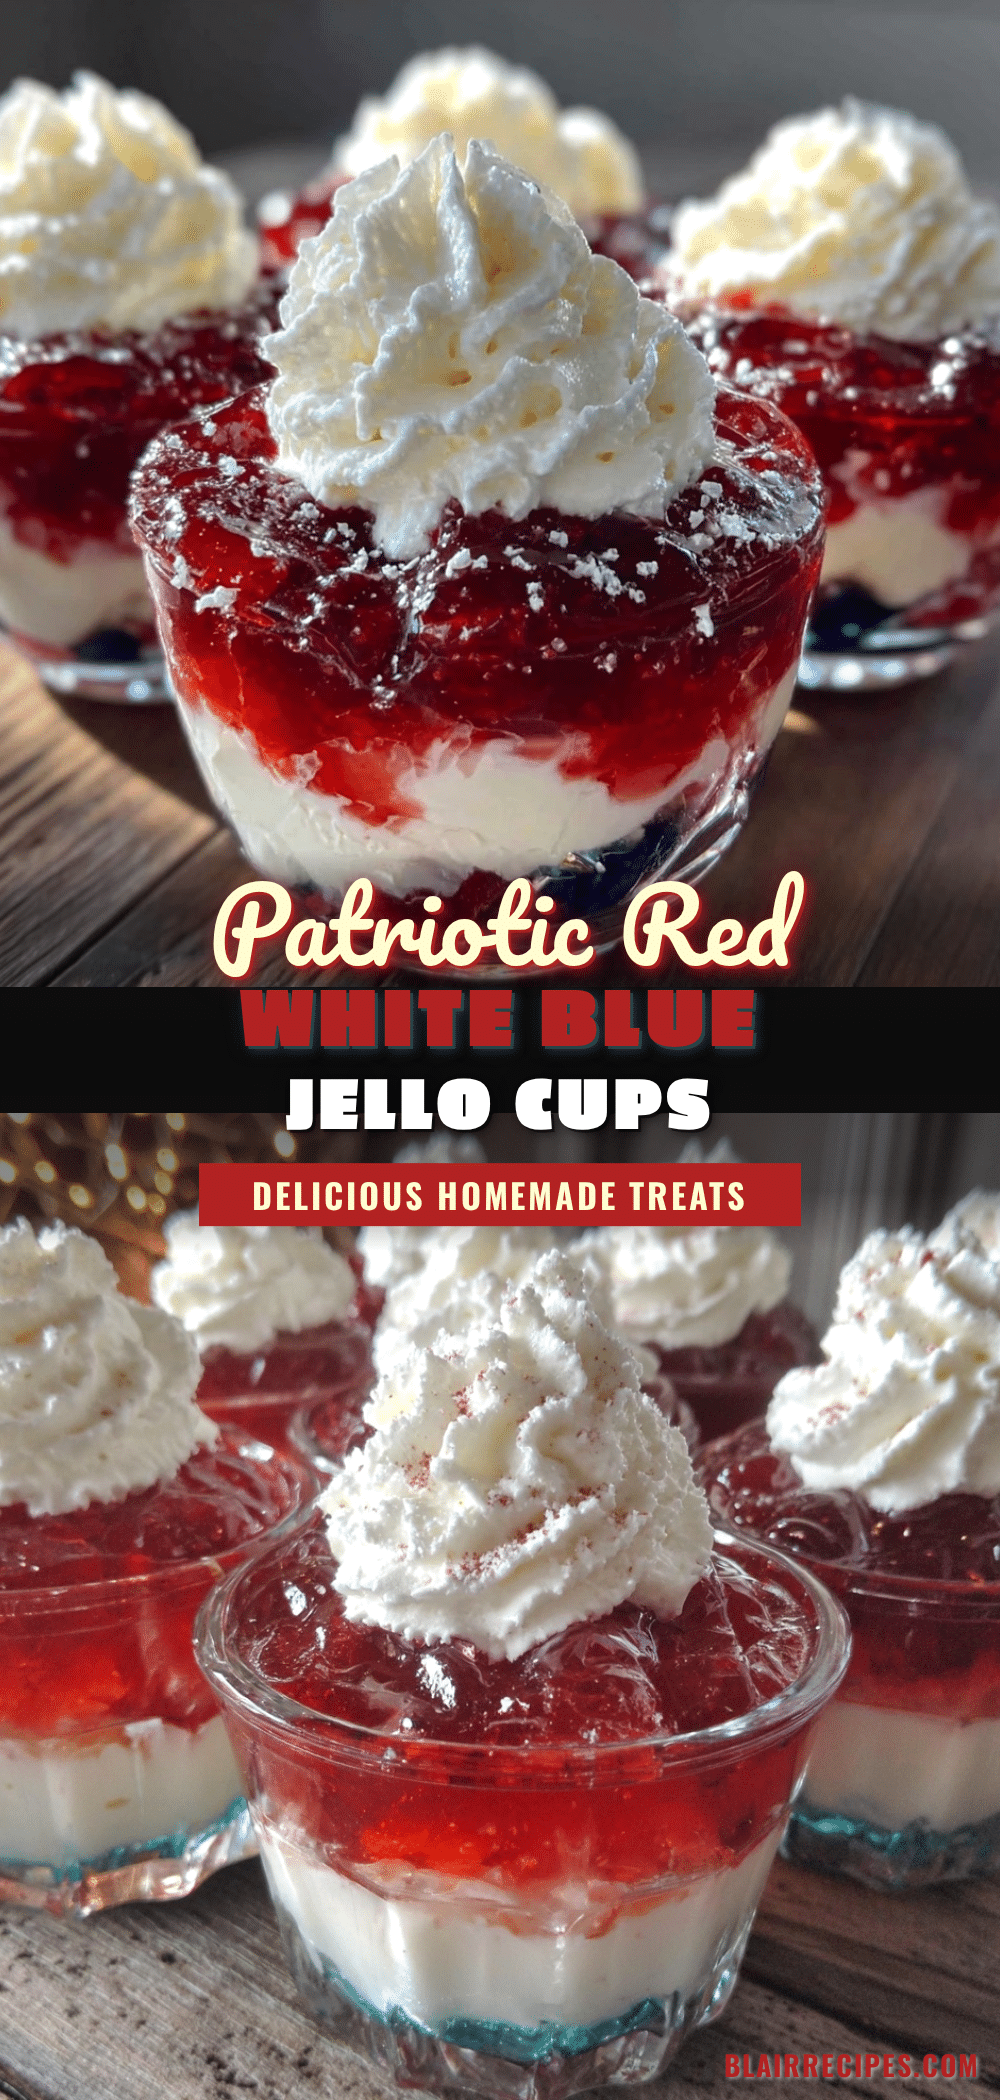
Festive Red White Blue Jello Cups Recipe Easy Patriotic Dessert for Parties

A quick, colorful, and refreshing layered gelatin dessert perfect for patriotic occasions and summer gatherings, topped with whipped cream for a creamy contrast.
- Prep Time: 15 minutes
- Cook Time: 45 minutes
- Total Time: 1 hour
- Yield: 8 servings 1x
- Category: Dessert
- Cuisine: American
Ingredients
- 3 oz packet Red Jello Mix (e.g., strawberry or cherry flavor)
- 3 oz packet Blue Jello Mix (e.g., blueberry or berry blue flavor)
- 1 tablespoon Unflavored Gelatin
- 1 cup Sweetened Condensed Milk (recommend Eagle Brand)
- About 6 cups Water (boiling and cold combined)
- 1 cup Whipped Topping (about 8 oz), canned or homemade whipped cream
- 1 teaspoon Lemon Juice (optional)
Instructions
- Prepare the Red Jello Layer: Boil 1 cup (240 ml) water and stir in the red Jello powder until completely dissolved (about 2 minutes). Add 1/2 cup (120 ml) cold water and mix well. Pour evenly into clear cups, filling about one-third of each cup. Refrigerate for about 20 minutes until firm but slightly tacky.
- Make the White Layer: Sprinkle unflavored gelatin over 1/4 cup (60 ml) cold water and let bloom for 5 minutes. Heat 3/4 cup (180 ml) boiling water in a saucepan. Stir bloomed gelatin into hot water until dissolved. Add sweetened condensed milk and whisk until smooth. Let cool slightly but not set. Gently pour over red layer, filling another third. Refrigerate 20-25 minutes until set but tacky.
- Prepare the Blue Jello Layer: Boil 1 cup (240 ml) water and stir in blue Jello powder until dissolved. Add 1/2 cup (120 ml) cold water and lemon juice if using. Cool slightly, then pour carefully over white layer. Chill at least 30 minutes until fully firm.
- Add Whipped Topping: Once layers are set, top each cup with a generous dollop of whipped topping. Optionally pipe or spoon on, and garnish with red or blue sugar crystals, mini stars, or fresh berries.
- Chill Before Serving: Refrigerate for an additional 10-15 minutes to help whipped topping set slightly. Serve cold.
Notes
Bloom gelatin in cold water before heating to avoid lumps. Cool each gelatin mixture before layering to prevent colors from bleeding. Use clear cups for best visual effect. Homemade whipped cream with vanilla can be used instead of canned topping for fresher taste. Add lemon juice to blue layer for brightness. Allow each layer to become tacky before adding the next to maintain distinct layers.
Nutrition
- Serving Size: 1 cup (8 oz) Jello c
- Calories: 150200
- Sugar: 28
- Sodium: 150
- Fat: 5
- Saturated Fat: 3
- Carbohydrates: 30
- Protein: 2
Keywords: Jello cups, patriotic dessert, layered gelatin, red white blue dessert, easy summer dessert, Fourth of July dessert, no bake dessert


