
The first time I made a Hawaiian roll grilled cheese, my kitchen smelled like a blend of toasted sweet bread and melting cheddar—honestly, it was enough to stop my kids in their tracks. You know that feeling when something simple turns out way better than you thought? That’s exactly what happened here. I was trying to use up a pack of Hawaiian rolls left over from a party, and the idea just hit: why not make them into the ultimate grilled cheese?
Let’s face it, everyone loves a classic grilled cheese, but there’s just something about using those pillowy, slightly sweet Hawaiian rolls that takes it to a new level. The buttery, golden crust on the outside and the ooey-gooey cheese pull on the inside—ugh, it’s comfort food at its best. This recipe is perfect for busy families, picky eaters, or anyone looking for a quick lunch that feels a little special. I’ve tested this Hawaiian roll grilled cheese so many times, tweaking the cheese blend and buttering technique, and, let me tell you, it never lasts more than a few minutes in my house.
If you’re after a lunch that’s both fast and unforgettable, or you want a crowd-pleasing snack for movie nights, this is it. No fancy chef skills required—just a love of gooey cheese and those magic little rolls. So grab your favorite cheeses and let’s get melty! I can’t wait to share all the tricks I’ve learned to make this the best Hawaiian roll grilled cheese you’ll ever try.
Why You’ll Love This Hawaiian Roll Grilled Cheese Recipe
- Quick & Easy: You can whip up a batch of Hawaiian roll grilled cheese in under 20 minutes—seriously, it’s a lifesaver on hectic days or when you need something comforting, fast.
- Simple Ingredients: No hunting down specialty groceries; just grab Hawaiian rolls, cheese, butter, and a few pantry staples. Chances are, you’ve got everything already.
- Perfect for Any Occasion: These mini grilled cheeses are ideal for lunch, after-school snacks, game-day appetizers, or even lazy Sunday brunches. I’ve served them at everything from birthday parties to family picnics, and they always disappear first.
- Crowd-Pleaser: Kids, teens, adults—everyone loves them. Even my picky eater nephew gives these “two cheesy thumbs up!”
- Unbelievably Delicious: The way the sweet, tender rolls crisp up in butter and cradle that stretchy, gooey cheese… it’s just unbeatable. Close your eyes and take a bite—you’ll see what I mean.
But here’s what really sets this Hawaiian roll grilled cheese apart: I use a combo of cheeses for the perfect melt (cheddar for flavor, mozzarella for stretch, and a hint of American for creaminess). Plus, splitting the rolls into pull-apart portions before grilling means everyone gets a perfect mini sandwich. I even brush the tops with a little garlic butter for extra flavor—trust me, it’s worth the extra two minutes.
This isn’t just another grilled cheese—it’s the recipe you’ll crave on rainy afternoons or whenever you want to spoil yourself a little. It’s the kind of food that brings people together, makes you smile, and turns an ordinary lunch into a special treat. Whether you’re cooking for one or a hungry crew, this Hawaiian roll grilled cheese will hit the spot every time.
What Ingredients You Will Need
This recipe relies on a handful of straightforward, delicious ingredients that work together for maximum flavor and melty goodness. Most are pantry or fridge staples, but you can easily swap things out based on what you have.
- Hawaiian Rolls (12-count, original): Sweet, fluffy, and perfectly sized. Brands like King’s Hawaiian work best, but store brands are fine too.
- Cheddar Cheese (1 cup, shredded): Sharp cheddar brings bold flavor. I like Cabot or Tillamook for their melt and taste.
- Mozzarella Cheese (1/2 cup, shredded): For that dreamy cheese stretch. Use whole-milk mozzarella if you can.
- American Cheese (4 slices): The secret to ultra-creamy melt and classic grilled cheese flavor. You can use white or yellow—both work.
- Unsalted Butter (1/4 cup, softened): For crisping and flavor. If all you have is salted, just skip adding extra salt.
- Garlic Powder (1/2 teaspoon): Optional, but it gives the butter a savory kick.
- Parsley (dried or fresh, for garnish): Totally optional! I like to sprinkle it on for a pop of color (and a hint of freshness).
- Salt (a pinch): Only if your butter is unsalted.
Optional Add-Ins:
- Bacon Bits (adds a smoky crunch—cook and crumble before adding)
- Sliced Ham or Turkey (for a heartier version)
- Thinly Sliced Tomatoes (pat dry with a paper towel to prevent sogginess)
- Jalapeños or Sliced Pickles (if you like a little tang or heat)
Ingredient Tips:
- If you need a gluten-free option, try gluten-free sweet rolls (Schar makes a good one).
- Dairy-free cheese shreds melt pretty well in this recipe if you want a vegan version—just swap the butter too.
- For a spicy kick, use pepper jack instead of mozzarella.
Equipment Needed
Good news: You probably already have everything you need for this Hawaiian roll grilled cheese.
- Nonstick Skillet or Griddle: The best for even browning. Cast iron works too (it holds heat well and gives a crispier crust!).
- Spatula: For flipping and pressing. I use a wide silicone spatula for easy maneuvering.
- Bread Knife or Serrated Knife: To slice the Hawaiian rolls cleanly—don’t squish them!
- Small Bowl: For mixing the butter and garlic powder (if using).
- Pastry Brush: Handy for brushing garlic butter, but a spoon works in a pinch.
- Cutting Board: For assembling the sandwiches.
- Baking Sheet (optional): If you want to make a big batch in the oven instead of the skillet.
If you don’t have a griddle, just use your largest skillet and cook in batches. And for the butter brushing, don’t stress if you don’t own a pastry brush—back of a spoon or clean fingers will do. Clean-up is easy, especially if you let the pan cool before washing (makes the cheesy bits wipe right off!).
How to Make Hawaiian Roll Grilled Cheese
-
Prep the Hawaiian Rolls:
Carefully slice the entire pack of 12 Hawaiian rolls in half horizontally using a serrated knife. Keep the rolls attached to each other—think of it like slicing a bagel. Place the bottom half cut-side up on a cutting board.
Tip: Don’t separate the rolls yet; it’s easier to fill and grill as a slab, then pull apart later. -
Mix the Garlic Butter:
In a small bowl, combine 1/4 cup (60g) softened unsalted butter, 1/2 teaspoon garlic powder, and a pinch of salt (if your butter is unsalted). Stir until smooth.
Optional: Add a pinch of dried parsley for color. -
Assemble the Cheese Layers:
Evenly sprinkle 1 cup (115g) shredded cheddar cheese over the bottom half of the rolls. Top with 1/2 cup (60g) shredded mozzarella cheese for extra gooeyness. Place 4 slices of American cheese on top, overlapping slightly so every roll gets some creamy melt.
Personal tip: I sometimes add a little extra cheddar to the edges because the crusty corners are my favorite part! -
Close and Butter:
Place the top half of the rolls back on. Spread half of the garlic butter mixture over the tops—get all the way to the edges for a golden crust.
Warning: Don’t skimp on butter! That’s what gives you the perfectly crisp exterior. -
Grill the Sandwiches:
Heat a large nonstick skillet or griddle over medium-low. Once hot, carefully transfer the entire slab of buttered rolls (butter side down) to the pan.
Spread the remaining garlic butter on the top side while it cooks.
Cook for 3-4 minutes, pressing gently with a spatula, until the bottom is golden and crisp.
Use two spatulas to carefully flip the whole slab (or cut in half for easier flipping). Cook another 3-4 minutes until the second side is golden and the cheese is melted.
Sensory cue: You’ll smell the toasty butter and see cheese bubbling at the edges—it’s ready! -
Separate and Serve:
Transfer to a cutting board and let sit for 1-2 minutes (the cheese sets and makes it easier to pull apart). Use a knife or your hands to separate into individual rolls.
Garnish with parsley if you like—then dig in!
Troubleshooting: If the cheese isn’t melting but the rolls are browning too quickly, lower the heat and cover the pan for a minute. If your rolls start to pull apart, you can press them gently back together before flipping.
Cooking Tips & Techniques
- Don’t Rush the Heat: I learned the hard way that medium-low heat is your best friend here. It gives the cheese time to melt without burning the rolls. Patience = gooey perfection!
- Keep Rolls Together: Grilling the slab as one big sandwich makes flipping easier and keeps all that melty cheese inside. If you try to grill individual rolls, you’ll lose more cheese to the pan (trust me, I’ve made that mistake).
- Cheese Choices Matter: Blend your cheeses for the best flavor and stretch. Pre-shredded cheese is convenient, but block cheese you shred yourself melts smoother—less anti-caking agents, more gooeyness.
- Butter Every Surface: Don’t just do the tops—get the butter all the way to the edges, and even a bit on the sides. That’s where the crispy, golden goodness happens.
- Batch Cooking: Making a big batch for a party? Assemble on a baking sheet, brush with butter, and bake at 375°F (190°C) for 10-12 minutes until cheese is melted and tops are golden. It’s a great move for feeding a crowd!
- Pan Sticking: If you notice the rolls sticking, your pan might be too hot or not buttery enough. Lower the heat and don’t be shy with the butter or a spritz of nonstick spray.
- Personal Lesson: The first time I made these, I got too ambitious and flipped too soon—half the cheese fell out. Let them brown, and flip gently with two spatulas if needed.
- Multitasking: While the rolls are grilling, I usually prep a quick salad or cut up some fruit. You’ll have just enough time before it’s ready to serve.
Variations & Adaptations
- Meat Lover’s Version: Add thinly sliced ham, turkey, or cooked bacon between the cheese layers for a heartier sandwich. My husband’s favorite is cheddar and ham with a touch of Dijon.
- Spicy Kick: Use pepper jack cheese or add thin slices of jalapeño. You can also sprinkle in a little crushed red pepper for heat!
- Veggie Delight: Add thinly sliced tomatoes, sautéed spinach, or roasted red peppers. Just pat any wet veggies dry to keep the cheese from sliding off.
- Different Cooking Methods: Bake a whole tray in the oven at 375°F (190°C) until golden and melty. Or use an air fryer at 350°F (175°C) for 5-7 minutes for extra crispiness.
- Allergen-Friendly: For dairy-free, use vegan cheese and plant-based butter. For gluten-free, use gluten-free sweet rolls (brands like Schar or Canyon Bakehouse work well).
- Personal Favorite: Sometimes I brush the tops with everything bagel seasoning mixed into the butter—gives it a savory, herby crunch. Huge hit at brunch!
Serving & Storage Suggestions
For the best experience, serve your Hawaiian roll grilled cheese hot and fresh, right out of the pan. The cheese will be perfectly gooey, and the rolls ultra-crisp on the outside and soft inside—trust me, it’s irresistible!
- Serving Temperature: Hot is best, but they’re still tasty at room temperature (especially for parties or lunchboxes).
- Presentation: Pull-apart style is fun for sharing, or stack them high on a platter with a sprinkle of fresh parsley or chives for color.
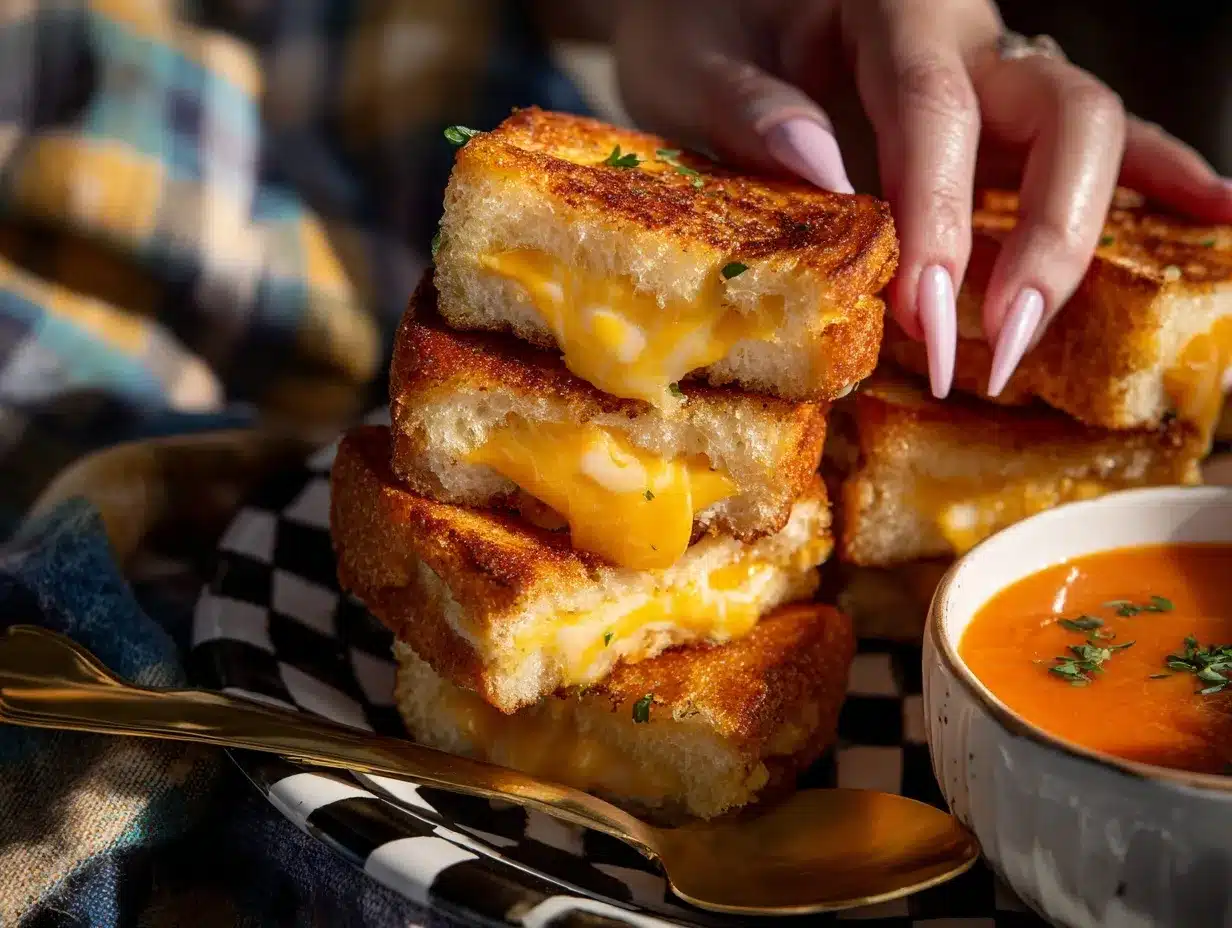
- Pairings: Serve with tomato soup, a crisp green salad, or fresh fruit. For parties, I love adding a bowl of pickles or a tangy dipping sauce on the side.
- Storage: Leftovers (if you have any!) keep in an airtight container in the fridge for up to 3 days.
- Reheating: Reheat in a toaster oven or oven at 350°F (175°C) for 6-8 minutes to crisp them back up. The microwave works, but the rolls get a bit soft.
- Flavor Over Time: The flavors actually deepen if you store them overnight—the rolls soak up the buttery goodness, and the cheese stays melty.
Nutritional Information & Benefits
Each Hawaiian roll grilled cheese (1/12th of the batch) packs about 210 calories, 10g fat, 22g carbs, and 8g protein. The mix of cheddar, mozzarella, and American cheese gives you calcium, a touch of protein, and major flavor satisfaction.
Using sweet Hawaiian rolls means you get a bit of fiber and a lower sodium count than most deli breads. If you swap in gluten-free or dairy-free ingredients, it’s easy to adapt for most diets. These mini sandwiches are nut-free as written, but watch for allergens in your cheese and rolls if you’re cooking for sensitive eaters.
From a wellness perspective, I love these as a satisfying treat that doesn’t feel heavy—especially when paired with a big salad or veggie soup. It’s comfort food that can fit into almost any lifestyle, with a few smart swaps.
Conclusion
This Hawaiian roll grilled cheese recipe is one of those rare finds—easy, affordable, and absolutely unforgettable. Whether you’re making it for a quick lunch, a game-day snack, or just to treat yourself, you’ll love how simple the process is and how impressive the results are.
I’ve made this recipe for family and friends more times than I can count, and every single time, it gets rave reviews. You can totally make it your own—switch up the cheese, add some meat or veggies, or try a fun seasoning twist. That’s the beauty of a good grilled cheese: it’s all about what makes you happy.
Give this recipe a try and let me know in the comments how you customized your Hawaiian roll grilled cheese. Did you add bacon? Go full veggie? I’d love to hear your spins on this classic (and if you snap a photo, tag me—I never get tired of seeing cheesy goodness!). Happy melting!
FAQs About Hawaiian Roll Grilled Cheese
Can I make Hawaiian roll grilled cheese in advance?
Yes! Assemble the sandwiches up to one day ahead, cover, and chill. Grill or bake just before serving for best results.
What’s the best cheese for maximum gooeyness?
A blend of cheddar, mozzarella, and American cheese gives the best stretch and melt. You can experiment with your favorites too!
Can I freeze leftovers?
Absolutely. Cool completely, wrap tightly, and freeze for up to one month. Reheat in the oven for crispiness.
How do I keep the rolls from burning?
Use medium-low heat and plenty of butter. If they brown too quickly, lower the heat and cover the pan to finish melting the cheese.
Are there gluten-free or dairy-free options?
Yes! Use gluten-free sweet rolls and your favorite dairy-free cheese and butter. The method stays the same, and you’ll still get a tasty result.
Pin This Recipe!

Hawaiian Roll Grilled Cheese

This Hawaiian roll grilled cheese recipe transforms sweet, fluffy rolls into gooey, golden mini sandwiches with a blend of cheddar, mozzarella, and American cheese. Perfect for a quick lunch, snack, or party appetizer, it’s easy, crowd-pleasing, and irresistibly delicious.
- Prep Time: 8 minutes
- Cook Time: 8 minutes
- Total Time: 16 minutes
- Yield: 12 mini sandwiches 1x
- Category: Lunch
- Cuisine: American
Ingredients
- 1 (12-count) package Hawaiian rolls (original, such as King’s Hawaiian)
- 1 cup shredded cheddar cheese
- 1/2 cup shredded mozzarella cheese
- 4 slices American cheese (white or yellow)
- 1/4 cup unsalted butter, softened
- 1/2 teaspoon garlic powder (optional)
- Parsley, dried or fresh, for garnish (optional)
- Salt, a pinch (only if using unsalted butter)
- Optional add-ins: cooked bacon bits, sliced ham or turkey, thinly sliced tomatoes (patted dry), jalapeños or sliced pickles
Instructions
- Carefully slice the entire pack of Hawaiian rolls in half horizontally with a serrated knife, keeping the rolls attached. Place the bottom half cut-side up on a cutting board.
- In a small bowl, mix softened butter, garlic powder, and a pinch of salt (if using unsalted butter). Stir until smooth. Add parsley if desired.
- Evenly sprinkle shredded cheddar cheese over the bottom half of the rolls. Top with shredded mozzarella, then layer the American cheese slices on top.
- Place the top half of the rolls back on. Spread half of the garlic butter mixture over the tops, reaching all the way to the edges.
- Heat a large nonstick skillet or griddle over medium-low. Transfer the slab of buttered rolls (butter side down) to the pan. Spread the remaining garlic butter on the top side while it cooks.
- Cook for 3-4 minutes, pressing gently with a spatula, until the bottom is golden and crisp. Carefully flip the slab (or cut in half for easier flipping) and cook another 3-4 minutes until the second side is golden and the cheese is melted.
- Transfer to a cutting board and let sit for 1-2 minutes. Separate into individual rolls. Garnish with parsley if desired and serve hot.
Notes
For best results, grill the rolls as a slab before separating. Use medium-low heat to avoid burning and ensure gooey cheese. For a big batch, bake at 375°F for 10-12 minutes. Add-ins like ham, bacon, or veggies can be layered with the cheese. For gluten-free or dairy-free, substitute appropriate rolls and cheese.
Nutrition
- Serving Size: 1 mini sandwich (1/12th of recipe)
- Calories: 210
- Sugar: 5
- Sodium: 320
- Fat: 10
- Saturated Fat: 6
- Carbohydrates: 22
- Fiber: 1
- Protein: 8
Keywords: Hawaiian roll grilled cheese, pull-apart grilled cheese, easy lunch, party snack, kid-friendly, skillet, cheese sandwich, comfort food


