The smell of freshly baked sugar cookies, sweet and buttery with just a hint of vanilla, always reminds me of cozy Valentine’s Days spent with family and friends. Honestly, nothing says love quite like warm, soft cookies cut into charming heart shapes. I first created this recipe for Irresistible Nut-Free Valentine Sugar Cookies when my niece came over with her notorious nut allergy. I wanted to make sure she could enjoy the holiday treats without any worries. After testing and tweaking it several times (and yes, eating way too many cookies in the process), I landed on this easy, foolproof recipe that’s as safe as it is delicious.
These sugar cookies are perfect for anyone looking to celebrate Valentine’s Day with a sweet touch but without the hassle of nuts or cross-contamination concerns. Whether you’re baking for kids, friends with allergies, or just want a simple, festive treat, this recipe delivers that classic sugar cookie flavor with a tender, melt-in-your-mouth texture. And believe me, it’s not just allergy-friendly—it’s downright addictive. You’ll find yourself making these nut-free Valentine sugar cookies year after year, guaranteed.
As someone who’s baked these cookies dozens of times for potlucks, school events, and quiet nights in, I can honestly say this recipe is a keeper. So grab your mixing bowl and let’s make some magic happen with these charming, nut-free Valentine sugar cookies that everyone will love!
Why You’ll Love This Recipe
After countless baking sessions and happy cookie eaters, I’m confident these nut-free Valentine sugar cookies will become a favorite for your holiday celebrations. Here’s why they stand out:
- Quick & Easy: The dough comes together in under 15 minutes, making it perfect for last-minute baking urges or busy holiday prep.
- Simple Ingredients: No weird or hard-to-find stuff here—just pantry staples you probably already have on hand.
- Perfect for Valentine’s Day: Heart-shaped, festive, and ready to be decorated with your favorite icing or sprinkles.
- Nut-Free & Allergy-Friendly: Safe for nut allergies without sacrificing taste or texture.
- Crowd-Pleaser: Kids, adults, and picky eaters alike rave about the soft, chewy crumb and sweet vanilla flavor.
- Versatile: These cookies hold their shape beautifully, which means you can get creative with decorations or keep them simple and classic.
What really sets this recipe apart is the balance between a soft, tender bite and a sturdy cookie that’s perfect for decorating. I’ve played with various fats and flours to find the sweet spot that keeps these cookies from spreading too much or turning crispy. Plus, making them nut-free doesn’t mean you miss out on flavor or texture. It’s all about the right combo—and this recipe nails it every time.
Plus, baking these cookies feels like a little act of love. You know what I mean? The kind of treat that makes you smile with the first bite, maybe close your eyes for a moment, and remember why holidays taste so sweet.
What Ingredients You Will Need
This recipe uses simple, wholesome ingredients that come together to create a buttery, tender cookie perfect for Valentine’s Day. Most are pantry staples, and I’ve included some substitution tips so you can tailor it to your needs.
- All-purpose flour – 2 ¾ cups (345 grams) (provides structure; sifted for best results)
- Baking powder – 1 ½ teaspoons (helps cookies rise slightly and stay tender)
- Salt – ½ teaspoon (balances sweetness and enhances flavor)
- Unsalted butter – 1 cup (227 grams), softened (I recommend using Land O’Lakes or Kerrygold for rich flavor)
- Granulated sugar – 1 ¼ cups (250 grams) (classic sweetness; can reduce slightly if you like less sweet)
- Large egg – 1, room temperature (helps bind the dough)
- Vanilla extract – 2 teaspoons (pure vanilla is key for that classic cookie flavor)
- Milk – 2 tablespoons (30 ml), whole or 2% (adds moisture; use dairy-free milk like almond or oat milk if preferred)
Optional toppings and decorations:
- Colored sugar or sprinkles (make sure they’re nut-free!)
- Royal icing or buttercream for decorating
- Food coloring if you want to tint your dough or icing
Since this recipe is nut-free, I’ve avoided any nut flours or extracts. If you’re looking for gluten-free options, swapping the all-purpose flour for a 1:1 gluten-free blend works well, but expect a slightly different texture. For a dairy-free variation, use vegan butter and plant-based milk. I’ve tested these swaps, and the cookies still turn out soft and tasty!
Equipment Needed
- Mixing bowls – at least two (one for dry ingredients, one for wet)
- Electric mixer or hand mixer – for creaming butter and sugar smoothly
- Measuring cups and spoons – for precise ingredient amounts (accuracy matters here!)
- Rubber spatula – to scrape down the bowl and fold ingredients
- Rolling pin – to roll out the dough evenly (a non-stick or lightly floured surface helps)
- Heart-shaped cookie cutters – various sizes for Valentine’s Day shapes
- Baking sheets – lined with parchment paper or silicone mats to prevent sticking
- Cooling rack – to cool cookies evenly and avoid soggy bottoms
If you don’t have a stand mixer, a sturdy hand mixer or even vigorous hand mixing works fine—just takes a bit more elbow grease! For rolling, if you don’t own a rolling pin, a clean bottle or smooth glass can do the trick. The most important part is to chill the dough so it’s easier to handle and cuts cleanly.
Detailed Preparation Method

- Prep your workspace: Preheat your oven to 350°F (175°C). Line two baking sheets with parchment paper or silicone mats and set aside.
- Mix dry ingredients: In a medium bowl, whisk together 2 ¾ cups (345 g) all-purpose flour, 1 ½ tsp baking powder, and ½ tsp salt. Set this aside for now.
- Cream butter and sugar: In a large bowl, use your electric mixer to beat 1 cup (227 g) softened unsalted butter and 1 ¼ cups (250 g) granulated sugar on medium speed until the mixture is light and fluffy—about 3 to 5 minutes. You’ll notice the color lighten and the texture become creamy.
- Add egg and vanilla: Crack in the 1 large egg (room temperature) and add 2 tsp vanilla extract. Beat on medium speed until fully incorporated, scraping down the sides if needed.
- Incorporate dry ingredients: Gradually add the flour mixture into the wet ingredients, mixing on low speed. Stop mixing as soon as the dough comes together to avoid overworking it.
- Add milk: Mix in 2 tablespoons (30 ml) of milk to loosen the dough slightly. The dough should be soft but not sticky. If it feels sticky, add a dusting of flour.
- Chill the dough: Cover the dough with plastic wrap and refrigerate for at least 1 hour. This step is crucial—it makes rolling easier and helps cookies keep their shape.
- Roll and cut: Lightly flour your work surface and rolling pin. Roll the dough out to about ¼-inch (6 mm) thickness. Using heart-shaped cookie cutters, cut out your cookies and place them 1 inch (2.5 cm) apart on the prepared baking sheets.
- Decorate before baking (optional): Sprinkle with colored sugar or sprinkles if desired.
- Bake: Bake for 10 to 12 minutes, or until the edges just begin to turn golden. The centers should look set but soft. Don’t overbake—these cookies are best when tender.
- Cool: Let the cookies cool on the baking sheet for 5 minutes before transferring them to a wire rack to cool completely.
Pro tip: If your dough warms up too much while cutting, pop it back in the fridge for 10-15 minutes. This keeps shapes crisp and prevents spreading. Also, rotating the baking sheets halfway through baking helps even browning.
Cooking Tips & Techniques
Mastering sugar cookies can be tricky, but after baking these nut-free Valentine sugar cookies many times, I’ve learned some handy tips that really make a difference.
- Don’t skip chilling: I can’t stress this enough. Chilling the dough prevents the cookies from spreading too much and losing their shape. Plus, it helps the flavors meld.
- Use room temperature butter and egg: It’s key for a smooth, creamy dough. Cold ingredients can lead to lumpy batter and uneven texture.
- Roll evenly: Aim for consistent thickness (about ¼ inch). Too thin and cookies dry out; too thick and they take forever to bake.
- Watch baking time closely: Cookies can go from perfectly soft to overdone quickly. Pull them out as soon as edges start to turn golden.
- Don’t overmix: When adding flour, mix just until combined. Overworking develops gluten and leads to tougher cookies.
- Use parchment or silicone mats: This prevents sticking and makes cleanup a breeze.
I remember the first time I tried skipping the chill step—big mistake! The cookies spread into sad little pancakes. Lesson learned: a little patience goes a long way. Also, if your kitchen is warm, chilling the dough between batches helps keep things manageable.
Variations & Adaptations
This recipe is a great base for getting creative or adapting to different dietary needs.
- Gluten-Free Version: Substitute the all-purpose flour with a 1:1 gluten-free baking flour blend. I’ve had success with Bob’s Red Mill Gluten-Free Flour. The texture is slightly different but still delicious.
- Vegan Adaptation: Use vegan butter and replace the egg with a flax egg (1 tbsp ground flaxseed + 3 tbsp water, let sit 5 minutes). Add a splash more milk if needed to keep the dough soft.
- Flavored Dough: Add lemon or orange zest for a citrus twist, or a teaspoon of almond extract (if no nut allergies!) for a different flavor note.
- Decorating Ideas: Swap classic royal icing for a dairy-free glaze made with powdered sugar and lemon juice. Or keep it simple with colored sugar.
One personal favorite variation is swirling a bit of red or pink food coloring into the dough before rolling for a marbled Valentine’s effect. It’s festive, fun, and adds a splash of color without extra decorating fuss!
Serving & Storage Suggestions
These nut-free Valentine sugar cookies are best served at room temperature, fresh out of the oven or once fully cooled. They pair wonderfully with a warm cup of tea or a glass of cold milk—classic combo, you know?
For parties or gifting, arrange them on a pretty platter or stack in a decorative tin lined with parchment paper. If you want to dress them up, add a drizzle of melted chocolate or colorful icing right before serving.
To store, place cooled cookies in an airtight container at room temperature. They keep well for up to 5 days—if they last that long! For longer storage, freeze the cookies in a single layer on a baking sheet, then transfer to a freezer-safe bag. They thaw quickly at room temperature and taste just as good as fresh.
Pro tip: Flavors often deepen after a day or two, so if you can wait, letting the cookies rest in their container overnight makes them even more irresistible.
Nutritional Information & Benefits
Each cookie (assuming 24 cookies per batch) contains approximately:
| Calories | 120 |
|---|---|
| Fat | 6g |
| Carbohydrates | 16g |
| Sugar | 10g |
| Protein | 1g |
While these cookies are a treat, they’re free from nuts, making them safe for those with allergies. The use of real butter and egg provides some beneficial fats and protein, making them more satisfying than overly processed alternatives. Plus, the simple ingredient list means fewer additives and preservatives.
If you’re watching gluten, the recipe adapts well to gluten-free flours. Just keep in mind that sugar cookies are best enjoyed as an occasional indulgence, but baking your own lets you control what goes in—always a win in my book!
Conclusion
These Irresistible Nut-Free Valentine Sugar Cookies are a delightful way to celebrate love, friendship, and sweet moments together. They’re easy to make, safe for nut allergies, and perfect for decorating or enjoying plain. I love how this recipe brings people around the kitchen table—kids giggling with cookie cutters, friends sharing decorating ideas, and family savoring warm bites fresh from the oven.
Feel free to tweak the flavors and decorations to fit your style—you can’t go wrong here. If you try the recipe, I’d love to hear how your cookies turned out or what fun variations you came up with. Drop a comment or share your photos!
Now, grab your rolling pin and get baking—because nothing says “I care” quite like homemade Valentine sugar cookies made with love and zero nuts.
FAQs
Are these sugar cookies really nut-free?
Yes! This recipe uses no nuts or nut products, making it safe for those with nut allergies. Just be sure to use nut-free decorations and ingredients.
Can I use a different flour instead of all-purpose?
Absolutely. A 1:1 gluten-free flour blend works well if you need a gluten-free option. The texture changes slightly but remains tasty.
How do I keep my cookies soft instead of crispy?
Don’t overbake! Remove cookies when edges are just lightly golden and centers look set. Also, avoid rolling dough too thin.
Can I freeze the cookie dough or baked cookies?
Yes! Dough can be frozen wrapped tightly for up to 3 months. Baked cookies freeze well too—thaw at room temperature before serving.
What’s the best way to decorate these Valentine cookies?
Use royal icing, colored sugar, sprinkles, or simple glaze. For a fun twist, try edible markers or marbled dough with food coloring. Just keep decorations nut-free.
Pin This Recipe!

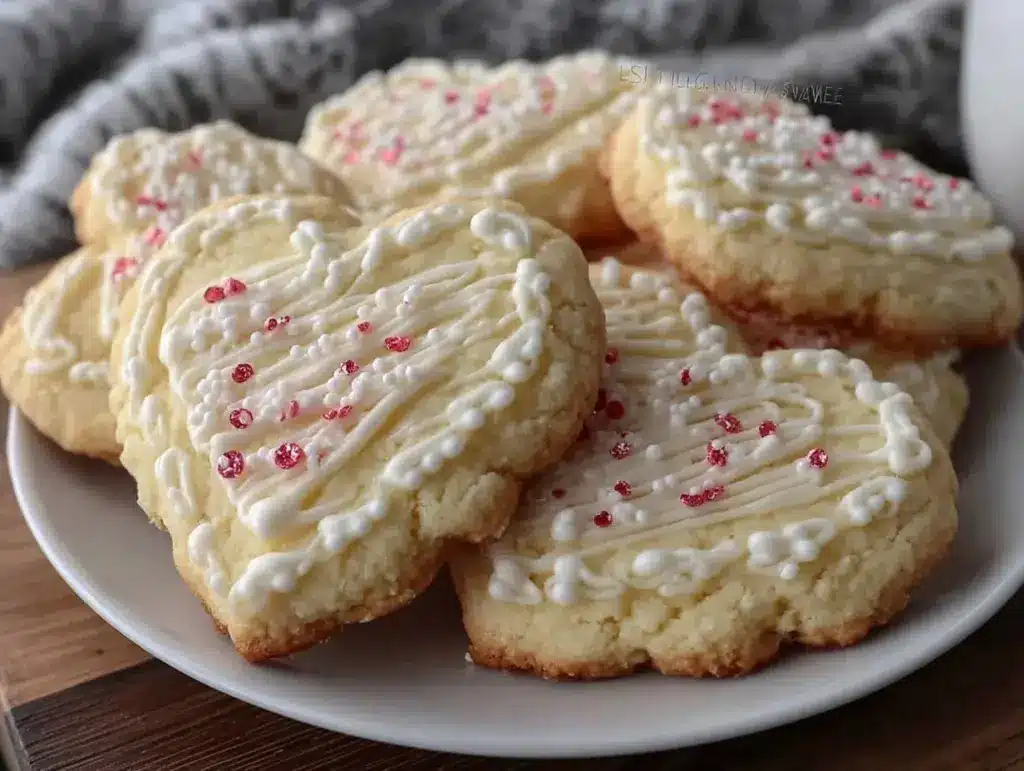
Irresistible Nut-Free Valentine Sugar Cookies

These nut-free Valentine sugar cookies are soft, buttery, and perfect for allergy-friendly holiday treats. They feature a tender, melt-in-your-mouth texture and classic vanilla flavor, ideal for decorating or enjoying plain.
- Prep Time: 15 minutes
- Cook Time: 12 minutes
- Total Time: 1 hour 27 minutes
- Yield: 24 cookies 1x
- Category: Dessert
- Cuisine: American
Ingredients
- 2 ¾ cups (345 grams) all-purpose flour
- 1 ½ teaspoons baking powder
- ½ teaspoon salt
- 1 cup (227 grams) unsalted butter, softened
- 1 ¼ cups (250 grams) granulated sugar
- 1 large egg, room temperature
- 2 teaspoons vanilla extract
- 2 tablespoons (30 ml) milk, whole or 2%
Instructions
- Preheat oven to 350°F (175°C). Line two baking sheets with parchment paper or silicone mats.
- In a medium bowl, whisk together flour, baking powder, and salt. Set aside.
- In a large bowl, beat softened butter and granulated sugar on medium speed until light and fluffy, about 3 to 5 minutes.
- Add the egg and vanilla extract; beat until fully incorporated.
- Gradually add the dry ingredients to the wet ingredients, mixing on low speed just until combined.
- Mix in the milk to loosen the dough slightly; dough should be soft but not sticky. Add a dusting of flour if sticky.
- Cover dough with plastic wrap and refrigerate for at least 1 hour.
- Lightly flour work surface and rolling pin. Roll dough to about ¼-inch (6 mm) thickness.
- Cut out cookies using heart-shaped cookie cutters and place 1 inch apart on prepared baking sheets.
- Optionally, decorate with colored sugar or sprinkles before baking.
- Bake for 10 to 12 minutes until edges begin to turn golden and centers look set but soft.
- Cool cookies on baking sheet for 5 minutes, then transfer to a wire rack to cool completely.
Notes
Chilling the dough for at least 1 hour is crucial to prevent spreading and to keep cookie shapes crisp. Use room temperature butter and egg for best texture. Avoid overmixing once flour is added to prevent tough cookies. Rotate baking sheets halfway through baking for even browning. Dough can be frozen for up to 3 months. For gluten-free, substitute flour with a 1:1 gluten-free blend. For vegan, use vegan butter and a flax egg substitute.
Nutrition
- Serving Size: 1 cookie
- Calories: 120
- Sugar: 10
- Fat: 6
- Carbohydrates: 16
- Protein: 1
Keywords: nut-free, sugar cookies, Valentine cookies, allergy-friendly, heart-shaped cookies, easy sugar cookies, holiday treats


