“You have to try this sakura mochi!” my coworker whispered across the break room table one afternoon, waving a delicate pink treat wrapped in a cherry leaf. I was skeptical at first — rice cakes aren’t exactly my go-to snack, and the idea of a salty leaf hugging a sweet red bean filling seemed, honestly, odd. But curiosity got the better of me that day. As I bit into the soft, subtly sweet mochi, the gentle fragrance of cherry blossoms wafted up, and the smooth red bean paste melted on my tongue. It was quietly mesmerizing.
That moment sparked a bit of an obsession. Over the next week, I found myself making batch after batch of this Perfect Cherry Blossom Sakura Mochi with Red Bean Filling. The recipe is deceptively simple but carries a nostalgic elegance that feels like spring in a bite—soft, fragrant, and comforting all at once. It’s the kind of recipe that doesn’t shout for attention but lingers in your memory, the way the scent of blossoms lingers long after they fall.
Making sakura mochi isn’t just about assembling ingredients; it’s about embracing the season’s fleeting beauty and savoring a taste that feels both traditional and timeless. And while I might not be a traditional baker, this recipe has become my quiet moment of joy, a little celebration of nature’s charm wrapped in rice and sweetness.
Why You’ll Love This Recipe
If you’re wondering why this sakura mochi recipe is worth your time, let me share a few reasons I learned through my many trials in the kitchen:
- Quick & Easy: You can have these mochi ready in about 40 minutes, so they’re perfect for a last-minute treat or a simple dessert after dinner.
- Simple Ingredients: No fancy, hard-to-find items—just sweet rice flour, red bean paste, and preserved cherry leaves. Most of it you might already have or can easily find at an Asian market.
- Perfect for Spring Celebrations: Whether you’re marking the cherry blossom season or just want a light, floral-flavored dessert, sakura mochi sets a special mood.
- Crowd-Pleaser: Kids and adults alike love the sweet and slightly salty contrast. I’ve brought this to potlucks and family gatherings, and it always gets quiet, satisfied smiles.
- Unbelievably Delicious: The chewy texture combined with the gentle cherry aroma and sweet bean paste is unlike any other mochi I’ve tried. It’s simple but feels so thoughtfully crafted.
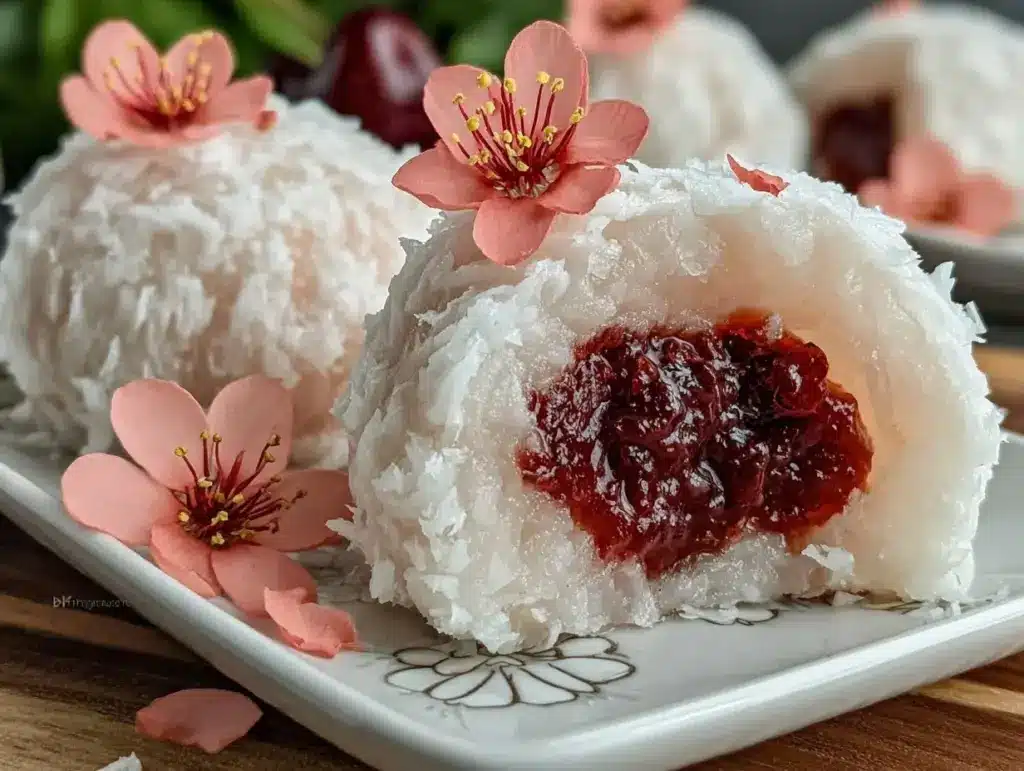
This isn’t just another red bean mochi recipe. The magic lies in wrapping the mochi with salted cherry blossom leaves that add a subtle umami note, balancing the sweetness perfectly. The dough is tender but resilient, thanks to the precise rice flour blend and steaming technique I’ve fine-tuned after several batches.
Honestly, it’s the kind of recipe that makes you pause, savor, and smile with each bite—a quiet reminder that simple ingredients can create something truly memorable.
What Ingredients You Will Need
This recipe uses simple, wholesome ingredients to deliver bold flavor and satisfying texture without the fuss. Here’s what you’ll gather to make your own perfect cherry blossom sakura mochi:
- Sweet rice flour (Shiratamako or Mochiko) – 1 cup (120g) (I prefer Shiratamako for a softer texture)
- Granulated sugar – 1/3 cup (65g) (balances the floral notes with sweetness)
- Water – 2/3 cup (160ml) (room temperature, for smooth dough)
- Red bean paste (anko) – 1 cup (240g), smooth variety preferred (I use store-bought, but homemade works wonders too)
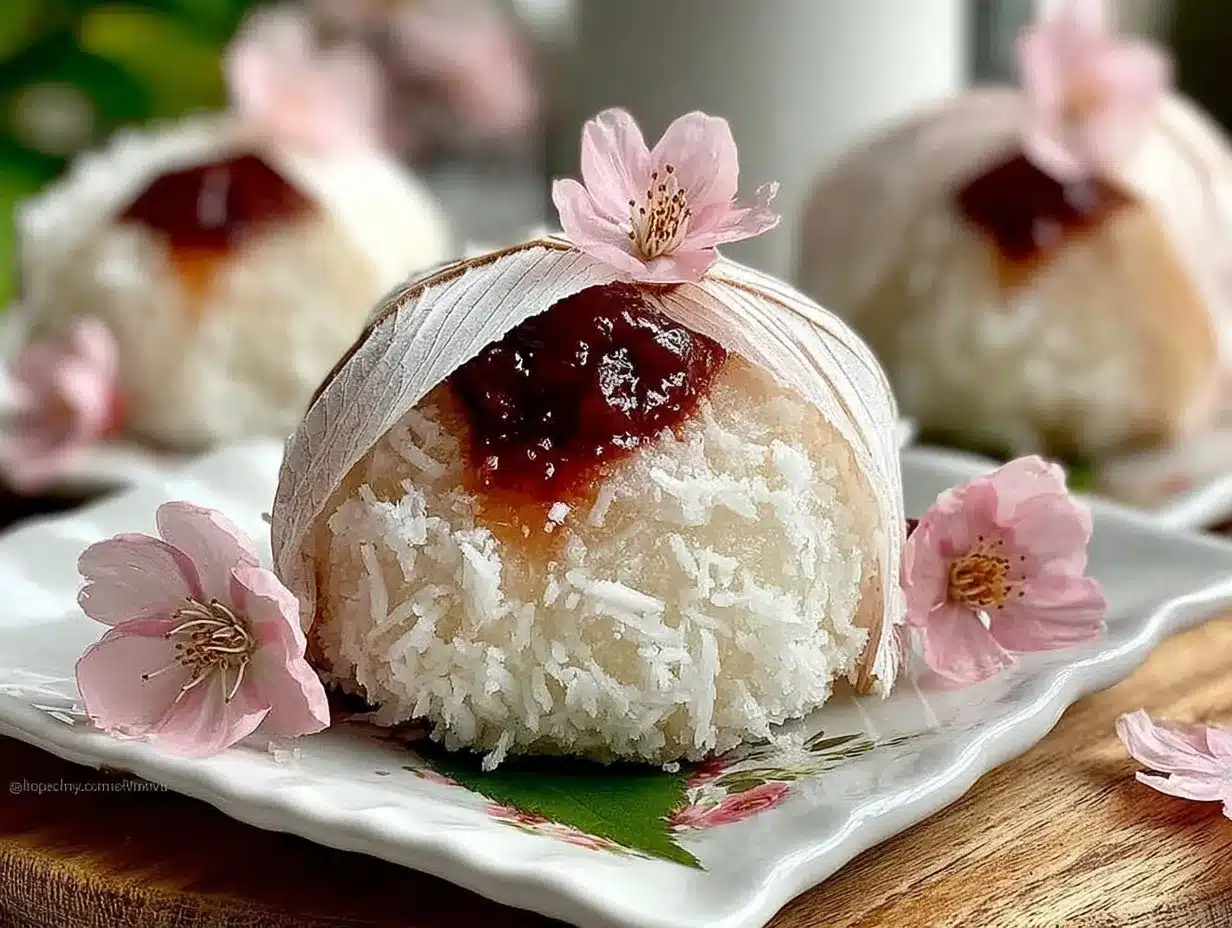
- Salted cherry blossom leaves – 10-12 leaves, rinsed and soaked in water for 30 minutes to soften (adds authentic sakura aroma and subtle saltiness)
- Pickled cherry blossom flowers (optional) – for garnish (adds a delicate floral touch)
If you can’t find salted cherry blossom leaves, you could try lightly pickled grape leaves as a last resort, but the flavor won’t be quite the same. For a gluten-free variation, this recipe is naturally gluten-free thanks to rice flour.
When selecting red bean paste, look for a smooth, not too sweet brand like Hikari Miso or Ohtsuka Anko for the best balance. The cherry leaves should be pliable and fragrant; I always soak mine to reduce excess salt and soften them, which makes wrapping much easier.
Equipment Needed
Here’s what you’ll want on hand to make sakura mochi without a hitch:
- Steaming basket or bamboo steamer – Perfect for gentle cooking of the mochi dough. If you don’t have one, a metal colander over a pot of boiling water works fine.
- Mixing bowls – For mixing dough and preparing ingredients.
- Plastic wrap or parchment paper – To prevent sticking when shaping mochi.
- Measuring cups and spoons – Accurate measurements make a big difference here.
- Kitchen towel – For covering the mochi during resting.
- Small spatula or wooden spoon – For stirring the dough gently.
I’ve tried shaping mochi with and without plastic gloves; gloves make it less sticky on your hands but aren’t absolutely necessary if you dust with a little cornstarch or wet your hands.
For steaming, I recommend a bamboo steamer—it’s gentle and lets steam circulate nicely, which helps get that perfect chewy texture. Plus, it’s easy to clean and stack if you’re making batches.
Preparation Method
- Prepare Cherry Leaves: Soak the salted cherry blossom leaves in cold water for 30 minutes to remove excess salt. Pat dry and set aside. This step is key to balancing the salty aroma so it doesn’t overpower the mochi’s sweetness. (10 minutes active prep)
- Make Mochi Dough: In a medium bowl, combine 1 cup (120g) sweet rice flour and 1/3 cup (65g) granulated sugar. Gradually add 2/3 cup (160ml) water, stirring gently with a wooden spoon until the mixture is smooth and lump-free. It should have a thick, slightly runny batter consistency. (5 minutes)
- Steam the Dough: Transfer the batter into a heatproof bowl or shallow dish that fits your steamer. Cover loosely with foil or a lid to prevent water droplets from falling in. Steam over boiling water for 15 minutes, until the mochi dough turns translucent and slightly shiny. It should feel soft but hold its shape. (15 minutes steaming)
- Cool & Knead: Remove the mochi from the steamer and let it cool until it’s warm but safe to handle, about 5 minutes. Then transfer the dough to a clean surface lightly dusted with cornstarch or use wet hands to knead gently for 1-2 minutes to achieve a smooth, pliable texture. (5-7 minutes)
- Shape Mochi & Fill: Divide the dough into 10-12 equal portions, about 30g (1 oz) each. Flatten each piece into a small disk, place about 1 tablespoon (15g) of red bean paste in the center, and carefully wrap the dough around the filling, sealing it completely. (10 minutes)
- Wrap with Cherry Leaves: Gently wrap each mochi ball with one cherry blossom leaf, veins facing outward for a pretty pattern. The leaf adds a hint of saltiness and a floral note that’s signature to sakura mochi. (5 minutes)
- Optional Garnish: Top with a pickled cherry blossom flower if you like, adding a delicate floral aroma that complements the mochi beautifully.
Tip: Work quickly while the mochi dough is warm—it’s much easier to shape and wrap. If it cools too much, warm it gently over steam for a few seconds before shaping.
Cooking Tips & Techniques
Getting sakura mochi just right is a bit of an art, but here’s what I’ve learned:
- Steaming, not boiling: Too much water can make your mochi gummy. Use a steamer to cook the dough gently so it becomes tender and chewy, not sticky or watery.
- Soak your cherry leaves: This step can’t be skipped. Without soaking, the leaves are too salty and tough, which throws off the flavor and texture balance.
- Use the right rice flour: Shiratamako rice flour yields the best chewy texture. Mochiko works in a pinch but can sometimes be a bit denser.
- Keep your hands wet or dusted: When shaping mochi, wet your hands or dust with cornstarch to prevent sticking. It makes the process much smoother and less frustrating.
- Don’t overfill: Too much red bean paste can cause the mochi to split. Use about 1 tablespoon of filling per piece to keep everything neat.
- Work fast: Mochi becomes harder to mold as it cools. Prepare your fillings and leaves ahead of time so you can shape while the dough is warm and pliable.
I remember the first time I tried to rush the shaping step and ended with cracked mochi balls. Slow and steady wins this race, honestly.
Multitasking tip: While the dough is steaming, prepare the filling and soak your cherry leaves. It keeps the process flowing without downtime.
Variations & Adaptations
Sakura mochi is wonderfully versatile. Here are some of my favorite twists and substitutions:
- Dietary Adaptation: For a vegan-friendly and gluten-free option, stick to the traditional ingredients since this recipe naturally avoids animal products and gluten.
- Flavored Fillings: Swap red bean paste for white bean paste (shiro-an) for a milder, creamier filling. Or add a touch of yuzu zest into the filling for a citrusy surprise.
- Cooking Method: Instead of steaming, you can microwave the batter in short bursts (30 seconds at a time), stirring between, but steaming gives a more tender texture.
- Seasonal Twist: In summer, try swapping cherry leaves for shiso leaves for a fresh herbal note, or omit the leaf entirely and dust mochi with kinako (roasted soybean flour).
- Personal Variation: Once, I added a tiny sprinkle of toasted black sesame seeds into the red bean paste. The nutty crunch added a lovely contrast and made the mochi feel even more special.
Serving & Storage Suggestions
Serve your sakura mochi at room temperature for the best texture and flavor. The mochi should be soft and chewy, with the salted cherry leaf gently infusing each bite.
They make a beautiful addition to a spring tea ceremony or casual afternoon snack. Pair with green tea or a light jasmine tea to complement the floral notes perfectly.
Store leftover mochi in an airtight container at room temperature for up to 1 day. For longer storage, keep them in the refrigerator wrapped well to prevent drying out, but note the texture will firm up.
To reheat, steam gently for 3-4 minutes or microwave covered with a damp paper towel for 20-30 seconds. This helps restore the soft chewiness.
Flavors tend to mellow and meld after a few hours, so if you can wait, the mochi tastes even better the next day.
For a spring table, these sakura mochi pair nicely with lighter side dishes like a sautéed green beans with lemon zest and pine nuts. The freshness of the beans contrasts beautifully with the sweet mochi.
Nutritional Information & Benefits
Each serving (one mochi ball) contains approximately:
| Calories | 120 kcal |
|---|---|
| Carbohydrates | 28g |
| Protein | 2g |
| Fat | 0.2g |
| Fiber | 2g |
Red bean paste is a good source of fiber and plant-based protein, while the rice flour provides slow-digesting carbs. The salted cherry leaves add minimal sodium but deliver antioxidants and that signature floral aroma.
This recipe is naturally gluten-free and low in fat, making it a lighter dessert option. Just be mindful of the sugar content in the red bean paste if you’re watching sugar intake.
From a wellness perspective, sakura mochi offers a satisfying sweet treat without the heaviness of rich cakes or pastries—perfect for those who want something gentle on the stomach but still flavorful.
Conclusion
This Perfect Cherry Blossom Sakura Mochi with Red Bean Filling recipe has quietly become a favorite in my kitchen, not just for its delicate flavors but for the way it captures spring’s fleeting beauty in a bite. It’s approachable, satisfying, and carries a little story with every chew—whether you’re sharing it with friends or savoring a quiet moment alone.
Feel free to make it your own by experimenting with fillings or wrapping styles. It’s a versatile treat that invites creativity without demanding perfection. I hope it brings you the same simple joy and calm that it has brought me.
When you try this recipe, I’d love to hear how it turns out or what personal touches you add. Sharing stories and tweaks always makes the kitchen feel a little warmer.
Happy cooking, and may your sakura mochi bloom beautifully!
FAQs
What can I use if I can’t find salted cherry blossom leaves?
Salted cherry blossom leaves are unique, but if you can’t find them, lightly pickled grape or shiso leaves can be used as alternatives, though the flavor will be different. You can also omit the leaf and dust mochi with kinako powder for a different take.
How do I store leftover sakura mochi?
Store mochi in an airtight container at room temperature for up to 1 day. For longer storage, refrigerate wrapped tightly, but expect a firmer texture. Reheat gently by steaming or microwaving covered with a damp towel.
Can I make sakura mochi ahead of time?
Yes, you can prepare the mochi dough and filling in advance. Shape and wrap them just before serving for the freshest texture. Alternatively, shape and store refrigerated, then warm before serving.
Is this recipe gluten-free?
Absolutely. Sweet rice flour used here is naturally gluten-free, making this recipe safe for gluten-sensitive diets.
What tea pairs best with sakura mochi?
Green tea or jasmine tea complements sakura mochi beautifully, balancing the sweet and floral notes with their fresh, slightly bitter flavors.
Pin This Recipe!
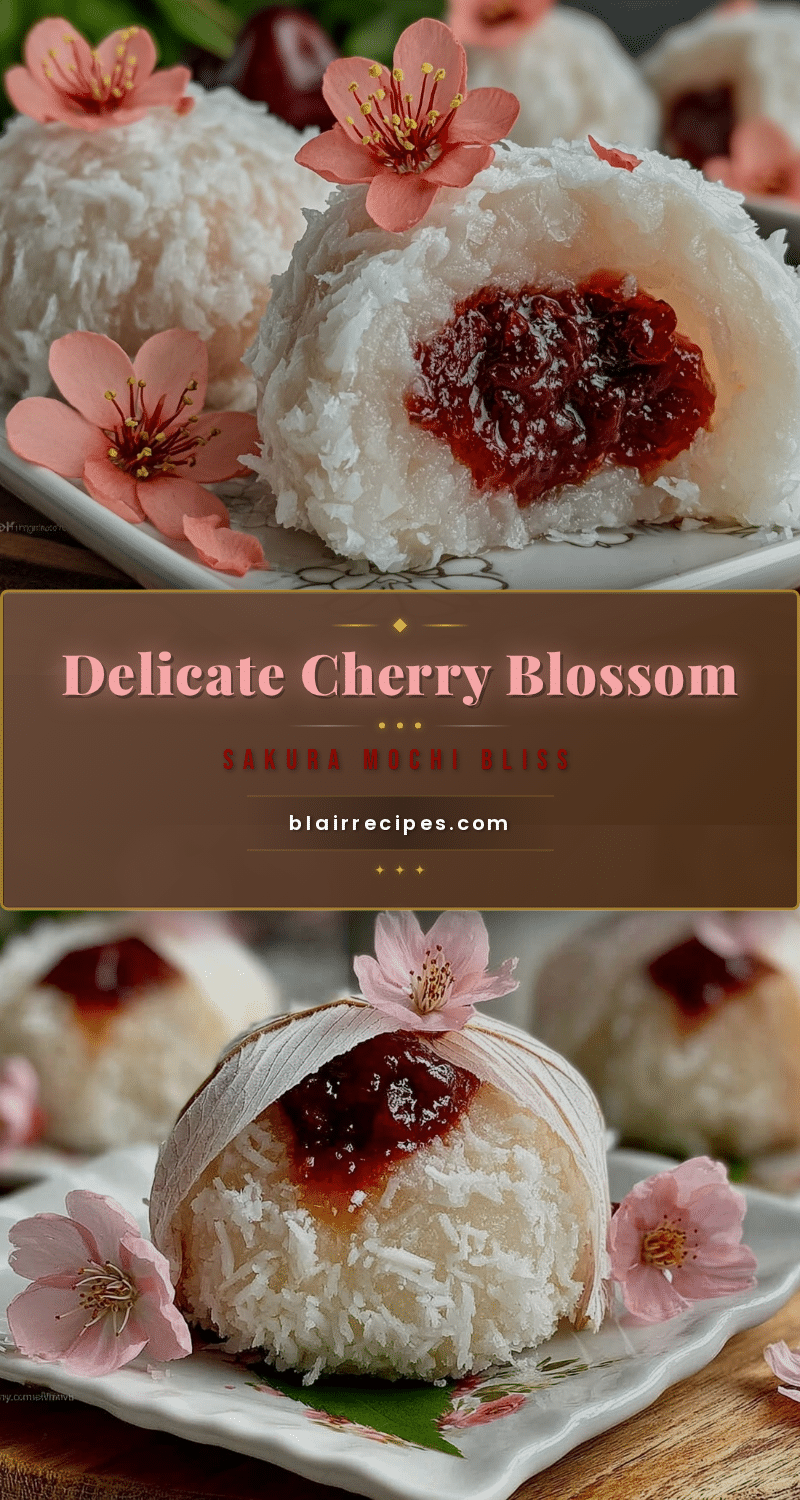
Perfect Cherry Blossom Sakura Mochi Recipe with Sweet Red Bean Filling

A delicate and fragrant sakura mochi with sweet red bean paste wrapped in salted cherry blossom leaves, perfect for spring celebrations and a light, floral dessert.
- Prep Time: 15 minutes
- Cook Time: 15 minutes
- Total Time: 40 minutes
- Yield: 10-12 mochi balls 1x
- Category: Dessert
- Cuisine: Japanese
Ingredients
- 1 cup (120g) sweet rice flour (Shiratamako or Mochiko)
- 1/3 cup (65g) granulated sugar
- 2/3 cup (160ml) water, room temperature
- 1 cup (240g) smooth red bean paste (anko)
- 10–12 salted cherry blossom leaves, rinsed and soaked in water for 30 minutes
- Pickled cherry blossom flowers (optional, for garnish)
Instructions
- Soak the salted cherry blossom leaves in cold water for 30 minutes to remove excess salt. Pat dry and set aside.
- In a medium bowl, combine sweet rice flour and granulated sugar. Gradually add water, stirring gently with a wooden spoon until smooth and lump-free with a thick, slightly runny batter consistency.
- Transfer the batter into a heatproof bowl or shallow dish that fits your steamer. Cover loosely with foil or a lid to prevent water droplets from falling in.
- Steam over boiling water for 15 minutes, until the mochi dough turns translucent and slightly shiny. It should feel soft but hold its shape.
- Remove the mochi from the steamer and let it cool until warm but safe to handle, about 5 minutes.
- Transfer the dough to a clean surface lightly dusted with cornstarch or use wet hands to knead gently for 1-2 minutes to achieve a smooth, pliable texture.
- Divide the dough into 10-12 equal portions, about 30g (1 oz) each.
- Flatten each piece into a small disk, place about 1 tablespoon (15g) of red bean paste in the center, and carefully wrap the dough around the filling, sealing it completely.
- Gently wrap each mochi ball with one cherry blossom leaf, veins facing outward for a pretty pattern.
- Optionally, top with a pickled cherry blossom flower for garnish.
Notes
Soak cherry blossom leaves for 30 minutes to reduce saltiness and soften them for easier wrapping. Work quickly while the mochi dough is warm to shape and wrap. Use wet hands or dust with cornstarch to prevent sticking. Steaming is preferred over boiling for tender, chewy texture. Store leftovers in an airtight container at room temperature for up to 1 day or refrigerate wrapped tightly for longer storage. Reheat gently by steaming or microwaving covered with a damp towel.
Nutrition
- Serving Size: One mochi ball
- Calories: 120
- Fat: 0.2
- Carbohydrates: 28
- Fiber: 2
- Protein: 2
Keywords: sakura mochi, cherry blossom mochi, red bean mochi, Japanese dessert, sweet rice flour, anko, spring dessert, gluten-free dessert


