Can you smell that sweet, buttery aroma wafting through your kitchen? That’s the scent of fresh Raspberry Coconut Magic Bars baking away—a spring dessert that’s become my go-to for parties, picnics, and, honestly, random Tuesday cravings. I first stumbled onto the idea for these bars when my neighbor dropped off a basket of just-picked raspberries. Suddenly, my classic magic bar recipe got a fresh, tangy upgrade, and I’ve never looked back.
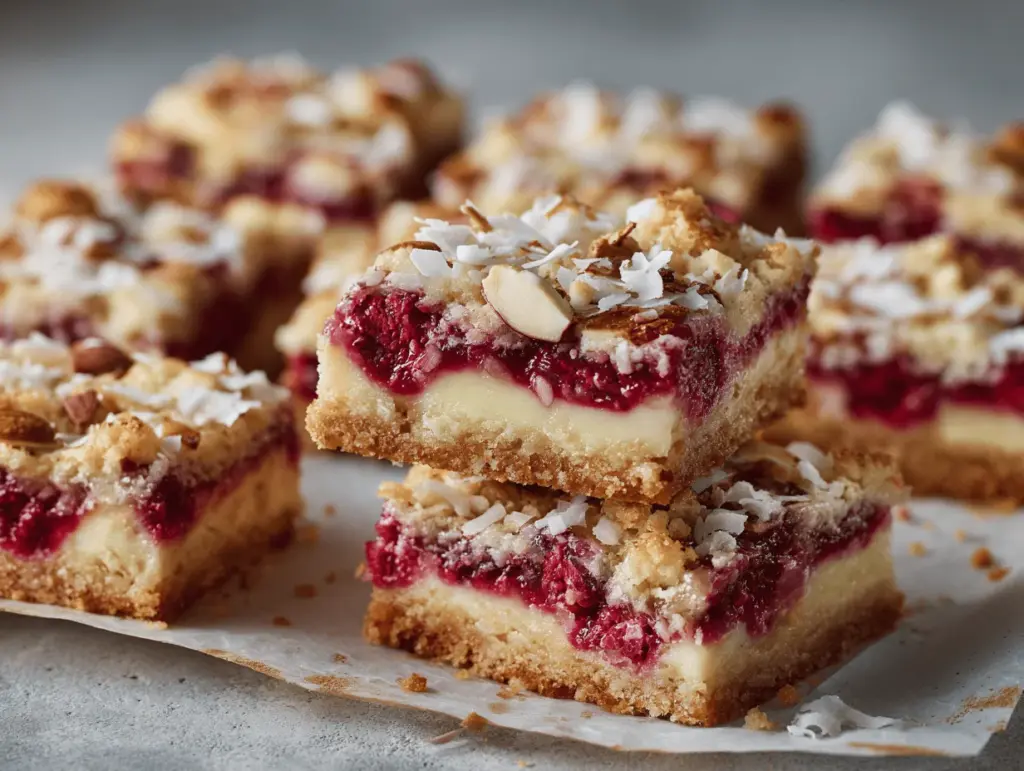
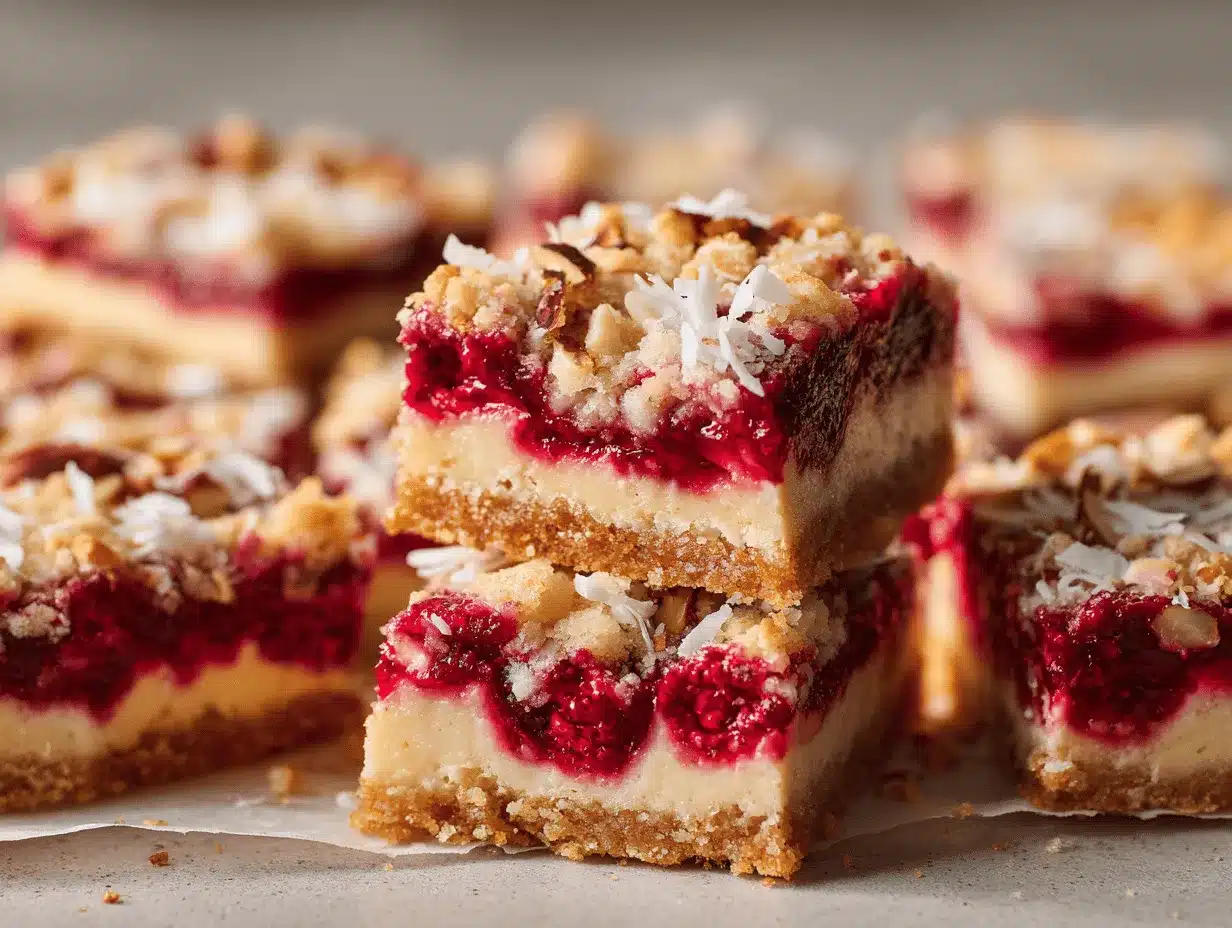
Raspberry Coconut Magic Bars have this irresistible blend of chewy coconut, tart raspberry, and creamy condensed milk, all layered over a buttery graham cracker base. I grew up eating the classic seven-layer bars, but adding raspberries and coconut feels like a tiny celebration of spring in every bite. They’re easy enough for a beginner, but they look so pretty and taste so dreamy that people always ask for the recipe. (Seriously, I’ve scribbled it on napkins at more than one get-together!)
If you love desserts that require minimal fuss but deliver maximum flavor, these magic bars will make you swoon. They’re perfect for busy families, anyone who needs a dessert in a pinch, or those of us who just want a sweet treat to brighten up the table. I’ve tested and tweaked this recipe at least a dozen times, and it’s never failed—so you can trust it’s party-proof. Raspberry Coconut Magic Bars are the spring dessert delight you didn’t know you needed, until now.
Why You’ll Love This Recipe
- Quick & Easy: You can whip these up in just about 15 minutes of prep. The oven does all the heavy lifting, which is perfect for busy hosts (or anyone who doesn’t love complicated baking projects).
- Simple Ingredients: No need to hunt down anything fancy—most ingredients are probably already in your pantry or fridge. A can of sweetened condensed milk, some graham crackers, coconut, and fresh raspberries are the stars of the show.
- Perfect for Spring Parties: These bars are a hit at brunches, Easter tables, potlucks, and outdoor picnics. Their pretty pink hue and coconut sparkle make them so inviting.
- Crowd-Pleaser: Kids dig the gooey sweetness, adults love the balanced flavors, and everyone comes back for seconds. (I’ve watched grown men sneak thirds when they thought no one was looking!)
- Unbelievably Delicious: The combination of tart raspberries with creamy coconut is just next-level comfort food. Every bite feels like sunshine and happiness.
What sets my Raspberry Coconut Magic Bars apart is the layering technique and the use of fresh berries. Blending the coconut with the condensed milk before layering creates an ultra-chewy, evenly sweet topping—no dry bits here! Plus, I use a graham cracker crust with a pinch of salt for balance. It’s these little tweaks that make the difference.
For me, these bars are more than just dessert—they’re a little piece of spring. They’re easy to share, gorgeous on a platter, and taste like a celebration. If you’re searching for a dessert that’s effortless but impressive, this is the one. Trust me, after the first bite, you’ll understand why I keep coming back.
What Ingredients You Will Need
This recipe uses simple, wholesome ingredients to deliver bold flavor and satisfying texture without the fuss. Most are pantry staples, and you can swap or substitute as needed to suit your tastes or dietary needs.
- For the Crust:
- Graham cracker crumbs – 1 1/2 cups (180g) (classic magic bar base; use gluten-free graham crackers if needed)
- Unsalted butter, melted – 1/2 cup (115g) (adds richness and helps the crust set)
- Pinch of salt (balances sweetness)
- For the Filling:
- Sweetened condensed milk – 1 can (14 oz / 396g) (the “magic” glue that holds everything together)
- Shredded coconut – 1 1/2 cups (120g) (I use unsweetened for less sugar, but sweetened works if you love extra sweetness)
- White chocolate chips – 3/4 cup (135g) (adds creamy flavor and texture)
- Fresh raspberries – 1 1/2 cups (180g) (washed and patted dry; frozen raspberries work in a pinch but may add more moisture)
- Chopped pecans or sliced almonds – 1/2 cup (50g) (optional, for crunch and flavor depth; omit if nut-free)
- Mini marshmallows – 1/2 cup (25g) (optional, for extra gooeyness—my kids love this addition!)
Ingredient Notes and Substitutions:
- Butter: If you prefer dairy-free, use melted coconut oil or vegan butter.
- Graham Crackers: Gluten-free brands like Pamela’s or Kinnikinnick work well.
- Condensed Milk: Vegan condensed milk is available for plant-based diets.
- Coconut: Flaked coconut can work, but shredded gives a chewier texture.
- Nuts: Swap pecans for walnuts or skip them entirely for nut allergies.
- White Chocolate Chips: Dark chocolate chips or butterscotch chips give a different twist.
- Raspberries: In summer, try fresh blackberries or blueberries. For a winter version, dried cranberries (soaked in hot water) are fun.
I personally prefer using fresh raspberries for their tart pop, but you can mix and match the berries depending on what’s in season. It’s a forgiving recipe, so don’t stress if you need to make a few swaps!
Equipment Needed
- 9×13-inch (23x33cm) baking pan – the classic size for magic bars; glass or metal both work. If you only have an 8×8-inch pan, halve the recipe.
- Parchment paper or nonstick foil – for easy removal and cleanup. I swear by parchment for perfect edges.
- Mixing bowls – one for the crust, one for the coconut mixture.
- Measuring cups and spoons – accuracy matters for the crust and coconut ratio.
- Spatula or wooden spoon – helps with spreading the layers evenly.
- Food processor (optional) – useful for making graham cracker crumbs if you don’t have pre-crushed.
I’ve tried making these bars in both glass and metal pans. Metal gives a slightly crisper crust, while glass keeps things a bit softer. If you’re using parchment paper, let the edges hang over for easy lifting. For graham crackers, a rolling pin works if you don’t have a food processor—just toss them in a zip-top bag and crush away. And honestly, a basic spatula gets the job done just fine. No need to splurge on fancy gadgets!
If you use a silicone pan, be sure to let the bars cool completely before removing—they’re softer until set. Budget tip: Dollar store measuring cups work great, but always check for cracks before baking.
Preparation Method
- Preheat and Prep: Preheat your oven to 350°F (175°C). Line a 9×13-inch (23x33cm) baking pan with parchment paper, leaving a 2-inch overhang for easy lifting. (Trust me, this saves headaches later.)
- Make the Crust: In a medium mixing bowl, combine 1 1/2 cups (180g) graham cracker crumbs, 1/2 cup (115g) melted unsalted butter, and a pinch of salt. Mix until the texture resembles wet sand. Pour into the prepared pan and press down firmly with your hands or the bottom of a measuring cup. The crust should be even and compact. Bake for 8-10 minutes until lightly golden—don’t skip this step or your base may get soggy.
- Mix the Coconut Layer: While the crust bakes, stir together 1 1/2 cups (120g) shredded coconut and 1 can (14 oz / 396g) sweetened condensed milk in a clean bowl. It should look sticky and thick. (If using sweetened coconut, the mix will be stickier.) Set aside.
- Layer the Ingredients: Remove the crust from the oven. Sprinkle 3/4 cup (135g) white chocolate chips evenly over the hot crust—this helps them melt slightly and stick. Scatter 1/2 cup (50g) chopped pecans or sliced almonds if using, followed by 1/2 cup (25g) mini marshmallows (optional).
- Add Raspberries: Gently place 1 1/2 cups (180g) fresh raspberries across the pan. Try not to crush the berries; a gentle hand keeps them looking pretty and prevents excess moisture. If using frozen berries, thaw and drain well first.
- Spread Coconut Mixture: Dollop the coconut-condensed milk mixture over the berries. Use a spatula to gently spread it, covering the berries as evenly as possible. It’s okay if some berries peek through—makes for a gorgeous finish.
- Bake: Bake in the preheated oven for 25-30 minutes. The top should be golden brown and bubbling at the edges. If you notice the coconut browning too quickly, loosely tent with foil for the last 10 minutes.
- Cool Completely: Remove from the oven and cool in the pan for at least 2 hours (or pop the pan in the fridge for faster setting). This is crucial—bars cut best when fully set.
- Lift and Slice: Use the parchment overhang to lift the bars out. Slice into 24 squares or rectangles. Wipe your knife between cuts for clean edges.
Troubleshooting Tips: If bars seem too soft after cooling, refrigerate for another hour. If crust crumbles, press harder next time or add 1-2 tablespoons extra butter. (Been there, done that.) If berries bleed juice, use slightly less or choose firmer berries. Sensory cue: bars should feel chewy, smell sweet and coconutty, and look golden on top.
Efficiency Tip: Prepare all ingredients before starting, and measure everything out—makes layering a breeze. If you’re making these for a party, bake the night before for best texture and ease.
Cooking Tips & Techniques
There’s a reason I keep coming back to these Raspberry Coconut Magic Bars—they’re forgiving, but a few pro tips make them even better.
- Layering Matters: Always add the white chocolate chips and nuts right after baking the crust so they melt into the base. I learned the hard way that waiting makes them sit on top and fall off when you slice.
- Berry Distribution: Space raspberries out evenly. Too many in one spot and the bars can get mushy. Use firm, dry berries for the prettiest slices.
- Oven Watch: Coconut browns fast! Check at 20 minutes and tent with foil if needed. I once left the bars in for “just a few extra minutes”—ended up with burnt coconut on top. Not fun.
- Cutting Cleanly: Chill bars before slicing, then use a sharp knife. Wiping the blade between cuts makes the bars look bakery-perfect.
- Multitasking: While the crust bakes, prep the coconut mixture and berries. Makes the process feel seamless and saves a few precious minutes.
- Consistency: If you prefer crunchier bars, bake an extra 3-4 minutes. For softer, gooier bars, stick to the lower end of the baking time.
- Personal Note: I’ve tried substituting frozen berries, but they tend to release more juice—fresh really is best for texture.
The biggest mistake I made was not letting the bars cool enough before slicing. Patience pays off here! And if you’re doubling the recipe for a crowd, use two pans—overcrowding can lead to uneven baking.
Variations & Adaptations
One of the best things about Raspberry Coconut Magic Bars is how easily you can switch up flavors and ingredients. Here are some of my favorite twists:
- Gluten-Free Version: Use gluten-free graham crackers for the crust. The bars stay just as delicious—my cousin with celiac swears by this swap.
- Vegan Adaptation: Replace butter with coconut oil and use vegan condensed milk. Omit the white chocolate chips or use a dairy-free brand. I’ve made these for vegan friends, and they disappear just as quickly!
- Nut-Free Option: Skip the nuts entirely—add a few extra marshmallows or more coconut if you want more chew.
- Seasonal Fruit Swaps: Try blueberries, blackberries, or diced strawberries instead of raspberries. In fall, dried cranberries (plumped in hot water) are a cozy twist.
- Chocolate Lovers: Swap half of the white chocolate chips for dark or milk chocolate. It’s a richer flavor that pairs well with tart berries.
- Personal Favorite: I once added a layer of lemon zest to the coconut mixture—gave the bars a bright, citrusy kick. Highly recommend if you like a little zing!
If you want to change up the baking method, these bars also work in muffin tins for individual servings—just reduce baking time to 15-18 minutes. You can also make them as a thicker slab in an 8×8-inch pan (bake for 35-40 minutes).
Don’t be afraid to get creative—the base recipe is sturdy and adaptable. (That’s half the fun!)
Serving & Storage Suggestions
For the prettiest presentation, serve Raspberry Coconut Magic Bars at room temperature, cut into neat squares and arranged on a platter. They look stunning with a sprinkle of extra coconut or a few fresh raspberries on top. If you’re feeling fancy, a dusting of powdered sugar gives them a bakery vibe.
These bars pair beautifully with light drinks—think iced tea, lemonade, or a fruity white wine. For brunch, I love serving them alongside a fresh fruit salad or vanilla yogurt.
Storage: Store bars in an airtight container at room temperature for up to 3 days. For longer storage, refrigerate for up to a week. They also freeze well—layer with parchment paper in a freezer-safe container and freeze for up to 2 months. Thaw overnight in the fridge before serving.
To reheat, microwave individual bars for 5-10 seconds. Just a quick zap brings back that gooey texture. Over time, the flavors meld, and the coconut gets chewier—it’s a little secret that makes leftover bars taste even better!
Nutritional Information & Benefits
Each bar is approximately 180-210 calories, with about 3g protein, 9g fat, and 22g carbohydrates. Raspberry Coconut Magic Bars are a bit indulgent, but the fresh raspberries add vitamin C and fiber, while coconut offers healthy fats. Using unsweetened coconut keeps the sugar in check.
For gluten-free or vegan diets, the suggested swaps keep these bars accessible. Potential allergens include dairy, nuts, and gluten (if not using gluten-free graham crackers). Always check your ingredients for hidden allergens.
From a wellness perspective, I see these bars as a joyful treat—one that fits into a balanced lifestyle. I love knowing that every bite packs a little fruit and fiber, and the homemade touch means you control what goes in.
Conclusion
Raspberry Coconut Magic Bars are the kind of dessert that brings people together—easy to make, beautiful to serve, and packed with spring flavor. If you’re craving something sweet, chewy, and tangy, this recipe is worth a spot in your rotation. It’s a crowd-pleaser that adapts to your dietary needs and taste preferences.
Don’t be afraid to get creative with add-ins or swap out ingredients. That’s what I love about these magic bars—they’re flexible, fun, and always delicious. Every time I make them, I’m reminded of sunny spring days and laughter around the kitchen table.
If you try these Raspberry Coconut Magic Bars, let me know in the comments! Share your tweaks, your party stories, or your favorite berry combinations—I’d love to hear how you make this recipe your own. Happy baking, and here’s to sweet moments ahead!
FAQs
Can I use frozen raspberries instead of fresh?
Yes, you can use frozen raspberries, but make sure to thaw and drain them well. Excess moisture from frozen berries can make the bars a bit soggy, so pat them dry before layering.
How do I make these bars gluten-free?
Simply swap regular graham crackers for a trusted gluten-free brand. The texture and flavor stay just as tasty—no one will know the difference!
Can I make these bars ahead of time?
Absolutely! Raspberry Coconut Magic Bars taste great the next day. Bake and cool, then store in an airtight container overnight. The flavors meld and the bars become even chewier.
What can I use instead of sweetened condensed milk?
If you need a dairy-free version, use coconut condensed milk (available at most health food stores). You can also make your own by simmering coconut milk with sugar until thick, but the canned version is easier.
How do I get clean slices without crumbling?
Let the bars cool completely, then chill in the fridge for an hour before slicing. Use a sharp knife and wipe it between cuts for neat edges. Don’t rush this step—patience pays off!
Pin This Recipe!
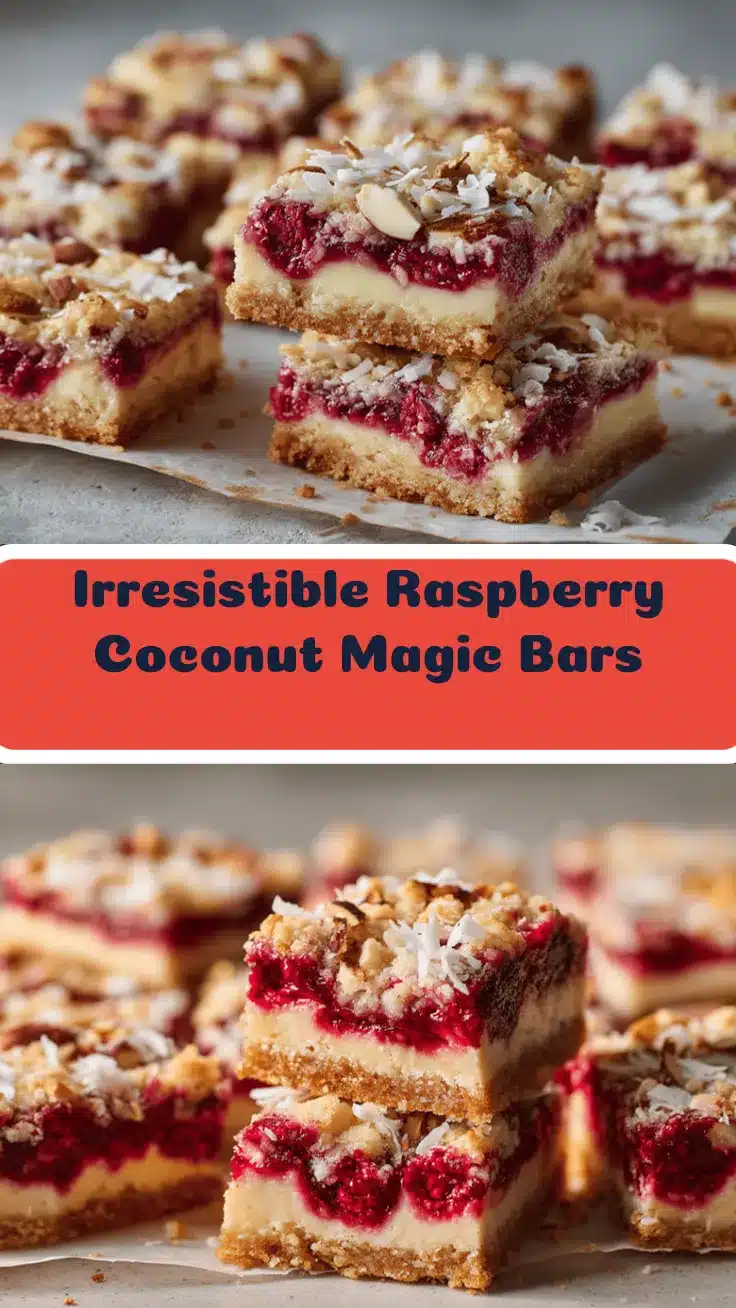
Raspberry Coconut Magic Bars

Raspberry Coconut Magic Bars are a chewy, gooey dessert layered with buttery graham cracker crust, tart raspberries, coconut, and creamy condensed milk. This easy spring treat is perfect for parties, picnics, or whenever you need a sweet, crowd-pleasing dessert.
- Prep Time: 15 minutes
- Cook Time: 35-40 minutes
- Total Time: 2 hours 55 minutes
- Yield: 24 bars 1x
- Category: Dessert
- Cuisine: American
Ingredients
- 1 1/2 cups graham cracker crumbs (about 12 full sheets, 180g)
- 1/2 cup unsalted butter, melted (1 stick, 115g)
- Pinch of salt
- 1 can (14 oz) sweetened condensed milk
- 1 1/2 cups shredded coconut (unsweetened or sweetened, 120g)
- 3/4 cup white chocolate chips (135g)
- 1 1/2 cups fresh raspberries (180g)
- 1/2 cup chopped pecans or sliced almonds (optional, 50g)
- 1/2 cup mini marshmallows (optional, 25g)
Instructions
- Preheat oven to 350°F (175°C). Line a 9×13-inch baking pan with parchment paper, leaving a 2-inch overhang for easy lifting.
- In a medium mixing bowl, combine graham cracker crumbs, melted butter, and a pinch of salt. Mix until the texture resembles wet sand. Press firmly and evenly into the prepared pan.
- Bake the crust for 8-10 minutes until lightly golden. Remove from oven.
- While the crust bakes, stir together shredded coconut and sweetened condensed milk in a bowl until thick and sticky.
- Sprinkle white chocolate chips evenly over the hot crust. Add chopped pecans or sliced almonds and mini marshmallows if using.
- Gently distribute fresh raspberries across the pan.
- Dollop the coconut-condensed milk mixture over the berries and use a spatula to spread it as evenly as possible.
- Bake for 25-30 minutes, until the top is golden brown and bubbling at the edges. Tent with foil if coconut browns too quickly.
- Cool completely in the pan for at least 2 hours (or refrigerate for faster setting).
- Lift bars out using parchment overhang and slice into 24 squares or rectangles. Wipe knife between cuts for clean edges.
Notes
For best results, use fresh raspberries and let bars cool completely before slicing. To make gluten-free, use gluten-free graham crackers. For vegan, use coconut oil and vegan condensed milk. Bars freeze well and can be made ahead. If using frozen berries, thaw and drain well to avoid soggy bars.
Nutrition
- Serving Size: 1 bar (1/24 of recipe)
- Calories: 200
- Sugar: 14
- Sodium: 70
- Fat: 9
- Saturated Fat: 6
- Carbohydrates: 22
- Fiber: 2
- Protein: 3
Keywords: raspberry coconut bars, magic bars, spring dessert, party dessert, easy dessert, coconut, raspberry, magic cookie bars, seven layer bars


