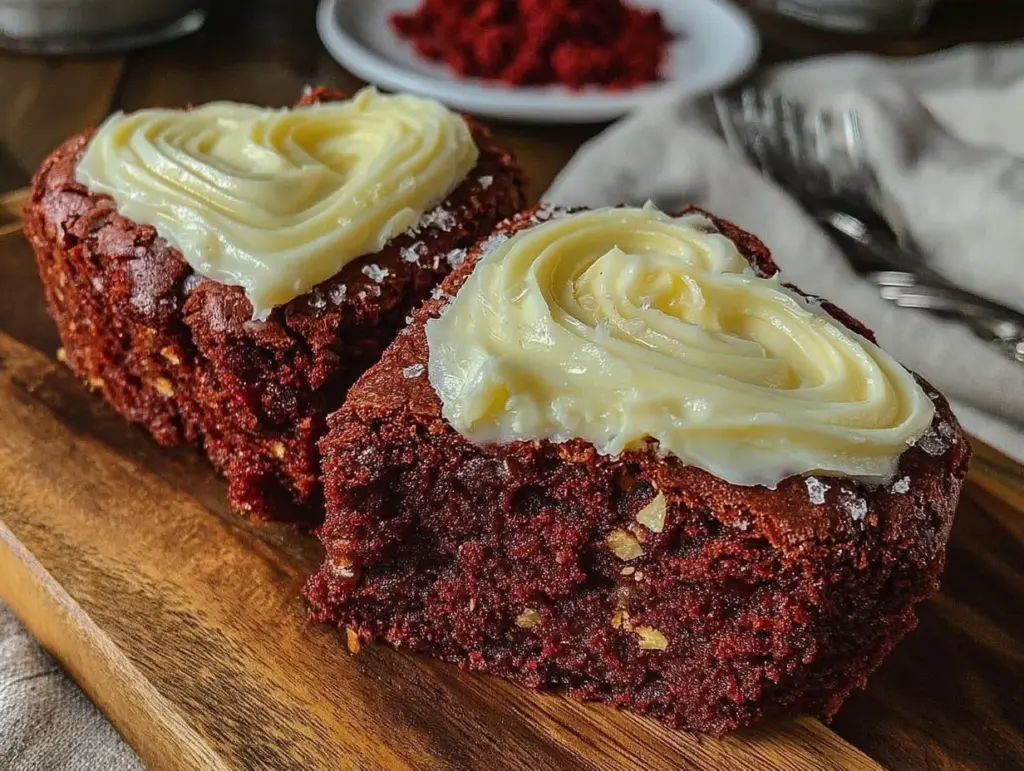
There was this one evening when I found myself rummaging through the pantry, searching for something sweet but nothing seemed to fit the bill. Honestly, I wasn’t in the mood for complicated baking—just a quick treat with a bit of flair. Then, out of nowhere, I spotted a box of cocoa and that half-used bottle of red food coloring hiding in the back. I thought, why not try making red velvet brownies? But to make it a bit special (because, honestly, who doesn’t love a little heart-shaped charm?), I decided to cut them into hearts and top with a luscious cream cheese frosting I whipped up on the fly.
At first, I was skeptical—red velvet in brownie form? Would it be too dense, or worse, dry? But the moment I took that first bite, the softness, the subtle cocoa flavor, and that tangy-sweet frosting had me hooked. It turned an ordinary night into a cozy, comforting little celebration. Since then, these delicious red velvet heart-shaped brownies with cream cheese frosting have become my go-to when I want something quick but feels special. They’re perfect for sharing—or secretly enjoying all by yourself (no judgment here!).
What stuck with me is how surprisingly simple they are, yet they look like you spent hours fussing over them. It’s that quiet joy of making something heartfelt without the hassle. And honestly, that’s why these brownies have a special place in my recipe collection.
Why You’ll Love This Recipe
- Quick & Easy: Comes together in under 45 minutes, perfect for last-minute treats or unexpected guests.
- Simple Ingredients: Uses pantry staples like cocoa powder, flour, and cream cheese—no need for fancy shopping trips.
- Perfect for Celebrations: Ideal for Valentine’s Day, anniversaries, or any time you want to impress with minimal stress.
- Crowd-Pleaser: Kids, adults—everyone loves the rich red hue paired with creamy frosting.
- Unbelievably Delicious: The fudgy texture contrasts beautifully with tangy, smooth cream cheese frosting for a flavor combo that’s hard to beat.
What makes this recipe different? It’s the way the red velvet batter blends a hint of cocoa with just the right amount of acidity, creating a brownie that’s moist but not heavy. And the cream cheese frosting here isn’t just slapped on—it’s whipped until silky smooth, balancing sweetness with a subtle tang that cuts through the richness. Plus, shaping the brownies into hearts adds that personal touch that makes the whole experience feel a bit more special—without any extra baking skill needed.
This recipe isn’t just a dessert; it’s a little moment of joy wrapped in red and white. It’s the kind of treat that makes you pause, smile, and savor the goodness—something I find myself coming back to whenever I want a sweet reset.
What Ingredients You Will Need
This recipe uses simple, wholesome ingredients to deliver bold flavor and satisfying texture without the fuss. Most are pantry staples, and substitutions are easy if you need them.
- For the Brownies:
- All-purpose flour – 1 cup (125 g), sifted for light texture
- Cocoa powder – 2 tbsp (unsweetened, good quality like Hershey’s)
- Baking powder – 1/2 tsp (helps with a slight lift)
- Salt – 1/4 tsp (balances sweetness)
- Unsalted butter – 1/2 cup (115 g), melted and slightly cooled
- Sugar – 3/4 cup (150 g), granulated
- Large eggs – 2, room temperature (for better mixing)
- Vanilla extract – 1 tsp (adds warmth)
- Red food coloring – 2 tbsp (liquid or gel, gel for more vibrant color)
- Buttermilk – 1/4 cup (60 ml) (adds moisture and tender crumb; substitute with milk + 1 tsp vinegar if needed)
- For the Cream Cheese Frosting:
- Cream cheese – 8 oz (225 g), softened (Philadelphia brand works great)
- Unsalted butter – 1/4 cup (55 g), softened
- Powdered sugar – 1 1/2 cups (180 g), sifted to avoid lumps
- Vanilla extract – 1 tsp
- Pinch of salt (balances sweetness)
Ingredient tips: For a dairy-free version, swap butter and cream cheese with plant-based alternatives and use coconut milk in place of buttermilk. If you prefer a less sweet frosting, reduce powdered sugar by 1/4 cup. Also, fresh cream cheese at room temperature is key to smooth frosting—don’t rush that step!
Equipment Needed
- 8×8-inch square baking pan (for evenly baked brownies; I use a non-stick metal one for best results)
- Mixing bowls (one large for batter, one medium for frosting)
- Whisk and rubber spatula (for folding and mixing)
- Electric hand mixer or stand mixer (makes frosting silky smooth, but you can whisk by hand if you’re patient!)
- Measuring cups and spoons (precision matters here)
- Cooling rack (helps brownies cool evenly and prevents sogginess)
- Heart-shaped cookie cutter (around 2.5 inches wide for cute, uniform shapes)
If you don’t have a heart-shaped cutter, a small knife and a steady hand work too—just cut triangles or squares for a rustic look. I’ve tried silicone pans for brownies, but they sometimes result in uneven browning, so stick to metal or glass pans for this recipe. Also, make sure your cream cheese is properly softened—too cold, and your frosting will be lumpy.
Preparation Method
- Preheat your oven to 350°F (175°C). Grease your 8×8-inch pan or line it with parchment paper, leaving some overhang for easy brownie removal.
- Mix dry ingredients: In a medium bowl, sift together the flour, cocoa powder, baking powder, and salt. Set aside.
- Combine wet ingredients: In a large bowl, whisk melted butter and sugar until combined and slightly glossy. Add eggs one at a time, whisking well after each addition. Stir in vanilla extract and red food coloring until the batter turns a vibrant red.
- Incorporate buttermilk: Slowly add the buttermilk to the wet mixture, stirring gently until blended. This keeps the batter moist and tender.
- Fold in dry ingredients: Gradually add the flour mixture to the wet ingredients, folding with a spatula just until combined. Don’t overmix—the batter should be thick but smooth with no streaks.
- Pour batter into prepared pan: Spread evenly using your spatula. Tap the pan lightly on the counter to release any air bubbles.
- Bake for 25 to 30 minutes or until a toothpick inserted in the center comes out with a few moist crumbs (not wet batter). Don’t overbake or brownies will dry out.
- Cool completely: Place the pan on a cooling rack and let the brownies cool fully—this usually takes about 1 hour. If you frost too soon, the frosting will melt and slide off.
- Prepare the cream cheese frosting: In a medium bowl, beat softened cream cheese and butter together until smooth and fluffy (about 2-3 minutes). Gradually add powdered sugar, mixing on low speed to avoid sugar clouds, then increase speed to fully combine. Stir in vanilla extract and a pinch of salt. If the frosting is too thick, add a teaspoon of milk to loosen it.
- Cut brownies into hearts: Remove the cooled brownies from the pan using parchment overhang. Use your heart-shaped cookie cutter to stamp out shapes. Reassemble leftover scraps and cut more shapes if desired.
- Frost each heart: Using a small spatula or knife, spread a generous layer of cream cheese frosting on each brownie heart. For a fancy touch, pipe the frosting with a piping bag fitted with a star tip.
Tip: If your brownies crumble when cutting, chill them in the fridge for 15-20 minutes first—it firms them up nicely. Also, try not to rush the cooling step; it makes a huge difference in texture and frosting application.
Cooking Tips & Techniques
The key to these brownies is balancing moisture and texture. Here are some tricks I’ve learned along the way:
- Don’t overmix your batter: Mixing too much develops gluten, making brownies tough. Fold ingredients gently until just combined.
- Use room temperature eggs: They blend better with butter and sugar, resulting in a smoother batter.
- Red food coloring matters: Gel colors give a richer, deeper hue without watering down your batter. I’ve tried liquid colors, but they sometimes make the batter too runny.
- Watch your baking time carefully: Brownies continue cooking a little after you take them out of the oven. Pull them when a toothpick shows moist crumbs, not dry.
- Softened cream cheese is essential: If the cream cheese is cold, the frosting will be lumpy. Let it sit at room temperature for at least 30 minutes before mixing.
- Use an electric mixer for frosting: It whips air into the frosting, making it light and fluffy rather than dense.
One time, I skipped the buttermilk and ended up with dry brownies that didn’t have that signature tender crumb. Lesson learned! Also, multitasking by preparing the frosting while brownies bake saves time and keeps your workflow smooth.
Variations & Adaptations
Feel free to tweak this recipe to suit your taste or dietary needs:
- Gluten-Free Option: Swap all-purpose flour with a 1:1 gluten-free baking blend. Make sure it contains xanthan gum for structure.
- Vegan Version: Use flax eggs (1 tbsp ground flax + 3 tbsp water per egg) and dairy-free cream cheese and butter alternatives. Coconut yogurt can replace buttermilk.
- Flavor Twists: Add 1/4 cup finely chopped walnuts or pecans to the batter for crunch. You can also fold in fresh raspberries for a tart contrast.
- Frosting Variations: Try swapping cream cheese frosting for whipped coconut cream mixed with a touch of maple syrup for a lighter topping.
Personally, I once added a teaspoon of espresso powder to the batter to deepen the chocolate notes—it was subtle but gave the brownies a richer flavor that paired beautifully with the frosting.
Serving & Storage Suggestions
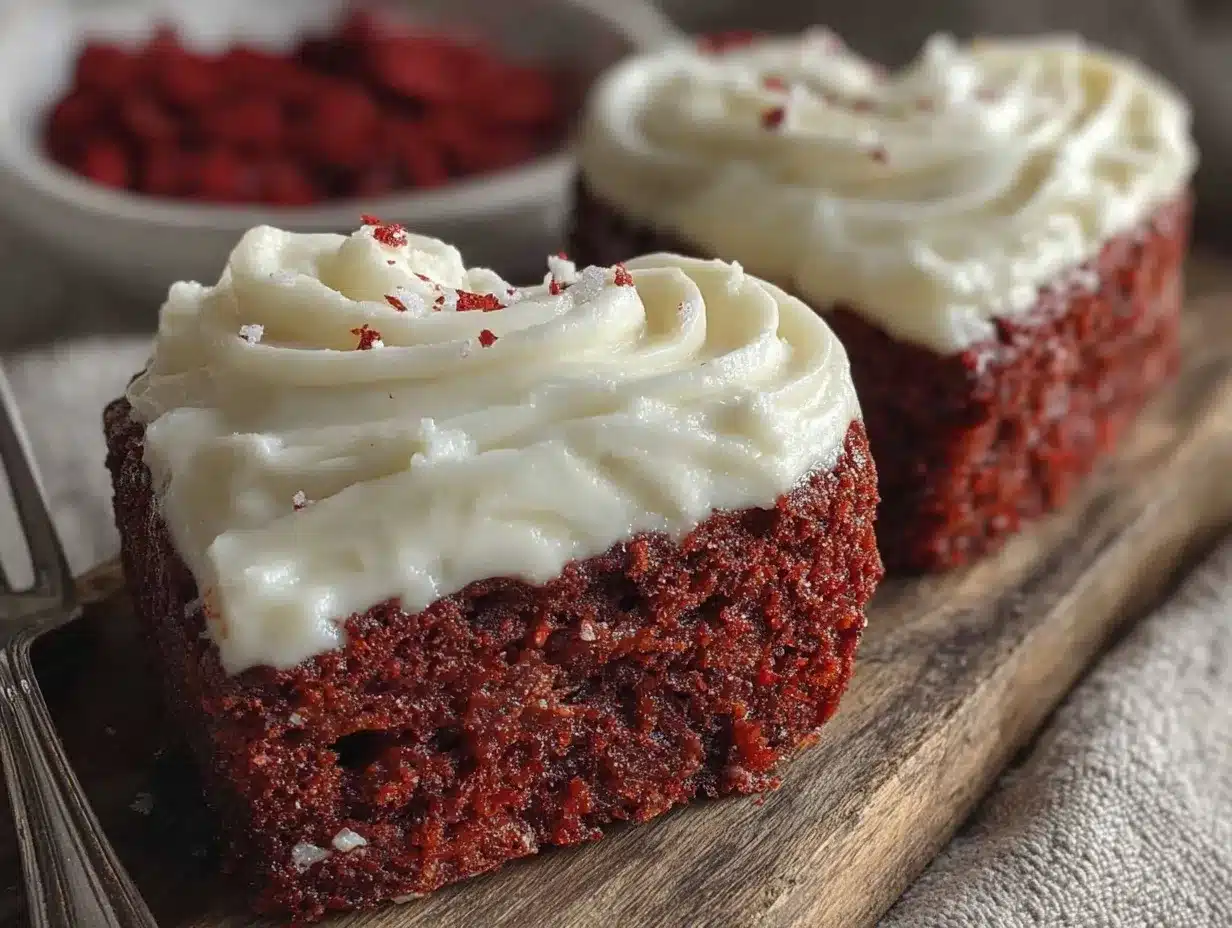
Serve these brownies at room temperature for the best flavor and texture. If you’re bringing them to a party, arranging the heart-shaped brownies on a pretty plate or tiered tray makes a charming presentation.
They pair wonderfully with a cup of freshly brewed coffee or a glass of cold milk. For a festive touch, sprinkle some edible glitter or crushed freeze-dried strawberries on top of the frosting.
To store, place the frosted brownies in an airtight container and refrigerate. They keep well for up to 4 days. Before serving, let them sit at room temperature for about 30 minutes to soften the frosting.
For longer storage, freeze unfrosted brownies wrapped tightly in plastic wrap and foil for up to 3 months. Thaw overnight in the fridge, then frost before serving. Flavors often deepen after a day or two, making leftovers even more delightful.
Nutritional Information & Benefits
Each heart-shaped brownie (approximately 2.5 inches) contains about:
| Calories | 180-200 kcal |
|---|---|
| Fat | 10 g (mostly from butter and cream cheese) |
| Carbohydrates | 22 g (includes sugar and flour) |
| Protein | 3 g |
The cream cheese adds a bit of calcium and protein, while cocoa powder provides antioxidants. Using buttermilk contributes to a tender crumb and adds a touch of vitamin B12. For those watching sugar intake, reducing powdered sugar in the frosting slightly can help.
While these brownies are definitely a treat, they can fit into a balanced diet when enjoyed mindfully. I appreciate that they use real butter and cream cheese, ingredients I trust for quality and flavor, rather than processed alternatives.
Conclusion
These delicious red velvet heart-shaped brownies with cream cheese frosting are more than just a dessert—they’re a little celebration in every bite. They bring that cozy, homemade feeling with none of the fuss, making them perfect whether you’re impressing guests or indulging solo.
Feel free to play around with the ingredients and shapes to make them truly your own. I love how this recipe manages to combine simplicity with a special touch, which is why it’s become a staple in my kitchen.
If you try this recipe, don’t hesitate to leave a comment or share your variations—I’m always curious how others make it their own. Remember, the best treats come from sharing a bit of love, one heart-shaped brownie at a time.
Happy baking!
FAQs
Can I make the brownies ahead of time?
Yes! You can bake the brownies a day in advance and store them wrapped at room temperature. Frost just before serving for the freshest taste.
What if I don’t have buttermilk?
No worries. Mix 1/4 cup (60 ml) milk with 1 tsp vinegar or lemon juice and let it sit for 5 minutes to sour. Use this as a buttermilk substitute.
How do I prevent the cream cheese frosting from melting?
Make sure the brownies are completely cooled before frosting. Also, keep the frosting chilled until ready to use and store the frosted brownies in the fridge.
Can I use a different shape instead of hearts?
Absolutely! Squares, circles, or even stars work well. The heart shape is just a fun, festive touch.
Is it possible to make these brownies gluten-free?
Yes, swap the all-purpose flour with a gluten-free baking blend that contains xanthan gum for best texture.
Pin This Recipe!
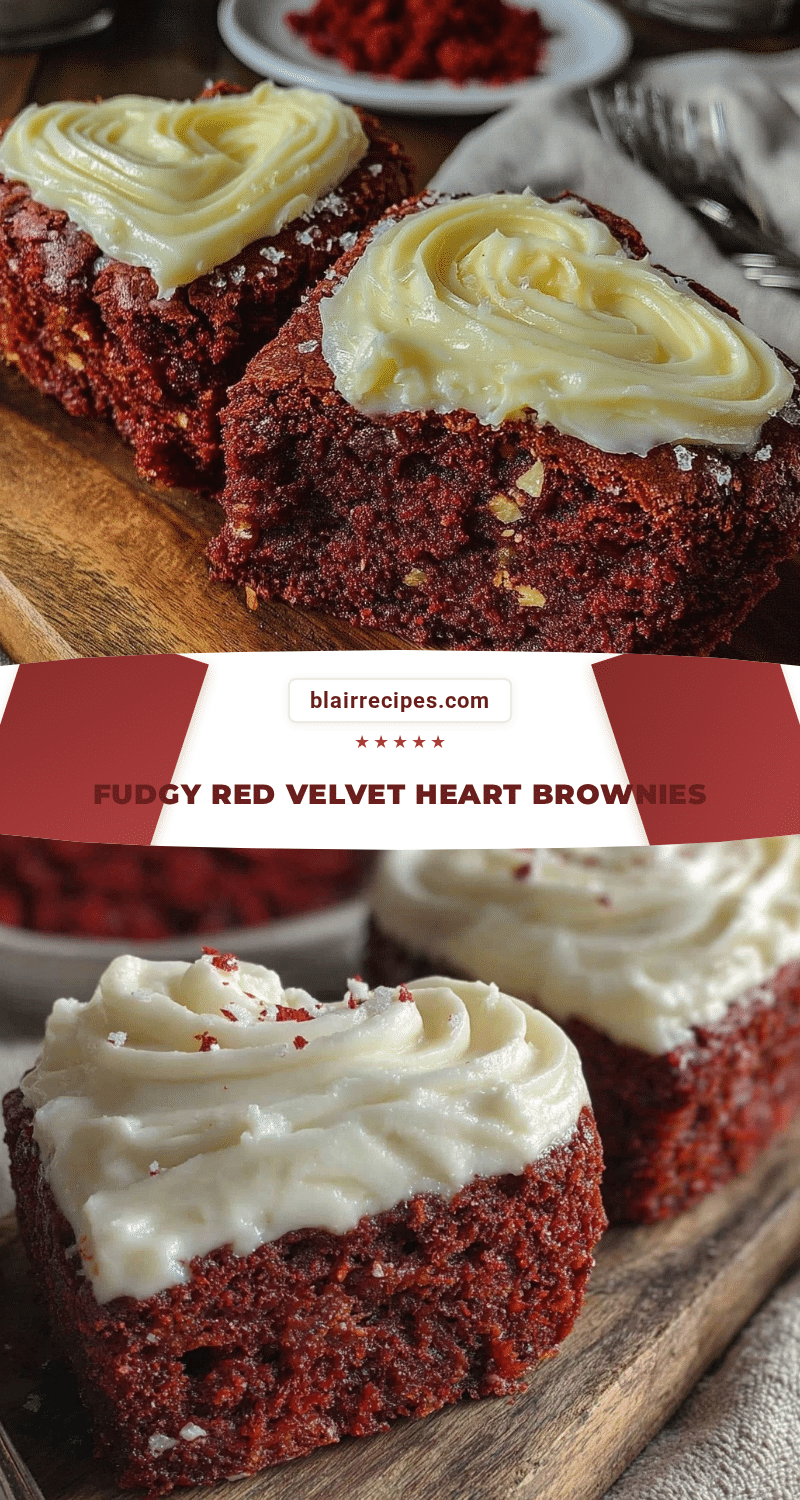
Red Velvet Heart-Shaped Brownies with Cream Cheese Frosting

Delicious red velvet brownies cut into heart shapes and topped with a luscious cream cheese frosting. Quick and easy to make, perfect for celebrations or a cozy treat.
- Prep Time: 15 minutes
- Cook Time: 30 minutes
- Total Time: 45 minutes
- Yield: 16 servings 1x
- Category: Dessert
- Cuisine: American
Ingredients
- 1 cup all-purpose flour (125 g), sifted
- 2 tbsp unsweetened cocoa powder
- 1/2 tsp baking powder
- 1/4 tsp salt
- 1/2 cup unsalted butter (115 g), melted and slightly cooled
- 3/4 cup granulated sugar (150 g)
- 2 large eggs, room temperature
- 1 tsp vanilla extract
- 2 tbsp red food coloring (liquid or gel)
- 1/4 cup buttermilk (60 ml) (or 1/4 cup milk + 1 tsp vinegar as substitute)
- 8 oz cream cheese (225 g), softened
- 1/4 cup unsalted butter (55 g), softened
- 1 1/2 cups powdered sugar (180 g), sifted
- 1 tsp vanilla extract
- Pinch of salt
Instructions
- Preheat oven to 350°F (175°C). Grease an 8×8-inch baking pan or line with parchment paper with overhang.
- In a medium bowl, sift together flour, cocoa powder, baking powder, and salt. Set aside.
- In a large bowl, whisk melted butter and sugar until combined and slightly glossy. Add eggs one at a time, whisking well after each addition.
- Stir in vanilla extract and red food coloring until batter is vibrant red.
- Slowly add buttermilk to wet mixture, stirring gently until blended.
- Gradually fold in dry ingredients with a spatula until just combined; do not overmix.
- Pour batter into prepared pan and spread evenly. Tap pan lightly to release air bubbles.
- Bake for 25 to 30 minutes or until a toothpick inserted in the center comes out with a few moist crumbs.
- Cool brownies completely on a cooling rack, about 1 hour.
- Prepare frosting: Beat softened cream cheese and butter until smooth and fluffy (2-3 minutes). Gradually add powdered sugar on low speed, then increase speed to combine fully.
- Stir in vanilla extract and a pinch of salt. Add a teaspoon of milk if frosting is too thick.
- Remove cooled brownies from pan using parchment overhang. Use a heart-shaped cookie cutter to cut brownies into hearts.
- Frost each heart-shaped brownie with cream cheese frosting using a spatula or piping bag.
Notes
Use room temperature eggs and softened cream cheese for best texture. Do not overmix batter to avoid tough brownies. Gel red food coloring gives a richer color. Chill brownies if they crumble when cutting. Frost only after brownies are completely cooled to prevent melting.
Nutrition
- Serving Size: One heart-shaped bro
- Calories: 190
- Sugar: 18
- Sodium: 120
- Fat: 10
- Saturated Fat: 6
- Carbohydrates: 22
- Fiber: 1
- Protein: 3
Keywords: red velvet brownies, heart-shaped brownies, cream cheese frosting, easy brownies, Valentine's Day dessert, homemade brownies


