
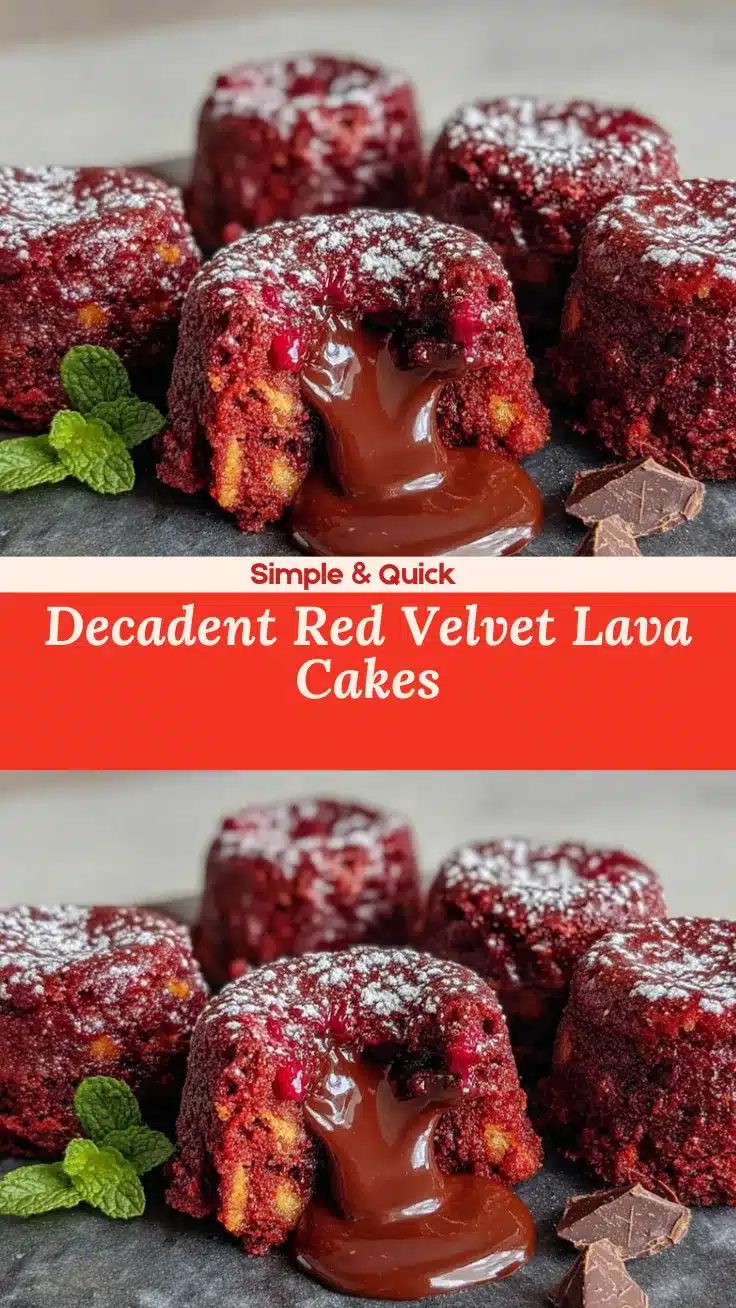
The first time I smelled the rich aroma of red velvet lava cakes baking, I was hooked. The smell of warm cocoa mingling with a hint of vanilla and that unmistakable red hue—it’s like a little celebration in your kitchen! I’ve made this recipe countless times, tweaking it here and there, and honestly, it’s become my go-to dessert when I want to impress guests without spending hours in the kitchen. Red velvet lava cakes are that perfect sweet spot between a cozy, comforting treat and a fancy dessert that says, “Wow, you’re special.”
What’s delightful about this red velvet lava cakes recipe is how it captures the classic flavors of red velvet cake but with a molten, gooey center that melts in your mouth. It’s the kind of dessert that makes you pause, savor, and maybe even close your eyes after that first bite. Trust me, once you try making these at home, you’ll see why they’re a showstopper for any occasion.
As someone who loves baking but hates complicated recipes, this red velvet lava cakes recipe is refreshingly straightforward. It uses simple ingredients you probably already have, and with just a few steps, you’re on your way to a dessert that looks and tastes like it came from a fancy bakery. Plus, I’ve tested this recipe multiple times, so you’re getting a tried-and-true method that works every time.
Why You’ll Love This Red Velvet Lava Cakes Recipe
There are so many reasons this red velvet lava cakes recipe has earned a permanent spot in my dessert repertoire, but here are a few highlights that might convince you too:
- Quick & Easy: You can whip these up in about 30 minutes, including baking time. Perfect for last-minute dinner parties or a sweet craving that can’t wait.
- Simple Ingredients: No fancy, hard-to-find items here. Just pantry staples like cocoa powder, buttermilk, and a splash of vanilla.
- Perfect for Special Occasions: Whether it’s Valentine’s Day, a birthday, or just a Friday night treat, these lava cakes add a touch of elegance without the fuss.
- Crowd-Pleaser: I’ve served these to family, friends, and even picky eaters, and they always ask for seconds.
- Unbelievably Delicious: The contrast between the moist cake and molten center is pure magic—a texture and flavor combo that’s comfort food with a twist.
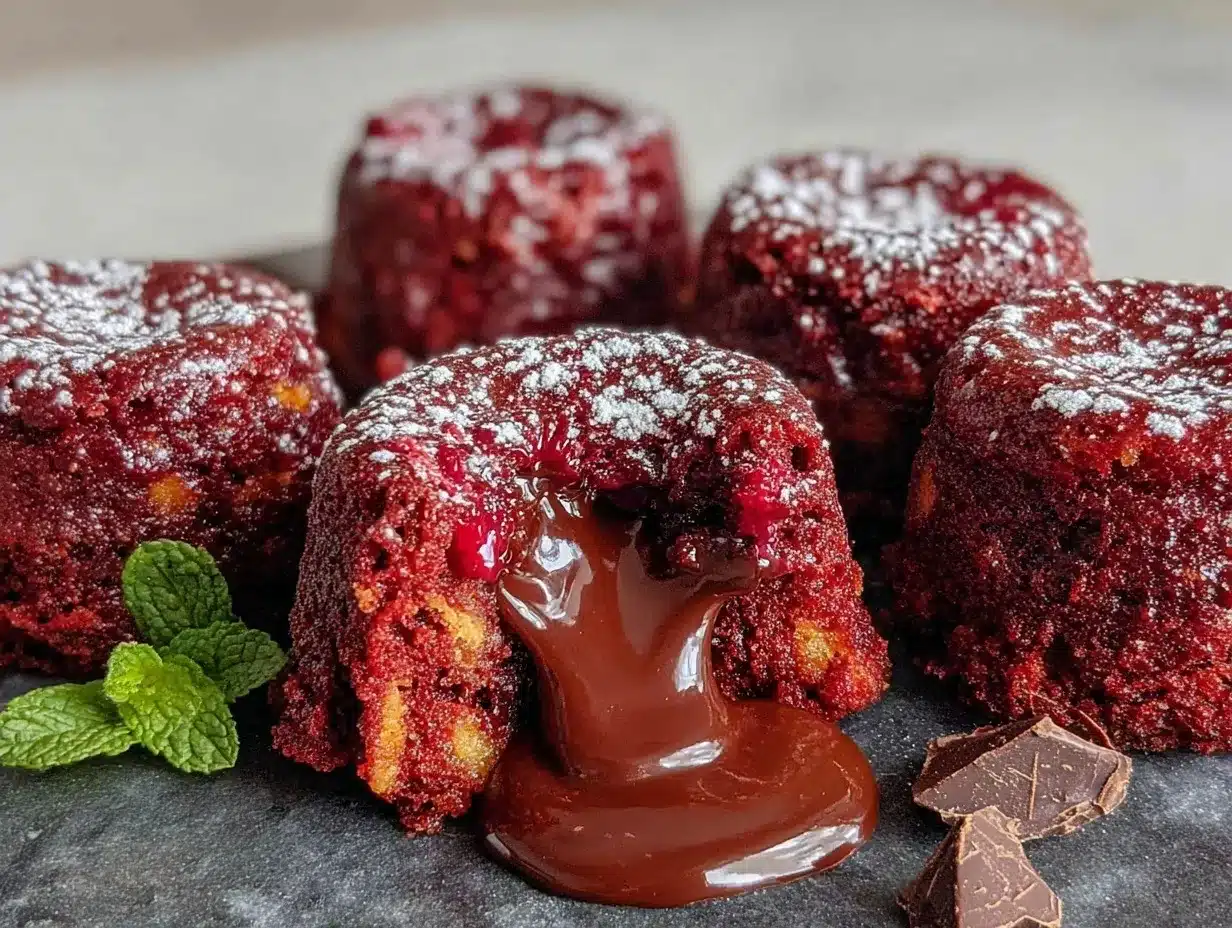
What sets this recipe apart is the way the batter balances sweetness with just the right hint of cocoa and tang from buttermilk. The lava center is perfectly molten, not too runny or dry, thanks to a little extra butter and chocolate mixed into the middle. And honestly, the vibrant red color makes these cakes truly eye-catching on any dessert table.
This isn’t just another red velvet cake—it’s a little molten masterpiece that brings joy every time. I love how it makes me feel like a pro baker with minimal effort, and it’s the kind of recipe that impresses guests without making the host sweat.
What Ingredients You Will Need
This red velvet lava cakes recipe calls for straightforward, reliable ingredients that combine to create that iconic flavor and texture. Here’s a breakdown of what you’ll need:
- Unsalted Butter (6 tablespoons / 85g): For richness and that silky molten center. I prefer using a European-style butter like Kerrygold for its creamy texture.
- Semisweet Chocolate (4 ounces / 115g): Chopped finely, this melts inside to create the lava. Good quality chocolate makes a noticeable difference here.
- All-Purpose Flour (1/2 cup / 65g): Provides structure while keeping it tender.
- Cocoa Powder (2 tablespoons / 15g): Unsweetened and sifted—this adds the deep chocolate flavor without bitterness.
- Granulated Sugar (3/4 cup / 150g): Sweetens the cake. You can swap half with coconut sugar for a subtle caramel note.
- Eggs (2 large): Large eggs, at room temperature, help with texture and rise.
- Buttermilk (1/4 cup / 60ml): Adds tang and moistness. If you don’t have buttermilk, mix regular milk with 1 teaspoon lemon juice and let sit 5 minutes.
- Vanilla Extract (1 teaspoon): For that warm, inviting aroma.
- Red Food Coloring (1 tablespoon): Gel or liquid, depending on preference. Gel tends to give a more vibrant color without thinning the batter.
- Salt (1/4 teaspoon): Balances the sweetness and enhances flavor.
- Powdered Sugar (optional, for dusting): Adds a pretty finishing touch.
When selecting cocoa powder, I usually go for Dutch-processed because it creates a smoother, less acidic taste that pairs beautifully with the tangy buttermilk. For the chocolate center, I’ve found that using semisweet chocolate bars chopped finely melts more evenly than chips. And if you prefer a dairy-free option, swap the butter for coconut oil and use almond milk mixed with lemon juice instead of buttermilk.
Equipment Needed
- Ramekins or Muffin Tin: Four 6-ounce ramekins work perfectly for individual servings. If you don’t have ramekins, a muffin tin lined with foil or silicone cups can work as an alternative.
- Mixing Bowls: At least two bowls—one for dry ingredients, one for wet.
- Whisk and Spatula: For combining ingredients smoothly and folding the batter.
- Double Boiler or Microwave-Safe Bowl: To melt butter and chocolate gently. A microwave is faster, but watch carefully to prevent burning.
- Measuring Cups and Spoons: For accuracy. Baking is a science, after all!
- Cooling Rack: To let the cakes rest after baking without getting soggy.
Personally, I prefer using ceramic ramekins because they hold heat evenly and make for elegant presentation. If you use metal muffin pans, be sure to grease them well or use parchment liners—lava cakes can be sticky! For melting chocolate, I find a double boiler gives gentle heat that prevents burning, but the microwave works fine as long as you stop and stir every 20 seconds.
Detailed Preparation Method
- Preheat your oven to 425°F (220°C). This high heat is essential for that quick bake that leaves the outside cake baked and the center molten. Grease four 6-ounce ramekins generously with butter and lightly dust with cocoa powder to prevent sticking.
- Melt the butter and chopped semisweet chocolate together. Use a double boiler or microwave in 20-second bursts, stirring each time until smooth and shiny. Set aside to cool slightly—this prevents cooking the eggs when mixed.
- In a medium bowl, whisk together the flour, cocoa powder, sugar, and salt. Make sure there are no lumps—sifting helps here if you have time.
- In another bowl, beat the eggs until frothy. Add in the buttermilk, vanilla extract, and red food coloring, stirring until combined. The batter will have that signature red hue—if it’s too pale, add a bit more coloring.
- Slowly pour the melted chocolate mixture into the wet ingredients. Stir gently to combine.
- Fold the dry ingredients into the wet ingredients carefully. Don’t overmix—just fold until no flour streaks remain. The batter should be thick but pourable.
- Divide the batter evenly among the prepared ramekins. Fill each about 3/4 full to leave room for rising.
- Bake in the preheated oven for 12 to 14 minutes. The edges should be set and slightly puffed but the center will still look soft and jiggly. Don’t overbake or you’ll lose the lava effect.
- Remove from oven and let the cakes cool for 1 minute. This brief rest helps the lava set just enough to hold its shape.
- Run a knife around the edges of each ramekin. Carefully invert onto dessert plates. If they stick, gently tap or wiggle until they release.
- Optional: Dust with powdered sugar or garnish with fresh berries and a dollop of whipped cream for an extra special touch.
Pro tip: If you want to prep ahead, you can assemble the batter in the ramekins and refrigerate them covered with plastic wrap for up to 24 hours. Bring them to room temperature before baking, and you might need to add a minute or two to the bake time.
Cooking Tips & Techniques
Making red velvet lava cakes can be straightforward, but a few insider tips will make your results shine:
- Temperature is key: Preheat the oven fully before baking. A too-low oven will cook the cake all the way through, losing the molten center.
- Don’t overmix the batter: Overworking the flour can make the cake dense rather than tender. Fold gently!
- Watch the bake time carefully: These cakes bake fast. Check at 12 minutes and do not open the oven door early or the temperature will drop.
- Use room temperature eggs: This helps the batter emulsify and rise better.
- Grease ramekins well: Butter and cocoa powder combo prevents sticking better than flour alone, especially with these gooey cakes.
- If your lava is not molten: Try decreasing bake time by one or two minutes next round. For too runny centers, bake a minute longer.
One time, I left the cakes in for 16 minutes—big mistake! They came out fully baked with no lava at all. After a couple of tests, I nailed the timing and now it’s foolproof. Honestly, patience and attention to timing are your best friends here.
Variations & Adaptations
Want to switch things up? This red velvet lava cakes recipe is flexible and easy to personalize:
- Dietary Variation: Use gluten-free flour blend instead of all-purpose for a gluten-free version. Coconut flour can work too but adjust liquids as it absorbs more moisture.
- Flavor Twist: Add a teaspoon of espresso powder to the batter to deepen the chocolate flavor without making it taste like coffee.
- Filling Swap: Replace the semisweet chocolate with white chocolate or cream cheese filling for a different molten surprise.
- Seasonal Adaptation: Fold in fresh raspberries or chopped strawberries into the batter for a fruity pop.
I once tried making a peppermint red velvet lava cake by adding peppermint extract and topping with crushed candy canes—holiday magic on a plate! Just be careful with extracts; a little goes a long way.
Serving & Storage Suggestions
Serve these red velvet lava cakes warm—straight from the oven is best. The molten center is at its most decadent when warm and gooey, so plan to plate and serve immediately.
Presentation-wise, a light dusting of powdered sugar, a scoop of vanilla ice cream, or a dollop of whipped cream complements the richness beautifully. Fresh berries add a refreshing contrast and a pop of color.
If you have leftovers (though unlikely!), store cooled cakes in an airtight container in the refrigerator for up to 2 days. To reheat, pop them in the microwave for about 20 seconds to soften the center again. Avoid reheating in the oven as it can dry them out.
Interestingly, the flavors mellow and become more harmonious after resting, but the lava effect diminishes once cooled, so fresh is always best for that wow factor.
Nutritional Information & Benefits
Each red velvet lava cake serving contains approximately 350 calories, with around 20g of fat, 35g of carbohydrates, and 5g of protein. The use of real butter and chocolate means it’s a richer dessert, but using quality ingredients ensures a satisfying treat.
Key ingredients like cocoa powder provide antioxidants, and buttermilk adds calcium and probiotics, making it a slightly more nourishing choice than many desserts. Plus, the portion-controlled ramekins help keep indulgence in check.
For those watching dietary needs, swapping ingredients like using coconut sugar and gluten-free flour can tailor this recipe to fit various lifestyles without sacrificing flavor.
Conclusion
If you’re looking for a dessert that combines effortless preparation with a dazzling presentation and unforgettable flavor, this red velvet lava cakes recipe is your ticket. It’s a dessert that turns simple ingredients into a luxurious experience, perfect for impressing guests or treating yourself after a long day.
What I love most is how it feels both indulgent and approachable—like a secret recipe you’re excited to share but proud to claim as your own. Don’t hesitate to tweak it to your tastes, whether adding a personal twist or making it allergy-friendly.
Give this recipe a try, and I’d love to hear your thoughts! Share your variations or any tips you’ve discovered along the way. Happy baking, friends!
Frequently Asked Questions About Red Velvet Lava Cakes
Can I make red velvet lava cakes ahead of time?
You can prepare the batter and fill the ramekins up to 24 hours in advance, covering them tightly with plastic wrap and refrigerating. Bring to room temperature before baking, and add a minute or two to the bake time.
What if I don’t have buttermilk? Can I substitute it?
Yes! Mix 1 tablespoon of lemon juice or white vinegar with 1 cup of milk, let it sit for 5 minutes, and use it as a buttermilk substitute.
How do I prevent the cakes from sticking to the ramekins?
Grease the ramekins thoroughly with butter and dust with cocoa powder, shaking out the excess. This combo helps the cakes release easily after baking.
Can I use white or dark chocolate instead of semisweet?
Absolutely! White chocolate will give a sweeter, creamier center, while dark chocolate adds richness and intensity. Adjust sugar slightly if using very sweet chocolate.
What’s the best way to serve red velvet lava cakes?
Serve warm, dusted with powdered sugar or alongside vanilla ice cream or whipped cream. Fresh berries or a drizzle of chocolate sauce also pair wonderfully.
Pin This Recipe!
Red Velvet Lava Cakes

A quick and easy homemade dessert featuring classic red velvet cake flavors with a molten, gooey chocolate center. Perfect for impressing guests with minimal effort.
- Prep Time: 10 minutes
- Cook Time: 14 minutes
- Total Time: 24 minutes
- Yield: 4 servings 1x
- Category: Dessert
- Cuisine: American
Ingredients
- 6 tablespoons unsalted butter (85g)
- 4 ounces semisweet chocolate, finely chopped (115g)
- 1/2 cup all-purpose flour (65g)
- 2 tablespoons unsweetened cocoa powder, sifted (15g)
- 3/4 cup granulated sugar (150g)
- 2 large eggs, room temperature
- 1/4 cup buttermilk (60ml) or substitute with 1 tablespoon lemon juice + milk to make 1/4 cup
- 1 teaspoon vanilla extract
- 1 tablespoon red food coloring (gel or liquid)
- 1/4 teaspoon salt
- Powdered sugar (optional, for dusting)
Instructions
- Preheat your oven to 425°F (220°C). Grease four 6-ounce ramekins generously with butter and lightly dust with cocoa powder to prevent sticking.
- Melt the butter and chopped semisweet chocolate together using a double boiler or microwave in 20-second bursts, stirring each time until smooth and shiny. Set aside to cool slightly.
- In a medium bowl, whisk together the flour, cocoa powder, sugar, and salt until no lumps remain.
- In another bowl, beat the eggs until frothy. Add the buttermilk, vanilla extract, and red food coloring, stirring until combined.
- Slowly pour the melted chocolate mixture into the wet ingredients and stir gently to combine.
- Fold the dry ingredients into the wet ingredients carefully until no flour streaks remain. The batter should be thick but pourable.
- Divide the batter evenly among the prepared ramekins, filling each about 3/4 full.
- Bake in the preheated oven for 12 to 14 minutes until edges are set and slightly puffed but centers remain soft and jiggly.
- Remove from oven and let the cakes cool for 1 minute.
- Run a knife around the edges of each ramekin and carefully invert onto dessert plates. If they stick, gently tap or wiggle until they release.
- Optional: Dust with powdered sugar or garnish with fresh berries and whipped cream.
Notes
Use room temperature eggs for better emulsification. Grease ramekins well with butter and dust with cocoa powder to prevent sticking. Watch bake time carefully to maintain molten center. Batter can be prepared and refrigerated in ramekins up to 24 hours ahead; bring to room temperature before baking and add 1-2 minutes to bake time.
Nutrition
- Serving Size: 1 lava cake (6-ounce
- Calories: 350
- Sugar: 25
- Sodium: 150
- Fat: 20
- Saturated Fat: 12
- Carbohydrates: 35
- Fiber: 3
- Protein: 5
Keywords: red velvet lava cakes, molten lava cake, red velvet dessert, easy lava cake, homemade dessert, chocolate lava cake


