Introduction
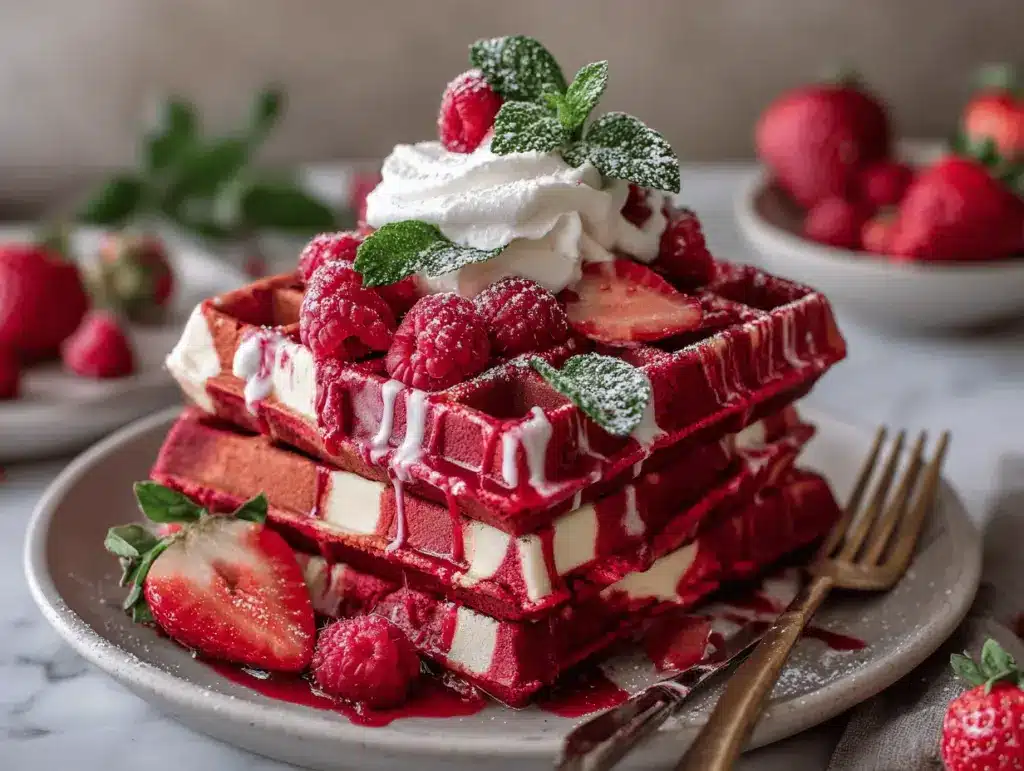
You know that moment when you catch the scent of cocoa and vanilla swirling through your kitchen, and you just know something special is about to hit your breakfast table? That’s exactly how I feel every time I whip up these Red Velvet Marble Waffles. The first time I made them, it was a snowy weekend morning—one of those days where you crave comfort but still want a little drama. That’s when the idea for red velvet waffles struck me, but I couldn’t resist marbling them with classic vanilla batter for that gorgeous, Insta-worthy swirl. If you’re like me and love a bit of flair with your breakfast, this recipe has your name all over it.
Honestly, these waffles are more than just a pretty face. The red velvet flavor is rich and slightly tangy, and when you drizzle on the creamy, sweet cream cheese glaze, it’s pure bliss. Add a handful of fresh berries on top, and suddenly, breakfast feels like a celebration. I’ve made these for birthdays, cozy brunches, and even to impress my in-laws (it worked!). The best part? They’re surprisingly easy, even if you’re not a baking whiz. You’ll get all the nostalgia of classic red velvet cake, but in a format that’s perfect for sharing and pinning.
As someone who’s tested more waffle recipes than I care to admit, I can vouch for how foolproof this one is. Whether you’re treating yourself, feeding a crowd, or just want an excuse to bust out your waffle iron, these Red Velvet Marble Waffles with Cream Cheese Glaze & Berries are bound to become a favorite. Let’s dig in—your morning is about to get a whole lot sweeter!
Why You’ll Love This Recipe
- Quick & Easy: These waffles come together in about 30 minutes, so you don’t have to wait forever to enjoy a spectacular breakfast.
- Simple Ingredients: No need for fancy stuff—the basics like flour, cocoa, and buttermilk are probably already in your pantry.
- Perfect for Brunch or Special Occasions: The marbled look and rich flavor make these a showstopper for birthdays, holidays, or lazy Sunday mornings.
- Crowd-Pleaser: Kids love the vibrant color, adults go wild for the cream cheese glaze—everyone asks for seconds.
- Unbelievably Delicious: Imagine the classic red velvet taste, but crisp on the outside and fluffy inside, with sweet and tangy glaze melting over warm waffles.
After baking these Red Velvet Marble Waffles for family gatherings and foodie friends, I’ve gotten raves every time. What makes them stand out? The marbling technique isn’t just for looks—it actually gives you the best of both worlds: cocoa richness and vanilla warmth in every bite. I blend the batters just enough for that dramatic swirl (not too much, or you’ll lose the effect!).
The cream cheese glaze is my secret weapon—it’s thick but pourable, so it hugs every nook and cranny of the waffle. And let’s face it, the berries on top add a pop of freshness and color that makes these waffles practically Pinterest-perfect. If you’ve ever felt intimidated by red velvet anything, trust me, this recipe will change your mind. It’s forgiving, fun, and totally worthy of a spot in your breakfast rotation.
Honestly, there’s nothing better than seeing someone’s eyes light up when they take that first bite. These waffles are comfort food at its finest—warm, sweet, and just a little bit fancy. Whether you want to treat yourself or wow a crowd, you can’t go wrong with this recipe.
What Ingredients You Will Need
This recipe uses classic, wholesome ingredients to create bold flavor and that signature red velvet look—without a million steps or specialty products. Most of these are pantry staples, and you can swap in a few things if needed (I’ll share those tips along the way!).
- For the Red Velvet Batter:
- 1 cup (125g) all-purpose flour
- 2 tbsp (14g) unsweetened cocoa powder (Dutch-processed for deeper color and flavor)
- 2 tbsp (25g) granulated sugar
- 1 tsp baking powder
- 1/4 tsp baking soda
- 1/4 tsp salt
- 3/4 cup (180ml) buttermilk (adds tang and tenderness)
- 2 tbsp (28g) unsalted butter, melted
- 1 large egg (room temperature)
- 1 tsp vanilla extract
- 2 tsp red food coloring (use gel for vibrant color; natural beet powder works too)
- For the Vanilla Batter:
- 1 cup (125g) all-purpose flour
- 2 tbsp (25g) granulated sugar
- 1 tsp baking powder
- 1/4 tsp baking soda
- 1/4 tsp salt
- 3/4 cup (180ml) buttermilk
- 2 tbsp (28g) unsalted butter, melted
- 1 large egg
- 2 tsp vanilla extract
- For the Cream Cheese Glaze:
- 4 oz (115g) cream cheese, softened
- 1/2 cup (60g) powdered sugar (sifted for smoothness)
- 2–3 tbsp (30–45ml) milk (whole or 2% works best)
- 1/2 tsp vanilla extract
- Pinch salt
- Berry Topping:
- 1 cup (150g) mixed berries (strawberries, blueberries, raspberries—fresh or thawed frozen)
- Optional: 1 tbsp (12g) granulated sugar (toss with berries for extra shine)
If you need gluten-free waffles, swap in your favorite 1:1 gluten-free flour blend. Dairy-free? Use almond milk with a splash of lemon juice for the buttermilk, and swap cream cheese with a dairy-free version (I’ve tried Kite Hill—works great!). You don’t have to hunt down rare ingredients—just stick to the basics, and you’ll get waffles that taste like pure luxury.
For the cocoa powder, I always use Valrhona or Ghirardelli for deeper chocolate flavor—makes a difference! For food coloring, gel types are best because you get that vivid red without watering down the batter. And honestly, if you want to skip the berries, you can—these waffles are pretty fabulous on their own (but the berries really do make them pop!).
Equipment Needed
- Waffle Iron: Any standard or Belgian waffle maker works. I’ve used both, but Belgian irons give you deeper pockets for glaze!
- Mixing Bowls: Two medium bowls for each batter, and a small bowl for the glaze.
- Whisk & Spatula: A whisk for blending batters; spatula for marbling and scraping.
- Measuring Cups & Spoons: For accuracy. If you bake often, invest in a digital kitchen scale—seriously, it changed my baking game.
- Hand Mixer or Stand Mixer: Optional for the glaze; a whisk works if cream cheese is super soft.
- Wire Rack: For cooling waffles so they stay crisp (I learned this the hard way!).
- Serving Plate or Platter: For that Pinterest-ready presentation.
If you don’t have a waffle iron, you can use a grill pan or even make pancakes out of the same batter—just adjust cooking time. For clean-up, a silicone spatula helps scrape out every last bit of batter, and nonstick spray is a must for easy waffle release. I’ve tried cheap waffle irons and pricier ones; honestly, both work as long as you preheat and clean them well. Pro tip: Wipe down after each batch for longevity!
Preparation Method
- Preheat your waffle iron. Set to medium-high heat. You want a hot iron so your waffles cook evenly and get crisp edges. (Usually takes 5–8 minutes.)
- Make red velvet batter:
- In a medium bowl, sift together 1 cup (125g) flour, 2 tbsp (14g) cocoa powder, 2 tbsp (25g) sugar, 1 tsp baking powder, 1/4 tsp baking soda, and 1/4 tsp salt.
- In another bowl, whisk 3/4 cup (180ml) buttermilk, 2 tbsp (28g) melted butter, 1 large egg, 1 tsp vanilla, and 2 tsp red food coloring until well combined.
- Pour wet into dry ingredients and whisk until just combined. Don’t overmix—some lumps are okay.
- Make vanilla batter:
- In a separate bowl, sift 1 cup (125g) flour, 2 tbsp (25g) sugar, 1 tsp baking powder, 1/4 tsp baking soda, and 1/4 tsp salt.
- In another bowl, whisk 3/4 cup (180ml) buttermilk, 2 tbsp (28g) melted butter, 1 large egg, and 2 tsp vanilla extract.
- Combine wet and dry ingredients, mixing until just combined.
- Marble the batters: Spoon dollops of red velvet and vanilla batter side by side onto the preheated waffle iron. Use a chopstick or skewer to gently swirl them together (don’t overmix—you want clear swirls!).
- Cook waffles: Close the lid and cook for 4–5 minutes (Belgian irons may take up to 6 minutes). Waffles should be crisp at the edges and springy in the center. If they stick, let them sit for 30 seconds before lifting.
- Repeat: Continue with remaining batters, wiping the iron with a paper towel between batches if needed. Place cooked waffles on a wire rack to stay crisp while you finish the batch.
- Make cream cheese glaze:
- Beat 4 oz (115g) cream cheese in a small bowl until smooth.
- Add 1/2 cup (60g) powdered sugar, 2–3 tbsp (30–45ml) milk, 1/2 tsp vanilla, and pinch salt. Beat or whisk until thick but pourable. If too thick, add a splash more milk.
- Taste and adjust sweetness if needed.
- Prep berries: Toss 1 cup (150g) mixed berries with 1 tbsp sugar (optional) for extra shine and sweetness.
- Serve: Stack warm waffles on a plate, drizzle generously with cream cheese glaze, and top with plenty of berries.
If your waffles turn out pale or soggy, your iron wasn’t hot enough or the batter was too runny. Try adding a tablespoon more flour if needed. And don’t forget—let your waffles rest on a wire rack to keep that crunch!
I love making extra glaze for dipping, and sometimes I use strawberries only when they’re in season. Efficiency tip: Mix both batters at the same time (get kids involved for swirling—the mess is half the fun!).
Cooking Tips & Techniques
Here’s the thing about Red Velvet Marble Waffles: the technique is what makes them unforgettable. I’ve had my share of waffle fails—burnt edges, soggy middles, weirdly pink batter… But after a few dozen tries, I’ve learned what works.
- Preheat Thoroughly: Don’t rush the waffle iron. A properly heated iron gives you crisp, golden waffles every time. (If the first batch is pale, wait a few more minutes!)
- Don’t Overmix: Both batters should be slightly lumpy. Overmixing leads to tough waffles—a gentle hand is key.
- Marble, Don’t Blend: Use a skewer to swirl, not stir. You want ribbons of color, not a uniform pink. If you swirl too much, the effect disappears.
- Oil or Spray the Iron: Even nonstick irons like a little help—grease between batches for easy release. Learned this after scraping one too many stuck waffles!
- Let Waffles Rest: Place cooked waffles on a wire rack, not a plate, so steam escapes and they stay crisp.
I’ve also discovered that multitasking helps—while the first waffle cooks, prep your cream cheese glaze and berries. That way, everything’s ready to assemble as soon as the last waffle is done. Timing is everything for serving these warm and fresh!
If you want extra crunchy edges, leave the waffles in the iron an extra 30 seconds. But watch closely—the color makes it hard to tell if they’re browning too much. Don’t worry if you get a little uneven marbling; honestly, that’s part of the fun and the homemade charm.
Variations & Adaptations
You can absolutely make these Red Velvet Marble Waffles your own. Here are a few fun twists I’ve tried (and loved):
- Gluten-Free: Use a 1:1 gluten-free baking flour blend. The marble effect and flavor stay the same (I’ve done this for my sister-in-law—no complaints!)
- Dairy-Free: Swap buttermilk for almond milk + 1 tsp lemon juice, and use plant-based butter and cream cheese. The glaze is a little lighter, but still dreamy.
- Chocolate Explosion: Add mini chocolate chips to either batter for pockets of melty chocolate. My kids beg for this version!
- Seasonal Berry Swap: Use fresh peaches or cherries when berries are out of season. Even a quick berry compote works in winter.
- Nut-Free: This recipe is naturally nut-free, but double-check your cocoa powder and other ingredients for cross-contamination if needed.
- Flavor Boost: Add a pinch of cinnamon or espresso powder to the red velvet batter for a deeper flavor (I do this for adult brunches—so good!).
Once, I even did a pumpkin swirl in the fall—subbed half the vanilla batter for pumpkin puree and a dash of spice. It worked surprisingly well! If you want to play around, try marbling with matcha or coffee batter for a whole new twist. The beauty of this recipe is how forgiving it is—just keep the base ratios, and you’ll get waffles that look and taste amazing.
Serving & Storage Suggestions
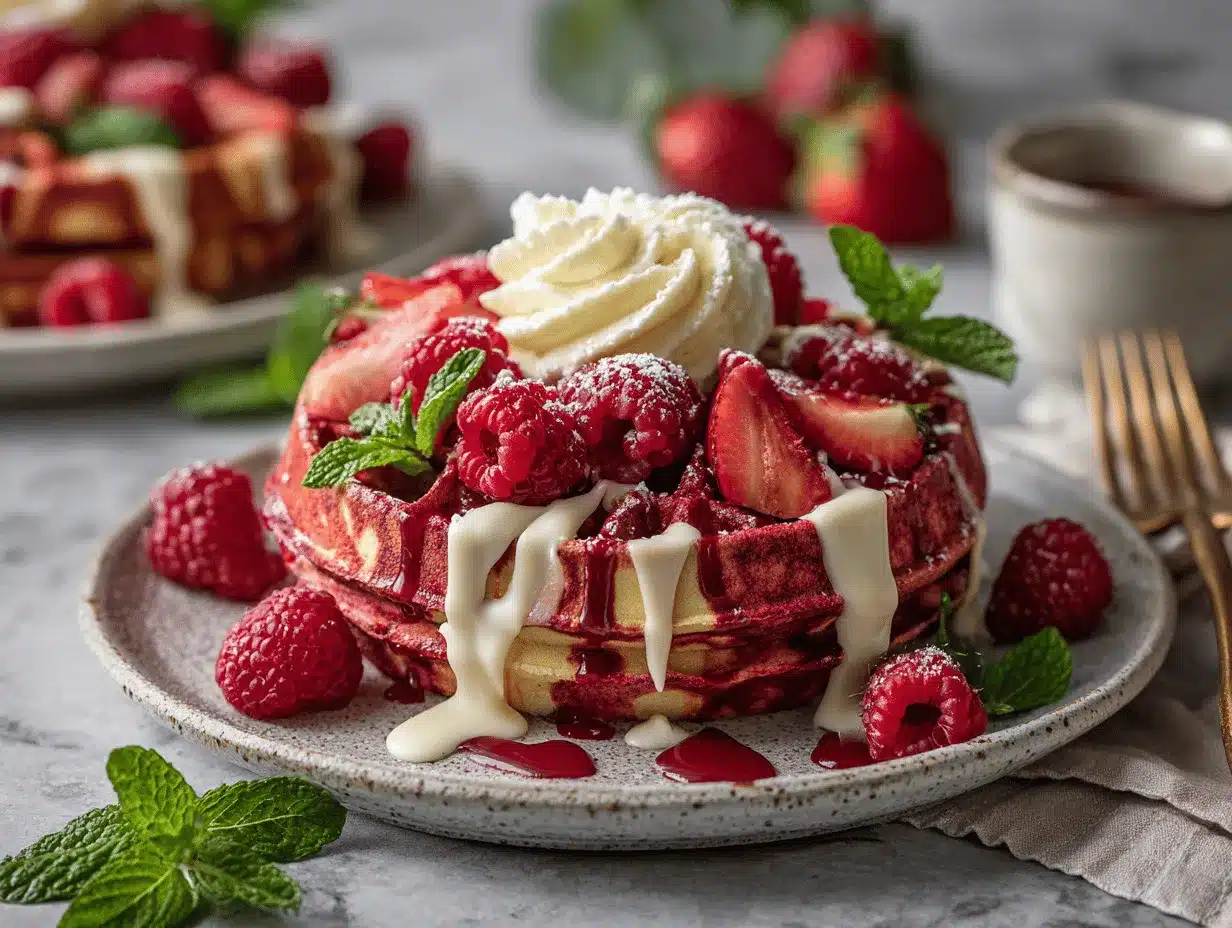
Red Velvet Marble Waffles are best served hot, right off the iron. Stack them high, drizzle with cream cheese glaze (go heavy—it’s not the time for restraint), and pile on the berries. If you want that Pinterest-perfect look, sprinkle a little powdered sugar over the berries for extra sparkle.
- Serving Temperature: Serve warm for the best texture. If you need to hold them, pop finished waffles in a 200°F (95°C) oven on a wire rack for up to 20 minutes.
- Presentation: Arrange waffles in a fan pattern on a platter, drizzle glaze in zigzags, and scatter berries strategically for a feast for the eyes.
- Pairings: These waffles go great with hot coffee, a vanilla latte, or even sparkling brunch cocktails. For a full brunch, serve with crispy bacon or breakfast sausage on the side.
- Storage: Leftovers? Cool waffles completely, then store in an airtight container in the fridge for up to 3 days. Freeze for up to 2 months—separate layers with parchment to prevent sticking.
- Reheating: Toast waffles in a toaster or warm in a 350°F (175°C) oven for 5–7 minutes. Skip the microwave—makes them soggy.
- Flavor Over Time: The glaze thickens as it sits, and the flavors meld. Waffles are even more flavorful the next day (if you have any leftovers!).
For a fun brunch spread, let guests build their own stacks—set out bowls of glaze, berries, and even mini chocolate chips or nuts. It’s interactive and makes everyone happy!
Nutritional Information & Benefits
Here’s the scoop on what you’re eating (estimated per waffle with glaze and berries):
- Calories: roughly 320
- Protein: 7g
- Fat: 12g
- Carbs: 44g
- Fiber: 2g
- Sugar: 18g
Key ingredients like cocoa powder offer antioxidants, while berries add vitamin C and fiber. The buttermilk gives you calcium and a touch of gut-friendly cultures. For gluten-free or dairy-free needs, see my swaps above—these waffles are adaptable for most diets. That said, they do contain eggs, dairy, and wheat, so check labels if you have allergies.
From a wellness perspective, I love that you get a little protein and some fruit in each serving. It’s a treat, but with benefits! I always feel good serving these for brunch—satisfying but not over-the-top heavy.
Conclusion
If you’re searching for a breakfast that’s bold, beautiful, and downright delicious, these Red Velvet Marble Waffles with Cream Cheese Glaze & Berries deliver every single time. The marbling gives you bakery-level flair, but with the comfort of homemade. It’s honestly one of my favorite recipes to make when I want to wow someone—whether it’s family, friends, or just myself on a quiet Saturday.
Don’t be afraid to tweak the flavors or toppings to suit your crew. I’ve made these with extra chocolate, swapped in seasonal fruits, and even tried dairy-free versions—always a hit. The best part? You get all the fun of red velvet cake, but with way less fuss and way more crunch.
I’d love to hear how your batch turns out! Drop a comment below with your favorite swirl or berry combo, pin this recipe for later, or share your own adaptation. Happy waffle-making—may your mornings be sweet and a little bit fancy!
FAQs
Can I make these Red Velvet Marble Waffles ahead of time?
Yes! Cook, cool, and store in the fridge or freezer. Reheat in the toaster or oven for crispiness before serving.
Do I need a Belgian waffle maker for this recipe?
Nope! Any standard waffle iron works. Belgian irons just give deeper pockets for glaze and berries.
Can I use natural food coloring instead of red food dye?
Absolutely. Beet powder or natural gel food coloring will give a reddish hue, though it may be softer than classic red velvet.
Is there a way to make the cream cheese glaze dairy-free?
Yes! Substitute plant-based cream cheese and non-dairy milk. The glaze will be a bit lighter, but still delicious.
How do I prevent waffles from sticking to the iron?
Preheat fully and use nonstick spray or a little oil between batches. Don’t rush—let the waffles cook before lifting the lid.
Pin This Recipe!
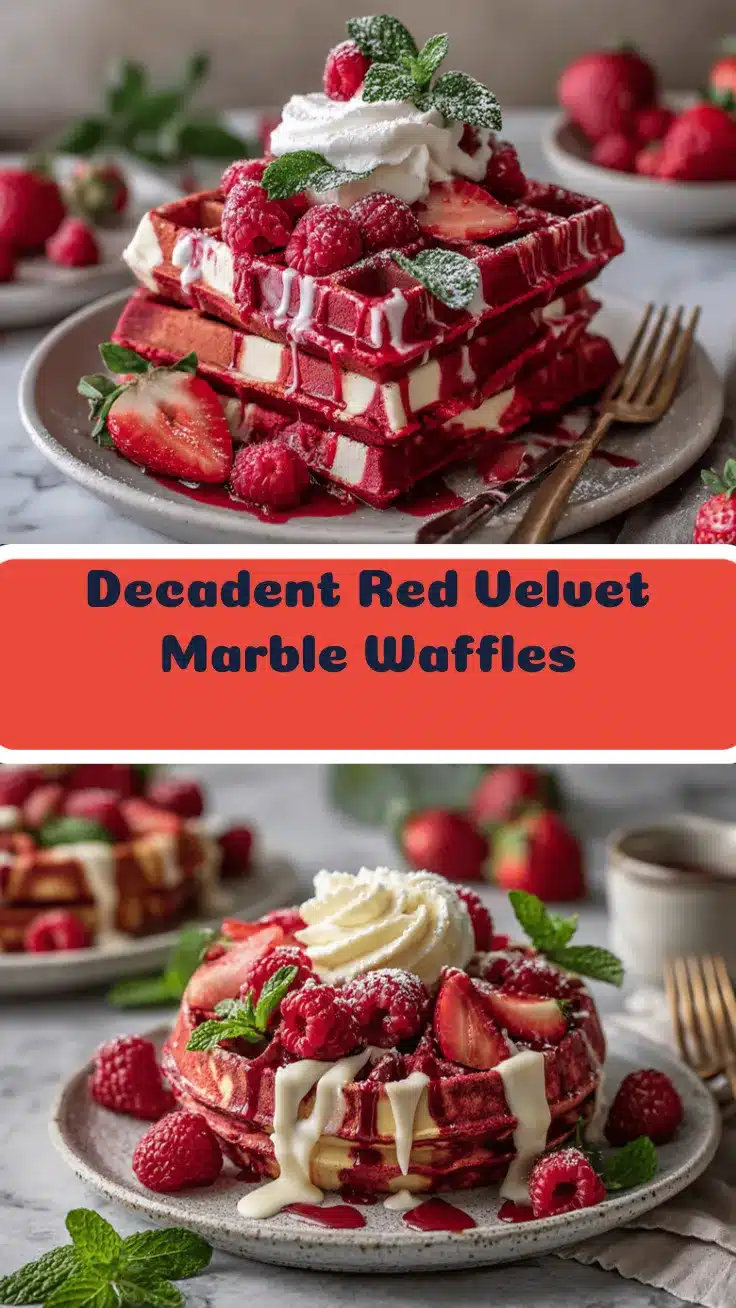
Red Velvet Marble Waffles with Cream Cheese Glaze and Berry Topping

These Red Velvet Marble Waffles combine rich cocoa and classic vanilla batters for a stunning marbled effect, topped with a luscious cream cheese glaze and fresh berries. Perfect for brunch, special occasions, or whenever you want to treat yourself to a bakery-worthy breakfast at home.
- Prep Time: 15 minutes
- Cook Time: 15 minutes
- Total Time: 30 minutes
- Yield: 4 servings 1x
- Category: Breakfast
- Cuisine: American
Ingredients
- For the Red Velvet Batter:
- 1 cup (125g) all-purpose flour
- 2 tbsp (14g) unsweetened cocoa powder (Dutch-processed preferred)
- 2 tbsp (25g) granulated sugar
- 1 tsp baking powder
- 1/4 tsp baking soda
- 1/4 tsp salt
- 3/4 cup (180ml) buttermilk
- 2 tbsp (28g) unsalted butter, melted
- 1 large egg (room temperature)
- 1 tsp vanilla extract
- 2 tsp red food coloring (gel preferred, or beet powder)
- For the Vanilla Batter:
- 1 cup (125g) all-purpose flour
- 2 tbsp (25g) granulated sugar
- 1 tsp baking powder
- 1/4 tsp baking soda
- 1/4 tsp salt
- 3/4 cup (180ml) buttermilk
- 2 tbsp (28g) unsalted butter, melted
- 1 large egg
- 2 tsp vanilla extract
- For the Cream Cheese Glaze:
- 4 oz (115g) cream cheese, softened
- 1/2 cup (60g) powdered sugar, sifted
- 2–3 tbsp (30–45ml) milk (whole or 2%)
- 1/2 tsp vanilla extract
- Pinch salt
- Berry Topping:
- 1 cup (150g) mixed berries (strawberries, blueberries, raspberries—fresh or thawed frozen)
- Optional: 1 tbsp (12g) granulated sugar (for tossing with berries)
Instructions
- Preheat your waffle iron to medium-high heat (about 5–8 minutes).
- Make the red velvet batter: In a medium bowl, sift together flour, cocoa powder, sugar, baking powder, baking soda, and salt. In another bowl, whisk buttermilk, melted butter, egg, vanilla, and red food coloring. Pour wet into dry ingredients and whisk until just combined (some lumps are okay).
- Make the vanilla batter: In a separate bowl, sift flour, sugar, baking powder, baking soda, and salt. In another bowl, whisk buttermilk, melted butter, egg, and vanilla. Combine wet and dry ingredients, mixing until just combined.
- Marble the batters: Spoon dollops of red velvet and vanilla batter side by side onto the preheated waffle iron. Use a chopstick or skewer to gently swirl them together (do not overmix).
- Cook waffles: Close the lid and cook for 4–5 minutes (Belgian irons may take up to 6 minutes) until crisp at the edges and springy in the center. If they stick, let them sit for 30 seconds before lifting.
- Repeat with remaining batters, wiping the iron with a paper towel between batches if needed. Place cooked waffles on a wire rack to stay crisp.
- Make the cream cheese glaze: Beat cream cheese in a small bowl until smooth. Add powdered sugar, milk, vanilla, and salt. Beat or whisk until thick but pourable. Add more milk if needed for consistency. Taste and adjust sweetness if desired.
- Prep berries: Toss mixed berries with sugar (optional) for extra shine and sweetness.
- Serve: Stack warm waffles on a plate, drizzle generously with cream cheese glaze, and top with plenty of berries.
Notes
For gluten-free waffles, use a 1:1 gluten-free flour blend. For dairy-free, substitute almond milk with lemon juice for buttermilk and use plant-based butter and cream cheese. Preheat the waffle iron thoroughly for crisp waffles, and avoid overmixing the batters to keep them tender. Let cooked waffles rest on a wire rack to maintain crispness. The marbling technique is key—swirl gently for best visual effect. Waffles can be made ahead and reheated in a toaster or oven.
Nutrition
- Serving Size: 1 waffle with glaze and berries
- Calories: 320
- Sugar: 18
- Sodium: 350
- Fat: 12
- Saturated Fat: 7
- Carbohydrates: 44
- Fiber: 2
- Protein: 7
Keywords: red velvet waffles, marble waffles, cream cheese glaze, brunch, breakfast, berry topping, easy waffles, special occasion breakfast, American waffles, homemade waffles


