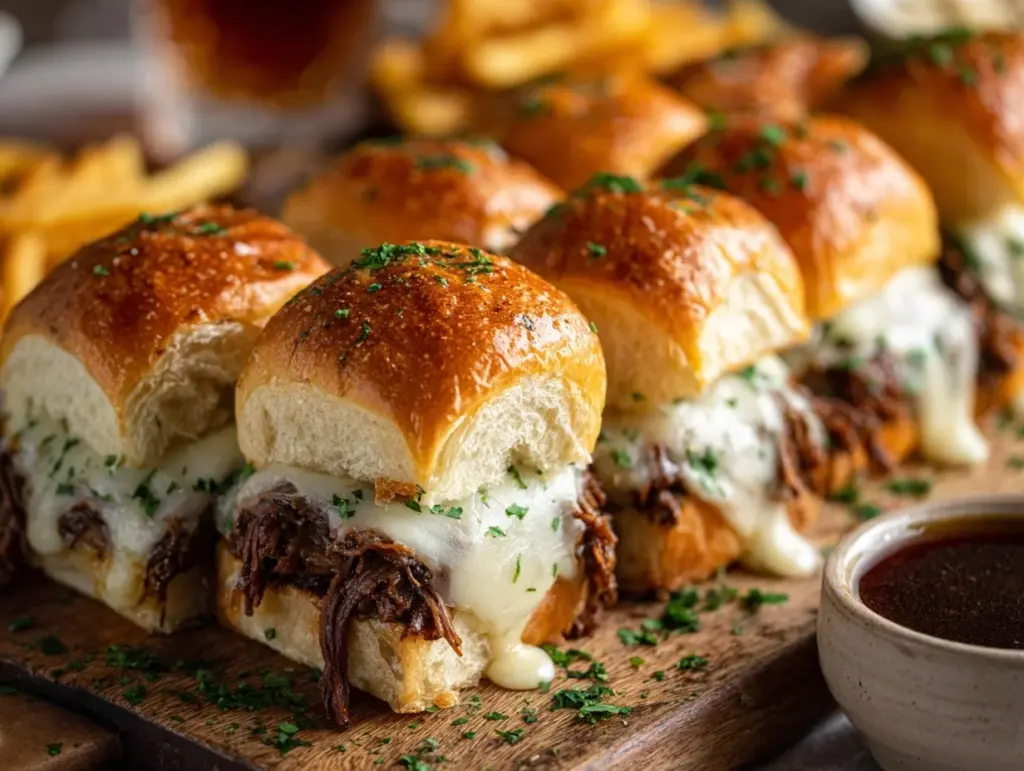
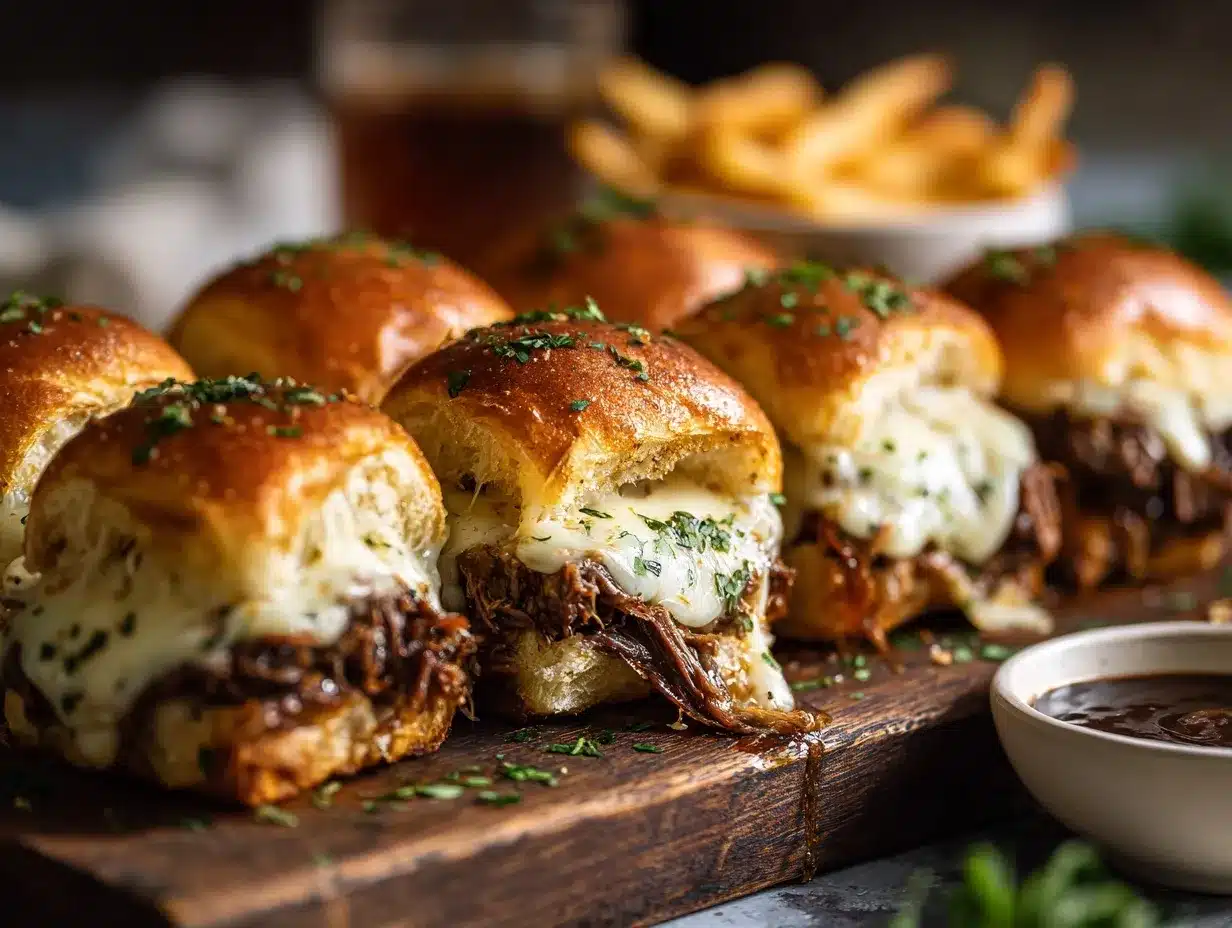
Buttery garlic bread, gooey melted cheese, and tender roast beef—honestly, if comfort food had a mascot, it’d be these Cheesy Garlic Bread French Dip Sliders. Just thinking about them makes my stomach do a happy little dance. The smell alone—garlic sizzling in butter, cheese bubbling in the oven—will have everyone wandering into your kitchen, noses in the air, waiting (not so patiently) for a taste.
I first stumbled upon this idea during a Sunday game day, when I wanted something heartier than chips but less fussy than a full-blown meal. Let’s face it, sliders are always a win at parties, but turning them into mini French dips with a garlic bread twist? That’s when things got interesting. The first batch disappeared before I could even grab seconds. I’ve tweaked and perfected this recipe over time, balancing just the right amount of garlic, making sure the bread stays crisp on the outside but pillowy in the middle, and nailing that melty cheese pull everyone loves.
These Cheesy Garlic Bread French Dip Sliders look fancy enough for a holiday spread but are simple enough for a random Tuesday night. They’re a lifesaver for busy families, picky eaters, and anyone who wants to impress guests with minimal effort. If you’re craving something savory, cheesy, and downright irresistible, this recipe is about to become your new best friend. Trust me—I’ve tested it more times than I can count, and it never lets me down.
Why You’ll Love This Recipe
Let’s be real—these Cheesy Garlic Bread French Dip Sliders aren’t just another party snack. They’re the kind of appetizer that makes people gather around the tray, sneak seconds, and ask for the recipe before they’ve even finished chewing. Here’s why this recipe is an absolute keeper (and why I keep coming back to it, batch after batch):
- Quick & Easy: You’ll have these sliders ready in under 35 minutes. They’re perfect when you want something impressive but don’t want to spend hours in the kitchen.
- Simple Ingredients: No need to hunt down fancy cheeses or specialty meats. Most of these ingredients are probably already in your fridge or pantry.
- Perfect for Parties & Game Days: These sliders are made for sharing—think potlucks, birthday parties, or just a casual movie night with friends.
- Crowd-Pleaser: I’ve never seen anyone turn down one of these. The kids love them, adults go back for more, and even picky eaters ask for the recipe.
- Unbelievable Flavor: Buttery garlic bread on top, melty cheese in the middle, and that savory au jus for dipping—each bite is a little explosion of joy.
- Unique Twist: While other sliders can be dry or bland, these have a rich garlic butter sauce and the fun of French dip—no more boring sandwiches!
- Make-Ahead Friendly: Assemble in advance, pop them in the oven when guests arrive, and serve warm and bubbling. Less stress, more fun.
What sets this recipe apart? I’ve tried plenty of slider recipes, but blending garlic bread with French dip flavor is a total game-changer. The secret is in the garlic butter—brushed on before and after baking for an out-of-this-world crust—and the way the cheese melts into every nook and cranny. It’s comfort food, but with a little extra magic. It’s that “eyes-closed, sigh of happiness” kind of bite. Whether you’re hosting a party or just want to treat yourself, you really can’t go wrong with these Cheesy Garlic Bread French Dip Sliders.
What Ingredients You Will Need
This recipe keeps things simple but delivers huge on taste. Each ingredient is there for a reason—no fluff, just pure slider goodness. Here’s what you’ll need for these Cheesy Garlic Bread French Dip Sliders:
- Slider Buns (12-count, soft dinner rolls or Hawaiian rolls): Soft, slightly sweet rolls work best. I love using King’s Hawaiian, but any fluffy dinner roll will do. (Day-old rolls? Even better—they hold up to the au jus!)
- Deli Roast Beef (1 pound, thinly sliced): Go for high-quality roast beef, preferably from the deli counter. I’ve tried everything from budget to top-shelf, and a good roast beef really makes a difference.
- Provolone Cheese (8-10 slices): Melts beautifully and has a mild flavor, but you can play around with Swiss or mozzarella if you want a twist.
- Unsalted Butter (8 tablespoons/113g, melted): The base for that magical garlic bread flavor. Don’t skimp!
- Fresh Garlic (4 cloves, minced): Raw garlic brings a punch—use fresh, not jarred, for the best flavor. (Pre-minced garlic will work in a pinch.)
- Fresh Parsley (2 tablespoons, chopped): For color and a fresh note that cuts through the richness.
- Onion Powder (1 teaspoon): Adds depth to the garlic butter. Sometimes I sneak in a pinch of garlic powder, too.
- Worcestershire Sauce (1 tablespoon): Stirred into the au jus for umami magic. Trust me, don’t skip it!
- Beef Broth (2 cups/475 ml): The base for the French dip. Use low-sodium if you want to control the saltiness.
- Salt & Pepper: To taste. I usually start with 1/2 teaspoon each and adjust after tasting.
Optional Extras:
- Mozzarella Cheese: For extra gooeyness, add a handful along with the provolone.
- Red Pepper Flakes: Sprinkle a pinch in the garlic butter for a little kick.
- Horseradish Cream or Dijon Mustard: Serve on the side for dipping, especially if you like a little heat.
If you want to swap ingredients, you totally can. I’ve made these with turkey deli meat, gluten-free rolls, and even a dairy-free cheese for friends with allergies. The recipe is forgiving, but each element really brings something special. If you’re heading to the store, grab the freshest rolls and best beef you can—it’s worth it!
Equipment Needed
- 9×13-inch Baking Dish or Casserole Pan: Perfect size for a dozen sliders. If you’re doubling up, use a sheet pan.
- Medium Saucepan: For simmering up that beautiful au jus. A nonstick pan makes cleanup easier, but any saucepan works.
- Small Mixing Bowl: For mixing up your garlic butter. A glass bowl is easiest for melting butter in the microwave.
- Basting Brush: Makes brushing the garlic butter quick and mess-free. If you don’t have one, use the back of a spoon.
- Serrated Bread Knife: For slicing the rolls cleanly so they don’t squish. I learned this the hard way with a regular knife—trust me, serrated is the way to go.
- Aluminum Foil: For covering the sliders so they bake up melty but not too browned. You can reuse foil to keep things budget-friendly.
- Sharp Chef’s Knife & Cutting Board: For mincing garlic and parsley. If you’re in a rush, a garlic press saves time.
I’ve made these sliders in everything from my grandma’s old Pyrex to disposable foil trays for tailgates. The key is even heat—don’t overcrowd your pan. And if you’re short on tools, improvise! I once used a clean paintbrush when I lost my basting brush—worked like a charm.
Preparation Method
-
Prep the Oven and Baking Dish:
Preheat your oven to 350°F (175°C). Lightly grease a 9×13-inch pan with a bit of melted butter or nonstick spray. This keeps the rolls from sticking and adds a little extra crispness to the bottoms. -
Make the Garlic Butter:
In a small mixing bowl, combine 8 tablespoons (113g) melted unsalted butter, 4 minced garlic cloves, 2 tablespoons chopped parsley, 1 teaspoon onion powder, and a pinch of salt and pepper. Taste and adjust seasoning if needed. If you like a little heat, now’s the time for a shake of red pepper flakes. -
Slice the Buns:
Using a serrated bread knife, slice the entire slab of slider rolls in half horizontally—keep the bottoms and tops intact as single pieces. Don’t pull them apart individually; it’s so much easier to assemble this way. -
Assemble the Sliders:
Place the bottom half of the rolls in your baking dish. Brush generously with garlic butter (about 1/3 of your mixture). Layer on half of your provolone cheese slices. Pile on the thinly sliced roast beef, spreading it evenly. Top with the remaining provolone, then place the top half of the buns over everything. -
Brush and Bake:
Brush the tops of the rolls with the rest of your garlic butter—get into all those little nooks and crannies. Cover the pan tightly with foil and bake for 18 minutes, then remove the foil and bake another 7-10 minutes, until the cheese is melty and the tops are golden brown. -
Make the Au Jus:
While the sliders bake, combine 2 cups (475ml) beef broth and 1 tablespoon Worcestershire sauce in a medium saucepan. Add a pinch of salt and pepper. Bring to a simmer over medium heat and let cook for 5-7 minutes, until slightly reduced and rich in flavor. Taste and adjust seasoning if needed. -
Serve:
When the sliders are golden and bubbling, remove from the oven and let cool for 3-5 minutes (this keeps the cheese from running everywhere). Slice into individual sliders and serve warm, with small bowls of au jus for dipping.
Troubleshooting: If your bottoms are getting too crisp, move the pan up a rack. If the cheese isn’t melting, pop the foil back on for a couple minutes. And if your rolls seem dry, brush with a bit more melted butter before serving. You’ll get the hang of it—I promise!
Cooking Tips & Techniques
- Layer Cheese Strategically: By placing cheese under and over the beef, you keep the sliders from getting soggy and lock in all that juicy flavor. I learned this after a few batches where the bottoms were a little too wet—cheese is your shield!
- Don’t Overfill: It’s tempting to pile on a mountain of roast beef, but too much can make the sliders tough to eat (and messy). A single even layer is perfect for bite-sized happiness.
- Use Fresh Garlic: Jarred garlic is okay in a pinch, but fresh gives you that punchy aroma and flavor that really shines through. I tried both, and fresh always wins.
- Watch the Bake: Ovens vary—a minute too long and the tops can go from golden to burnt. Check at the 18-minute mark and again at 25 minutes. If you’re not sure, a little under is better than over; you can always pop them back in.
- Warm the Au Jus: Serve the dipping sauce hot, not lukewarm. It brings the whole slider together. I accidentally served it cold once—not the same magic.
- Prep Ahead: Assemble the sliders and cover with foil in the fridge up to a day in advance. Just brush with butter and bake when ready. This is a game changer for party planning.
- Cut Cleanly: Use a sharp serrated knife and let the sliders cool for a couple minutes before cutting. This keeps the cheese in place and avoids squished sandwiches.
Little details—like using a fresh parsley garnish or that extra brush of butter—make all the difference. I’ve learned (sometimes the hard way) that patience pays off, especially with recipes like this. Keep it simple, trust your senses, and you’ll knock this out of the park every time.
Variations & Adaptations
One thing I love about these Cheesy Garlic Bread French Dip Sliders is how easy they are to customize. Here are some fun ways to mix things up (and a few I’ve tried myself):
- Gluten-Free: Use your favorite gluten-free rolls. I’ve made these for friends with allergies—just watch the baking time, as GF rolls can brown faster.
- Spicy Kick: Add sliced pickled jalapeños between the beef and cheese, or mix some crushed red pepper into the garlic butter. If you like heat, this really brings it!
- Different Cheeses: Try Swiss, mozzarella, or even sharp cheddar. I once used a combo of provolone and smoked gouda—so melty and delicious.
- Turkey or Chicken: Not a beef fan? Thinly sliced deli turkey or rotisserie chicken make great swaps. Just keep the au jus simple (maybe with chicken broth instead of beef).
- Vegetarian Version: Substitute sautéed mushrooms and spinach for the roast beef, and use vegetable broth for the dip. My sister prefers it this way and swears it’s just as satisfying.
- Dairy-Free: Use plant-based butter and cheese. I’ve made these for a dairy-sensitive friend, and they still had that gooey, garlicky vibe.
Feel free to riff on flavors—add caramelized onions, a swipe of horseradish sauce, or even a sprinkle of everything bagel seasoning on top. The base recipe is super flexible, so make it your own!
Serving & Storage Suggestions
These Cheesy Garlic Bread French Dip Sliders are best served hot from the oven, when the cheese is still gooey and the tops are crisp and fragrant. I love piling them onto a big platter with a sprinkle of fresh parsley and little bowls of steaming au jus for dipping—honestly, watching people dip their sliders is half the fun!
Pairing Ideas: Serve with a simple green salad, crispy potato wedges, or a side of pickles. For drinks, I like a cold beer, sparkling water, or even a light red wine (if you’re feeling fancy).
Storing Leftovers: If you’re lucky enough to have leftovers, store them in an airtight container in the fridge for up to 3 days. The sliders reheat surprisingly well—just wrap in foil and bake at 350°F (175°C) for about 10 minutes, or until warmed through. You can also microwave them in a pinch (about 30 seconds per slider), but the oven keeps the bread crispier.
Freezing: You can freeze baked or unbaked sliders, tightly wrapped, for up to 1 month. Thaw overnight in the fridge, then bake as directed. The garlic butter flavor gets even better after a rest!
Pro tip: Save any extra au jus in a jar for sandwiches or as a soup base. The flavors deepen overnight—so good the next day!
Nutritional Information & Benefits
Each Cheesy Garlic Bread French Dip Slider clocks in at around 260 calories, with about 15g protein, 18g carbs, and 13g fat (this is a ballpark—your numbers may vary based on brands and portions). The sliders deliver a good dose of protein from the roast beef and cheese, and you can lighten things up by using low-fat cheese or leaner deli meats.
Key ingredients like garlic and parsley offer immune-boosting benefits and a pop of freshness. If you’re watching sodium, opt for low-sodium broth and deli meat. For gluten- or dairy-free diets, there are easy swap options, so no one misses out at the party.
From a wellness perspective, I see these sliders as a perfect treat-food—satisfying, portion-controlled, and way better than fast food. They fit into balanced eating when you enjoy them alongside some veggies or a side salad (which is exactly how I like to do it!).
Conclusion
If you’re searching for the ultimate party appetizer or just a cheesy, savory comfort food fix, these Cheesy Garlic Bread French Dip Sliders are the answer. They’re easy to make, wildly flavorful, and always a hit—whether you’re feeding a crowd or treating yourself to something special.
Don’t be afraid to play around with flavors, swap in your favorite cheese, or adjust the seasonings. The recipe is super forgiving and honestly, it just keeps getting better every time I make it. There’s something magical about that combination of garlic bread, melty cheese, and savory beef—one bite, and you’ll see what I mean.
I hope you love these sliders as much as my family and friends do. If you make them, please let me know in the comments, share a photo, or tag me on Pinterest—I’d love to see your creations! Here’s to comfort food, made easy and delicious.
Frequently Asked Questions
Can I make Cheesy Garlic Bread French Dip Sliders ahead of time?
Absolutely! You can assemble the sliders up to a day in advance. Just cover and refrigerate, then brush with garlic butter and bake when you’re ready to serve.
What’s the best cheese for French dip sliders?
Provolone is my go-to for its meltiness and mild flavor, but Swiss, mozzarella, or even sharp cheddar work great too. Mix and match if you like!
How do I keep the sliders from getting soggy?
Layer cheese on both sides of the beef to act as a barrier, and avoid overloading with too much au jus. Serving the dip on the side keeps the bread nice and crisp.
Are these sliders freezer-friendly?
Yes! You can freeze baked or unbaked sliders. Wrap tightly and freeze for up to a month. Thaw before baking or reheating for best results.
Can I make these sliders gluten-free or dairy-free?
Definitely. Use gluten-free rolls and plant-based butter and cheese for a dairy-free version. The recipe is super flexible for different dietary needs.
Pin This Recipe!

Cheesy Garlic Bread French Dip Sliders

Buttery garlic bread, gooey melted cheese, and tender roast beef come together in these irresistible sliders. Perfect as a party appetizer or comforting snack, they’re easy to make and always a crowd-pleaser.
- Prep Time: 10 minutes
- Cook Time: 25 minutes
- Total Time: 35 minutes
- Yield: 12 sliders 1x
- Category: Appetizer
- Cuisine: American
Ingredients
- 12 slider buns (soft dinner rolls or Hawaiian rolls)
- 1 pound deli roast beef, thinly sliced
- 8–10 slices provolone cheese
- 8 tablespoons (1 stick) unsalted butter, melted
- 4 cloves fresh garlic, minced
- 2 tablespoons fresh parsley, chopped
- 1 teaspoon onion powder
- 1 tablespoon Worcestershire sauce
- 2 cups beef broth (low-sodium preferred)
- Salt and pepper, to taste
- Optional: mozzarella cheese (for extra gooeyness)
- Optional: red pepper flakes (for heat)
- Optional: horseradish cream or Dijon mustard (for serving)
Instructions
- Preheat oven to 350°F (175°C). Lightly grease a 9×13-inch baking dish with melted butter or nonstick spray.
- In a small mixing bowl, combine melted butter, minced garlic, chopped parsley, onion powder, and a pinch of salt and pepper. Add red pepper flakes if desired.
- Using a serrated bread knife, slice the entire slab of slider rolls in half horizontally, keeping the tops and bottoms intact.
- Place the bottom half of the rolls in the baking dish. Brush with about 1/3 of the garlic butter mixture.
- Layer half of the provolone cheese slices over the rolls. Evenly distribute the roast beef on top, then add the remaining provolone cheese. Place the top half of the rolls over everything.
- Brush the tops of the rolls with the remaining garlic butter, making sure to cover all surfaces.
- Cover the pan tightly with foil and bake for 18 minutes. Remove foil and bake an additional 7-10 minutes, until cheese is melted and tops are golden brown.
- While sliders bake, combine beef broth and Worcestershire sauce in a medium saucepan. Add a pinch of salt and pepper. Simmer over medium heat for 5-7 minutes until slightly reduced. Adjust seasoning to taste.
- Let sliders cool for 3-5 minutes after baking. Slice into individual sliders and serve warm with bowls of au jus for dipping.
Notes
Layer cheese under and over the beef to prevent soggy sliders. Don’t overfill with meat to keep them easy to eat. Use fresh garlic for best flavor. Assemble ahead and bake when ready to serve. For gluten-free or dairy-free versions, substitute appropriate rolls and cheese. Serve hot with warm au jus for best results.
Nutrition
- Serving Size: 1 slider
- Calories: 260
- Sugar: 3
- Sodium: 600
- Fat: 13
- Saturated Fat: 7
- Carbohydrates: 18
- Fiber: 1
- Protein: 15
Keywords: French dip sliders, cheesy garlic bread sliders, party appetizer, roast beef sliders, easy sliders, game day food, comfort food, garlic bread, provolone cheese, beef au jus


