
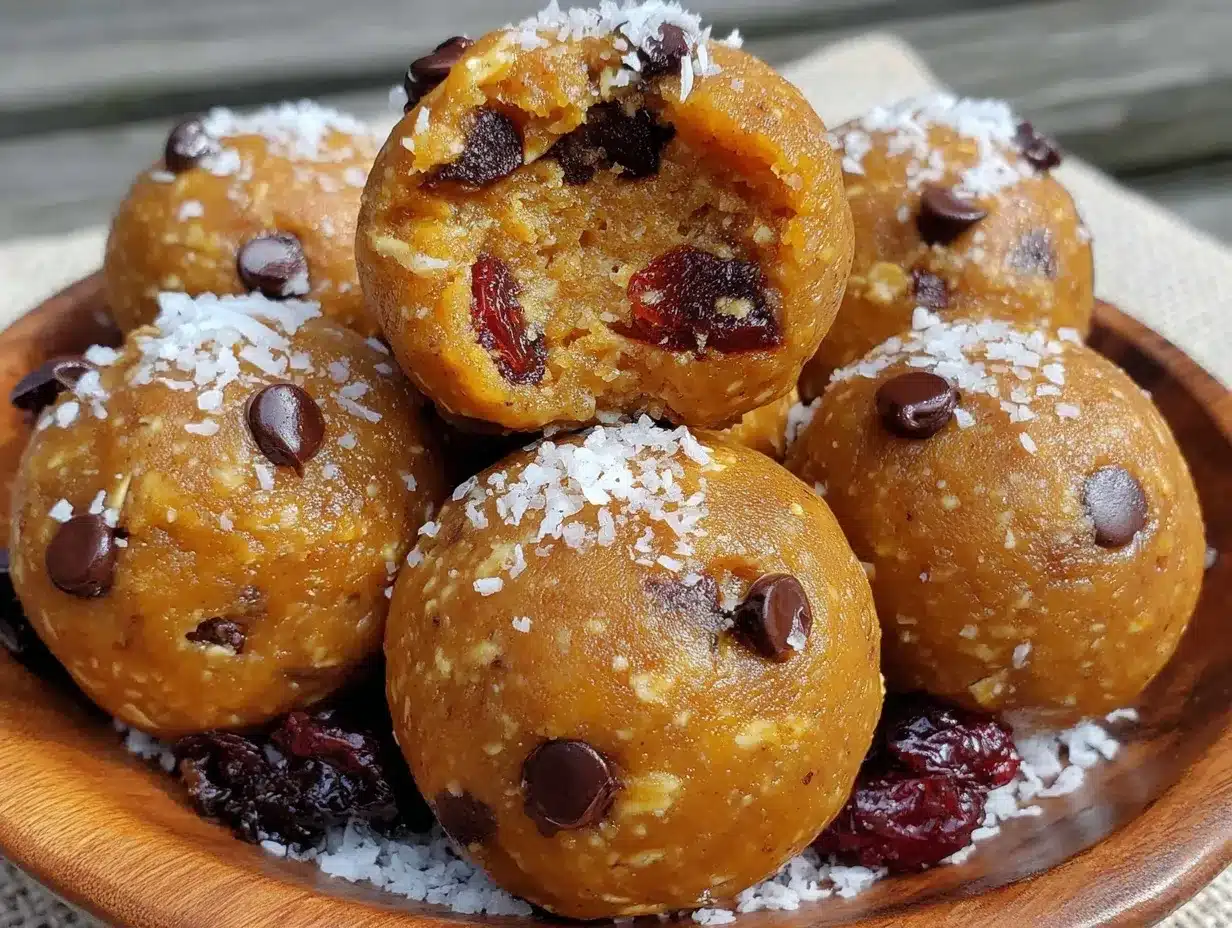
“You really should try these,” my coworker said, sliding a small, round bite across the desk. I eyed the no-bake protein ball skeptically—sticky, dense, and without the usual baked aroma that usually lures me in. Honestly, I was half expecting a bland, chalky chew. But one bite, and it was like a little burst of energy and comfort all at once. That afternoon, buried under a pile of emails and the usual midweek slump, those easy no-bake protein balls felt like a secret weapon. They weren’t just a snack; they were a reset button. I ended up making a batch that evening, tweaking the texture, the sweetness, and the mix-ins until they hit that perfect spot—nutty, sweet, and just chewy enough.
What stuck with me wasn’t just how quick and fuss-free they were (you don’t need an oven, which is a lifesaver on busy days), but how they fit so naturally into the rhythm of my day. These protein balls became my go-to for those moments when I needed something wholesome but didn’t want to deal with complicated recipes. Plus, they traveled well—perfect for keeping in my bag during long days on the run. It’s funny how a simple, no-fuss recipe can quietly become a staple, you know? No pretense, no stress, just a little ball of goodness that reminds you to take a moment for yourself.
Why You’ll Love This Recipe
Having tested countless snack recipes over the years, these easy no-bake protein balls stand out for a few solid reasons. It’s not just about convenience, though that’s a huge part of it. The balance of flavors and textures is something I fine-tuned after making these several times in a week (not kidding). Here’s what makes this recipe a keeper:
- Quick & Easy: Comes together in under 15 minutes—no baking or complicated steps. Perfect for those evenings when you want something nutritious but fast.
- Simple Ingredients: Uses pantry staples like oats, nut butter, and honey—no need to hunt down fancy stuff.
- Perfect for On-the-Go: Ideal for busy days, whether you need a mid-morning pick-me-up or an afternoon snack at your desk.
- Crowd-Pleaser: Tried these at a friend’s potluck, and they disappeared almost instantly. Kids and adults both give them thumbs up.
- Unbelievably Delicious: The mix of creamy nut butter and chewy oats with a hint of sweetness is just right—a little bite of comfort that’s also wholesome.
This recipe isn’t just another protein ball iteration. The trick is in the texture—using rolled oats that aren’t ground too fine, so you still get that satisfying bite, and a touch of natural sweetness that doesn’t overwhelm. Plus, swapping out common nut butters lets you personalize the flavor. This is the kind of snack that feels like a small treat, but it’s packed with the kind of energy that carries you through the day.
What Ingredients You Will Need
This recipe uses simple, wholesome ingredients to deliver bold flavor and satisfying texture without the fuss. Most of these are pantry staples, and if not, they’re easy to find at any grocery store or substitute as needed.
- Rolled oats (1 1/2 cups / 135g): The base for texture and fiber. Use old-fashioned oats, not instant, for the best chew.
- Natural peanut butter (1/2 cup / 125g): Creamy or crunchy, depending on your preference. I usually go with Smucker’s Natural for its smooth blend and no additives.
- Honey (1/3 cup / 113g): For natural sweetness and binding. Raw honey works great, but any local variety will do.
- Ground flaxseed (2 tablespoons / 14g): Adds nutrition and helps bind the mixture gently.
- Vanilla extract (1 teaspoon / 5ml): Just a splash to round out the flavors.
- Mini dark chocolate chips (1/4 cup / 40g): Optional, but highly recommended for that little melty surprise.
- Chia seeds (1 tablespoon / 12g): For a boost of omega-3 and a bit of crunch (optional).
If you want to switch things up, almond or cashew butter works beautifully instead of peanut butter. For a gluten-free option, make sure your oats are certified gluten-free. And if you’re avoiding honey, maple syrup or agave are good alternatives. In summer, I sometimes add a handful of chopped dried apricots or cranberries for a fruity tang. These little tweaks make each batch feel fresh without complicating the process.
Equipment Needed
- Mixing bowl: A large one to comfortably combine all ingredients.
- Spoon or spatula: For stirring. A sturdy wooden spoon works great, but a silicone spatula makes scraping easier.
- Measuring cups and spoons: Precision helps keep the texture consistent (especially with oats and nut butter).
- Baking sheet or tray: To place the formed balls for chilling. Lined with parchment paper, it makes cleanup a breeze.
- Refrigerator: Not exactly equipment, but chilling time is key to firming up these protein balls.
If you don’t have a kitchen scale, measuring cups work fine here, though a scale can help if you’re making larger batches. Tried using a food processor once to speed things up, but mixing by hand actually gives better control over texture. For budget-friendly options, any basic mixing bowl and spoon set will do—no fancy gadgets needed.
Preparation Method
- Combine the dry ingredients: In your large mixing bowl, stir together 1 1/2 cups (135g) rolled oats, 2 tablespoons (14g) ground flaxseed, 1 tablespoon (12g) chia seeds if using, and 1/4 cup (40g) mini dark chocolate chips. Mixing these first ensures even distribution.
- Add the wet ingredients: Pour in 1/2 cup (125g) natural peanut butter, 1/3 cup (113g) honey, and 1 teaspoon (5ml) vanilla extract. Use your spoon or spatula to mix thoroughly until the mixture comes together. It will be sticky but manageable.
- Check the texture: The mixture should hold together when pressed. If it feels too dry, add a teaspoon of water or a bit more honey. Too wet? Add a tablespoon of oats. This step is key for that perfect bite.
- Form the balls: Using your hands, scoop out about a tablespoon (15ml) of the mixture and roll it into a ball. Place each ball on a parchment-lined baking tray. This usually makes about 20-22 balls.
- Chill and set: Pop the tray into the refrigerator for at least 30 minutes to firm up. Once set, transfer the protein balls to an airtight container. They’ll keep well in the fridge for up to a week, or freeze for longer storage.
Pro tip: If your hands get sticky while rolling, lightly wet them with water to keep the mixture from sticking. Also, don’t rush this step—rolling the balls with care makes a big difference in how they hold together later.
Cooking Tips & Techniques
Honestly, the biggest win with no-bake protein balls is in the mixing and the balance of wet and dry ingredients. I learned the hard way that too much honey or nut butter can make these tricky to roll and prone to falling apart. Here’s a few nuggets of wisdom from my trials:
- Texture matters: Using old-fashioned rolled oats adds chew without turning the balls gummy. Avoid instant oats—they’re too fine and can make the mix mushy.
- Binding tricks: Ground flaxseed and chia seeds aren’t just nutritious—they help hold everything together. If you skip them, your balls might crumble faster.
- Chill time: Don’t skip the refrigeration step. It’s what firms up the balls, making them easier to handle and eat.
- Customization caution: Adding too many mix-ins (like nuts or dried fruit) can alter the texture. Add sparingly unless you like a chunkier bite.
- Multitasking tip: While these chill, it’s a great time to prepare other parts of your meal or even toss together a quick side like the vibrant sautéed green beans with lemon zest and pine nuts for a wholesome lunch.
One thing I used to overlook was the vanilla. Just a teaspoon adds a subtle depth that makes these protein balls taste much less like a health food and more like a treat. Trust me on that.
Variations & Adaptations
These protein balls are a perfect base for experimentation. Here are a few ways I’ve switched things up depending on mood or what’s in the pantry:
- Chocolate peanut butter: Add 2 tablespoons of cocoa powder to the dry mix for a rich, chocolatey twist.
- Nut-free option: Swap peanut butter for sunflower seed butter and use pumpkin seeds in place of chocolate chips to avoid nuts altogether.
- Seasonal fruits: Fold in finely chopped dried apricots or cranberries for a fruity note that brightens the flavor.
- Spiced kick: Sprinkle in a pinch of cinnamon and nutmeg for a cozy autumn vibe.
- Protein boost: Mix in a scoop of your favorite unflavored or vanilla protein powder to amp up the nutrition.
When I was on a bit of a health kick, I swapped honey for pure maple syrup and added hemp seeds for extra protein and omega-3s. It was a subtle change but made the snack feel like a whole new experience. If you’re looking for even more wholesome snack ideas, check out the sweet potato rounds with goat cheese and honey—they’re another favorite around here.
Serving & Storage Suggestions
These protein balls are best served chilled or at room temperature. I like to keep a few in the fridge door for easy grab-and-go snacking. They pair nicely with a cup of herbal tea or a cold glass of milk for a simple, satisfying snack break.
For storage, keep them in an airtight container in the refrigerator for up to a week. If you want to make a big batch ahead, they freeze beautifully—just thaw in the fridge or at room temperature before eating. The flavors tend to meld and mellow over time, making them even tastier after a day or two.
They’re a great addition to a packed lunch or a quick bite after a workout. If you want to round out a snack plate for guests, pairing these with fresh fruit or a small cheese selection works wonders. For a balanced snack, try them alongside a crisp salad like the vibrant green bean and tomato salad with feta. The fresh veggies complement the rich, nutty flavor nicely.
Nutritional Information & Benefits
Each protein ball (approximately 1 tablespoon-sized) contains roughly:
| Calories | 90-100 kcal |
|---|---|
| Protein | 4-5 grams |
| Fat | 5-6 grams (mostly healthy fats) |
| Carbohydrates | 9-10 grams (mostly from oats and honey) |
| Fiber | 2 grams |
The combination of oats, nut butter, flaxseed, and chia seeds makes these balls a balanced energy source with fiber, protein, and healthy fats. They fit well into gluten-free diets if you pick certified oats, and dairy-free if using plant-based nut butters. The natural ingredients keep them free from artificial additives or preservatives.
Personally, I appreciate how these protein balls help me avoid the afternoon slump without a sugar crash. They’re a solid snack for anyone aiming to stay fueled between meals, especially when life feels hectic.
Conclusion
Easy no-bake protein balls are one of those recipes that quietly become a staple once you find the right balance. They’re simple, nutritious, and flexible enough to suit whatever you’ve got in your pantry or your mood. I love how they remind me to pause and recharge during the busiest days—without any fuss or mess.
Feel free to make this recipe your own by swapping ingredients or mix-ins to suit your tastes. And if you ever want to try a snack that pairs beautifully with these protein balls, the honey roasted butternut squash with rosemary is a cozy side that complements any wholesome bite.
Let me know how you make these your own, or if you discover any new favorite add-ins. Sharing your tweaks and stories always makes this kitchen feel a little more connected.
FAQs
Can I store these protein balls at room temperature?
It’s best to keep them refrigerated to maintain firmness and freshness. At room temperature, they can get soft and sticky, especially in warmer weather.
Are these protein balls suitable for vegans?
To make them vegan, substitute honey with maple syrup or agave and double-check your nut butter is vegan-friendly. The rest of the ingredients are plant-based.
Can I freeze these protein balls?
Absolutely! Freeze them in an airtight container and thaw in the fridge or at room temperature before eating. They keep well for up to 3 months.
What’s the best way to make them less sticky?
Chilling is key. Also, wetting your hands lightly when rolling helps prevent sticking. If the mix is too sticky, add a bit more oats or flaxseed to balance it out.
Can I add other mix-ins like nuts or dried fruit?
Yes, but add them sparingly to keep the balls from becoming crumbly. Chopped nuts or dried fruits work well as long as you maintain the right balance of wet and dry ingredients.
Pin This Recipe!
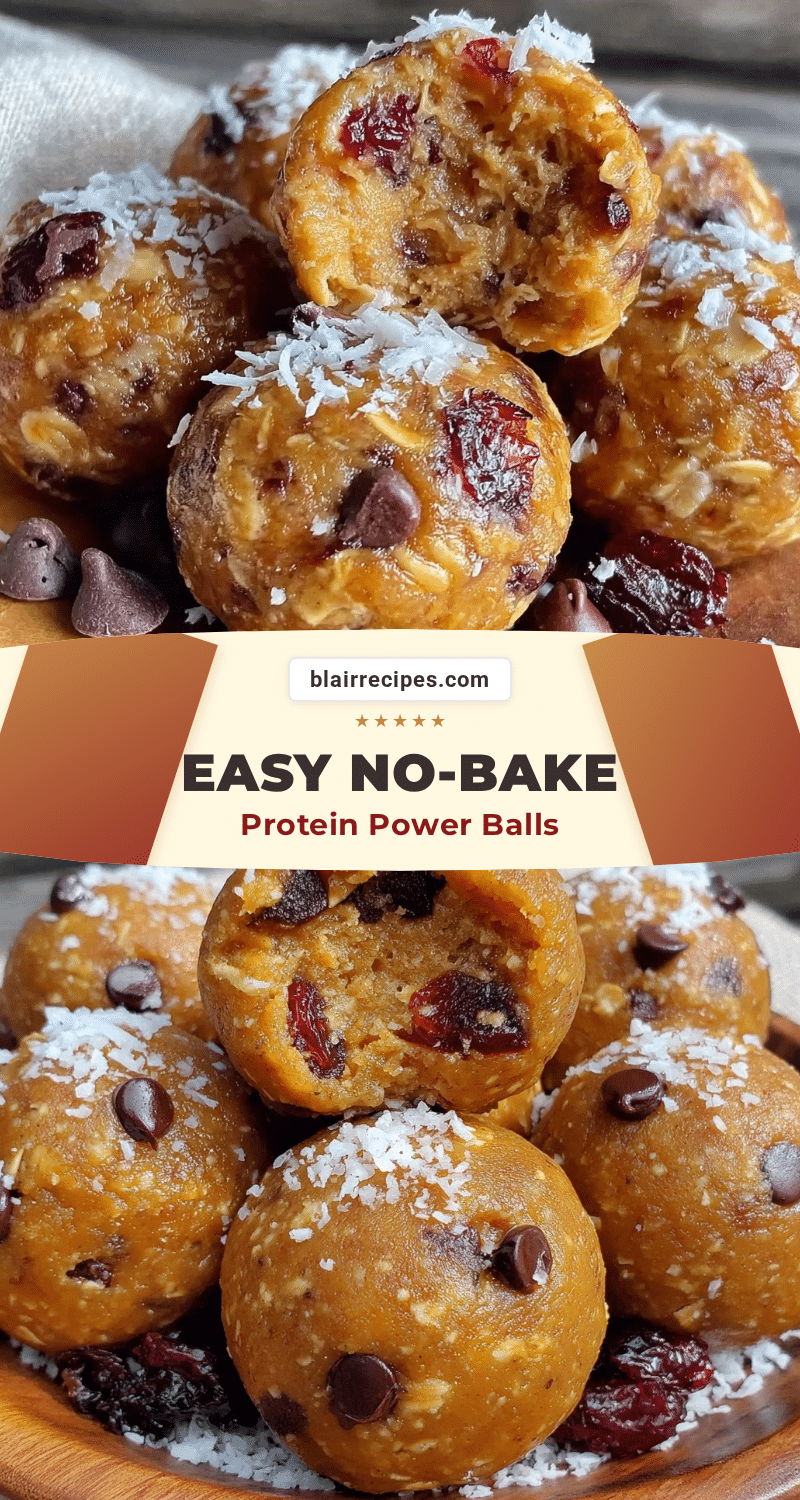
Easy No-Bake Protein Balls

Quick and fuss-free no-bake protein balls that are nutty, sweet, and chewy—perfect for a healthy snack on the go.
- Prep Time: 10 minutes
- Cook Time: 0 minutes
- Total Time: 40 minutes
- Yield: 20-22 balls 1x
- Category: Snack
- Cuisine: American
Ingredients
- 1 1/2 cups (135g) rolled oats (old-fashioned, not instant)
- 1/2 cup (125g) natural peanut butter (creamy or crunchy)
- 1/3 cup (113g) honey
- 2 tablespoons (14g) ground flaxseed
- 1 teaspoon (5ml) vanilla extract
- 1/4 cup (40g) mini dark chocolate chips (optional)
- 1 tablespoon (12g) chia seeds (optional)
Instructions
- Combine the dry ingredients: In a large mixing bowl, stir together rolled oats, ground flaxseed, chia seeds (if using), and mini dark chocolate chips.
- Add the wet ingredients: Pour in natural peanut butter, honey, and vanilla extract. Mix thoroughly until the mixture comes together and is sticky but manageable.
- Check the texture: The mixture should hold together when pressed. If too dry, add a teaspoon of water or more honey. If too wet, add a tablespoon of oats.
- Form the balls: Scoop about a tablespoon (15ml) of mixture and roll into balls. Place on a parchment-lined baking tray. Makes about 20-22 balls.
- Chill and set: Refrigerate for at least 30 minutes to firm up. Store in an airtight container in the fridge for up to a week or freeze for longer storage.
Notes
Use old-fashioned rolled oats for best texture. Wet hands lightly when rolling to prevent sticking. Adjust wet/dry ingredients to get perfect texture. Refrigeration is key to firm up the balls. Optional mix-ins like nuts or dried fruit can be added sparingly.
Nutrition
- Serving Size: 1 tablespoon-sized b
- Calories: 90100
- Sugar: 56
- Sodium: 50
- Fat: 56
- Saturated Fat: 0.5
- Carbohydrates: 910
- Fiber: 2
- Protein: 45
Keywords: no-bake, protein balls, healthy snack, easy recipe, peanut butter, oats, quick snack


