Last Saturday afternoon, my kitchen was a disaster zone—flour on the counter, a mountain of dishes, and a cranky toddler who refused to nap. I really wanted something sweet but quick, something that wouldn’t make the mess worse or demand a lot of babysitting. That’s when I remembered my no-bake banana pudding with Nilla Wafers, a recipe I’ve tested over a dozen times (and tweaked on the fly) to be as creamy and dreamy as possible without turning on the oven.
This no-bake banana pudding recipe easy creamy dessert with Nilla Wafers has saved me more times than I can count. It’s the kind of dessert that feels special but comes together in under 30 minutes, with ingredients you probably already have. Plus, the layers of soft bananas, sweet vanilla pudding, and crisp wafers? Pure magic. I’m telling you, after years of perfecting this, it’s become my go-to for everything from casual family nights to unexpected guests showing up.
Honestly, the best part is how forgiving the recipe is. I’ve accidentally doubled the pudding mix (because, why not?), skipped the whipped cream once when I ran out, and even swapped in a few ingredients here and there. It still turns out silky smooth and perfectly balanced every time. Stick around, and I’ll share all my tips, tricks, and the exact ingredients that make this no-bake banana pudding with Nilla Wafers stand out.
Why You’ll Love This Recipe
This recipe has completely changed how I handle dessert cravings, especially on busy days. I’ve made this for picky kids, dessert skeptics, and even my in-laws who usually prefer fancy bakery treats. Everyone asks for seconds.
- Ridiculously Easy — No baking, no fuss. If you can stir and slice bananas, you’re set. I’ve walked my friends through this recipe over text, and they nailed it every time.
- Ready in Under 30 Minutes — From start to finish, this banana pudding is quick enough for weeknight family dinners but indulgent enough for holiday gatherings. It’s a lifesaver when you need a last-minute dessert.
- Pantry Staples + Fresh Fruit — You only need a handful of ingredients, and I bet you have most of them already. Keep a box of Nilla Wafers on hand, and you’re dessert-ready anytime.
- Perfect for Any Occasion — Whether it’s a casual weekend treat or a crowd-pleaser at potlucks and holiday meals, this pudding fits right in. I’ve brought it to everything from birthday dinners to Sunday family meals.
- Delicious Leftovers — It actually tastes better the next day when the flavors have melded and the wafers soften just right. I always make extra on purpose.
If you’re looking for a creamy, easy dessert that’s crowd-friendly and doesn’t heat up your kitchen, this no-bake banana pudding recipe easy creamy dessert with Nilla Wafers is your new best friend. Plus, it pairs beautifully with fresh green beans or a simple salad if you want to add a fresh side (I love serving it alongside dishes like vibrant sautéed green beans with lemon zest and pine nuts for dinner).
Ingredients You’ll Need
Here’s the best part: you probably have most of this already. I’m picky about a few ingredients here, and I’ll tell you why.
- Bananas (4–5 ripe) — The star of the show. Not too green, not too mushy. I slice them thin so every bite gets banana goodness.
- Nilla Wafers (12 oz / 340 g) — The classic crunchy layer. I buy the original brand because the flavor and texture are unmatched. No substitutes here unless you want a different vibe.
- Instant vanilla pudding mix (2 packages, 3.4 oz each) — This is your base for creamy, thick pudding. I use instant for speed, but if you want homemade pudding, check out my recipe for creamy homemade sauces—same silky texture, less instant.
- Milk (3 cups / 720 ml) — Whole milk gives the pudding richness, but 2% works fine if that’s what you have.
- Whipped topping (1 cup / 240 ml) — For fluffy lightness. I use store-bought whipped topping because it’s fast, but homemade whipped cream works beautifully if you have the time.
- Vanilla extract (1 teaspoon) — Boosts the vanilla flavor and ties everything together.
- Sugar (optional, 2 tablespoons) — Only if your bananas aren’t quite ripe enough or you want it sweeter. I usually skip this.
Equipment Needed
You don’t need anything fancy for this. Here’s what I actually use:
- Mixing bowl — A large bowl to whisk the pudding and fold in the whipped topping. Glass or stainless steel works fine.
- Whisk — For smoothing out the pudding mix without lumps. A fork can work in a pinch but whisk is better.
- 9×13-inch baking dish — Ideal for layering the pudding, bananas, and wafers. If you want to make individual servings, use small glass cups or ramekins.
- Plastic wrap — To cover the pudding while it chills. Keeps it fresh and prevents a skin from forming on top.
- Optional: Rubber spatula — Great for folding in the whipped topping gently without deflating it.
How to Make No-Bake Banana Pudding Recipe Easy Creamy Dessert with Nilla Wafers: Step by Step
Alright, let’s get into it. I’ll walk you through exactly how I make this, including the small tricks that actually make a difference.
- Prepare the pudding (5 minutes)
Whisk together the instant vanilla pudding mix and milk in your mixing bowl. Stir briskly for 2 minutes until the pudding thickens and looks glossy. It should coat your spoon and hold for a couple of seconds. This is the creamy base that makes the whole dessert dreamy. - Add vanilla and sugar (1 minute)
Stir in the vanilla extract and sugar if using. This extra step lifts the flavor beyond the box mix and makes it taste homemade. - Fold in whipped topping (2 minutes)
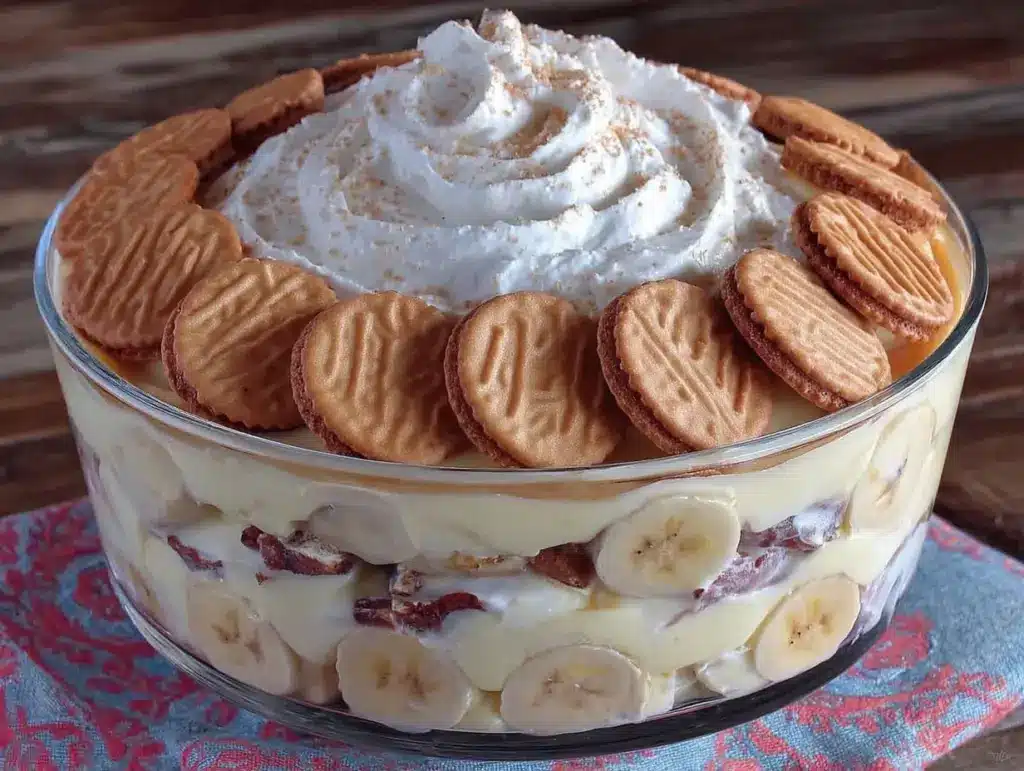
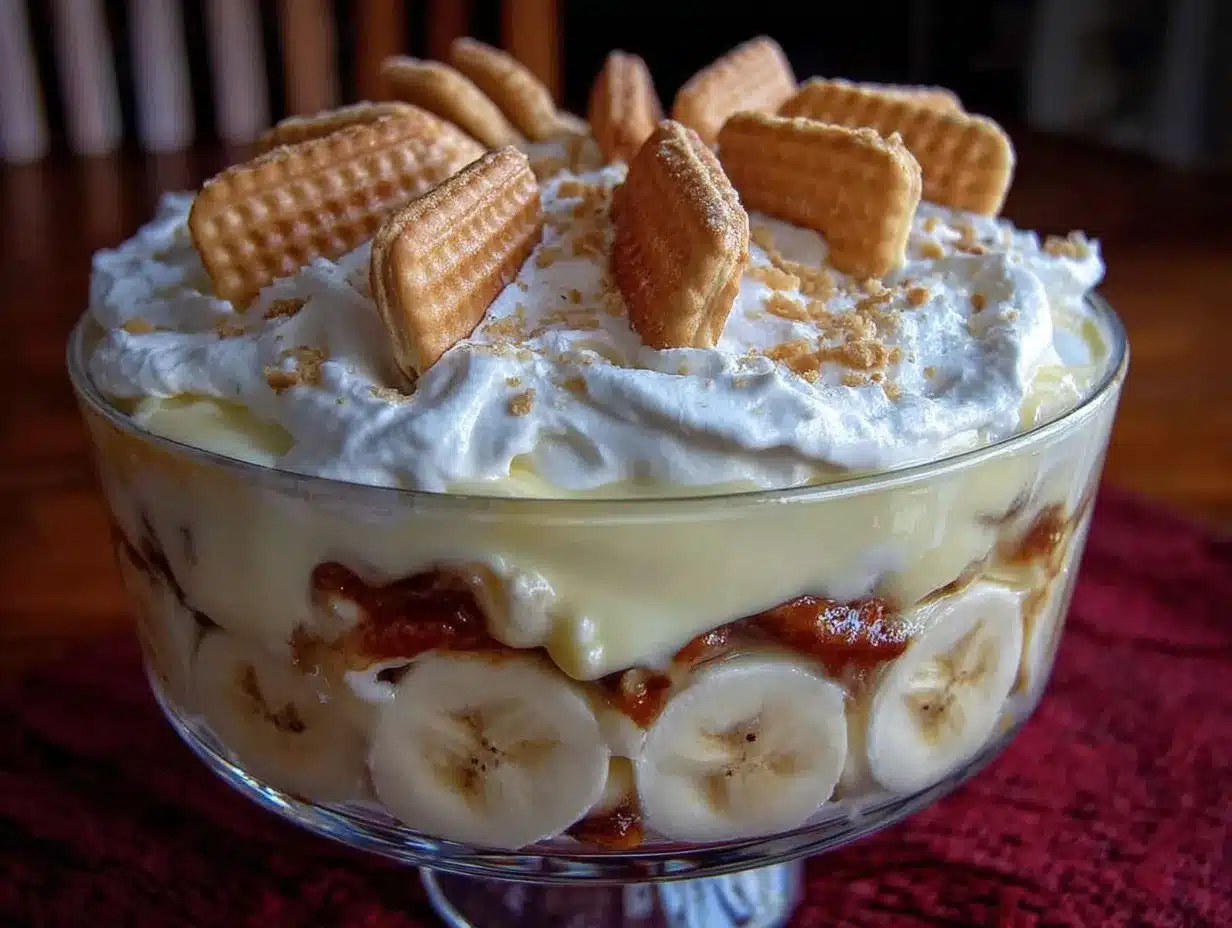
Gently fold the whipped topping into the pudding using a rubber spatula. You want to keep it light and fluffy, so don’t overmix. This adds the creamy, airy texture that sets this banana pudding apart from run-of-the-mill versions. - Layer the pudding and wafers (10 minutes)
Start by spreading a thin layer of pudding on the bottom of your baking dish. Then add a layer of Nilla Wafers, followed by a layer of sliced bananas. Repeat until you run out of ingredients, finishing with a layer of pudding on top. This layering technique ensures every bite has a perfect balance of creamy pudding, crunchy wafers, and fresh banana flavor. - Chill for at least 2 hours
Cover the dish with plastic wrap and refrigerate. The chilling time allows the wafers to soften slightly but still hold some texture, and the flavors to meld together. If you’re short on time, 1 hour will do, but overnight is best. - Serve and enjoy!
Spoon into bowls and garnish with extra wafer crumbs or banana slices if you want to get fancy. The pudding should be silky and thick, the bananas tender but not mushy, and the wafers perfectly soft with a bit of crunch.
Total time: about 30 minutes active, plus chilling time.
Expert Tips & Tricks
Here’s everything I’ve figured out from making this recipe dozens of times. These tips will save you from the mistakes I already made.
- Use ripe but firm bananas — Too green and they lack sweetness; too ripe and they turn mushy fast. Aim for bananas with a few brown spots for the best flavor and texture.
- Don’t skip folding in the whipped topping — It’s what makes the pudding light and creamy instead of dense and heavy. Gently does it.
- Layer carefully — Start and end with pudding to keep the dessert moist and prevent the wafers from drying out.
- Chill for at least 2 hours — I know it’s tempting to dive in right away, but the pudding needs time to set and the wafers to soften slightly. If you can, overnight is magic.
- Save some wafers for topping — Crushed wafers sprinkled on top add a lovely crunch and a pretty finish.
Mistake: Pudding is too runny
Fix: Make sure you whisk the instant pudding for the full 2 minutes to activate the thickening agents. If it’s still too thin, pop it in the fridge for 15 minutes before folding in whipped topping.
Mistake: Bananas turn brown too fast
Fix: Toss the banana slices gently in lemon juice before layering to slow browning if you’re prepping ahead.
Mistake: Wafers get soggy too quickly
Fix: Layer the wafers in thinner layers and keep the pudding cold. Don’t assemble too far in advance.
Variations & Substitutions
Once you’ve got the base version down, here’s how I mix it up. I’ve actually tried all of these.
- Chocolate Banana Pudding — Swap one package of vanilla pudding mix for chocolate. It’s a rich twist that’s a hit with chocolate lovers. Perfect for casual weekend treats.
- Peanut Butter Swirl — Gently fold in ½ cup creamy peanut butter into the pudding before layering. It adds a salty-sweet depth that’s unexpected but addictive.
- Lighter Version — Use low-fat milk and reduced-fat whipped topping. It’s thinner but still tasty. I go this route when I’m pretending to be health-conscious.
- Gluten-Free — Substitute gluten-free vanilla wafers. The rest of the recipe is naturally gluten-free, so it’s a great option for dietary needs.
- Dairy-Free — Use coconut milk instead of regular milk and a dairy-free whipped topping. The pudding texture changes slightly but it’s still delicious and creamy.
For a holiday dinner or potluck, this pudding pairs beautifully with fresh, vibrant sides like the irresistible crockpot green bean casserole or the vibrant green bean and tomato salad with feta for a complete meal.
Serving & Storage
I usually serve this straight from the dish — rustic and homey, with a spoon big enough to scoop layers.
Some of my favorite sides to go with banana pudding are simple but fresh — a crisp green salad, or even a light fruit salad if you want to keep things sweet but balanced.
Fridge: Store in an airtight container or cover the baking dish tightly with plastic wrap for up to 4 days. The pudding thickens and the flavors deepen, so leftovers taste great.
Reheating: No reheating here — this dessert is best served cold or at room temperature.
Freezing: Not recommended. The pudding’s creamy texture and bananas don’t freeze well and become watery when thawed.
Nutrition Information
I’m not a nutritionist, but here’s the breakdown if you’re keeping track. This is based on 8 servings.
| Nutrient | Per Serving |
|---|---|
| Calories | 250 |
| Protein | 3g |
| Carbohydrates | 38g |
| Fiber | 2g |
| Sugar | 24g |
| Fat | 8g |
| Saturated Fat | 4g |
| Sodium | 150mg |
Look — this is comfort food made with pudding mix and whipped topping. It’s not a diet recipe, and I’m not going to pretend it is. But it’s way better than store-bought desserts, costs less, and I know exactly what’s in it. When I want something lighter, I use the reduced-fat version and pile on extra fruit. Most nights, though? I make the real thing and enjoy every bite.
Final Thoughts
Remember that chaotic Saturday afternoon I told you about? This no-bake banana pudding with Nilla Wafers was the dessert that saved the day, turning stress into smiles. It’s simple, forgiving, and always hits the spot.
Make it yours. More bananas? Absolutely. Extra vanilla? Go for it. Swap whipped topping for homemade cream? I’m all for it. The base is forgiving, so don’t be shy about experimenting.
If you make this, drop a comment and tell me how it went. And if something goes sideways, tell me that too — I genuinely want to help troubleshoot. That’s what the comments are for.
Happy cooking — I hope your kitchen smells amazing.
Frequently Asked Questions
Q: Can I make this no-bake banana pudding without instant pudding mix?
A: Yes, you can make this pudding without instant mix by making homemade vanilla pudding from scratch. It takes a bit more time and stirring, but I’ve done it when I wanted a completely from-scratch dessert. Just be sure the pudding is fully cooled before folding in the whipped topping to keep the texture right.
Q: Why did my banana pudding turn out watery or runny?
A: The most common reason is not whisking the instant pudding mix long enough or not letting it set before adding the whipped topping. Whisk for a full 2 minutes, then chill the pudding for 15 minutes if needed. Also, layering bananas too early can release moisture—slice them just before assembling to keep the texture.
Q: Can I make this banana pudding ahead for a holiday dinner?
A: Absolutely. I recommend assembling it the day before to give the pudding time to set and the wafers to soften perfectly. Just cover it tightly with plastic wrap and keep it refrigerated. For big holiday dinners, this is a stress-free dessert that can be prepped early so you can focus on the main dishes.
Q: Is this recipe gluten-free or can it be made dairy-free?
A: The recipe is naturally gluten-free if you use gluten-free vanilla wafers. For a dairy-free version, swap regular milk for coconut milk and use a dairy-free whipped topping. I’ve made it this way for friends with allergies, and it’s surprisingly good—though the flavor changes a bit.
Q: Can I double or halve this recipe?
A: Yes, this recipe scales perfectly. I’ve doubled it for large gatherings and halved it for smaller families. Just be sure to use a larger or smaller dish accordingly and keep the layering consistent for best texture.
Q: Can I substitute other cookies for Nilla Wafers?
A: You can, but Nilla Wafers have a unique vanilla flavor and texture that really complement the pudding. If you swap, choose something light and crisp like shortbread or vanilla-flavored cookies. I tried graham crackers once, and while it worked, the flavor changed significantly.
Pin This Recipe!
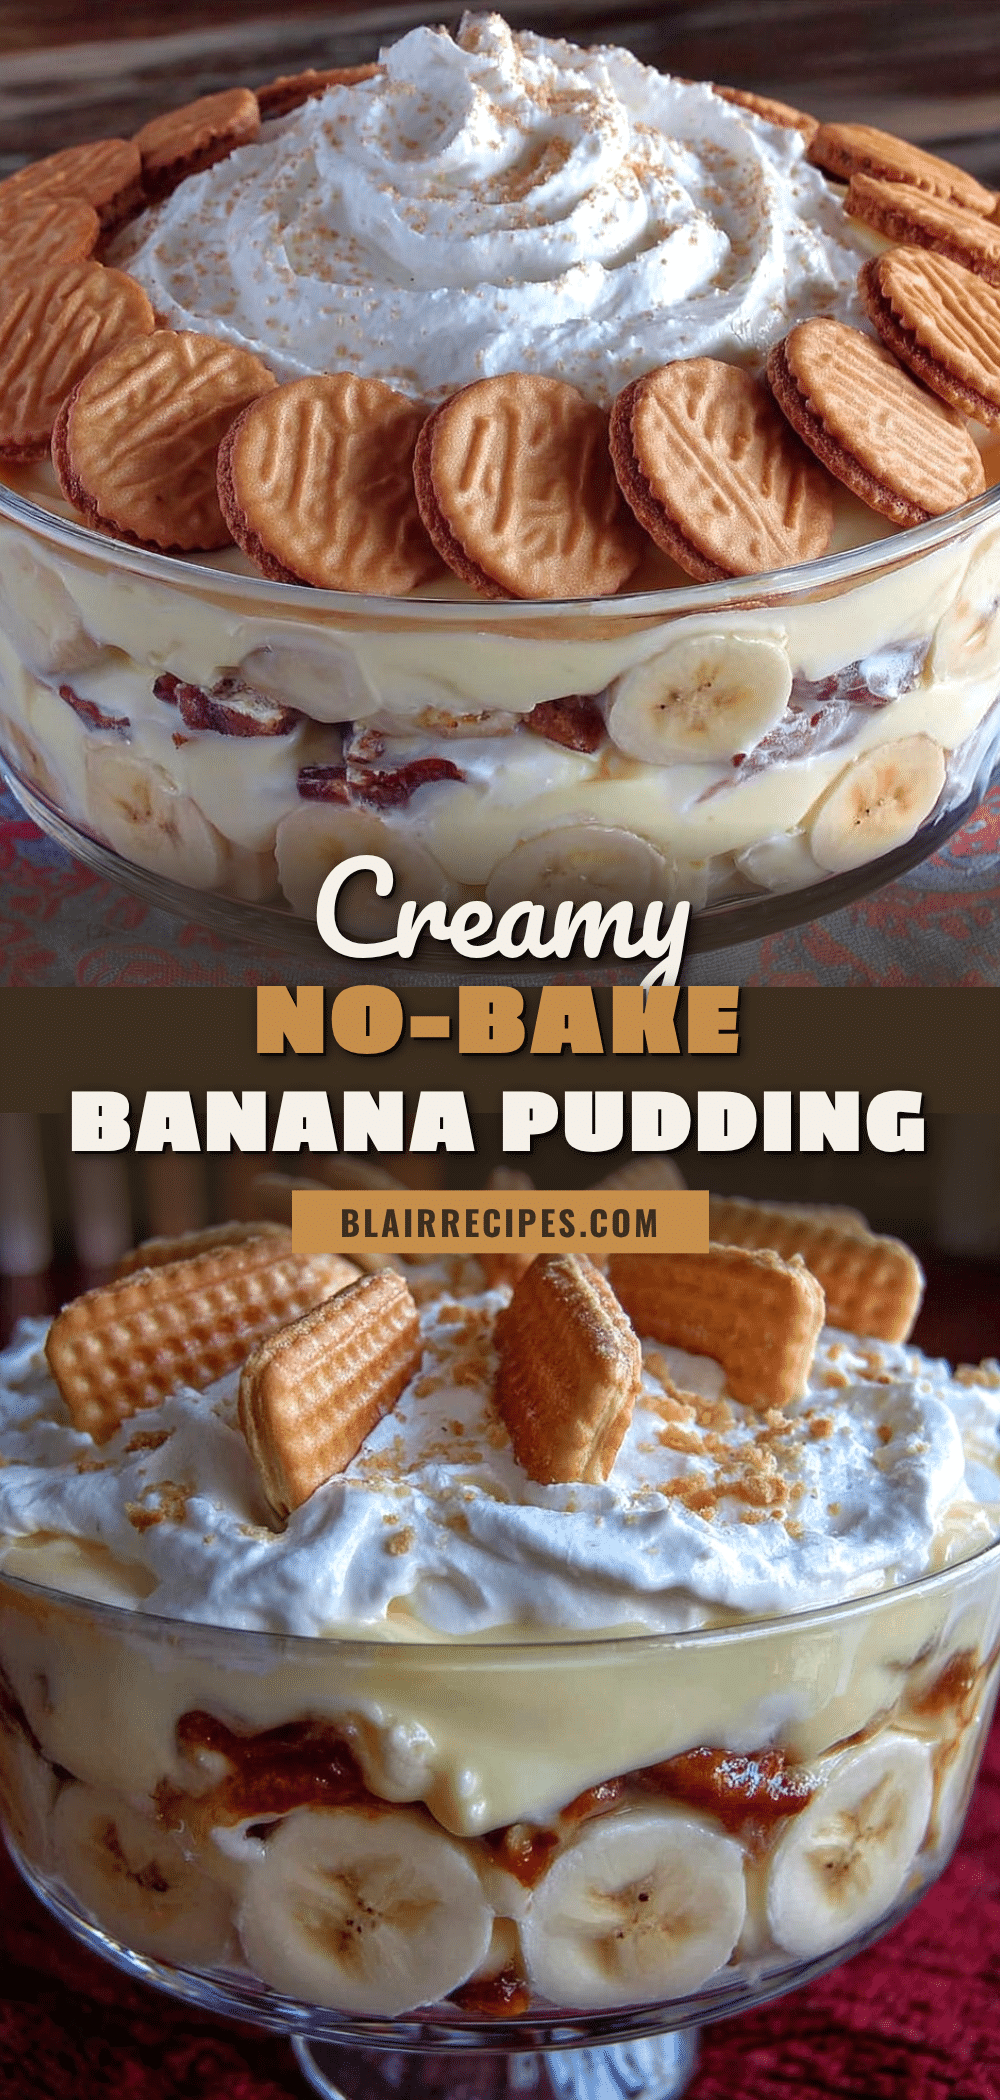
No-Bake Banana Pudding Recipe Easy Creamy Dessert with Nilla Wafers

A quick and creamy no-bake banana pudding layered with Nilla Wafers and ripe bananas, perfect for busy days and crowd-pleasing occasions.
- Prep Time: 15 minutes
- Cook Time: 0 minutes
- Total Time: 2 hours 15 minutes (including chilling time)
- Yield: 8 servings 1x
- Category: Dessert
- Cuisine: American
Ingredients
- 4–5 ripe bananas, sliced thin
- 12 oz (340 g) Nilla Wafers
- 2 packages (3.4 oz each) instant vanilla pudding mix
- 3 cups (720 ml) whole milk or 2% milk
- 1 cup (240 ml) whipped topping (store-bought or homemade whipped cream)
- 1 teaspoon vanilla extract
- 2 tablespoons sugar (optional)
Instructions
- Whisk together the instant vanilla pudding mix and milk in a large mixing bowl. Stir briskly for 2 minutes until the pudding thickens and looks glossy.
- Stir in the vanilla extract and sugar if using.
- Gently fold the whipped topping into the pudding using a rubber spatula to keep it light and fluffy.
- Spread a thin layer of pudding on the bottom of a 9×13-inch baking dish. Add a layer of Nilla Wafers, followed by a layer of sliced bananas. Repeat layering until ingredients are used, finishing with a layer of pudding on top.
- Cover the dish with plastic wrap and refrigerate for at least 2 hours to allow the wafers to soften and flavors to meld. Overnight chilling is best.
- Serve chilled, garnished with extra wafer crumbs or banana slices if desired.
Notes
Use ripe but firm bananas with a few brown spots for best flavor and texture. Gently fold in whipped topping to keep pudding light and creamy. Chill for at least 2 hours or overnight for best results. Save some wafers for topping to add crunch. If pudding is too runny, whisk longer or chill before folding in whipped topping. Toss banana slices in lemon juice to prevent browning if prepping ahead.
Nutrition
- Serving Size: 1 serving (approxima
- Calories: 250
- Sugar: 24
- Sodium: 150
- Fat: 8
- Saturated Fat: 4
- Carbohydrates: 38
- Fiber: 2
- Protein: 3
Keywords: no-bake banana pudding, easy dessert, creamy banana pudding, Nilla Wafers dessert, quick pudding recipe, layered banana pudding


