The smell of chocolate and peanut butter swirling together without even turning on the oven is honestly one of my favorite memories from childhood. I first made these simple no-bake cookies kids can make with my little cousins on a rainy afternoon when baking a real cake felt like too much fuss. The best part? They got to be the chefs, and the kitchen stayed cool and mess-free. If you’re looking for a quick, hands-on treat that brings smiles without a single oven mitt, this no-bake cookie recipe is your new best friend.
This easy treat has been a staple in my family for years, and after testing countless versions (trust me, I’m a bit of a cookie fanatic), I finally landed on this perfect balance of sweet, chewy, and just a little crunchy. These simple no-bake cookies kids can make are perfect for busy parents, rainy day boredom busters, or anytime you want a fuss-free, delicious reward. Plus, they’re a sneaky way to get a little protein and oats into snack time.
Whether you’re baking with your kids, hosting a classroom party, or just craving a quick homemade cookie that doesn’t heat up the house, this simple no-bake cookie recipe kids can make is a total game-changer. I’ve made it dozens of times, and it never disappoints — plus, it’s a fantastic way to get the little ones involved and proud of their culinary skills.
Why You’ll Love This Recipe
- Quick & Easy: Comes together in under 20 minutes — no baking required, which means less mess and more fun.
- Simple Ingredients: No weird or hard-to-find stuff here — just pantry staples you probably already have.
- Perfect for Kids: Great for little hands who want to help without the worry of hot ovens or sharp knives.
- Crowd-Pleaser: Always a hit at birthday parties, after-school snacks, or whenever a sweet craving strikes.
- Unbelievably Delicious: The chocolate and peanut butter combo is a classic that never gets old — soft, chewy, and oh-so-satisfying.
What makes this no-bake cookie recipe stand out is how kid-friendly it is without sacrificing flavor or texture. Instead of melting chocolate chips separately, we melt everything together in one pot, making it foolproof. Plus, the oats add a nice chew and a bit of fiber, so it’s not just empty sugar. Honestly, this recipe feels like a little hug in cookie form — comfort food that’s easy, quick, and just plain fun to make.
What Ingredients You Will Need
This recipe uses simple, wholesome ingredients to deliver bold flavor and satisfying texture without the fuss. Most of these are pantry staples, and you can easily swap a few if needed.
- Granulated sugar – 2 cups (400 g), for sweetness and structure
- Unsweetened cocoa powder – 1/2 cup (50 g), gives rich chocolate flavor (I use Ghirardelli for a smooth taste)
- Butter – 1/2 cup (115 g), unsalted and cut into pieces for even melting (you can use salted, but reduce added salt)
- Milk – 1/2 cup (120 ml), whole or 2% works best for creaminess (dairy-free options like almond milk can be used)
- Peanut butter – 1 cup (250 g), creamy or chunky depending on texture preference (natural peanut butter adds a nice nutty depth)
- Vanilla extract – 1 teaspoon (5 ml), for a subtle fragrant lift
- Quick oats – 3 cups (270 g), these absorb the chocolate mixture beautifully and hold the cookies together (old-fashioned oats work too but yield a chewier bite)
- Pinch of salt – balances the sweetness and enhances flavor
Substitutions: You can swap peanut butter for almond or sunflower seed butter if allergies are a concern. For a gluten-free option, ensure your oats are certified gluten-free. I’ve tried this recipe with a bit of honey instead of sugar, but it changes the texture a bit — still tasty but stickier.
Equipment Needed
- Medium saucepan: For melting the butter, sugar, cocoa, and milk together. A heavy-bottomed pan helps prevent scorching.
- Mixing bowl: To combine the melted mixture with oats and peanut butter.
- Wooden spoon or silicone spatula: For stirring — silicone works great because it scrapes the pan well.
- Cookie sheet or wax paper: To drop the cookie mixture onto while it sets.
- Measuring cups and spoons: Accuracy helps with consistent results.
If you don’t have a cookie sheet, a large plate or even parchment paper on your countertop works just fine. I’ve used both with success! And if you want to get fancy, a cookie scoop makes dropping uniform cookies super easy — but it’s totally optional.
Detailed Preparation Method
- Prepare your workspace: Line a cookie sheet or a large tray with wax paper or parchment paper. This will be where your cookies cool and set.
- Mix the base: In a medium saucepan, combine 2 cups (400 g) granulated sugar, 1/2 cup (115 g) butter, 1/2 cup (120 ml) milk, and 1/2 cup (50 g) unsweetened cocoa powder. Set the heat to medium and stir constantly until the butter melts and the mixture starts to bubble gently. This should take about 4-5 minutes.
- Boil and time: Once the mixture reaches a rolling boil, let it boil for exactly 1 minute while stirring continuously. This step is crucial — too little and your cookies won’t set properly; too long and they can scorch. (Pro tip: set a timer!)
- Remove from heat and add peanut butter and vanilla: Take the pan off the stove, then immediately stir in 1 cup (250 g) peanut butter and 1 teaspoon (5 ml) vanilla extract until smooth and creamy.
- Combine with oats: Quickly add 3 cups (270 g) quick oats and a pinch of salt. Stir thoroughly to coat every oat with the chocolate mixture. The mixture will be thick but glossy and sticky.
- Form cookies: Using a spoon or cookie scoop, drop spoonfuls of the mixture onto the prepared wax paper. Make the cookies as big or small as you like, but about 2 inches (5 cm) diameter is perfect for even setting.
- Set and cool: Let the cookies cool at room temperature until firm, about 30 minutes. If you’re impatient like me, pop them in the fridge for 15 minutes and they’ll firm up faster without losing chewiness.
Tips: Stirring continuously during the boil prevents burning, and using quick oats helps the cookies set better. If your mixture seems too runny, add a handful more oats. If too dry, a splash of milk can help.
Cooking Tips & Techniques
One of the trickiest parts of this recipe is timing the boil just right. I once let the mixture boil too long and ended up with rock-hard cookies — lesson learned! Set a timer and keep stirring to avoid burning.
Using quick oats is a game-changer here; they absorb the chocolate mixture better and give a nice chewy texture without being too dense. Old-fashioned oats are fine but can make the cookies a little tougher.
Another tip: don’t skip the vanilla extract! It might seem minor, but it really lifts the chocolate and peanut butter flavors, making the cookies taste richer and more complex.
If you want your cookies to have more crunch, try adding chopped nuts or a handful of mini chocolate chips when mixing in the oats — just fold them in gently.
Multitasking tip: while the cookies are setting, use the downtime to clean up the saucepan and utensils — less mess later, more time enjoying your treats!
Variations & Adaptations
- Nut-Free Version: Swap peanut butter for sunflower seed butter or soy nut butter to keep it allergy-friendly.
- Vegan Adaptation: Use coconut oil instead of butter, plant-based milk, and a natural sweetener like maple syrup (adjust oats as needed for consistency).
- Flavor Twists: Add a teaspoon of cinnamon or a pinch of cayenne pepper to the chocolate mixture for a warm spicy kick. Or fold in shredded coconut for a tropical vibe.
- Double Chocolate: Stir in 1/2 cup mini chocolate chips with the oats for extra chocolatey bites.
- Seasonal Fun: Around holidays, mix in crushed peppermint candies or chopped dried cranberries for a festive touch.
Personally, I once added a spoonful of espresso powder to the melted mixture — it made these cookies taste like a grown-up’s dream, but kids loved it too! Don’t be afraid to experiment a bit.
Serving & Storage Suggestions
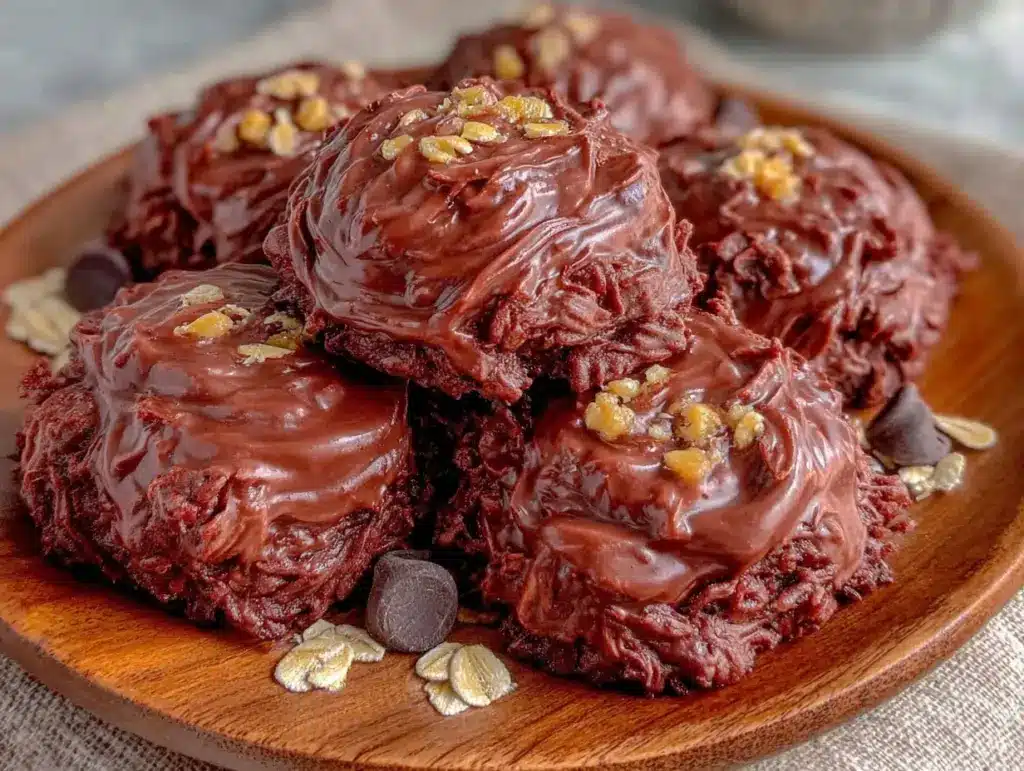
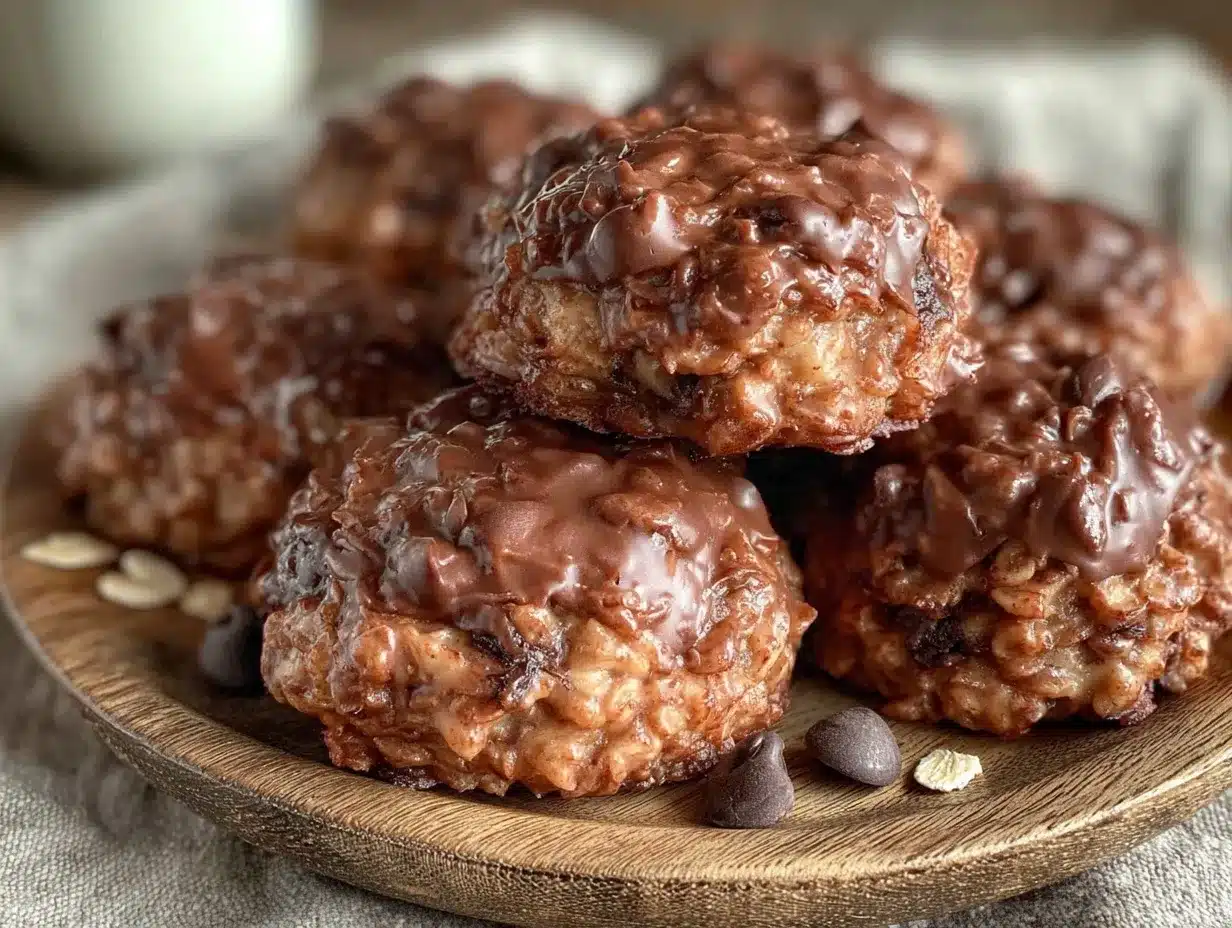
These simple no-bake cookies kids can make taste best at room temperature when the chocolate and peanut butter flavors are at their peak. Serve them on a colorful plate or stack them in a glass jar for a cute snack presentation.
They pair wonderfully with a cold glass of milk, a hot cup of tea, or even a scoop of vanilla ice cream for dessert.
Store leftover cookies in an airtight container at room temperature for up to 3 days. If your kitchen is warm, refrigerate them to keep their shape. They also freeze well — just pop them in a freezer-safe bag and thaw at room temperature when ready to enjoy.
Reheating isn’t necessary, but if you like them softer, microwave a cookie for 10 seconds. Flavors actually meld and deepen after a day or two, so if you can wait, they taste even better the next day.
Nutritional Information & Benefits
Each cookie (assuming about 20 cookies from the batch) contains roughly:
| Nutrient | Amount per Cookie |
|---|---|
| Calories | 120-130 kcal |
| Protein | 3 g |
| Fat | 6 g |
| Carbohydrates | 15 g |
| Fiber | 2 g |
The oats add fiber and slow-release energy, while the peanut butter contributes protein and healthy fats. This isn’t a low-calorie treat, but it’s a satisfying snack that keeps kids fueled without empty sugar crashes.
Keep in mind allergens: these cookies contain peanuts, dairy, and gluten (unless using gluten-free oats). I always recommend reading labels carefully, especially when serving to children with allergies.
Conclusion
Simple no-bake cookies kids can make are a fantastic way to bring some hands-on kitchen fun without the usual baking hassle. With just a handful of ingredients, a bit of stirring, and no oven in sight, you’ve got a sweet treat that tastes like it took way more effort than it did.
Feel free to tweak this recipe to suit your family’s tastes — more chocolate, less sugar, or a nut-free twist. I love how adaptable it is and how much joy it brings to little bakers. Honestly, these cookies remind me that sometimes the simplest recipes make the best memories.
Give it a try, share it with your kids, and let me know how it goes! Drop a comment below with your favorite variations or any fun kitchen moments you had. Happy no-baking!
FAQs About Simple No-Bake Cookies Kids Can Make
Can I use old-fashioned oats instead of quick oats?
Yes, but your cookies might be a bit chewier and less uniform. Quick oats absorb the chocolate mixture better for a softer texture.
How long do these no-bake cookies last?
Stored in an airtight container at room temperature, they last about 3 days. Refrigerate if your kitchen is warm to keep them firm, or freeze for up to 3 months.
Can I make these cookies without peanut butter?
Absolutely! Use sunflower seed butter, almond butter, or even tahini for a different flavor. Just make sure it’s a creamy type for best mixing.
Why do my no-bake cookies turn out crumbly?
Usually because the mixture didn’t boil long enough or you didn’t stir well. The 1-minute rolling boil is key for the right consistency.
Can kids really make this recipe on their own?
Yes! It’s perfect for kids because there’s no oven or stove danger involved once the base is melted (which an adult should handle). Kids can stir, scoop, and shape the cookies themselves.
Pin This Recipe!

Simple No-Bake Cookies Recipe Kids Can Make 5 Easy Steps

A quick and easy no-bake cookie recipe combining chocolate and peanut butter, perfect for kids to make with minimal mess and no oven required.
- Prep Time: 10 minutes
- Cook Time: 10 minutes
- Total Time: 20 minutes
- Yield: 20 cookies 1x
- Category: Dessert
- Cuisine: American
Ingredients
- 2 cups (400 g) granulated sugar
- 1/2 cup (50 g) unsweetened cocoa powder
- 1/2 cup (115 g) unsalted butter, cut into pieces
- 1/2 cup (120 ml) milk (whole or 2%)
- 1 cup (250 g) peanut butter (creamy or chunky)
- 1 teaspoon (5 ml) vanilla extract
- 3 cups (270 g) quick oats
- Pinch of salt
Instructions
- Line a cookie sheet or large tray with wax paper or parchment paper.
- In a medium saucepan, combine sugar, butter, milk, and cocoa powder. Heat over medium, stirring constantly until butter melts and mixture bubbles gently (about 4-5 minutes).
- Once boiling, let mixture boil for exactly 1 minute while stirring continuously.
- Remove from heat and immediately stir in peanut butter and vanilla extract until smooth.
- Quickly add oats and salt, stirring thoroughly to coat all oats with the chocolate mixture.
- Drop spoonfuls of the mixture onto the prepared wax paper, about 2 inches in diameter.
- Let cookies cool at room temperature until firm, about 30 minutes, or refrigerate for 15 minutes to set faster.
Notes
Use quick oats for best texture; old-fashioned oats will make cookies chewier. Stir continuously during boiling to prevent burning. If mixture is too runny, add more oats; if too dry, add a splash of milk. Refrigerate to set faster without losing chewiness. Variations include nut-free, vegan, and flavor twists like cinnamon or mini chocolate chips.
Nutrition
- Serving Size: 1 cookie
- Calories: 125
- Sugar: 10
- Sodium: 50
- Fat: 6
- Saturated Fat: 3.5
- Carbohydrates: 15
- Fiber: 2
- Protein: 3
Keywords: no-bake cookies, kids recipe, peanut butter cookies, chocolate cookies, quick dessert, easy cookies, no oven cookies


