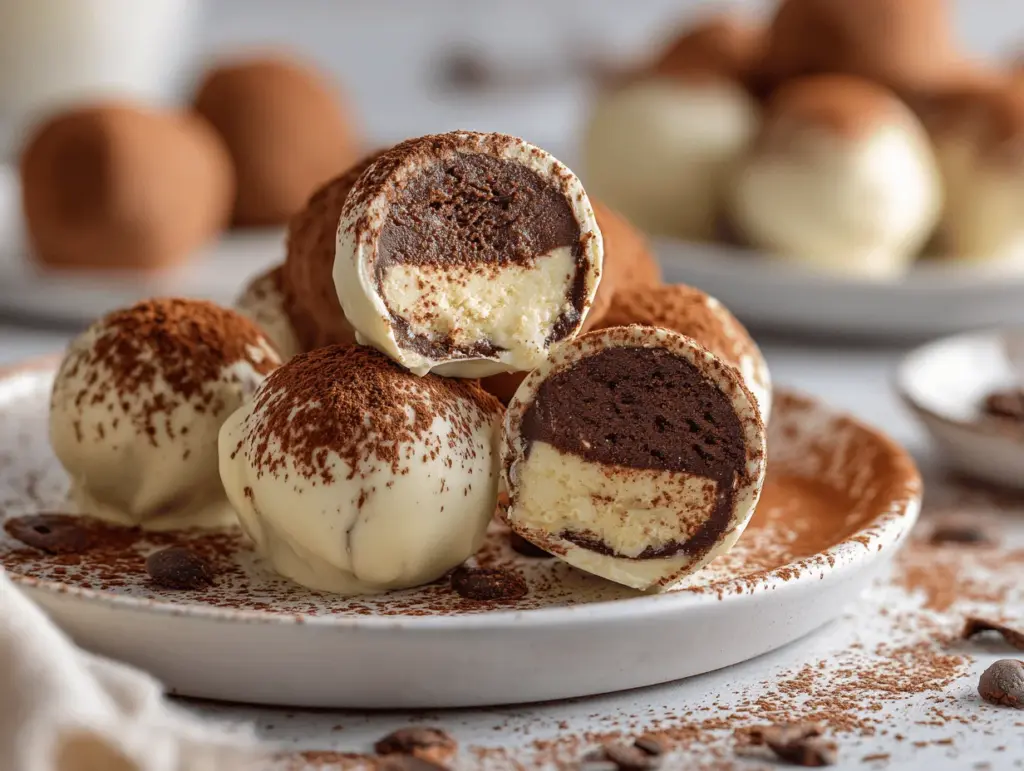
The first time I bit into a tiramisu truffle, I knew I was in trouble—in the best way possible. Imagine all the dreamy flavors of classic tiramisu—creamy mascarpone, bold espresso, a touch of chocolate—packed into a bite-sized, melt-in-your-mouth treat. That’s exactly what you get with this tiramisu truffles recipe. They’re rich, decadent, and honestly, more addictive than I’d like to admit.
These little Italian dessert balls are what I turn to when I want something special, but don’t have the time (or energy) for a full-blown tiramisu. They’ve become my go-to for everything from last-minute dinner parties to cozy nights in with a cup of coffee. I first whipped these up during a holiday baking binge, and they disappeared so fast my family demanded a second batch the same day! There’s just something about the creamy, coffee-kissed center wrapped in a delicate chocolate shell that makes everyone swoon.
Homemade tiramisu truffles are perfect for anyone who loves an easy, no-bake dessert. They’re elegant enough for entertaining, but simple enough for a quick weekday treat. Plus, you don’t need any fancy equipment or hard-to-find ingredients. If you’re a tiramisu fan—or just love Italian-inspired desserts—these truffle balls are a must-try. I’ve tested this recipe more times than I can count, tweaking ratios and flavors to make sure every batch is just right. Trust me, you’ll want to keep a stash of these in your fridge at all times. Let’s make some magic!
Why You’ll Love This Tiramisu Truffles Recipe
- Quick & Easy: These tiramisu truffles come together in about 30 minutes. No baking, no fuss, just pure dessert bliss. Perfect for those nights when you need a sweet fix ASAP!
- Simple Ingredients: Everything you need is probably already in your pantry or fridge—ladyfingers, mascarpone cheese, instant coffee, cocoa powder, and chocolate. No fancy shopping trips required.
- Perfect for Any Occasion: These Italian dessert balls are a hit at parties, holiday gatherings, and even as a sweet surprise for a friend. I’ve even tucked them into lunchboxes for a little midday pick-me-up.
- Crowd-Pleaser: If you’re looking for a dessert that gets rave reviews from everyone, look no further. Even picky eaters can’t resist the creamy, coffee-infused filling and silky chocolate coating.
- Unbelievably Delicious: Each truffle is a perfect bite—rich, creamy, with a hint of espresso and a dusting of cocoa. It really is comfort food with a touch of elegance.
What makes this tiramisu truffles recipe stand out from the rest? For starters, the filling is a blend of mascarpone and crushed ladyfingers, just like classic tiramisu. But here’s my special twist: I use strong brewed espresso (or instant coffee for convenience) and a splash of coffee liqueur for extra flavor. The result? A truffle that tastes like you spent hours in the kitchen, but really, you just rolled up some magic in under an hour.
And let’s be real: there’s something deeply satisfying about popping one of these into your mouth and tasting all those classic Italian dessert flavors in such a tiny, pretty package. They’re easier than traditional tiramisu, but bring all the same joy—a little moment of indulgence in every bite. Whether you’re a seasoned baker or a total beginner, these truffles are practically foolproof. That, my friend, is why you need to try this recipe.
What Ingredients You Will Need
This recipe uses simple, wholesome ingredients to deliver bold flavor and that creamy-dreamy texture you crave—no complicated steps, just classic tiramisu flavors wrapped up in a truffle.
- Ladyfingers (Savoiardi), crushed (about 120g / 4.2 oz) – The foundation of tiramisu! Look for the crisp, dry Italian kind. If you can’t find them, plain vanilla wafers work in a pinch.
- Mascarpone cheese (about 170g / 6 oz) – This gives the truffles their signature creaminess. I like the Galbani brand for its smooth texture, but any good-quality mascarpone works fine.
- Powdered sugar (60g / ½ cup) – Sweetens the filling just right. You can add a little more or less to taste.
- Espresso or strong brewed coffee (2 tbsp, cooled) – For that classic tiramisu flavor. Instant espresso powder works if you don’t want to brew a fresh cup. (Decaf is fine, too.)
- Coffee liqueur (like Kahlúa or Tia Maria, 1 tbsp, optional) – Adds depth and an extra kick, but you can leave it out or swap for vanilla extract if you want these kid-friendly.
- Vanilla extract (1 tsp) – Just a touch for warmth and balance.
- Dark or semi-sweet chocolate, chopped or chips (200g / 7 oz) – For coating the truffles. I prefer 60-70% dark chocolate for a nice bittersweet edge, but milk chocolate is lovely, too.
- Cocoa powder (for dusting, about 2 tbsp) – The finishing touch that really gives you that tiramisu vibe. I use Dutch-process for a rich color and flavor.
Optional Add-Ins:
- Pinch of cinnamon or nutmeg (for a subtle spice)
- Mini chocolate chips or chopped chocolate (folded into the filling for texture)
- Finely grated chocolate or chocolate curls (for garnish)
Ingredient Substitutions:
- No mascarpone? Try full-fat cream cheese. It’s tangier, but still delicious.
- Gluten-free? Use gluten-free ladyfingers or crunchy gluten-free cookies.
- Dairy-free? Substitute vegan mascarpone and use dairy-free chocolate for coating.
- No coffee liqueur? Just use extra espresso or a splash of almond extract for a nutty twist.
Everything here is easy to find, pantry-friendly, and forgiving. I’ve even used day-old cake instead of ladyfingers once in a pinch—honestly, it still turned out great!
Equipment Needed
- Mixing bowls – One medium for the filling, one small for the chocolate coating. Glass or stainless steel bowls are easiest to clean and don’t retain odors.
- Hand mixer or sturdy spatula – I love using my old wooden spoon for mixing, but a hand mixer will get everything super creamy and smooth in less time.
- Measuring cups and spoons – For accuracy. I use a digital scale for weighing ladyfingers and chocolate—it makes a difference!
- Food processor or zip-top bag & rolling pin – For crushing ladyfingers. The food processor is quick, but a bag and rolling pin works if you don’t want more dishes.
- Small cookie scoop or tablespoon – For evenly sized truffles. (I once used a melon baller in a pinch—it worked fine!)
- Baking sheet lined with parchment paper – For setting the truffles. The parchment makes cleanup a breeze.
- Microwave-safe bowl or double boiler – For melting chocolate. I usually opt for the microwave because it’s fast, but the double boiler is foolproof if you’re prone to burning chocolate.
- Forks or dipping tools – For coating the truffles in chocolate. Two regular forks work just fine.
If you don’t have a cookie scoop, don’t stress. Just use a tablespoon and roll the balls by hand. And for chocolate melting, even a basic saucepan with a heatproof bowl will do the trick. I always dry my utensils well before working with melted chocolate—any water can seize it up and ruin the batch. Budget tip: Dollar store mixing bowls and utensils work just as well as the fancy stuff!
Preparation Method
-
Crush the Ladyfingers:
Place the ladyfingers (120g / 4.2 oz) in a food processor and pulse until you get fine crumbs. No food processor? Pop them in a zip-top bag and crush with a rolling pin until sandy. This takes about 2 minutes. -
Mix the Filling:
In a medium bowl, combine the mascarpone cheese (170g / 6 oz), powdered sugar (60g / ½ cup), cooled espresso or coffee (2 tbsp), coffee liqueur (1 tbsp, optional), and vanilla extract (1 tsp). Use a hand mixer or sturdy spatula to blend until smooth and creamy—about 1-2 minutes. The mixture should be thick but not dry.
Tip: If your mascarpone is too cold, let it sit at room temperature for 10-15 minutes first. Cold mascarpone can make the filling lumpy. -
Add Crushed Ladyfingers:
Pour the ladyfinger crumbs into the mascarpone mixture. Stir until fully combined. The dough should be soft but not sticky—if it feels too wet, add a tablespoon more crumbs; if too dry, splash in a bit more coffee. -
Chill the Mixture:
Cover the bowl and refrigerate for 20-30 minutes. This firms up the mixture, making it much easier to roll.
Note: Don’t skip this step, or your truffles may be too soft to coat! -
Roll the Truffles:
Scoop out tablespoon-sized portions and roll into balls (about 2.5 cm / 1-inch in diameter). Place them on a parchment-lined baking sheet. You should get about 16-18 truffles.
Personal tip: If the mixture sticks to your hands, lightly dust them with powdered sugar or cocoa. -
Freeze for Easy Dipping:
Pop the tray of rolled truffles in the freezer for 10-15 minutes. This keeps them firm so they don’t fall apart when dipped in chocolate. -
Melt the Chocolate:
Place the chopped chocolate (200g / 7 oz) in a microwave-safe bowl. Microwave in 20-second bursts, stirring each time, until smooth. Or, use a double boiler over gently simmering water if you prefer.
Warning: Don’t let any water get into the chocolate—it can seize and turn grainy fast! -
Dip the Truffles:
Using two forks, dip each chilled truffle into the melted chocolate, turning to coat. Lift out, allowing excess chocolate to drip off, and return to the parchment-lined tray.
Tip: Work in batches, keeping the unused truffles in the fridge so they stay firm. -
Finish and Chill:
While the chocolate is still wet, dust each truffle with cocoa powder. You can also sprinkle with mini chocolate chips or curls if you’re feeling fancy. Chill the tray in the fridge for 20 minutes, or until the chocolate is set. -
Serve:
Enjoy straight from the fridge, or let them sit at room temperature for 5-10 minutes for a slightly softer bite. They’re best served chilled and devoured quickly!
If you run into trouble—like the filling is too soft—just chill it a bit longer. If your chocolate gets too thick, add a teaspoon of coconut oil or neutral oil to thin it out. These little fixes make all the difference!
Cooking Tips & Techniques
Having made these tiramisu truffles more times than I care to admit, I’ve picked up a few tricks (and learned from a few flops) along the way:
- Use Room-Temperature Ingredients: Cold mascarpone can turn lumpy and make mixing a pain. Let it sit out for a bit before starting—trust me, your arms will thank you.
- Watch the Coffee: Too much liquid makes the filling runny, too little and it’s a crumbly mess. If in doubt, add coffee a teaspoon at a time until you hit that sweet spot.
- Chill, Chill, Chill: The filling needs time to firm up or you’ll end up with sticky hands and misshapen truffles. If you get impatient (like I have), just pop them in the freezer for a few extra minutes.
- Don’t Burn the Chocolate: Chocolate scorches fast in the microwave. Always melt in short bursts and stir often. If it gets grainy, a little coconut oil can help smooth things out.
- Work in Batches: Only take out a few truffles at a time for dipping. The warmer they get, the messier the process. I learned this the hard way one summer afternoon—let’s just say, chocolate handprints everywhere.
- Perfecting the Coating: For a smooth finish, let excess chocolate drip off before placing the truffles back on the tray. Sometimes I use a toothpick to tidy up the bottom edges for a neater look.
- Multitask Like a Pro: While the filling chills, set up your dipping station, prep toppings, and clear a spot in the fridge for the finished truffles. It keeps things moving and saves time.
- Consistency is Key: Using a scoop or tablespoon for rolling keeps the truffles uniform, so they look extra professional (even if you’re just eating them on the couch in your pajamas… no judgment!).
Honestly, I’ve had batches where the filling was a little too gooey or the chocolate coating came out a bit thick. But every time, they’ve still tasted amazing—so don’t stress if yours aren’t picture-perfect the first time. Practice makes delicious progress!
Variations & Adaptations
One of the best things about this tiramisu truffles recipe is how easy it is to switch things up. Here are a few ideas to keep things fun and flexible:
- Gluten-Free Version: Use gluten-free ladyfingers or crunchy gluten-free cookies. I’ve tried it with almond flour cookies once—honestly, nobody could tell the difference.
- Alcohol-Free: Leave out the coffee liqueur and use a little extra espresso or a splash of vanilla or almond extract. Makes them perfect for kids or anyone avoiding alcohol.
- Flavor Twists: Fold a handful of mini chocolate chips, chopped toasted hazelnuts, or even orange zest into the filling for a fun twist on the classic. I love adding a pinch of cinnamon around the holidays for a cozy touch.
- Different Coatings: Instead of dipping in chocolate, roll the truffles in cocoa powder, finely chopped nuts, or even shredded coconut. It’s less work and still delicious!
- Alternative Cooking Methods: If you don’t want to melt chocolate, just dust the finished truffle balls generously with cocoa powder for a “naked” version. Still rich and totally satisfying.
- Dietary Adaptations: Use vegan mascarpone and dairy-free chocolate for a plant-based treat. Swap honey or maple syrup for the powdered sugar if you’re trying to cut processed sugars.
I once made a “holiday” version with a splash of Irish cream instead of coffee liqueur and a sprinkle of nutmeg on top. They vanished in minutes at my family’s Christmas gathering. Don’t be afraid to play with flavors and make these your own!
Serving & Storage Suggestions
Here’s how I like to serve and store my tiramisu truffles for the best texture and flavor:
- Serving: These are absolutely best served chilled, straight from the fridge. Arrange them on a pretty platter, dust with a bit more cocoa, and watch them disappear. For parties, I love placing each truffle in a mini cupcake liner for easy grab-and-go snacking.
- Pairings: Serve with hot espresso, cappuccino, or even a glass of dessert wine like Vin Santo. I sometimes add a bowl of fresh berries or whipped cream for extra flair.
- Storage: Keep tiramisu truffles in an airtight container in the fridge for up to 5 days. They’ll stay firm and delicious. If making ahead, you can freeze them for up to a month—just thaw in the fridge overnight before serving.
- Reheating: No reheating needed, but if you like a softer center, let them sit at room temperature for 10 minutes before eating.
- Flavor Development: The flavors actually deepen after a day in the fridge—so they’re even better on Day Two (if you can wait that long!).
They’re the perfect make-ahead treat for parties, gifts, or just a little afternoon indulgence with coffee. I always stash a few in the back of the fridge for “emergencies.”
Nutritional Information & Benefits
Each tiramisu truffle (assuming 18 truffles per batch) contains approximately:
- Calories: 110
- Fat: 7g
- Carbohydrates: 10g
- Protein: 2g
- Sugar: 6g
Health Benefits: Mascarpone provides a dose of calcium and healthy fats, while the dark chocolate coating is full of antioxidants. If you use high-quality cocoa and coffee, you get a little energy boost and mood lift, too. For those with gluten or dairy concerns, the recipe adapts easily with substitutions. The truffles are vegetarian, and can be made gluten-free or vegan as needed.
Allergen Note: Contains dairy, gluten (unless using substitutes), and may contain traces of nuts if using certain brands of chocolate or ladyfingers. Always check your ingredient labels if allergies are a concern.
While these truffles are definitely a treat, I love knowing exactly what goes into them—no weird additives, just real Italian-inspired goodness!
Conclusion
If you’re craving a touch of Italy without all the fuss, this tiramisu truffles recipe is your new secret weapon. They’re quick, easy, and taste like you spent way more time in the kitchen than you actually did. Whether you stick to the classic version or try one of the fun adaptations, these dessert balls are guaranteed to put a smile on your face (and impress anyone lucky enough to snag one).
I love making these for special occasions or just as a pick-me-up after a long day. There’s something magical about that creamy, coffee-infused bite with the snap of chocolate and dusting of cocoa. Don’t be afraid to experiment—add your own twist, switch up the flavors, or get creative with toppings. That’s half the fun!
If you try this tiramisu truffles recipe, I’d love to hear how it goes! Leave a comment, share your adaptations, or tag me on social media with your mouthwatering creations. Let’s keep the Italian dessert love going—one truffle at a time!
Frequently Asked Questions
How long do tiramisu truffles last in the fridge?
Stored in an airtight container, these truffles will stay fresh for up to 5 days in the refrigerator. They rarely last that long in my house, though!
Can I make tiramisu truffles ahead of time?
Absolutely. You can make them up to two days in advance for the best flavor, or freeze them for up to a month. Just thaw in the fridge before serving.
What can I use instead of ladyfingers?
If you can’t find ladyfingers, try vanilla wafers, shortbread cookies, or even leftover sponge cake. Just be sure to crush them finely.
Is there a way to make these truffles without alcohol?
Yes! Simply skip the coffee liqueur and use a little extra espresso or a splash of vanilla or almond extract for flavor. They’re just as delicious and totally family-friendly.
Can I use white chocolate for coating instead of dark chocolate?
Definitely. White chocolate gives a sweeter, creamier finish. Just melt and dip as you would with dark chocolate, and maybe sprinkle with a little instant espresso powder for contrast. Yum!
Pin This Recipe!

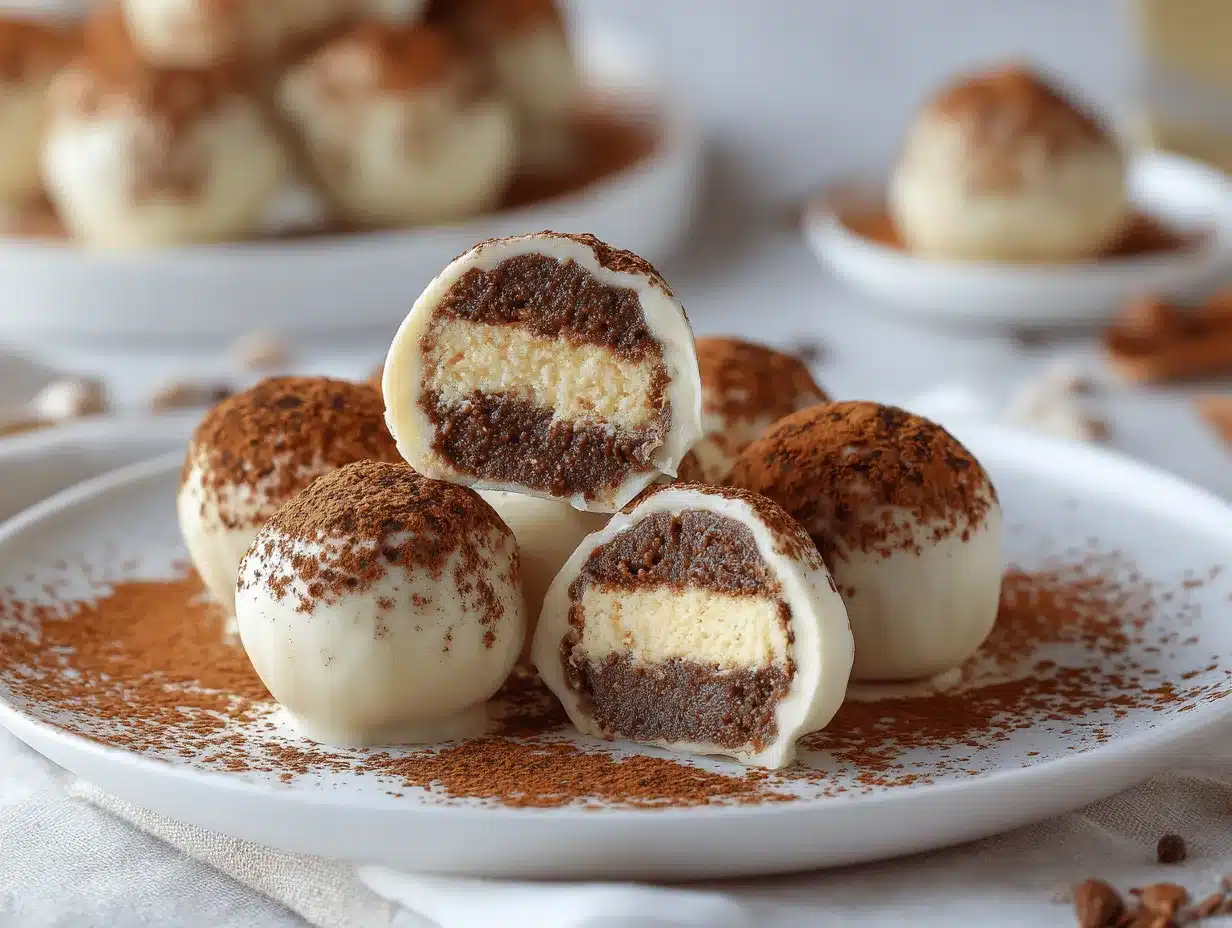
Tiramisu Truffles

These easy homemade tiramisu truffles pack all the creamy, coffee-kissed flavors of classic Italian tiramisu into decadent, bite-sized dessert balls. No baking required—just rich mascarpone, espresso, and chocolate for a treat that’s perfect for any occasion.
- Prep Time: 15 minutes
- Cook Time: 0 minutes
- Total Time: 45 minutes
- Yield: 16-18 truffles 1x
- Category: Dessert
- Cuisine: Italian
Ingredients
- 4.2 oz (120g) ladyfingers (Savoiardi), crushed
- 6 oz (170g) mascarpone cheese
- 1/2 cup (60g) powdered sugar
- 2 tablespoons espresso or strong brewed coffee, cooled
- 1 tablespoon coffee liqueur (like Kahlúa or Tia Maria, optional)
- 1 teaspoon vanilla extract
- 7 oz (200g) dark or semi-sweet chocolate, chopped or chips (60-70% preferred)
- 2 tablespoons cocoa powder (for dusting, Dutch-process preferred)
- Optional: pinch of cinnamon or nutmeg
- Optional: mini chocolate chips or chopped chocolate (for filling or garnish)
- Optional: finely grated chocolate or chocolate curls (for garnish)
Instructions
- Place the ladyfingers in a food processor and pulse until you get fine crumbs. Alternatively, crush them in a zip-top bag with a rolling pin (about 2 minutes).
- In a medium bowl, combine mascarpone cheese, powdered sugar, cooled espresso or coffee, coffee liqueur (if using), and vanilla extract. Mix with a hand mixer or sturdy spatula until smooth and creamy (1-2 minutes).
- Add the crushed ladyfingers to the mascarpone mixture and stir until fully combined. The dough should be soft but not sticky; adjust with more crumbs or coffee as needed.
- Cover the bowl and refrigerate the mixture for 20-30 minutes to firm up.
- Scoop out tablespoon-sized portions and roll into balls (about 1 inch in diameter). Place on a parchment-lined baking sheet. You should get about 16-18 truffles.
- Freeze the tray of truffles for 10-15 minutes to firm them up for dipping.
- Melt the chocolate in a microwave-safe bowl in 20-second bursts, stirring each time, until smooth. Alternatively, use a double boiler.
- Using two forks, dip each chilled truffle into the melted chocolate, turning to coat. Let excess chocolate drip off and return to the parchment-lined tray.
- While the chocolate is still wet, dust each truffle with cocoa powder and add any desired toppings (mini chips, curls, etc.). Chill in the fridge for 20 minutes, or until the chocolate is set.
- Serve chilled, or let sit at room temperature for 5-10 minutes for a softer bite. Store leftovers in an airtight container in the fridge.
Notes
For best results, use room-temperature mascarpone to avoid lumps. Adjust coffee and crumbs for the perfect dough consistency. Work in batches when dipping to keep truffles firm. For gluten-free or dairy-free adaptations, use appropriate substitutes. Truffles are best served chilled and can be made ahead or frozen for up to a month.
Nutrition
- Serving Size: 1 truffle (about 1 inch diameter)
- Calories: 110
- Sugar: 6
- Sodium: 25
- Fat: 7
- Saturated Fat: 4
- Carbohydrates: 10
- Fiber: 1
- Protein: 2
Keywords: tiramisu truffles, Italian dessert balls, no-bake tiramisu, mascarpone truffles, coffee dessert, chocolate truffles, easy tiramisu recipe, party dessert, holiday truffles, homemade truffles


